Okay. This is one of those recipes that builds on one you’ve seen here previously.
It’s not difficult, but can be fiddly. It’s certainly tasty and it can be as inexpensive as you want it to be.
Pizza pull-aparts or scrolls
It starts with a basic scone dough (biscuits for Americans) and gets creative soon after. It’s perfect for those days when you want something more substantial for lunch. It’s great for getting the kids involved if they’re underfoot too.
Also, if you have bits and bobs in the refrigerator that you want to use up, but which don’t really add up to a meal on their own…you know what I’m talking about.
Don’t you?
Moving on…
In other words this is more of a process than a recipe.
Start out by lining a cake tin with baking paper. It can be a square or round tin – it really doesn’t matter. If you find paper lining difficult, then grease it well instead. I find that paper makes it easier to remove the finished product when baked. 😉
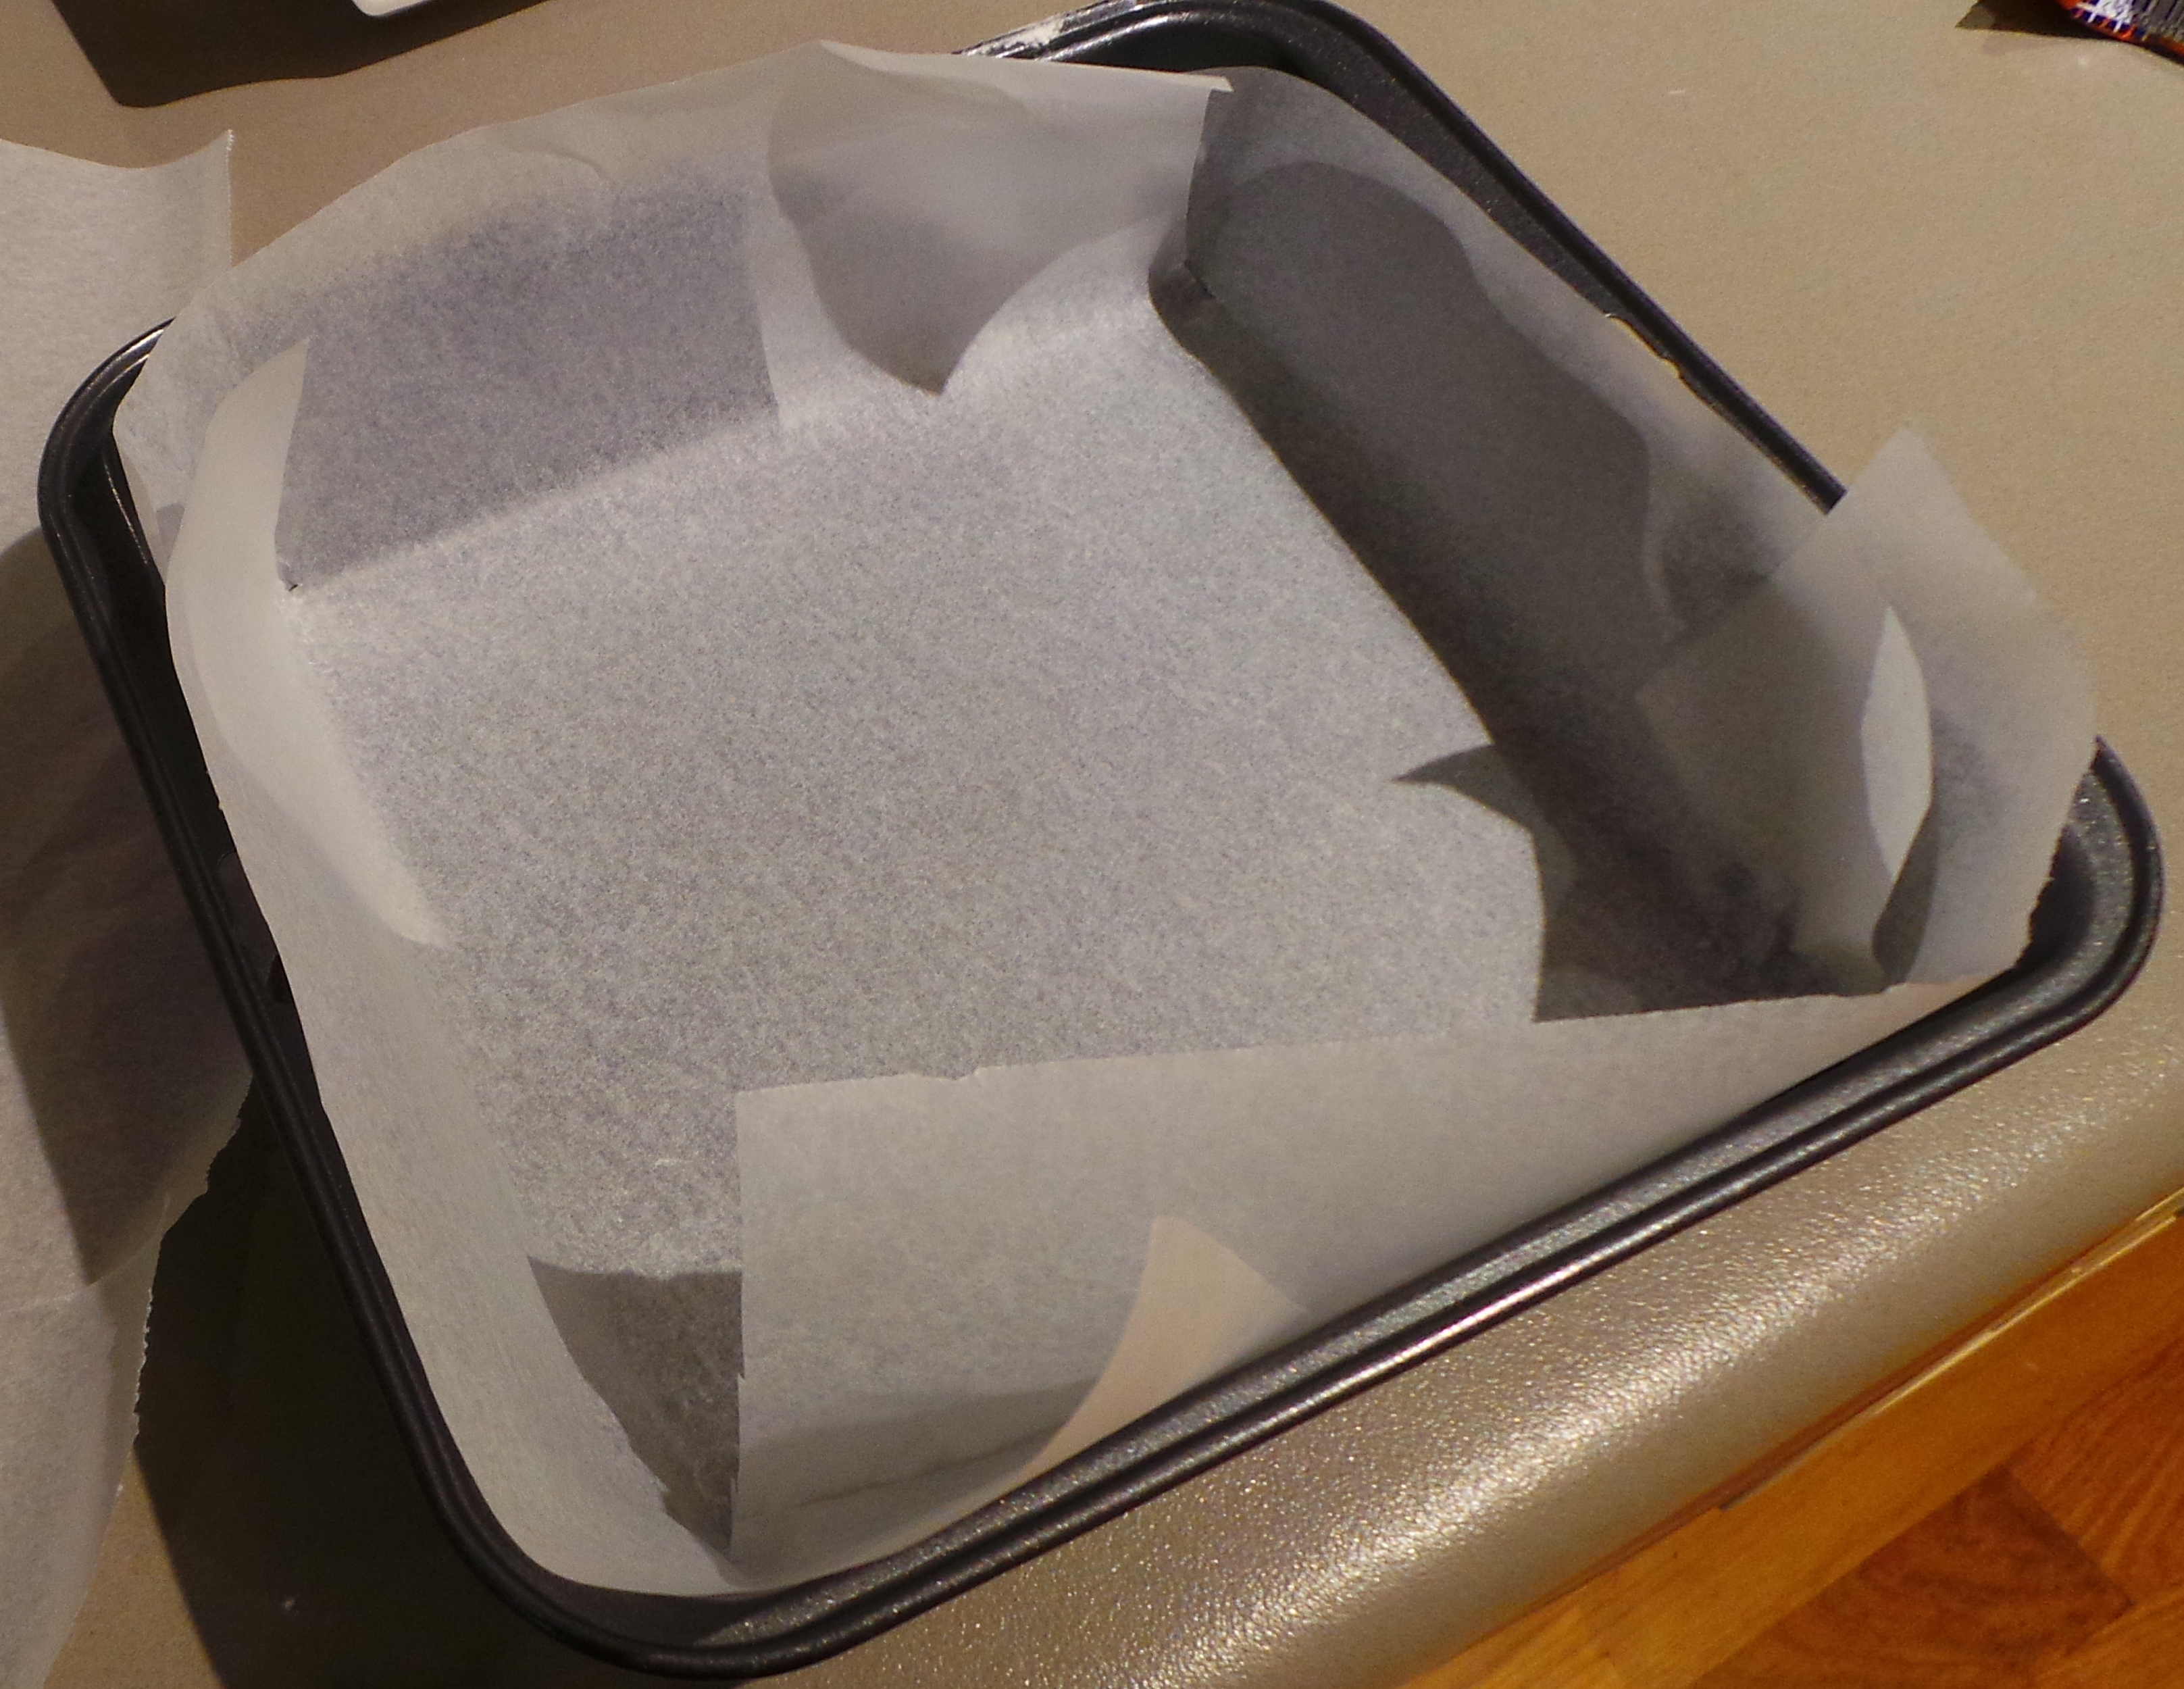
Line a cake tin with parchment paper
Make yourself some scone dough but, instead of making it into scones, simply flatten it out into a vague rectangle shape. Use your hands and fingertips for this, there’s no need for a rolling pin. Try doing this on a little more silicon/baking/parchment paper sprinkled with flour. It will make rolling it up a little easier.
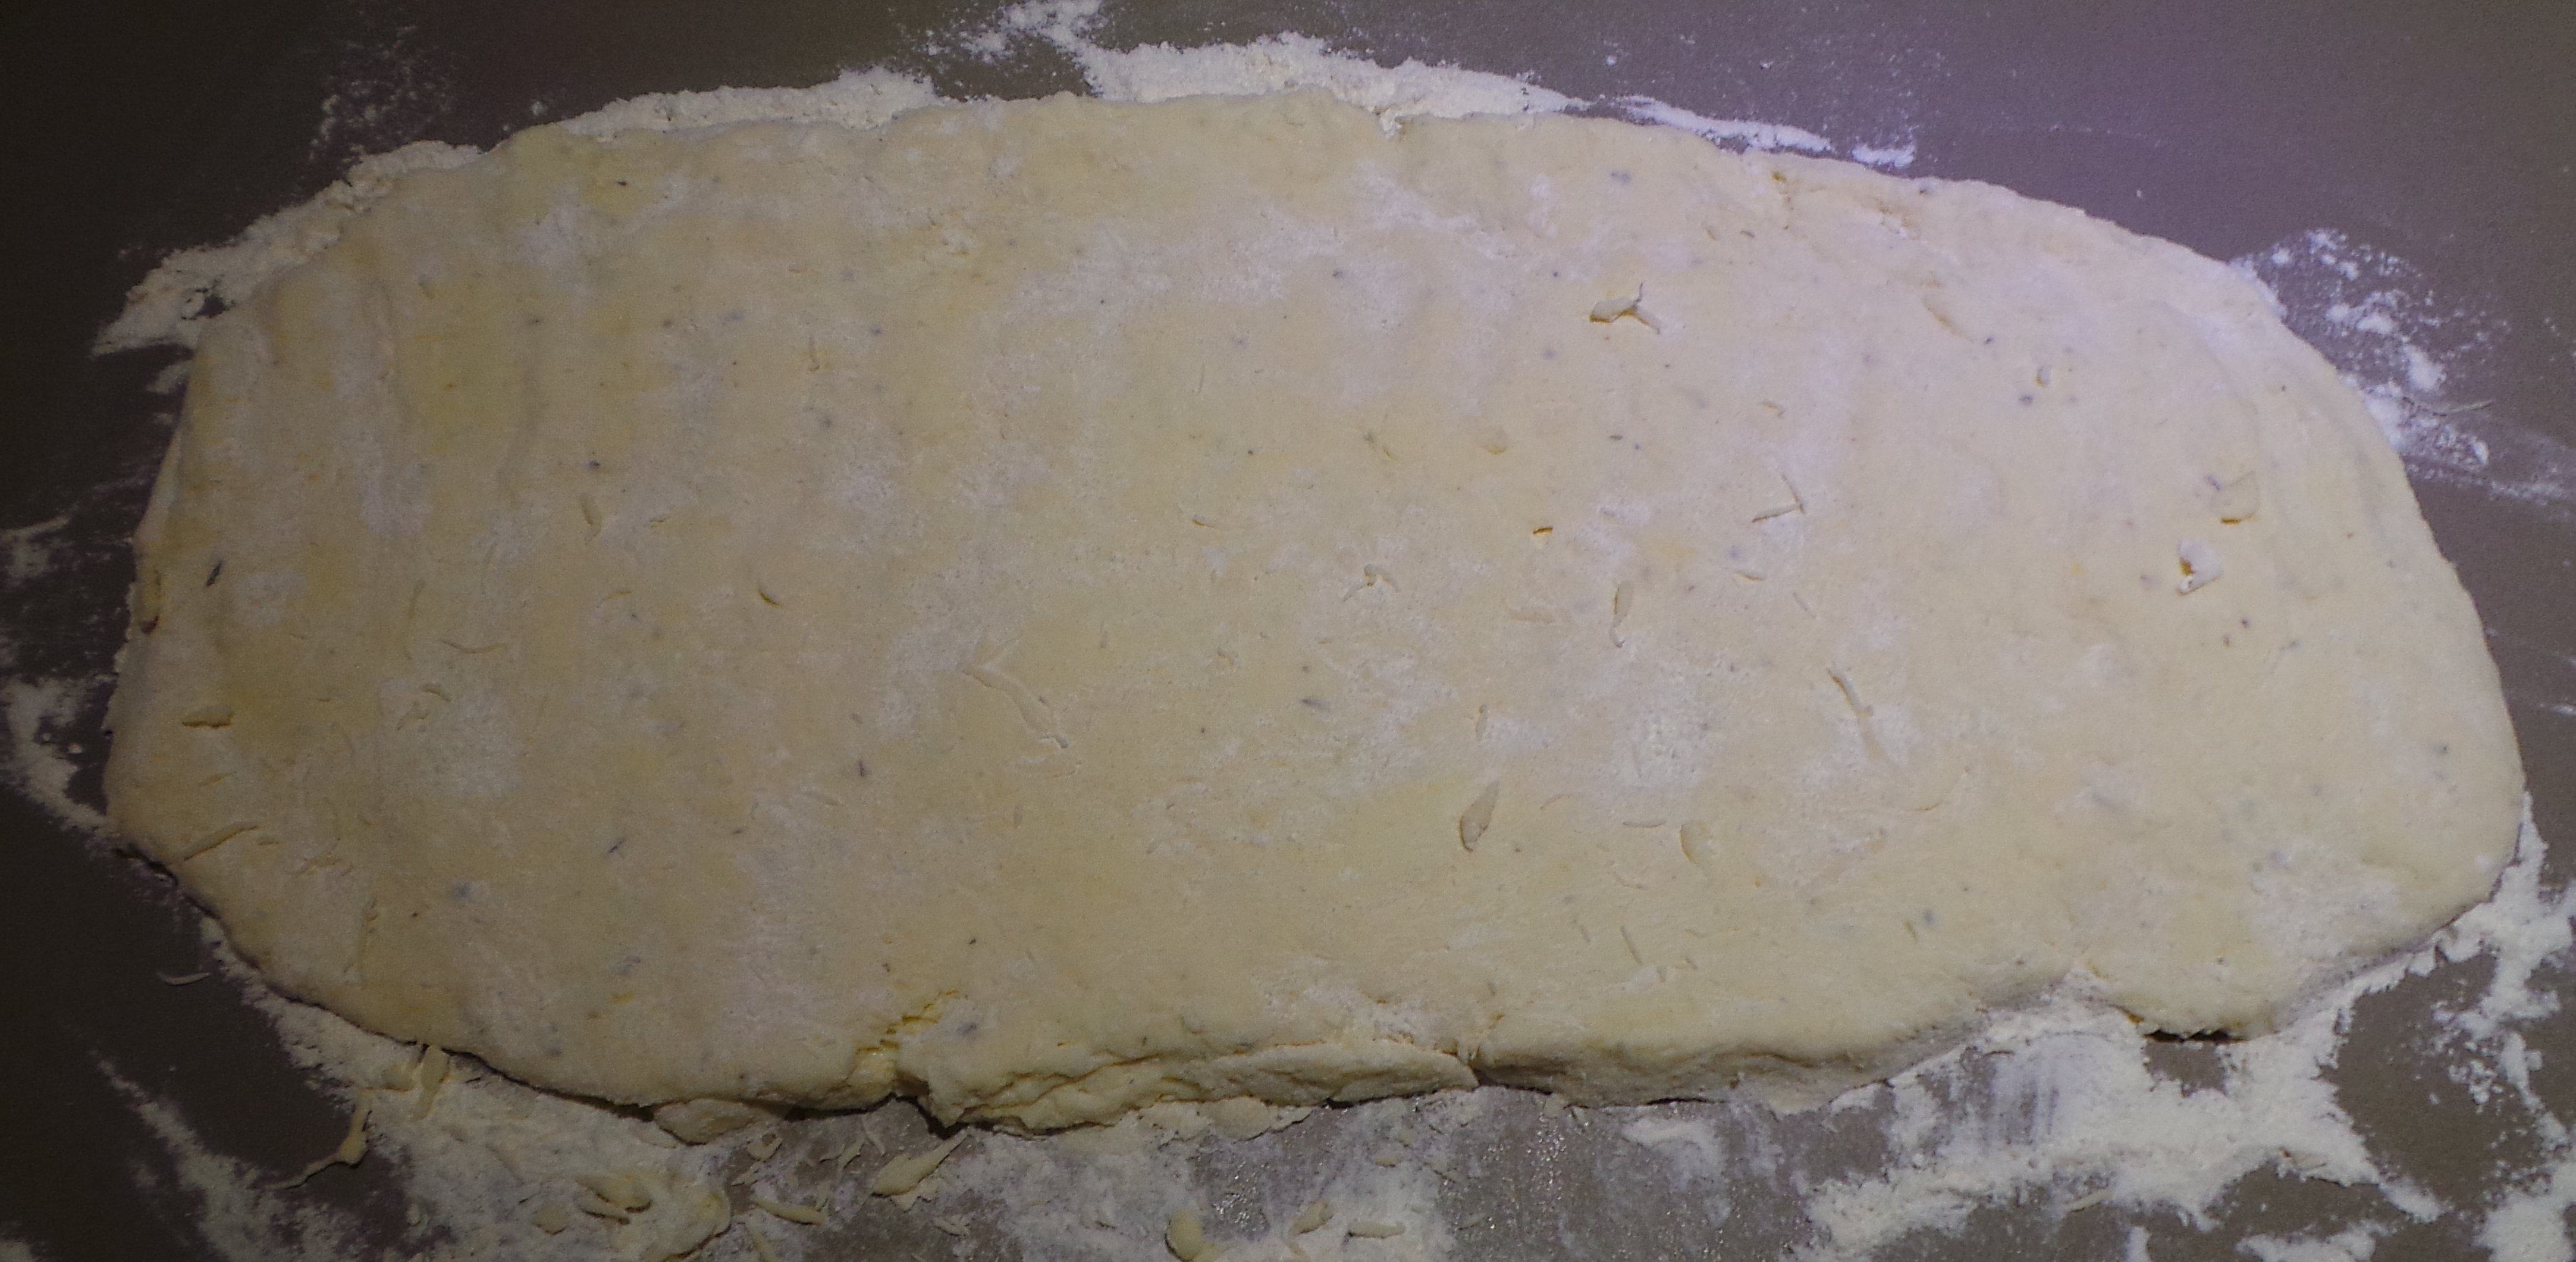
Press your dough out lightly into a rectangle.
The size of your rectangle will be determined by the thickness of your dough. Try to make it an even thickness all over – about 1 cm or ¼ inch. Try also not to make it too narrow a rectangle. You will be rolling it up and you want to fit a few turns into it!
Turn your oven on and set it to 220°C/450°F.
Spread your dough with a base flavouring. Tomato paste will work, as will pizza sauce. I find tomato-based spreads far too sweet for me and instead use a roasted capsicum spread called Ajvar that I was introduced to by some Macedonian friends (and now I’m hooked!) It’s something that is big among the former Yugoslavian nations, although I understand the Italians produce something similar – although I don’t know what it’s called.

Spread your base with something tasty.
You may use whatever you like.
Basically you are simply adding a moist base for the rest of your fillings and ensuring that there will be no dry stretches of dough in the finished product. Try using barbecue sauce, basil pesto, olive tapenade or a chutney instead.
You’ll find it much easier to spread if you use a spoon rather than a knife to spread it. Scoop it out onto the dough and then use the back of the spoon’s bowl to spread it.
Now scatter with some grated/shredded cheese.
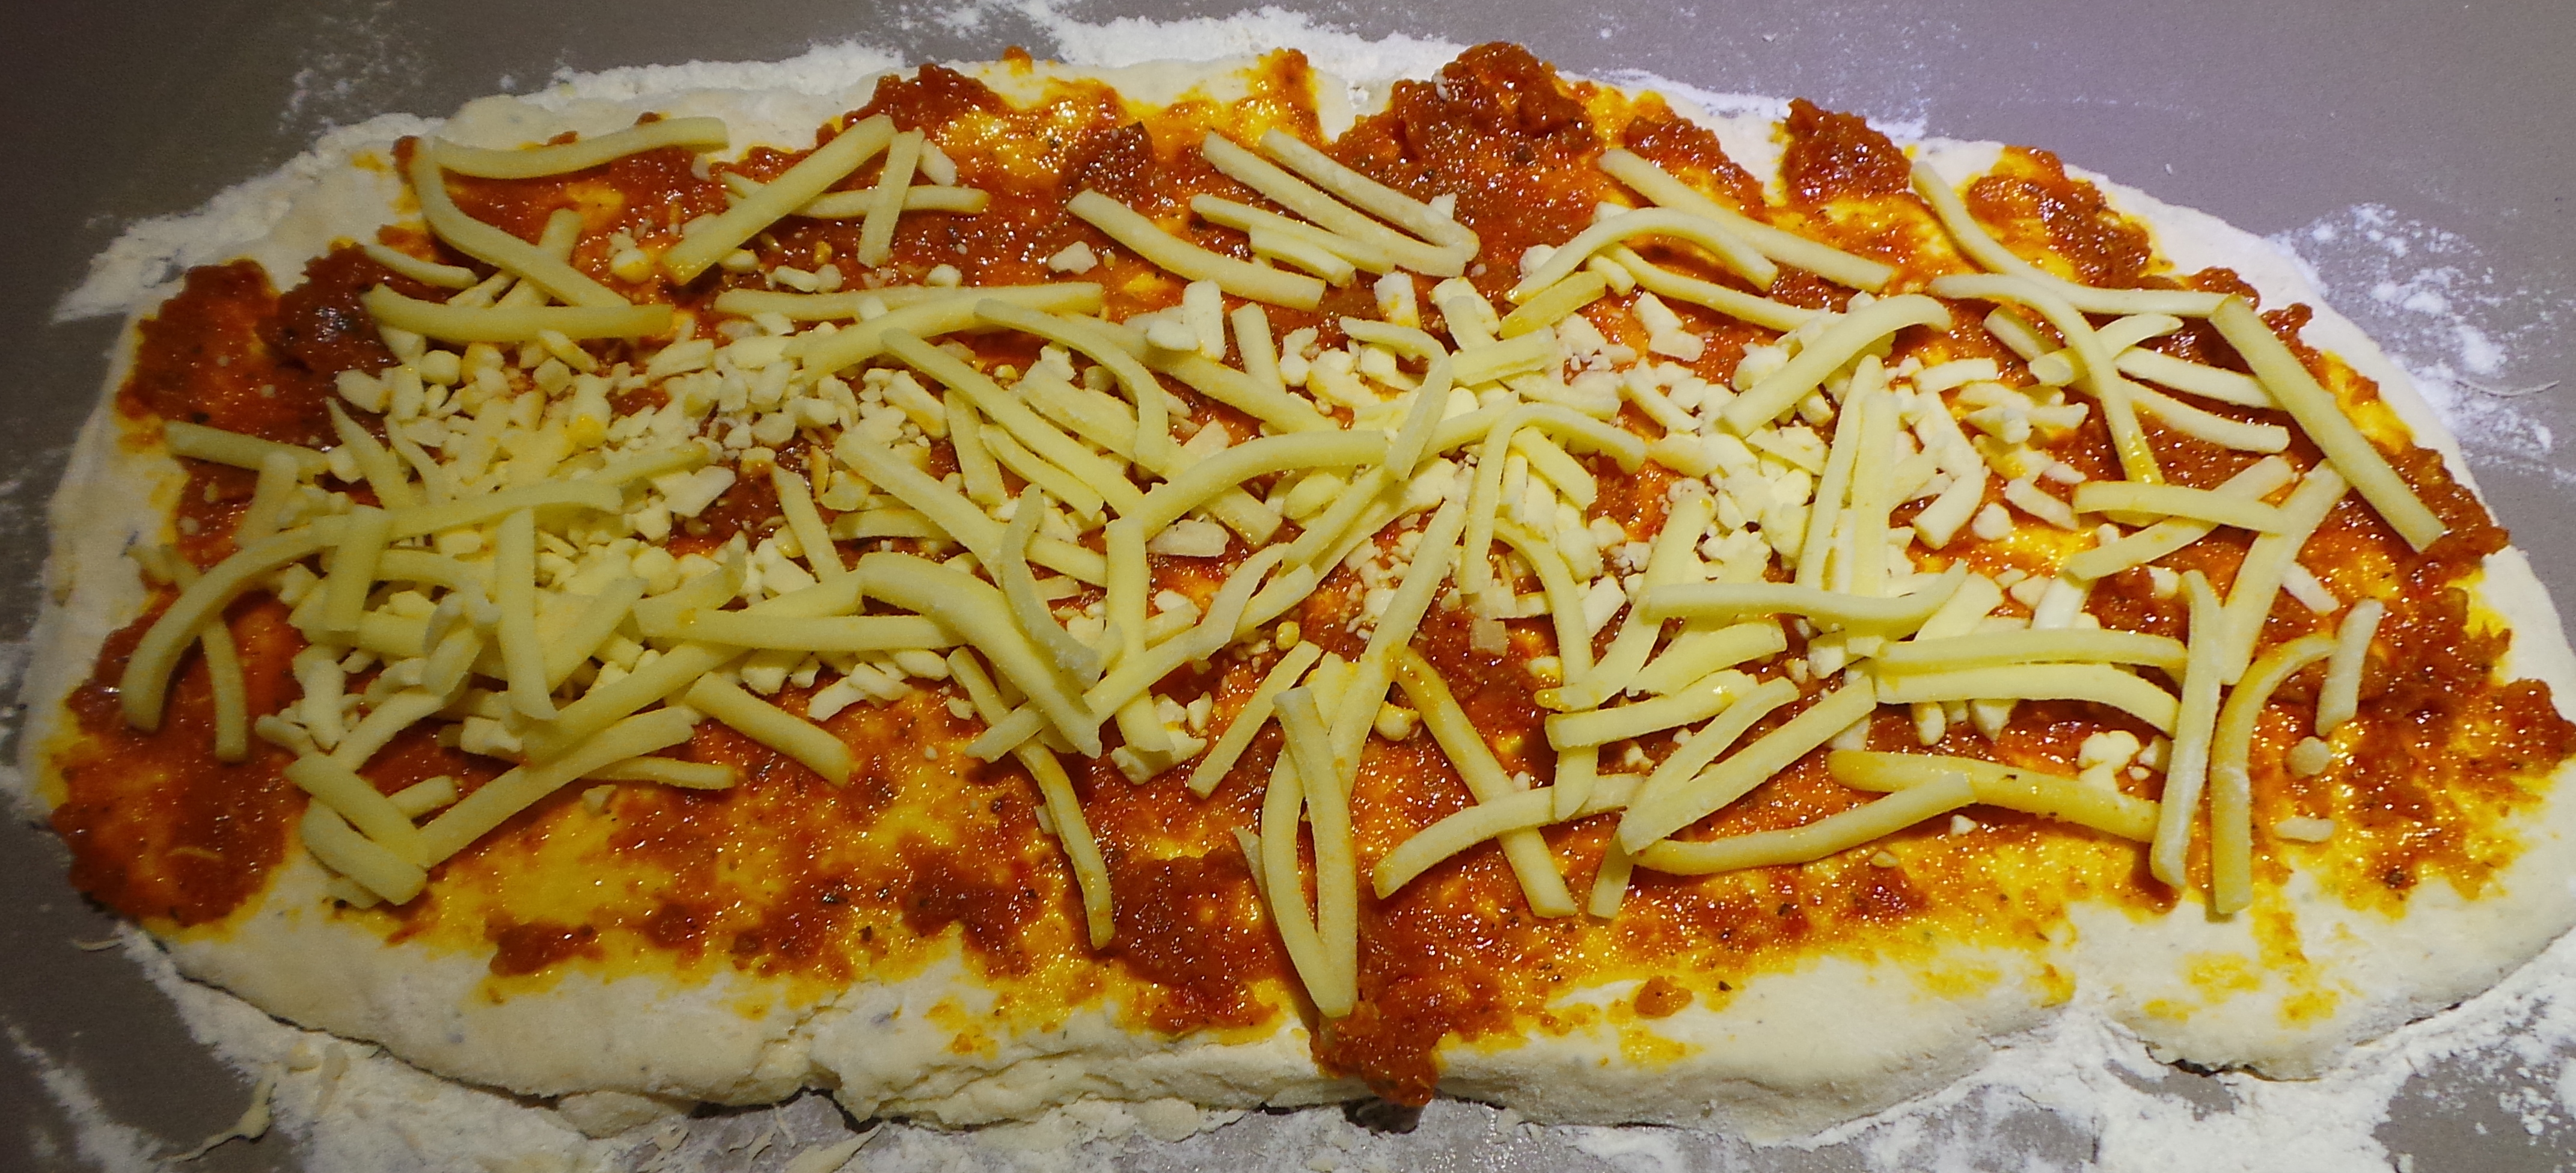
Add some shredded cheese.
Then get creative. This is where you can use the waifs and strays in your refrigerator. You won’t want to put too much on, or it will make the rolling process more difficult.
Add whatever you might add to a pizza: deli meats like salami or shredded ham, chop up a bacon rasher or two and scatter over, if you have some BBQ/rotisserie chicken in the fridge, dice it up and scatter it over. If you are vegetarian, try adding some chick peas/garbanzos or even some kidney beans. You won’t need much.
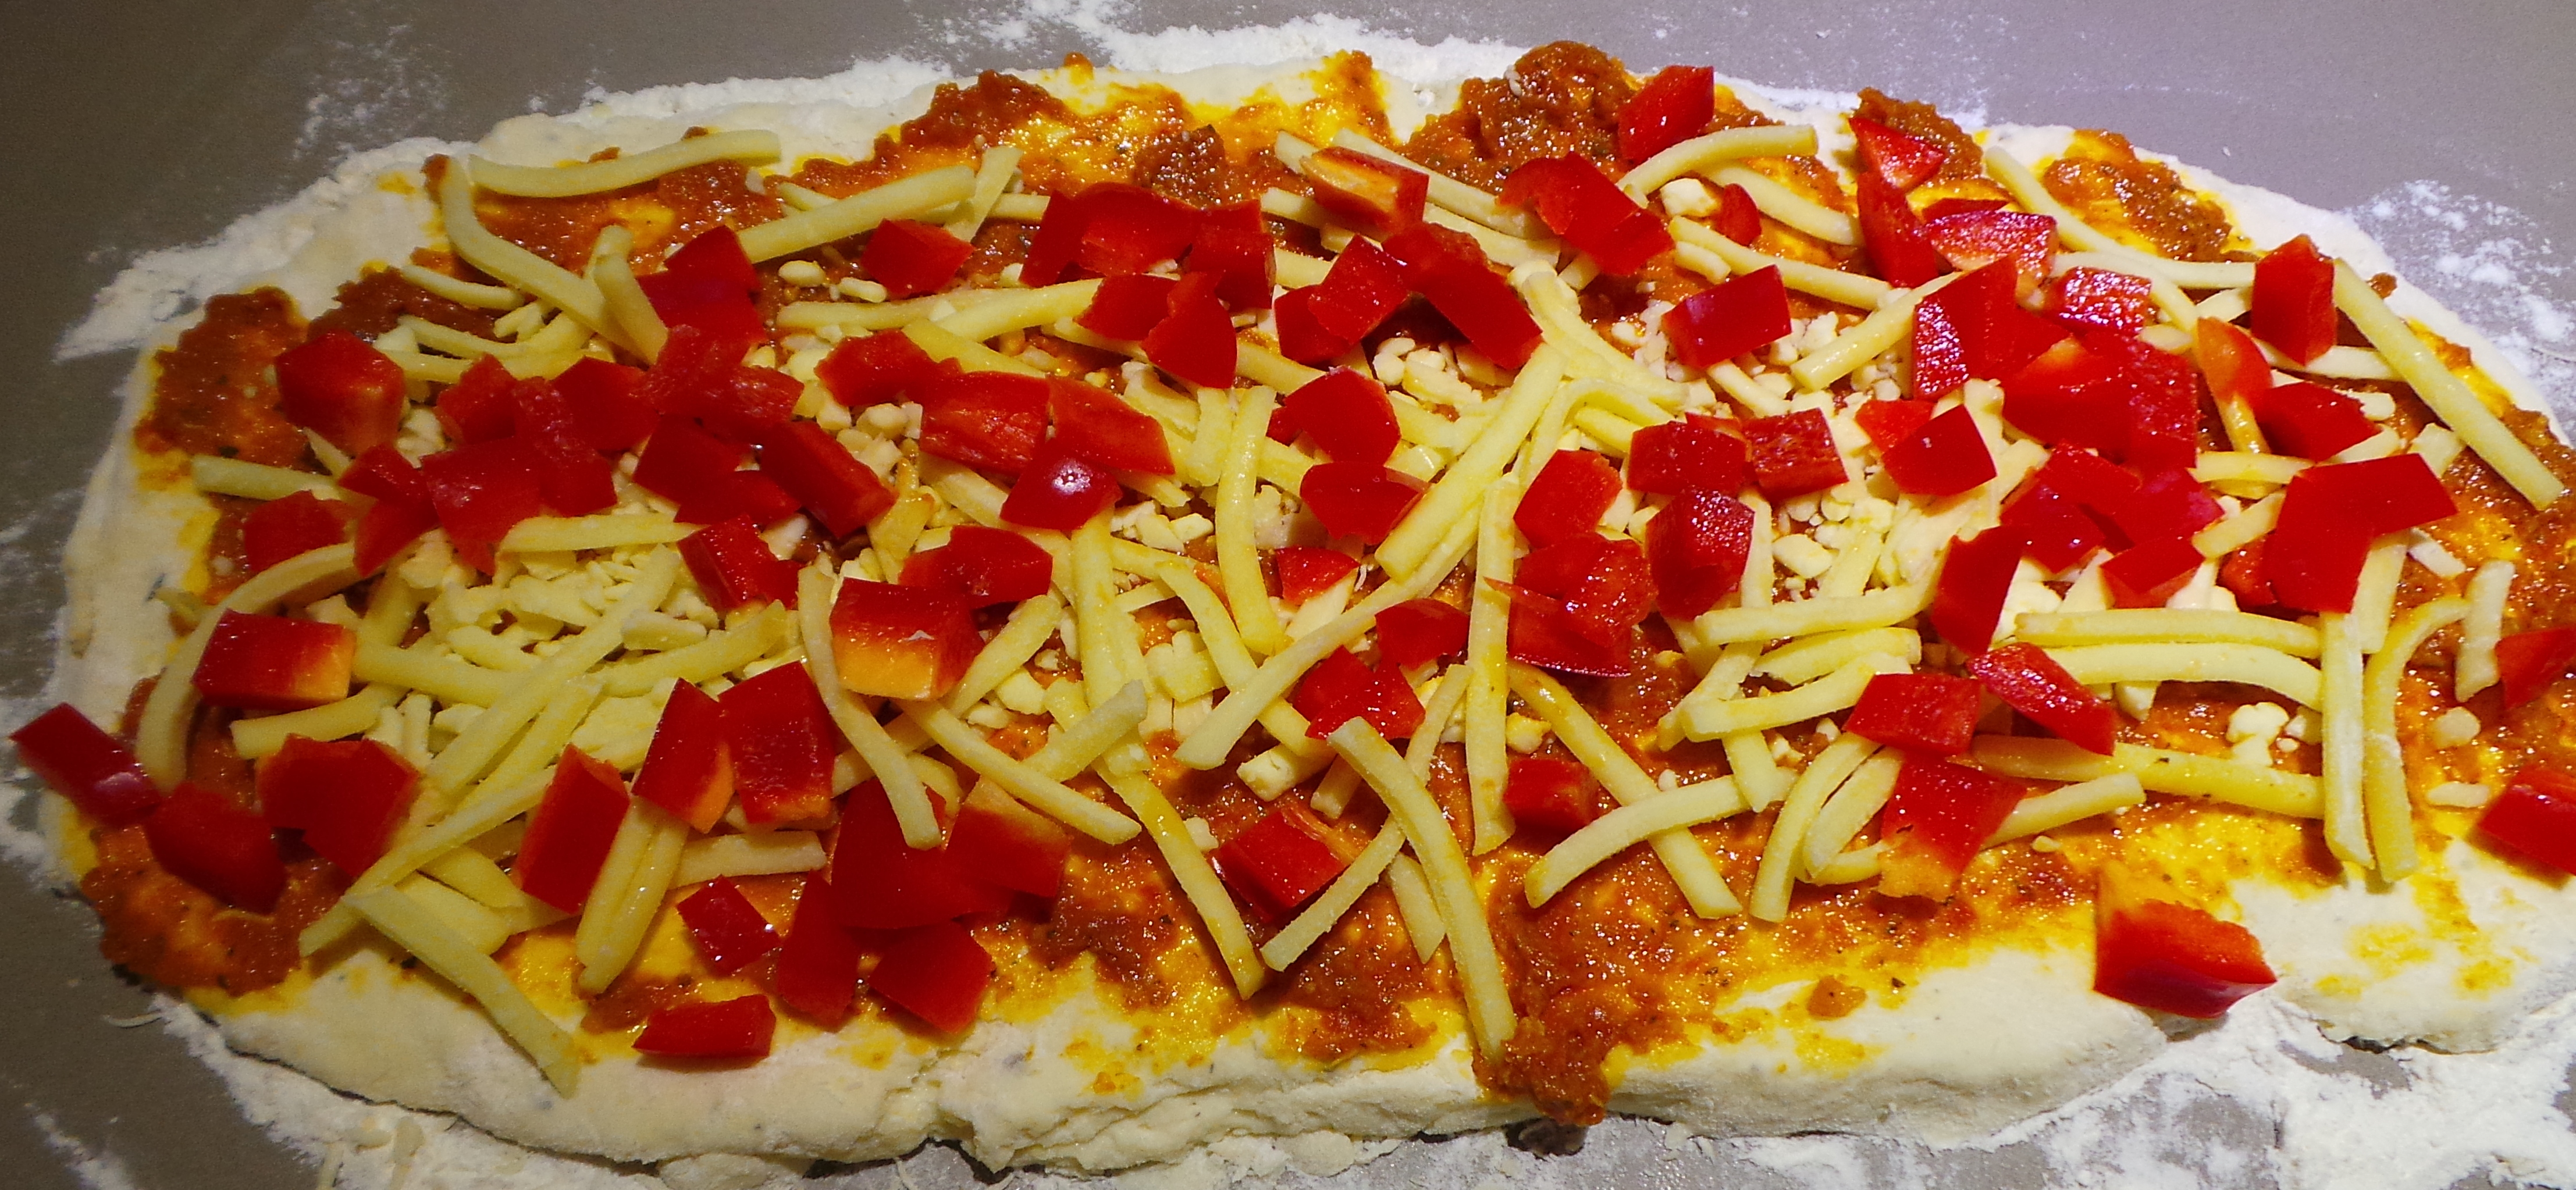
Add whatever fillings tickle your fancy.
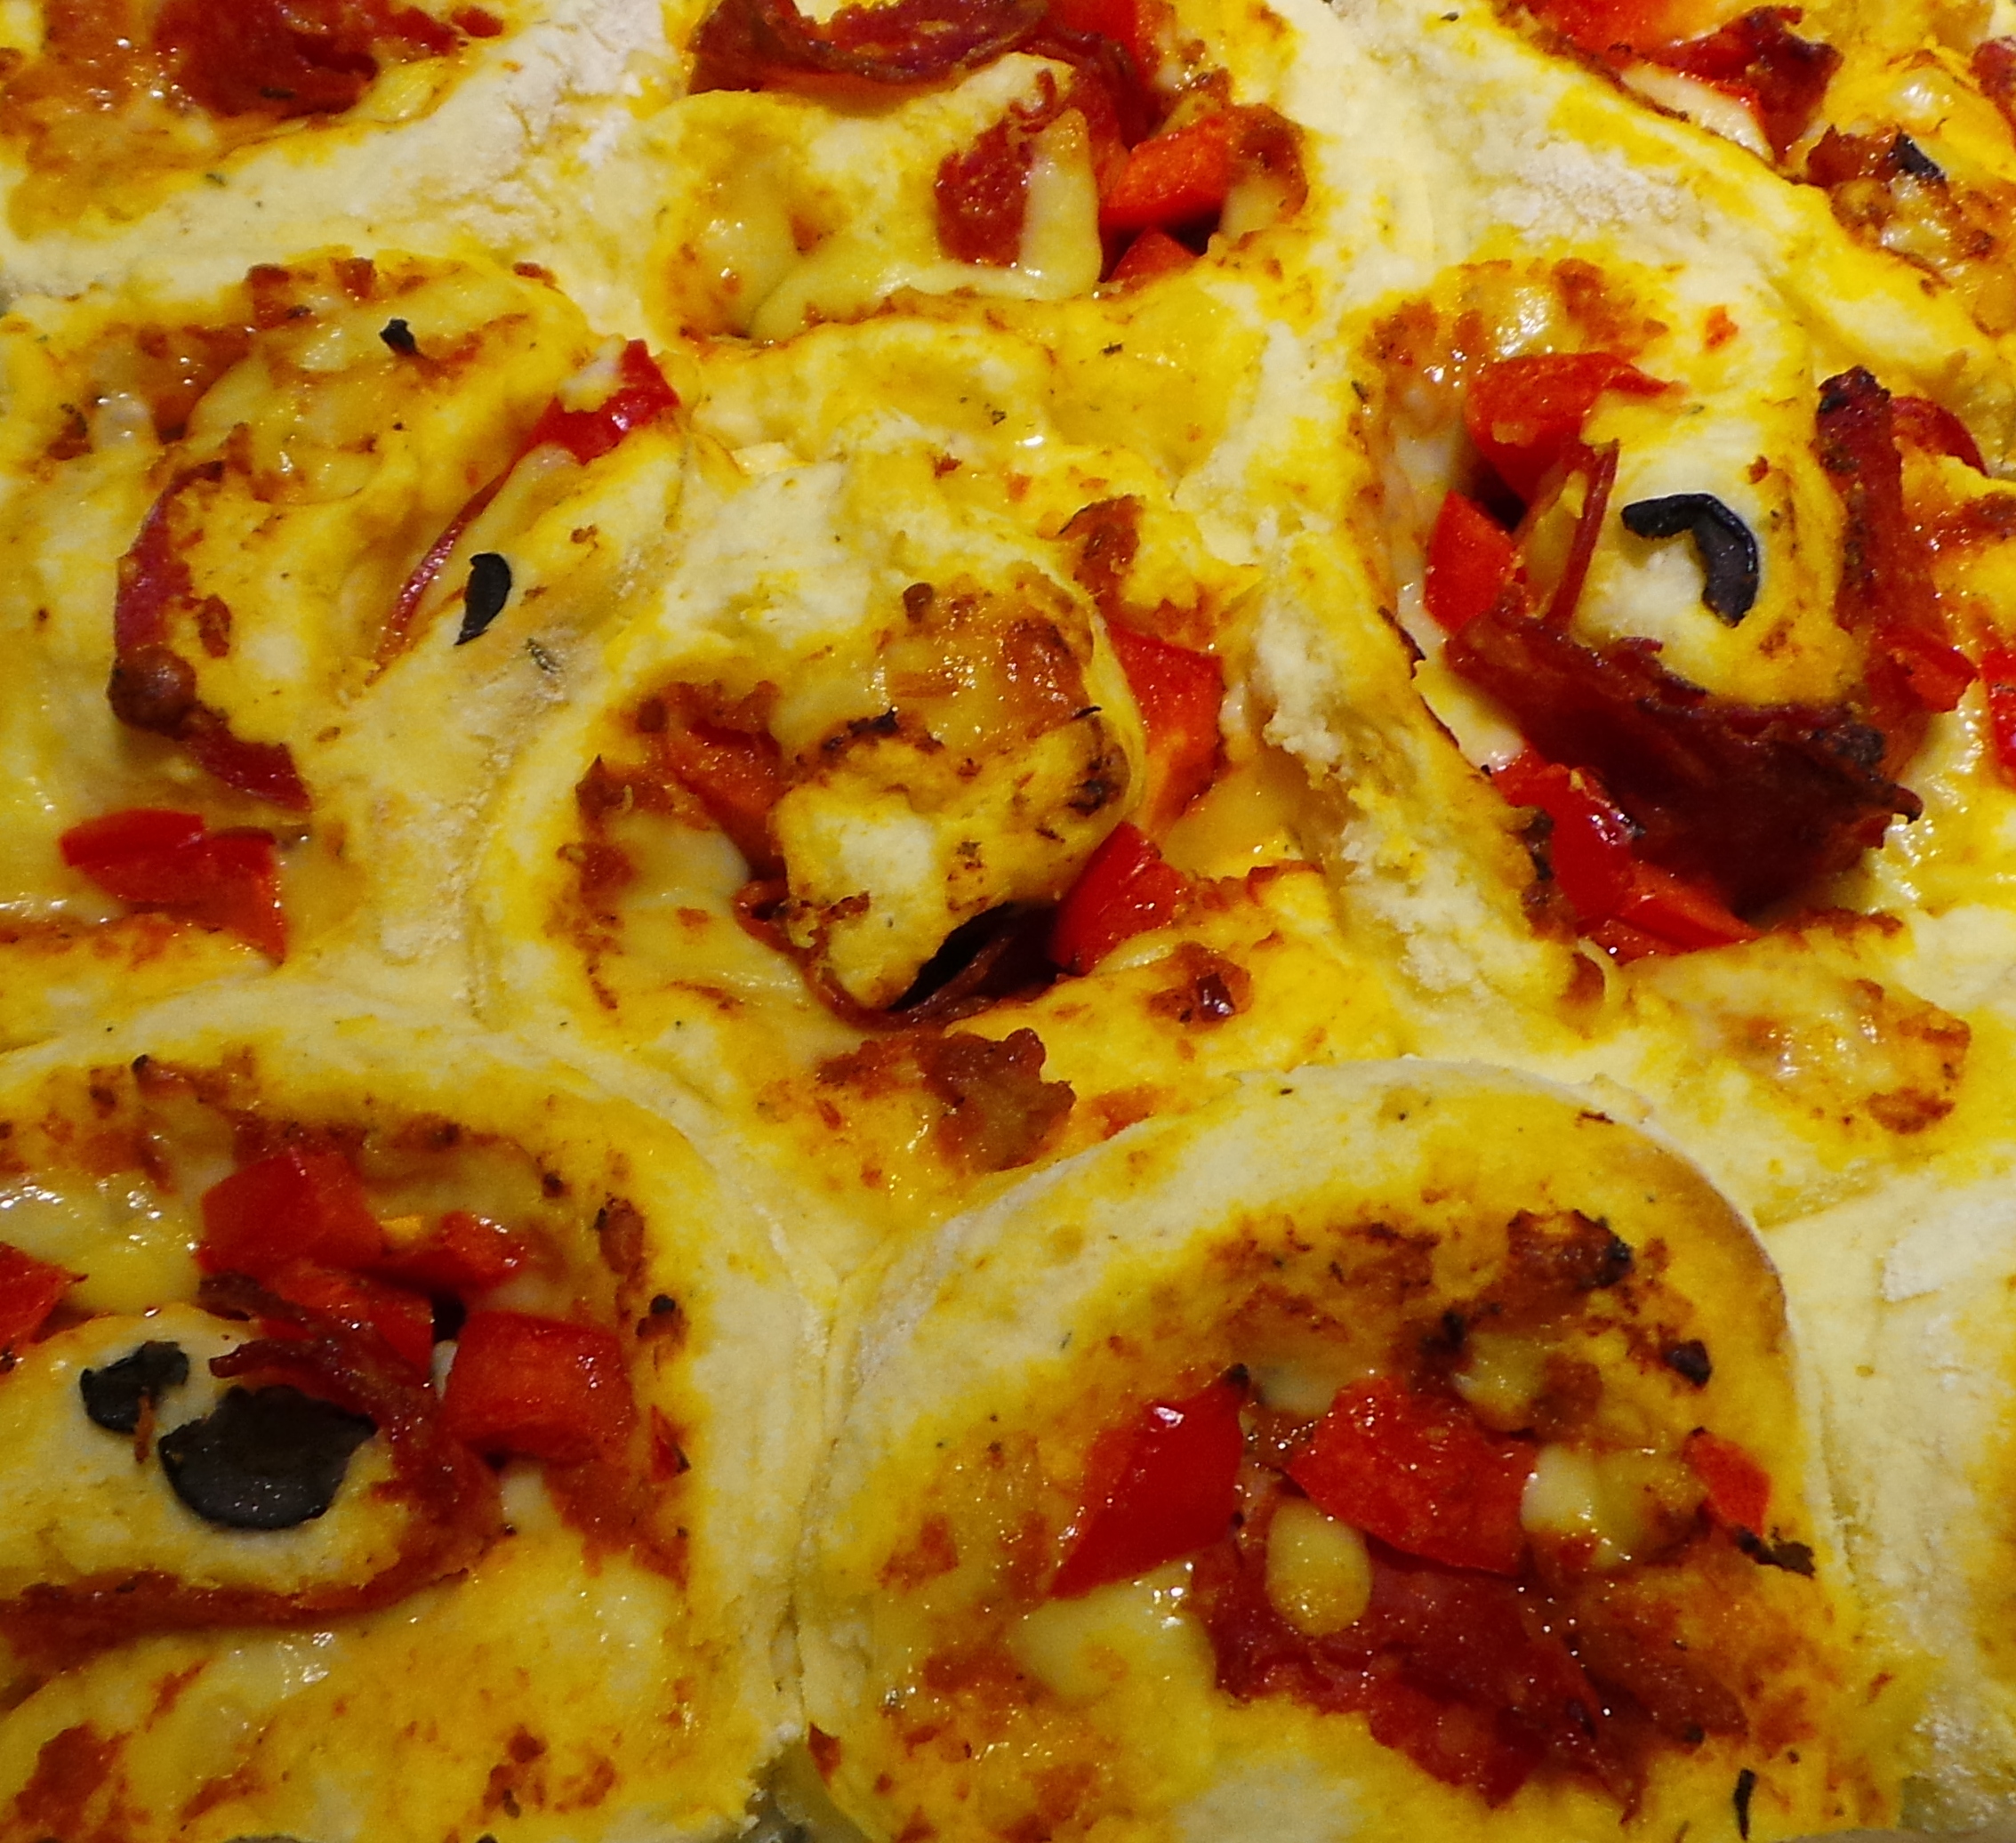
Then add some diced vegetables, I’ve added capsicum/bell pepper in the photo above. Slice a mushroom or two, confetti it with sliced black olives or – and this is yummy – slowly fry some sliced onions or leeks in butter until soft and starting to caramelise, drain on paper towel and add generously.
It’s completely up to you.
If you want to, at this stage you could just place it on a tray and bake it like a standard pizza. It will take 20 minutes at least.
Or you can go on to roll it up like a Swiss Roll, lifting the long edge nearest to you and rolling away. Make it as tight as you can, but try not to put holes in the dough. If you have used a piece of paper beneath it, then use that to help you with the rolling. Some of your filling will inevitably escape from the long end or pop out the short ends. Don’t panic. Push them back in if you can, or consider them a Cook’s treat for while it all bakes.

Roll it as tightly as you can, while still being gentle with the dough.
Then slice into even pieces. I cut it in the middle, then divide each half in half, and so on. Aim for 8 to 9 pieces. Be careful to slice and not chop your roll, you don’t want to squash it beyond recognition. (If you do squash it, don’t worry too much. The taste won’t be affected.)
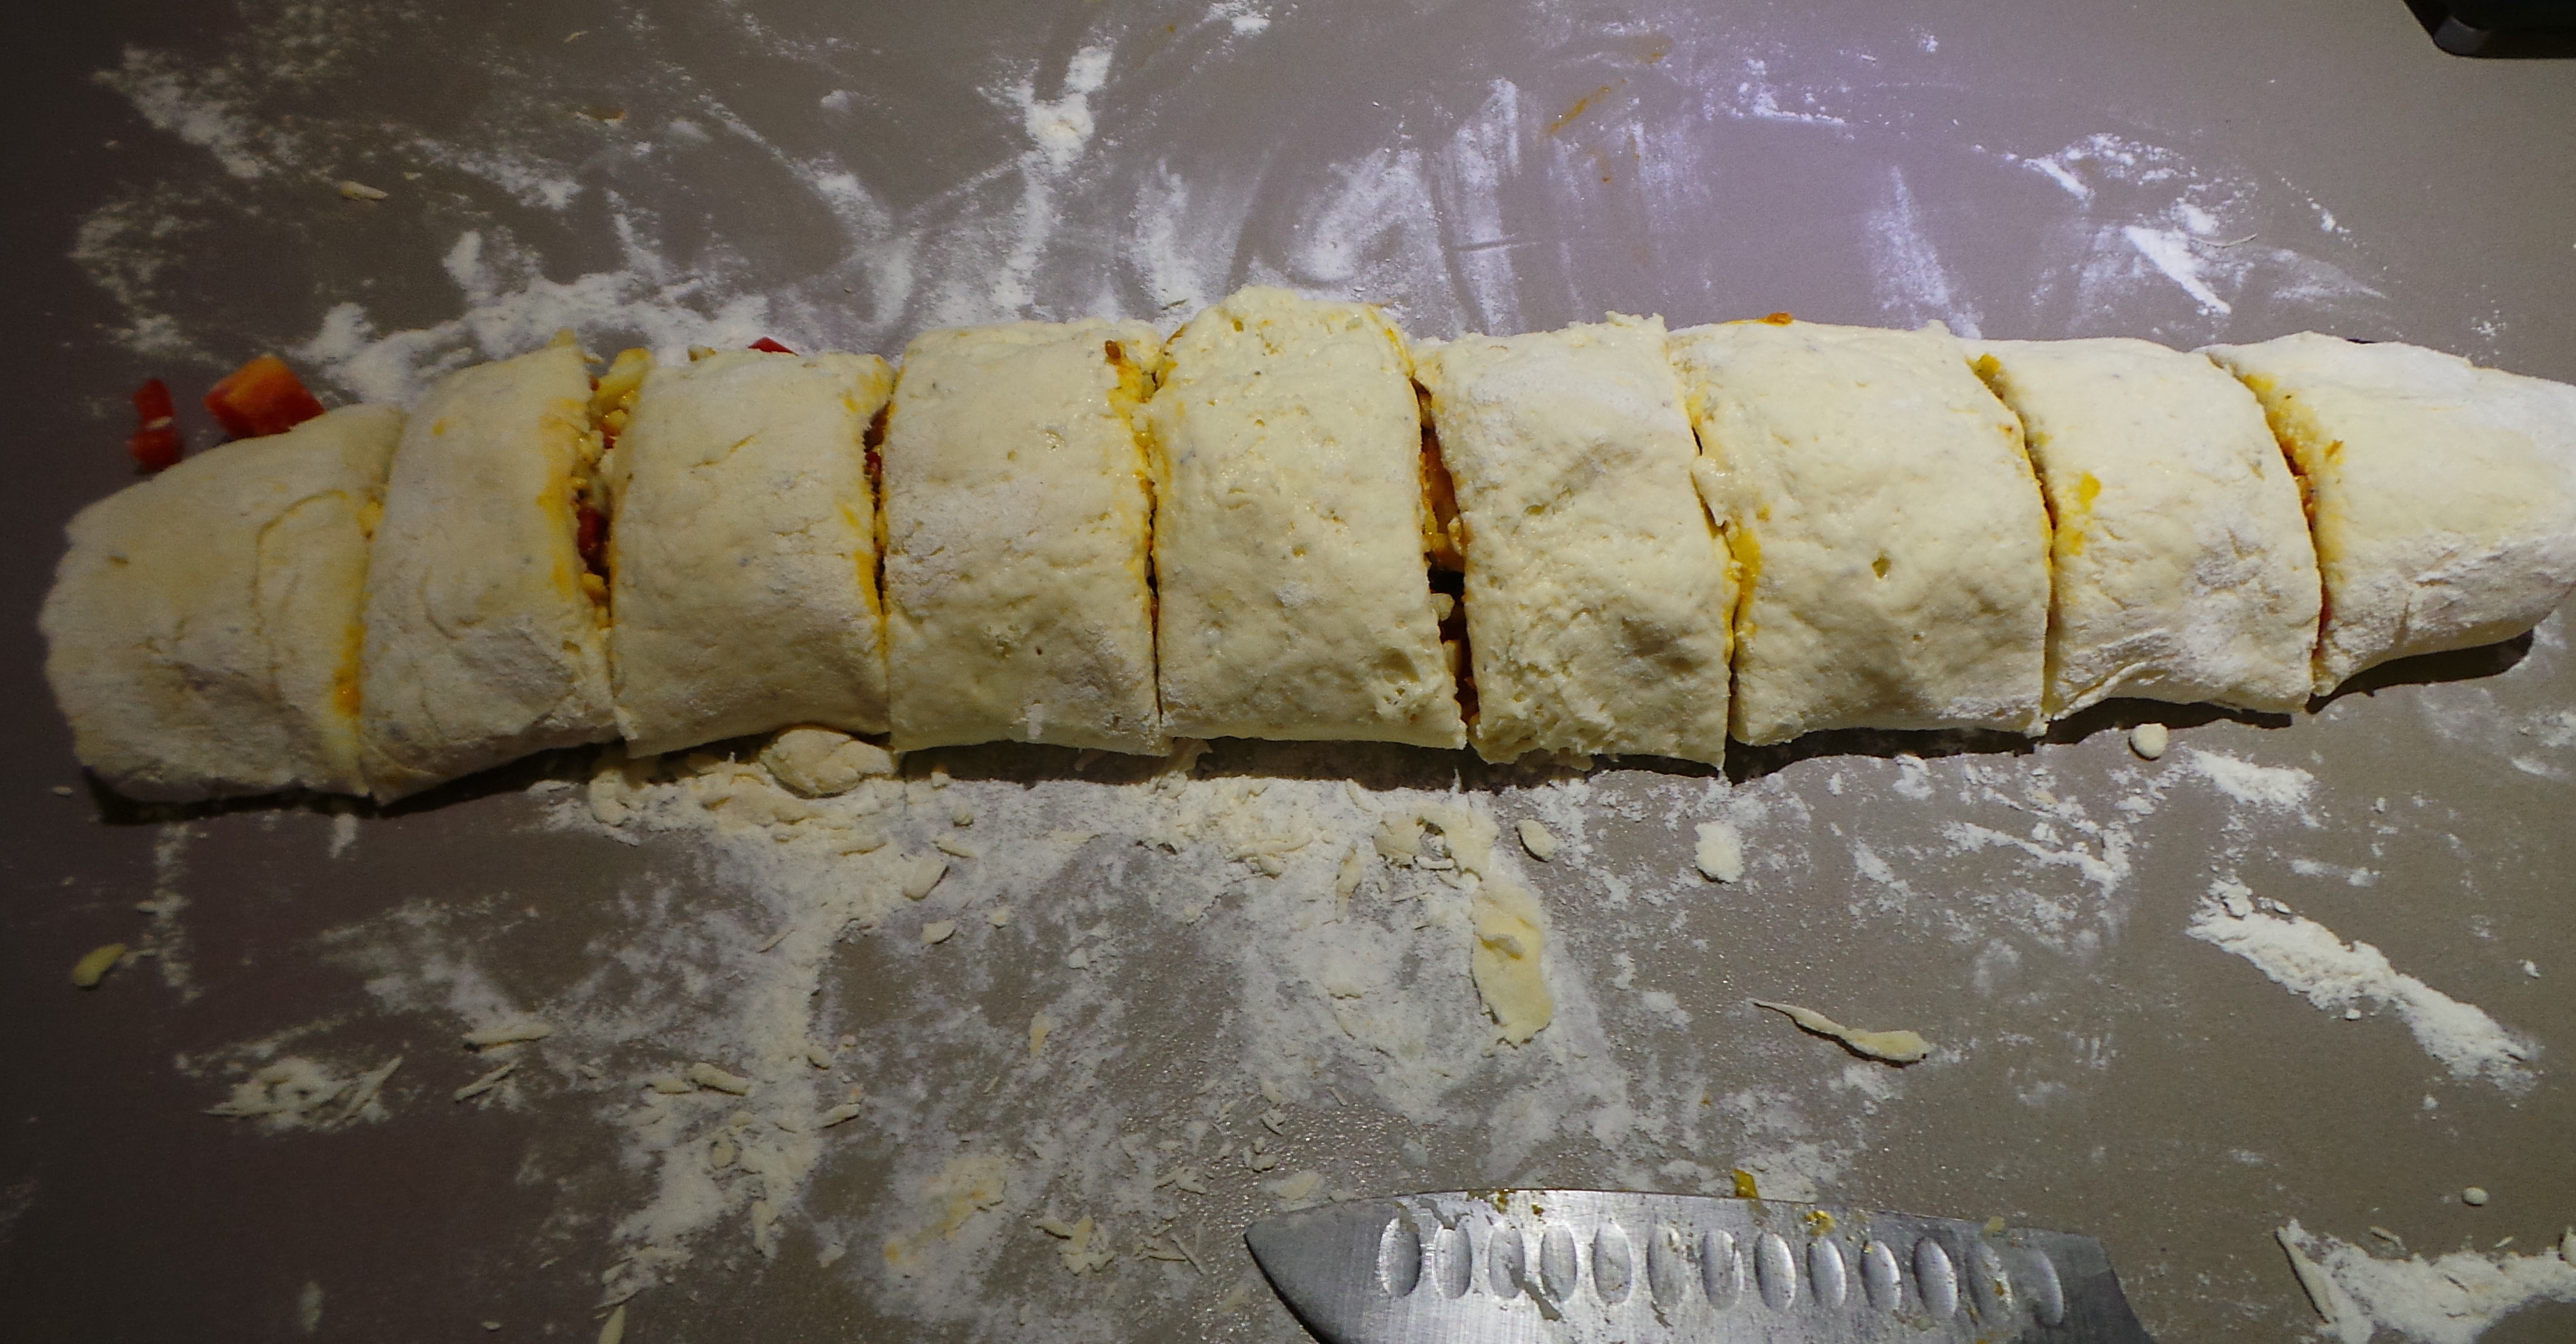
Divide into even-ish slices.
Now transfer the pieces into your cake tin. Start in the middle and work your way outward in a daisy formation. Be sure to grip the open edge closed as you lift it. It will end up looking a bit like this.
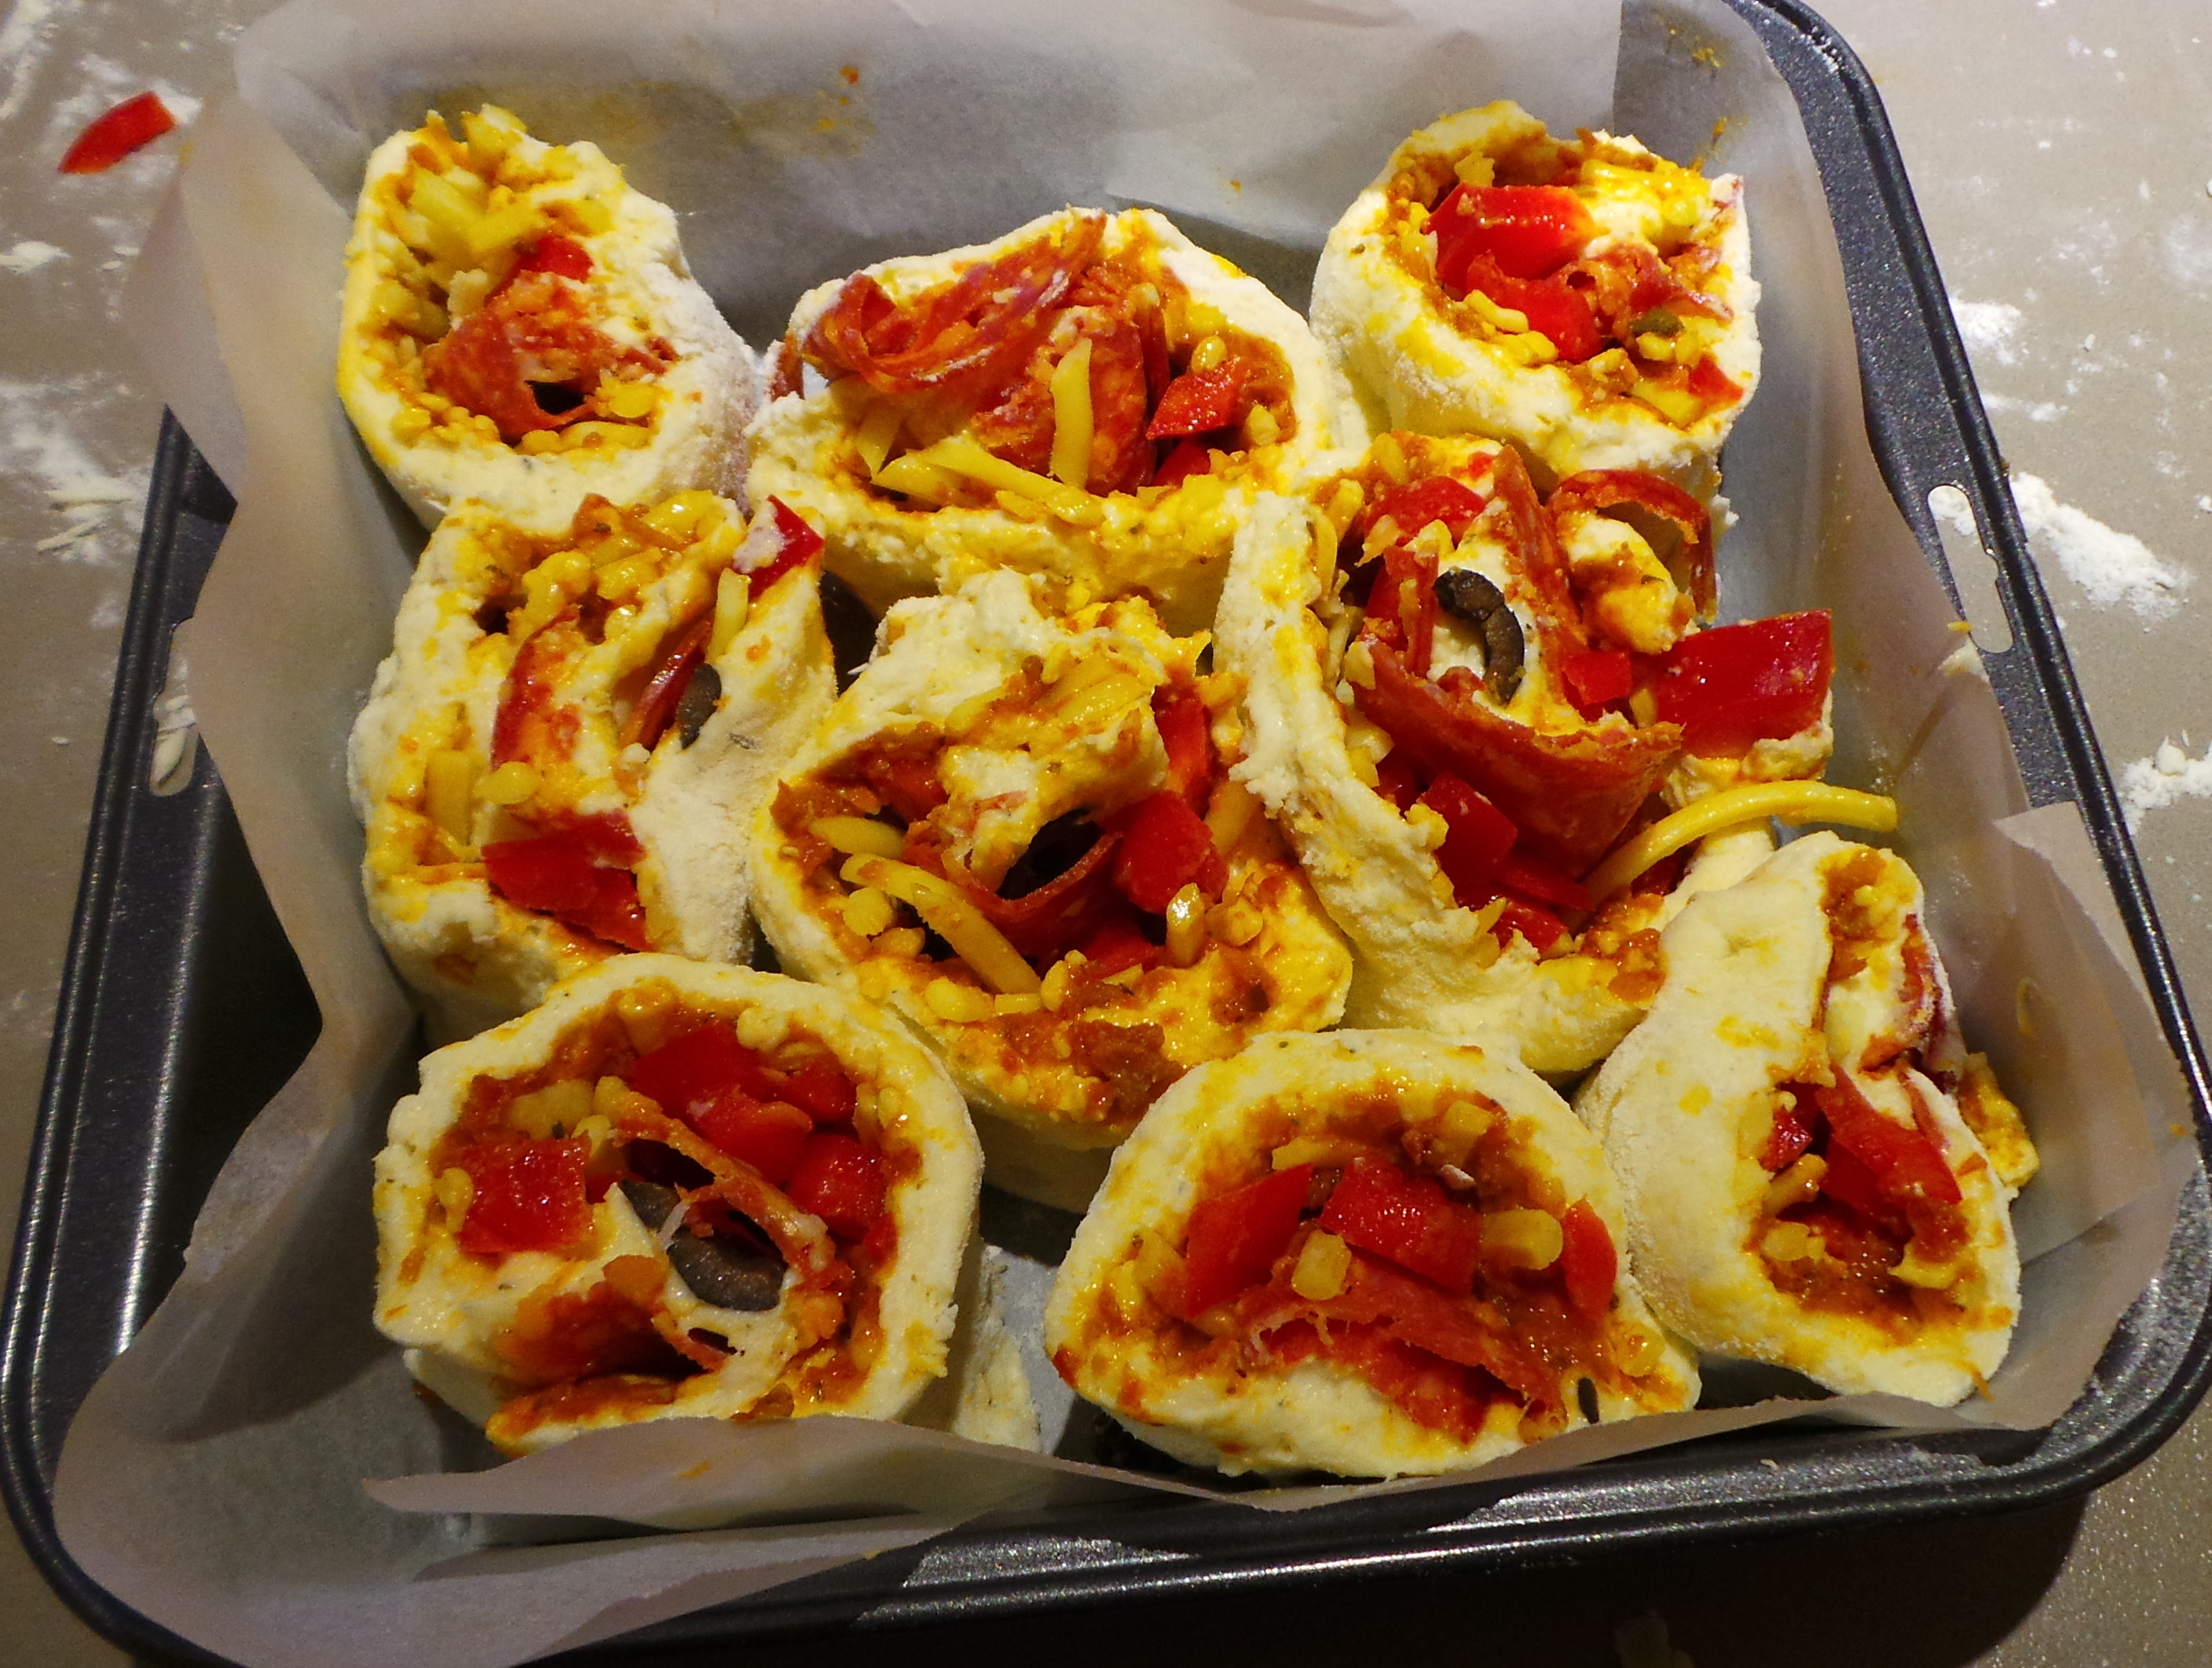
Ready for the oven.
Place it in the top third of the oven and bake for 20 mins before rotating the tin and baking for another 20 mins. It will be done when a toothpick or skewer inserted in a doughy part in the centre comes out clean.
You could sprinkle more cheese over the top at the half way mark if you wish.

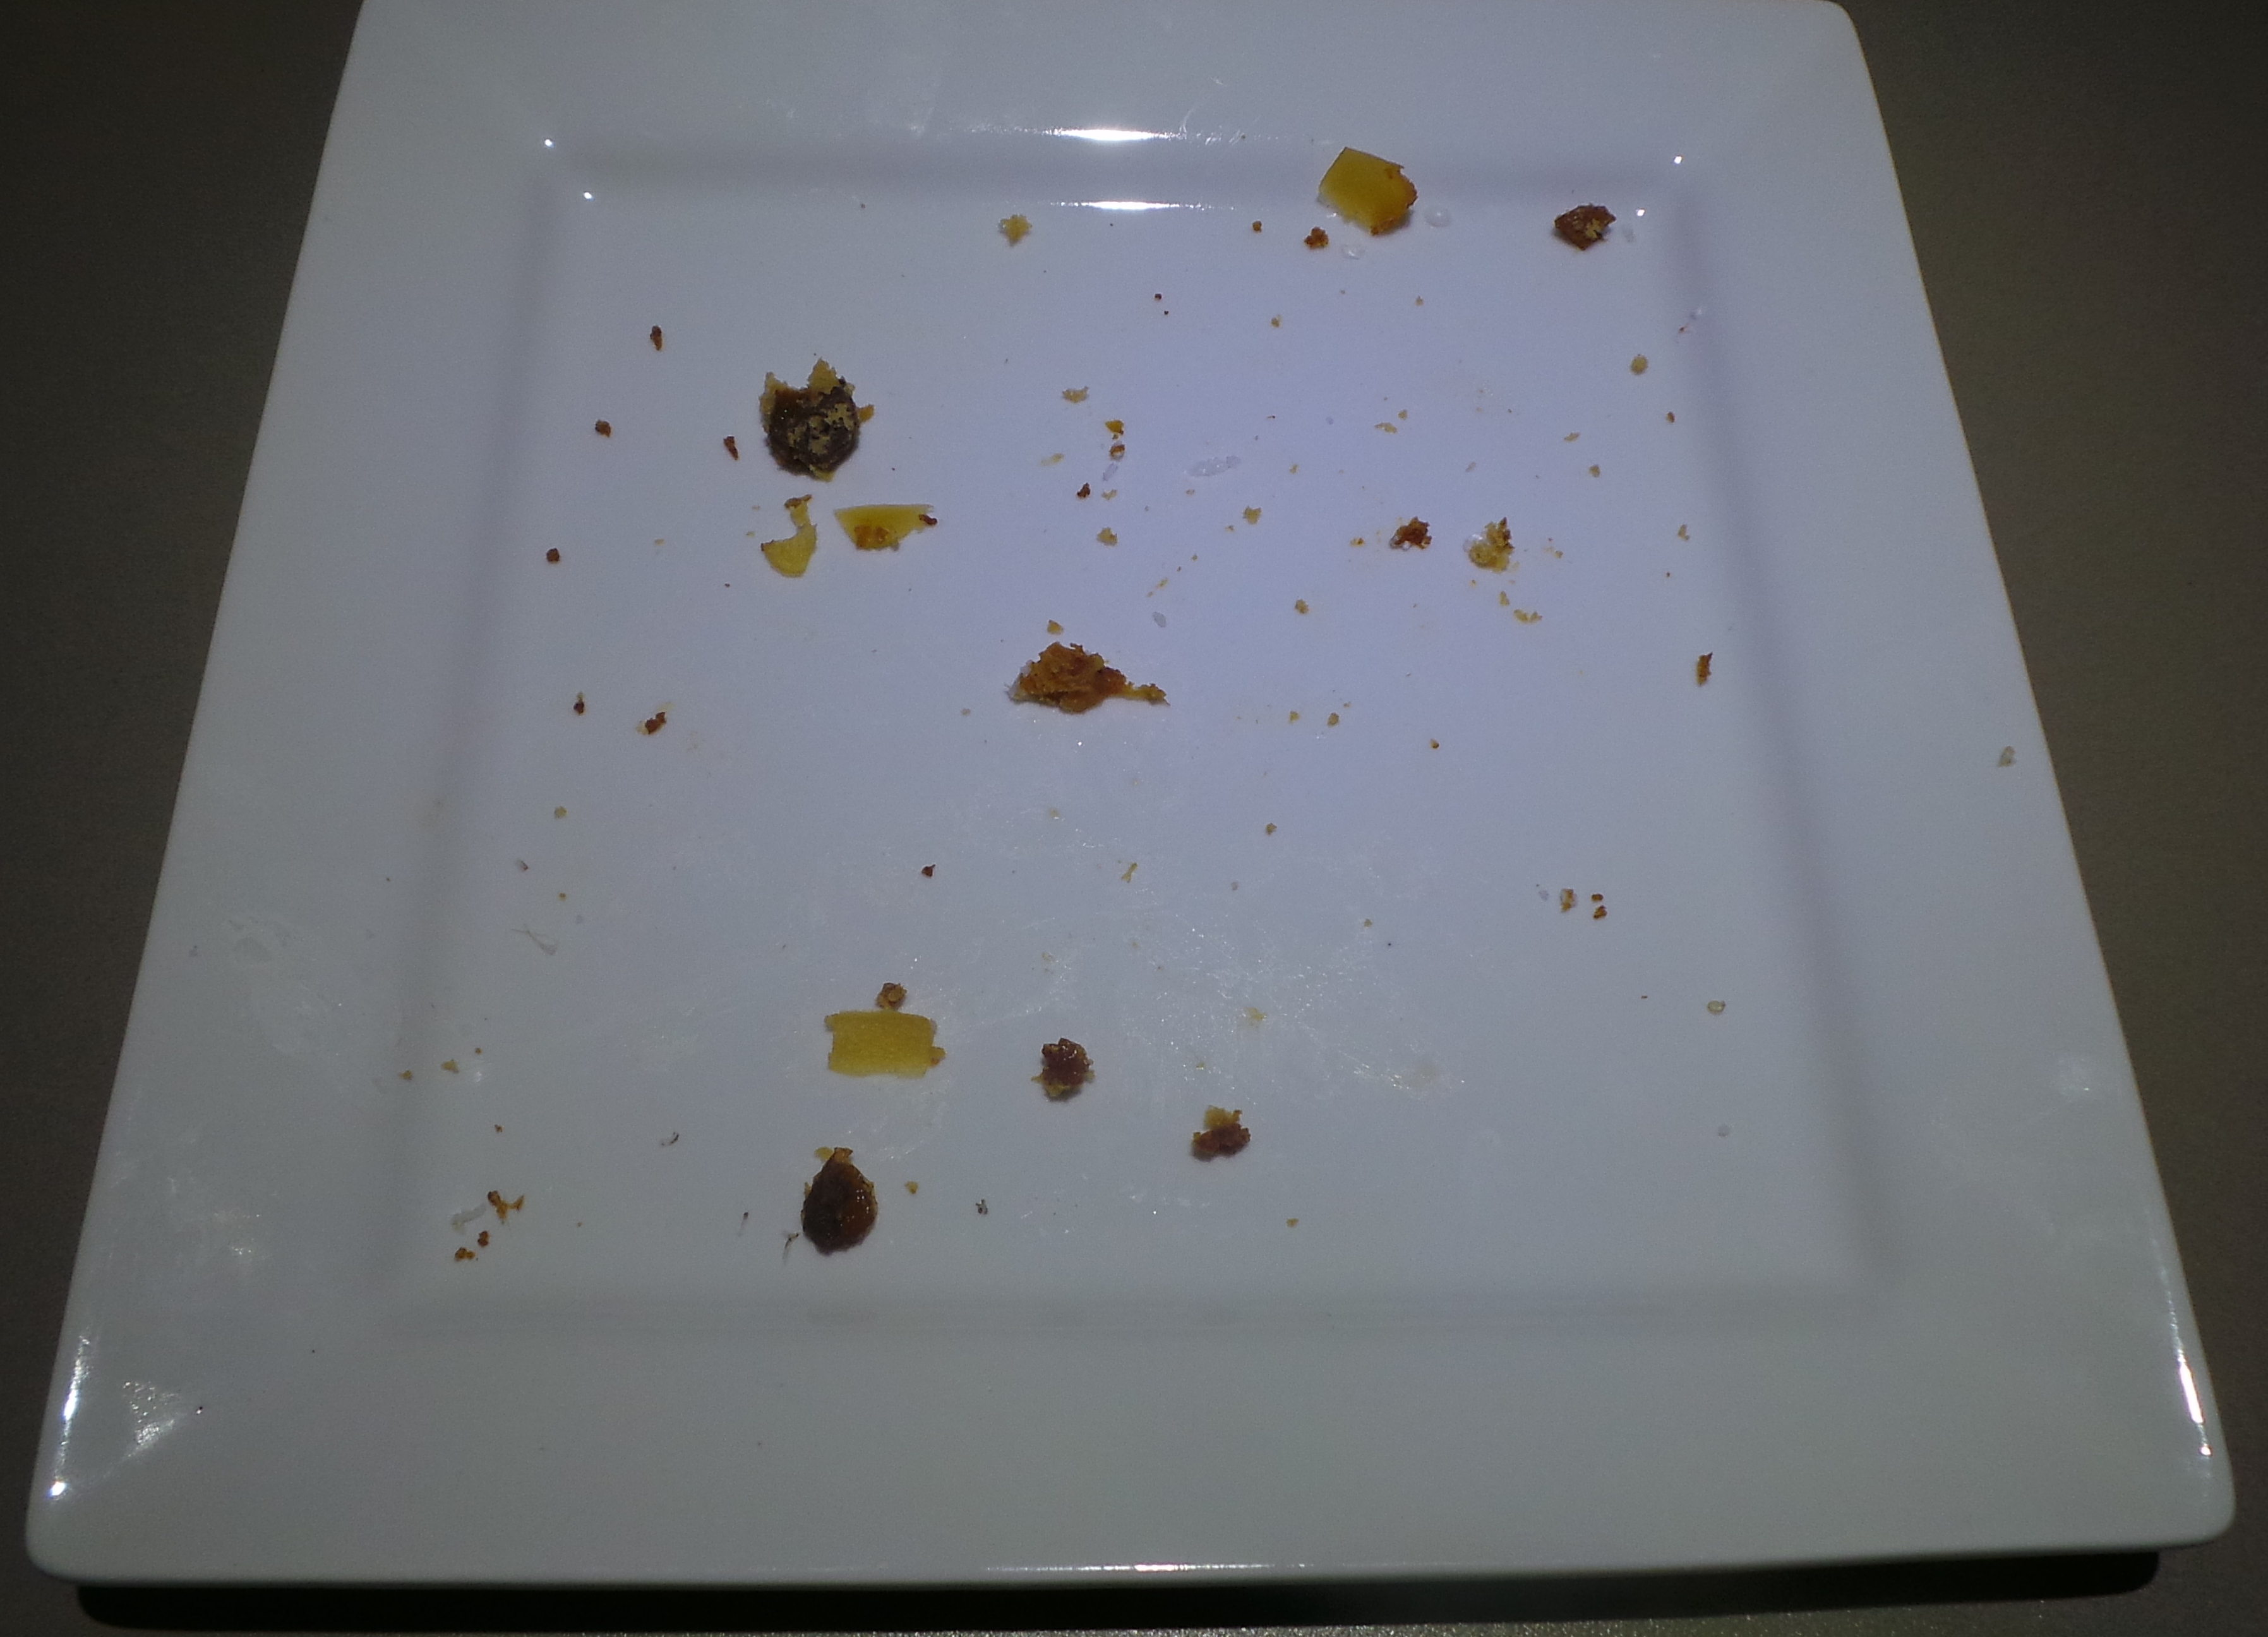
The finished result.
Lift it out and serve immediately for best results. Alternatively, wrap in a clean tea towel to cool, and it will be excellent cold for school lunches or a picnic. The cloth covering keeps the steam in and the quickbread soft.
For a slightly crunchy variation, sprinkle some polenta or cornmeal on your surface before you start to press out your scone dough.
Experiment and enjoy!