Today, bread was baked.  It was enriched with home-ground flaxseed and some steel cut oat groats that I want to use up.

Then the smallest slow cooker was filled with the makings of a lentil and barley hotpot with a slight variation. The Boy isn’t keen on the texture of the dried shiitake mushrooms that I like to add to it, so this time I thought I’d do something different.

Dried Mushrooms.

Dried Mushrooms.

I piled the dried mushrooms into the little electric coffee grinder- that I use for grinding everything except coffee – and pulverised them.

Dried mushroom powder.

Dried mushroom powder.

Then I added the mushroom powder to the chicken stock and continued as per normal. This way I got the mushroomy aroma that I adore and he didn’t have to deal with sensory issues. This is what is known as a win/win.

Some of yesterday’s Tuscan Kale bonanza was also added to the pot. We had it for dinner served over steamed basmati rice.

Lentil and Barley Hotpot

Lentil and Barley Hotpot

But before that we reduced a heaping pile of killer rose debris to a much smaller, smouldering pile of ash and charcoal. It was very satisfying.

However, it caused me to reflect on how skills are being lost – especially after three abortive attempts to get the pyre lit. My mother used to woman the incinerator at our house (before the advent of recycling bins) and I regaled The Boy with tales of yesteryear when everyone’s Sunday afternoon usually included one or another neighbour’s smoke from ‘burning off’ household waste of some kind.  Usually blowing directly onto someone’s freshly laundered sheets.

I now smell of wood smoke. The cats are viewing me with suspicion.

We followed this caveman-like feat with some very civilised Loaded Hot Potato Chips and collapsed in front of the telly.

Loaded hot potato chips

Loaded hot potato chips

I decided (in my deranged exhaustion) that I wanted to try something I’d never done before for dessert. I decided this about 10 minutes before I was going to serve dinner. I’m an idiot.

Anyway, I spent about 20 minutes searching for a recipe in my book collection and then asked Mr Google. For dessert I made some Baked Stuffed Apples.

Stuffed Baked Apple

Stuffed Baked Apple

I was too tired to eat them.

There were leftovers.

A mañana todos.

Today we managed to find an opening between the showers to pop down to our plot at the Community Garden and pick some stuff and weed and mulch other bits.

In summary, we came home with this pile of green awesomeness. It includes our very first leek (naaawww!), several pak choi, some broccolini and some Tuscan Kale (cavolo nero or black cabbage) very generously given to us by a neighbouring gardener.

We done grew all this green stuff!

We done grew all this green stuff!

It was all washed or scrubbed when we got home and has since been filed or eaten. We don’t muck around with our greens in this household, let that be a warning to ye!

Ahem. Moving on…

I have plans to use the leek and kale in a Lentil and Barley Hotpot tomorrow.

We’re planning on spending the greater part of tomorrow afternoon burning a pile of very old rose prunings that have been loitering on my front landing (oo er!) ever since we moved in about 18 months ago. It will be quite cathartic to watch them burn, really.

They are from very old plants that seem to have thorns on their thorns and the prospect of taking them to the tip was plagued by visions of us both bleeding to death from our wounds on the way. As it is, we have damp weather and a stubborn bald spot in our rear lawn that could use a fine layering of ash and charcoal – she said, pretending to know what she is talking about and fooling precisely no-one.

Regardless, the crock pot can crock while we give vent to our rather tame inner pyromaniacs.

Tonight, however, I had some leftover chilli mac from last night.

Chilli Mac

Chilli Mac

While The Boy filled his belly with a terrifyingly hot Vegan Thai Green Curry that I made up for him – on request.

Now doesn't that look purdy?

Now doesn’t that look purdy?

It used up most of what was left of our jar of green curry paste, some onion, carrot, celery, red capsicum, coconut cream, home-canned soy and adzuki beans and a goodly portion of the pak choi you saw in the first photograph.

I served it over some steamed basmati rice we had in the refrigerator and he was a very happy little camper.

Not blurry, but steamy.

Not blurry, but steamy.

Both dishes were consumed accompanied by discussion about the Rhinoceros in “The Gods must be crazy” and our newest household member, the Accidental Cat.

Sara - the accidental cat.

Sara – the accidental cat.

I’ll speak with you all tomorrow, if we manage not to burn anything we’re not supposed to.

Let me know if you’d like a post on how I constructed the curry.

ttfn.


Swiss Roll

The first time I made a Swiss Roll I do believe it was in my Home Economics class and I was around 14 years old. That was over 30 years ago.

It was also the last time I made a Swiss Roll.

In case you haven’t picked up on this yet, Swiss Roll making isn’t a high frequency activity in my kitchen.

Got it?

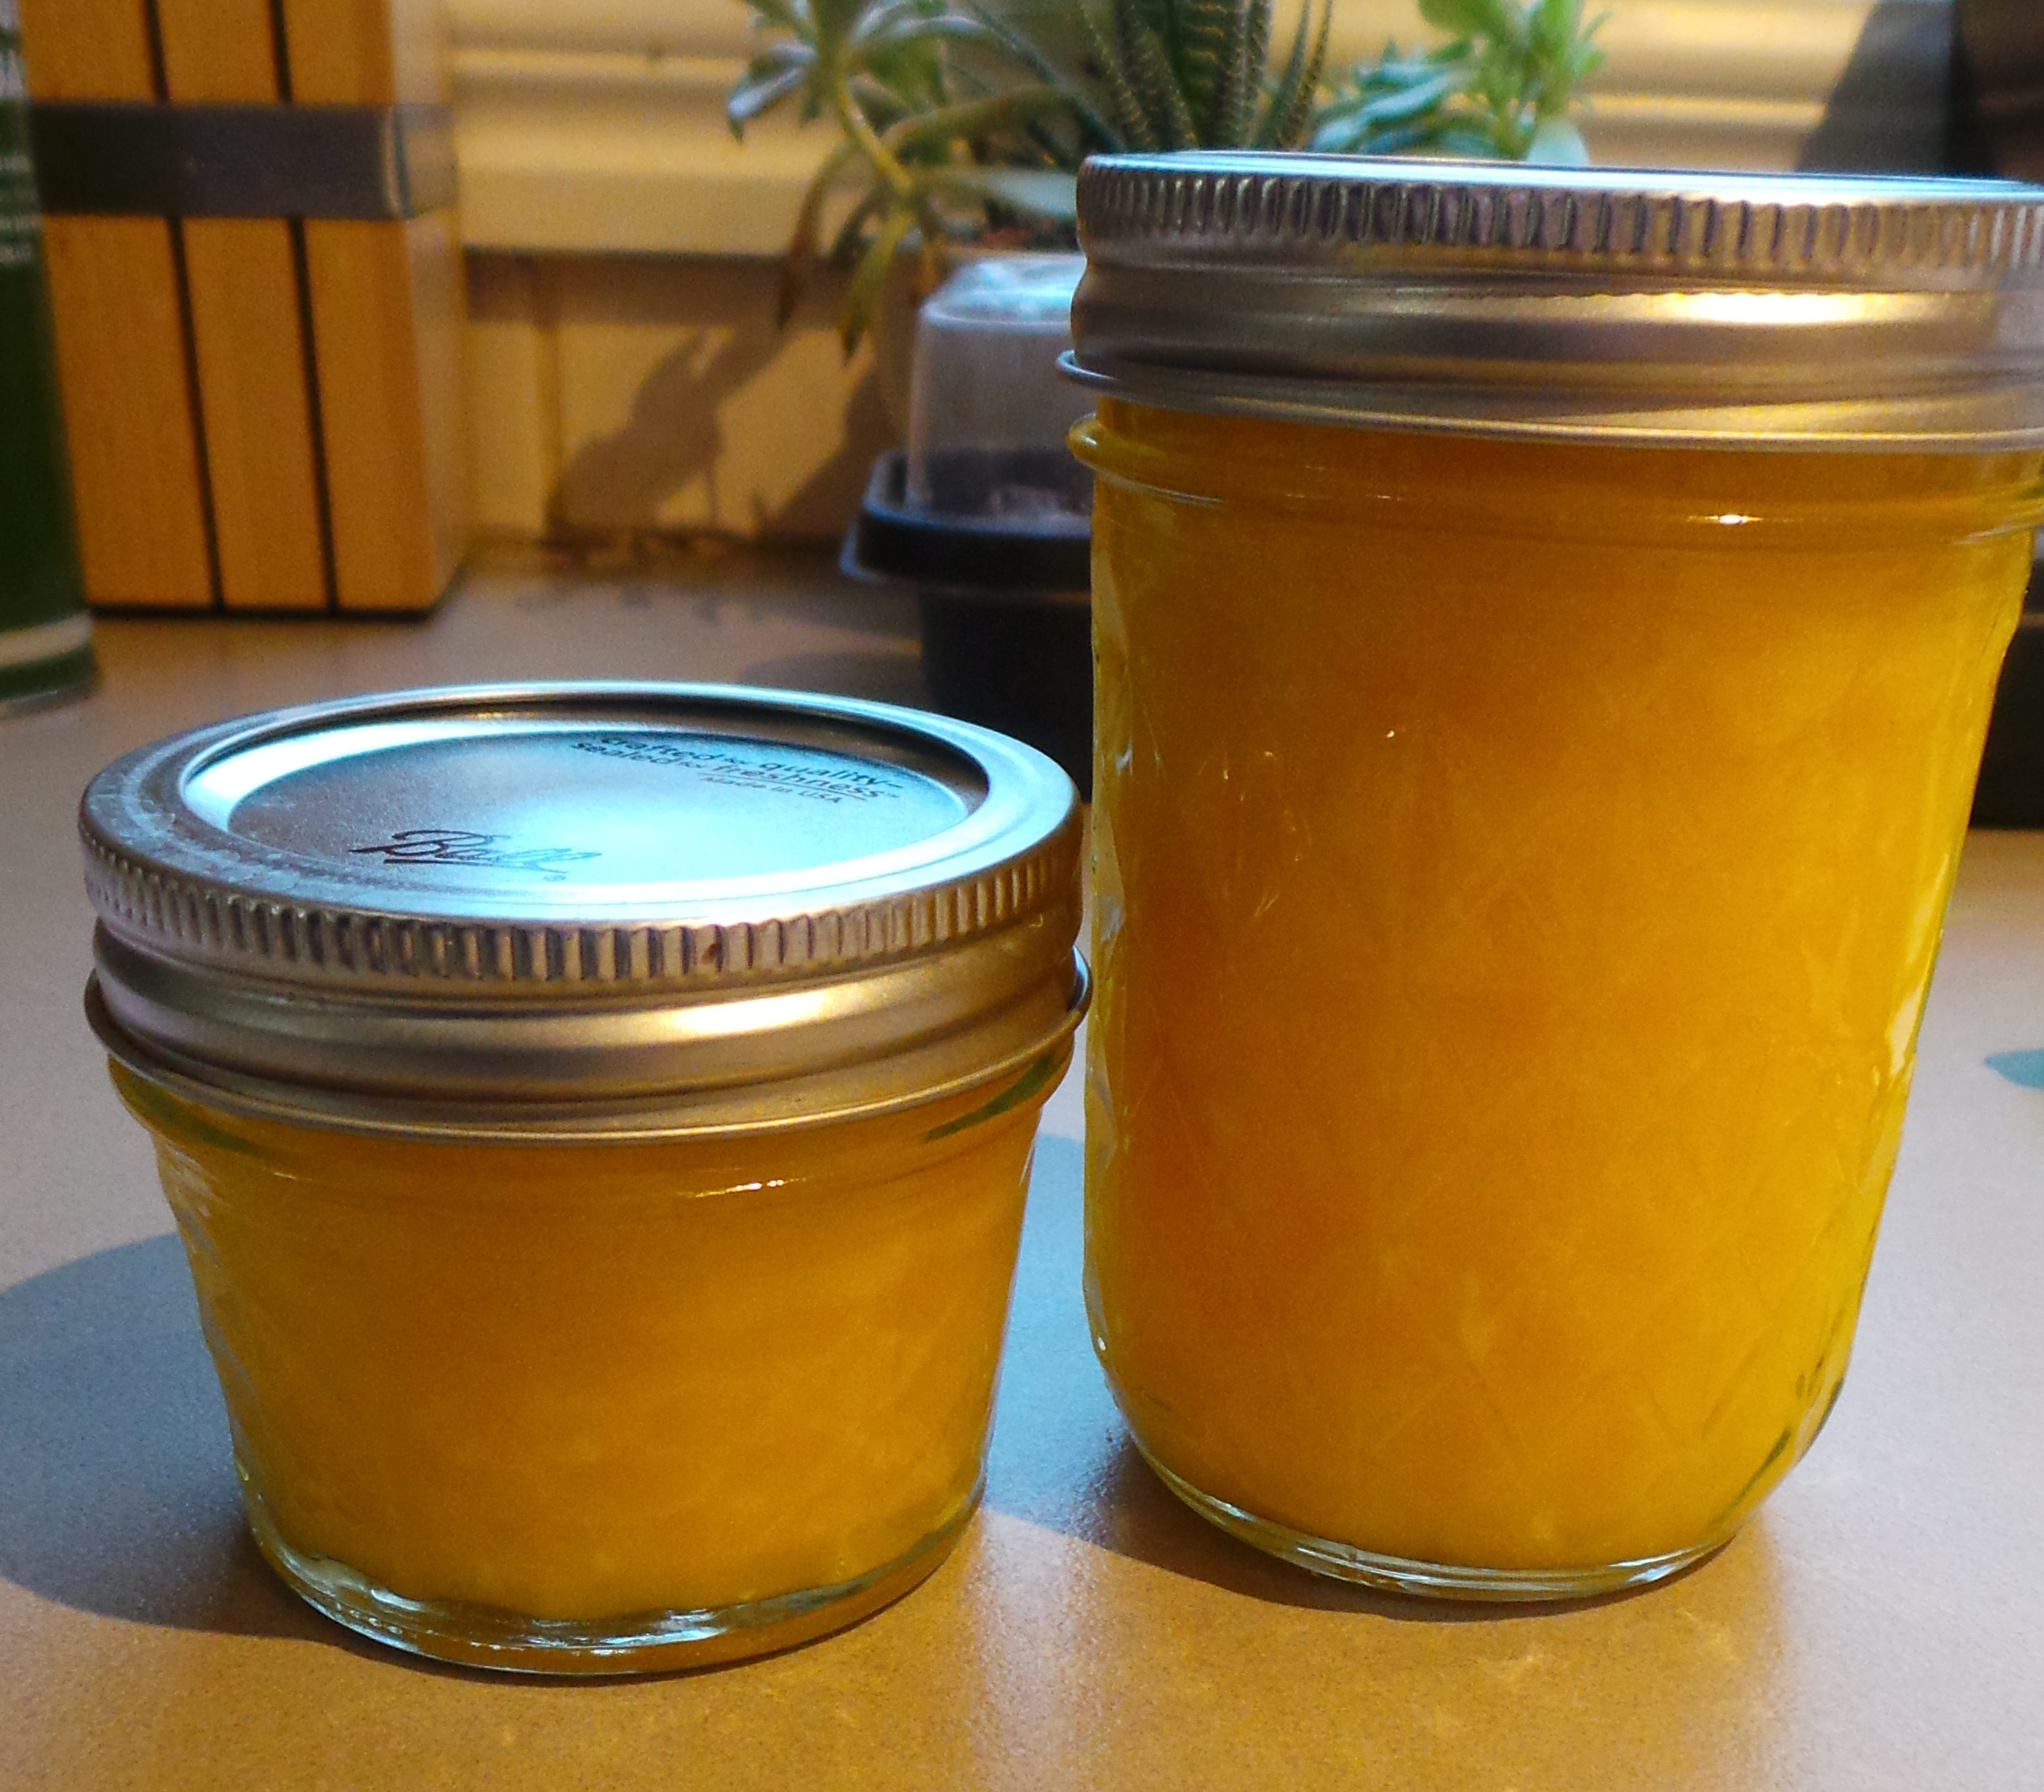
Anyhoo…I needed to make something for my Thursday lunch group.  It needed to be something simple and non energy-sapping. I’d just made a double batch of Lemon Butter and thought maybe some of that could be used in …  something?

Lemon Butter.

Lemon Butter.

Then I remembered that one of the ladies at the group is doing a cookery course and one of her assignments was a sponge cake filled with lemon curd.

‘What about a Swiss Roll?’ something whispered in the back of my head.

So I went with it.

I found this very simple recipe here on one of Jamie Oliver’s sites. I can honestly say it’s one of the easiest things I have ever made.

The hardest part was working out whether I had a Swiss Roll tin! I knew they were big and flattish but…so I asked Mr Google and found the answer resided here, with the ever delectable Nigella Lawson.

A Swiss roll tin is a specific tin that is designed to bake a thin, rectangular sponge cake that is then rolled up to make a Swiss roll (jelly roll or roulade). It has slightly raised edges (about 2 to 3cm/3/4 to 1 inch) deep and has dimensions of roughly 23 x 33cm (9 x 13 inches).

I had one of those. It was all good.

I also had all three (3!) of the necessary ingredients.

I used a stand mixer because I can’t hold things very well right now and I could just turn this on and block my ears. If you have a hand-held electric beater or whisk then go for it. If you have none of these things but are possessed of a balloon whisk and well-developed biceps, then feel free to join in the fun.

Heat your oven to 200°C/400°F.

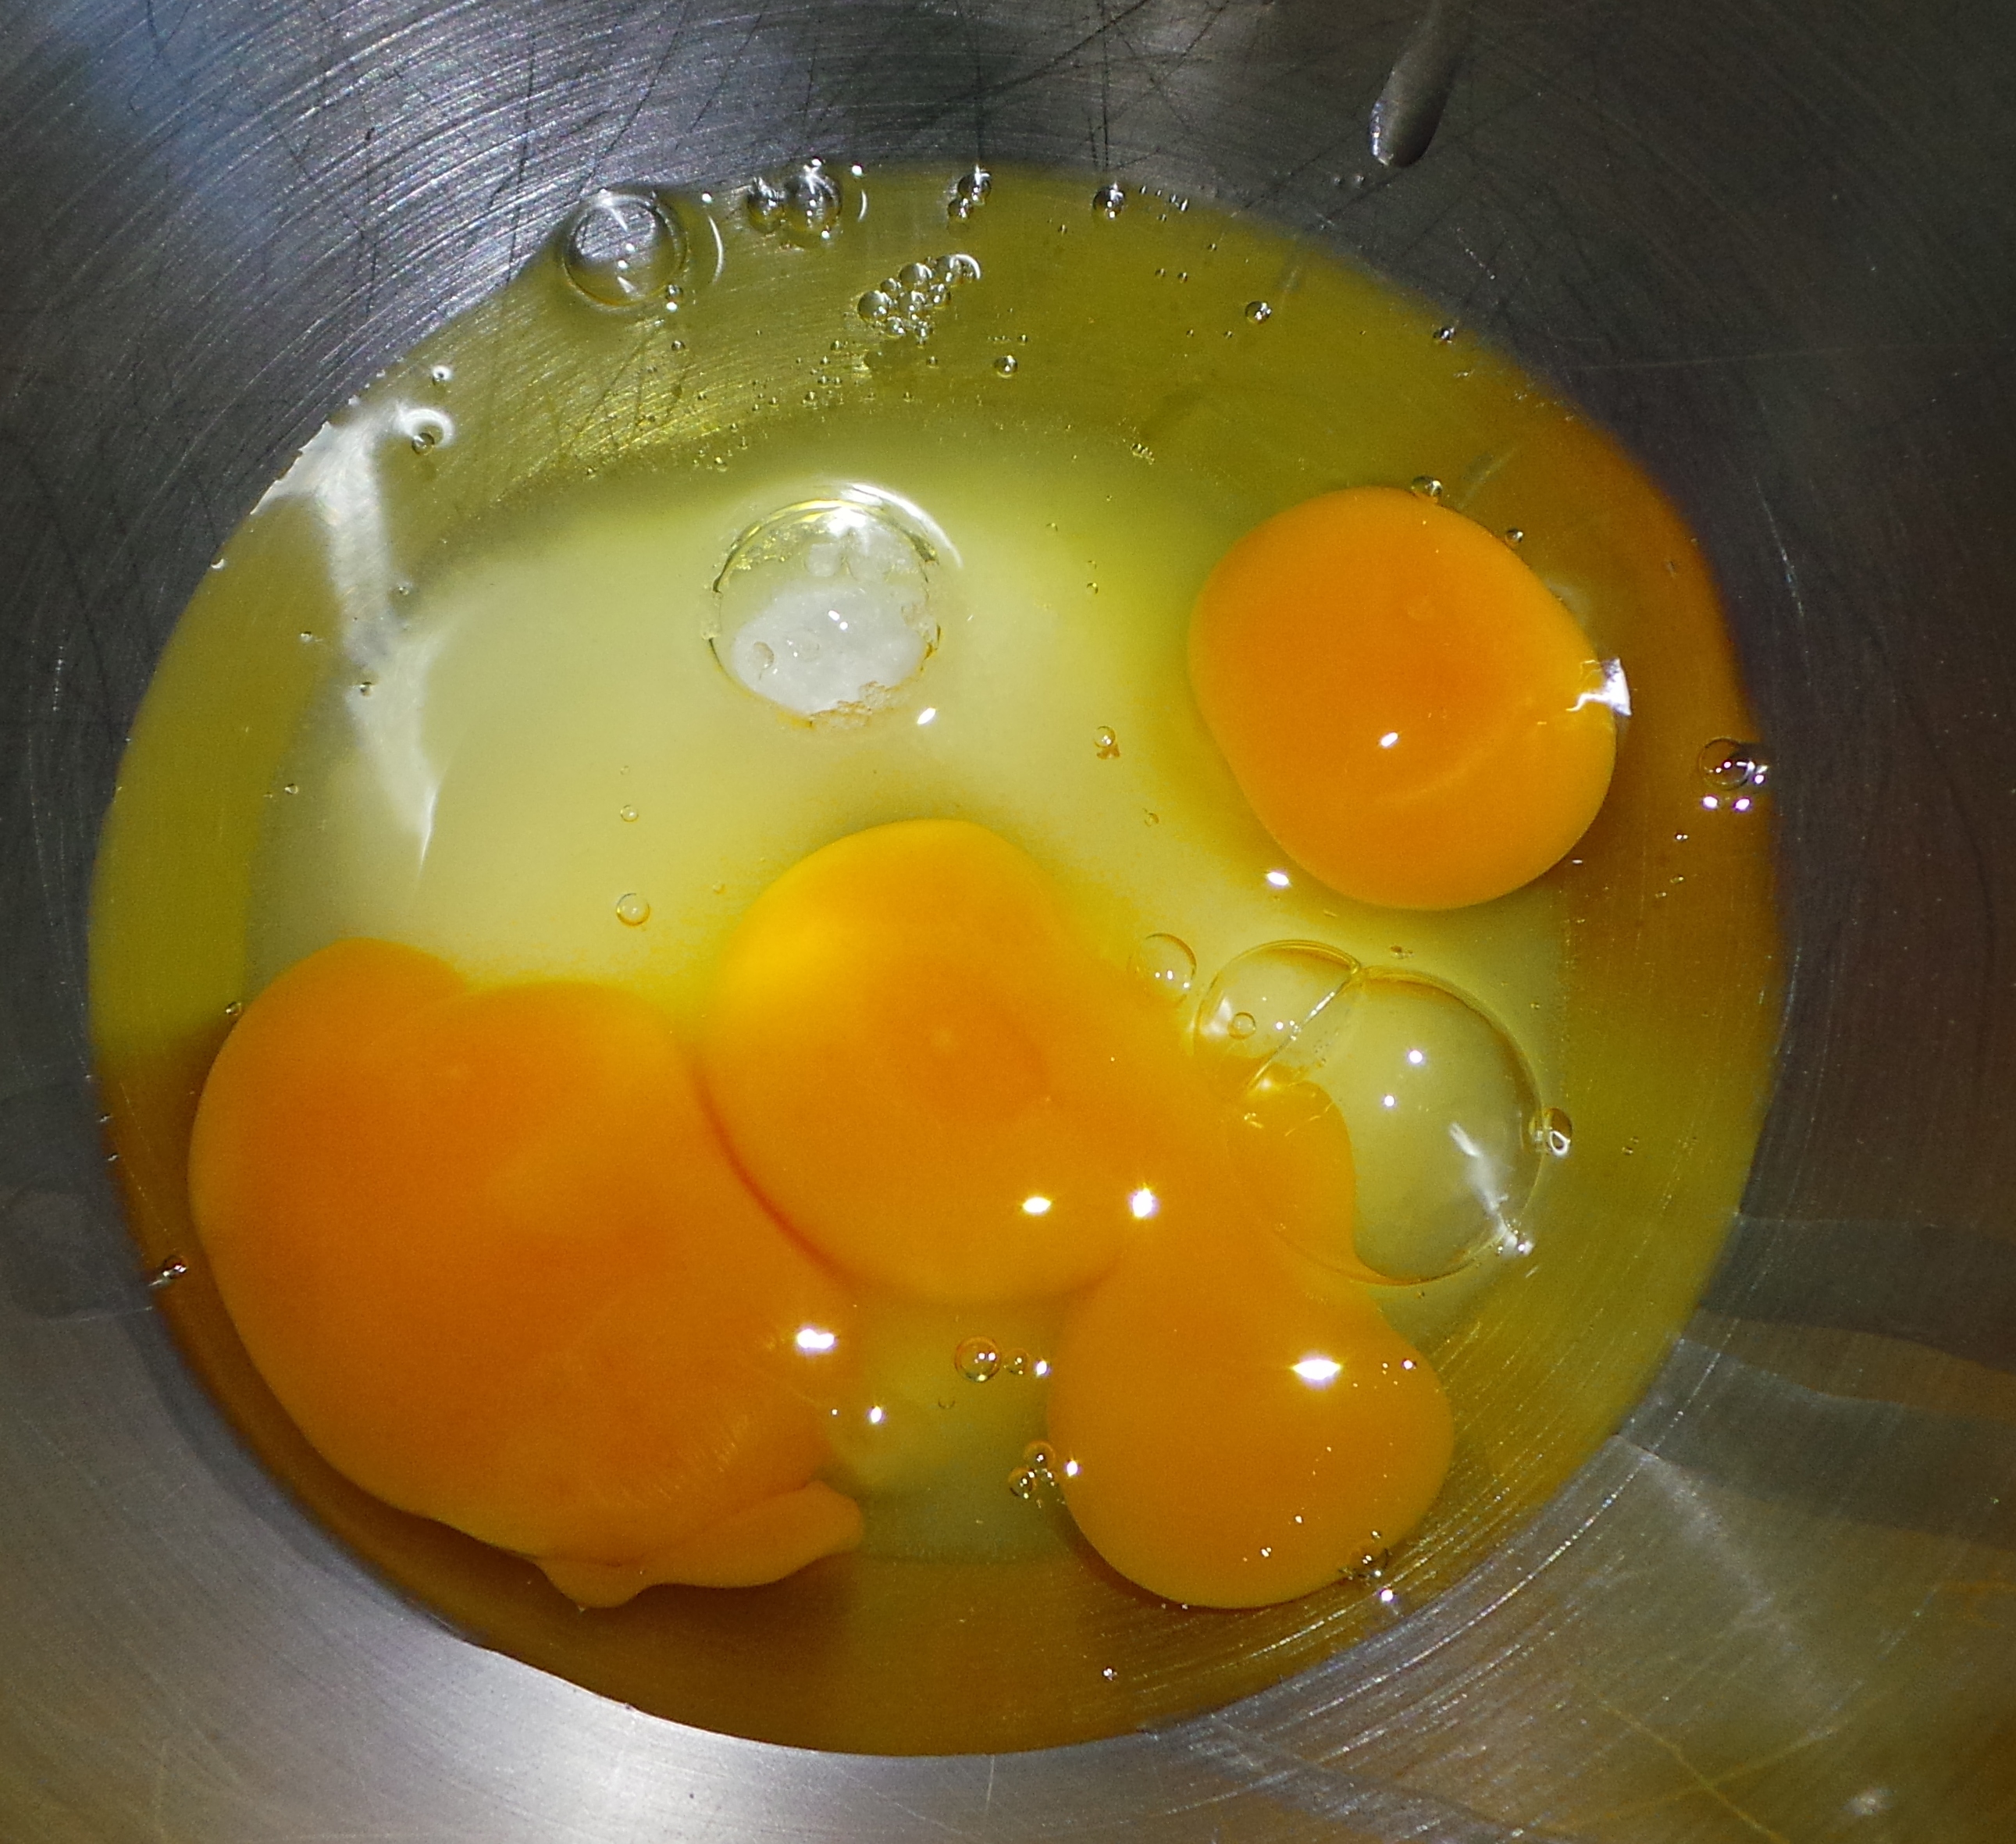
Start with sifting a teeny amount of caster sugar into a bowl and add three eggs.

Start with eggs and sugar. Now beat.

Start with eggs and sugar. Now beat.

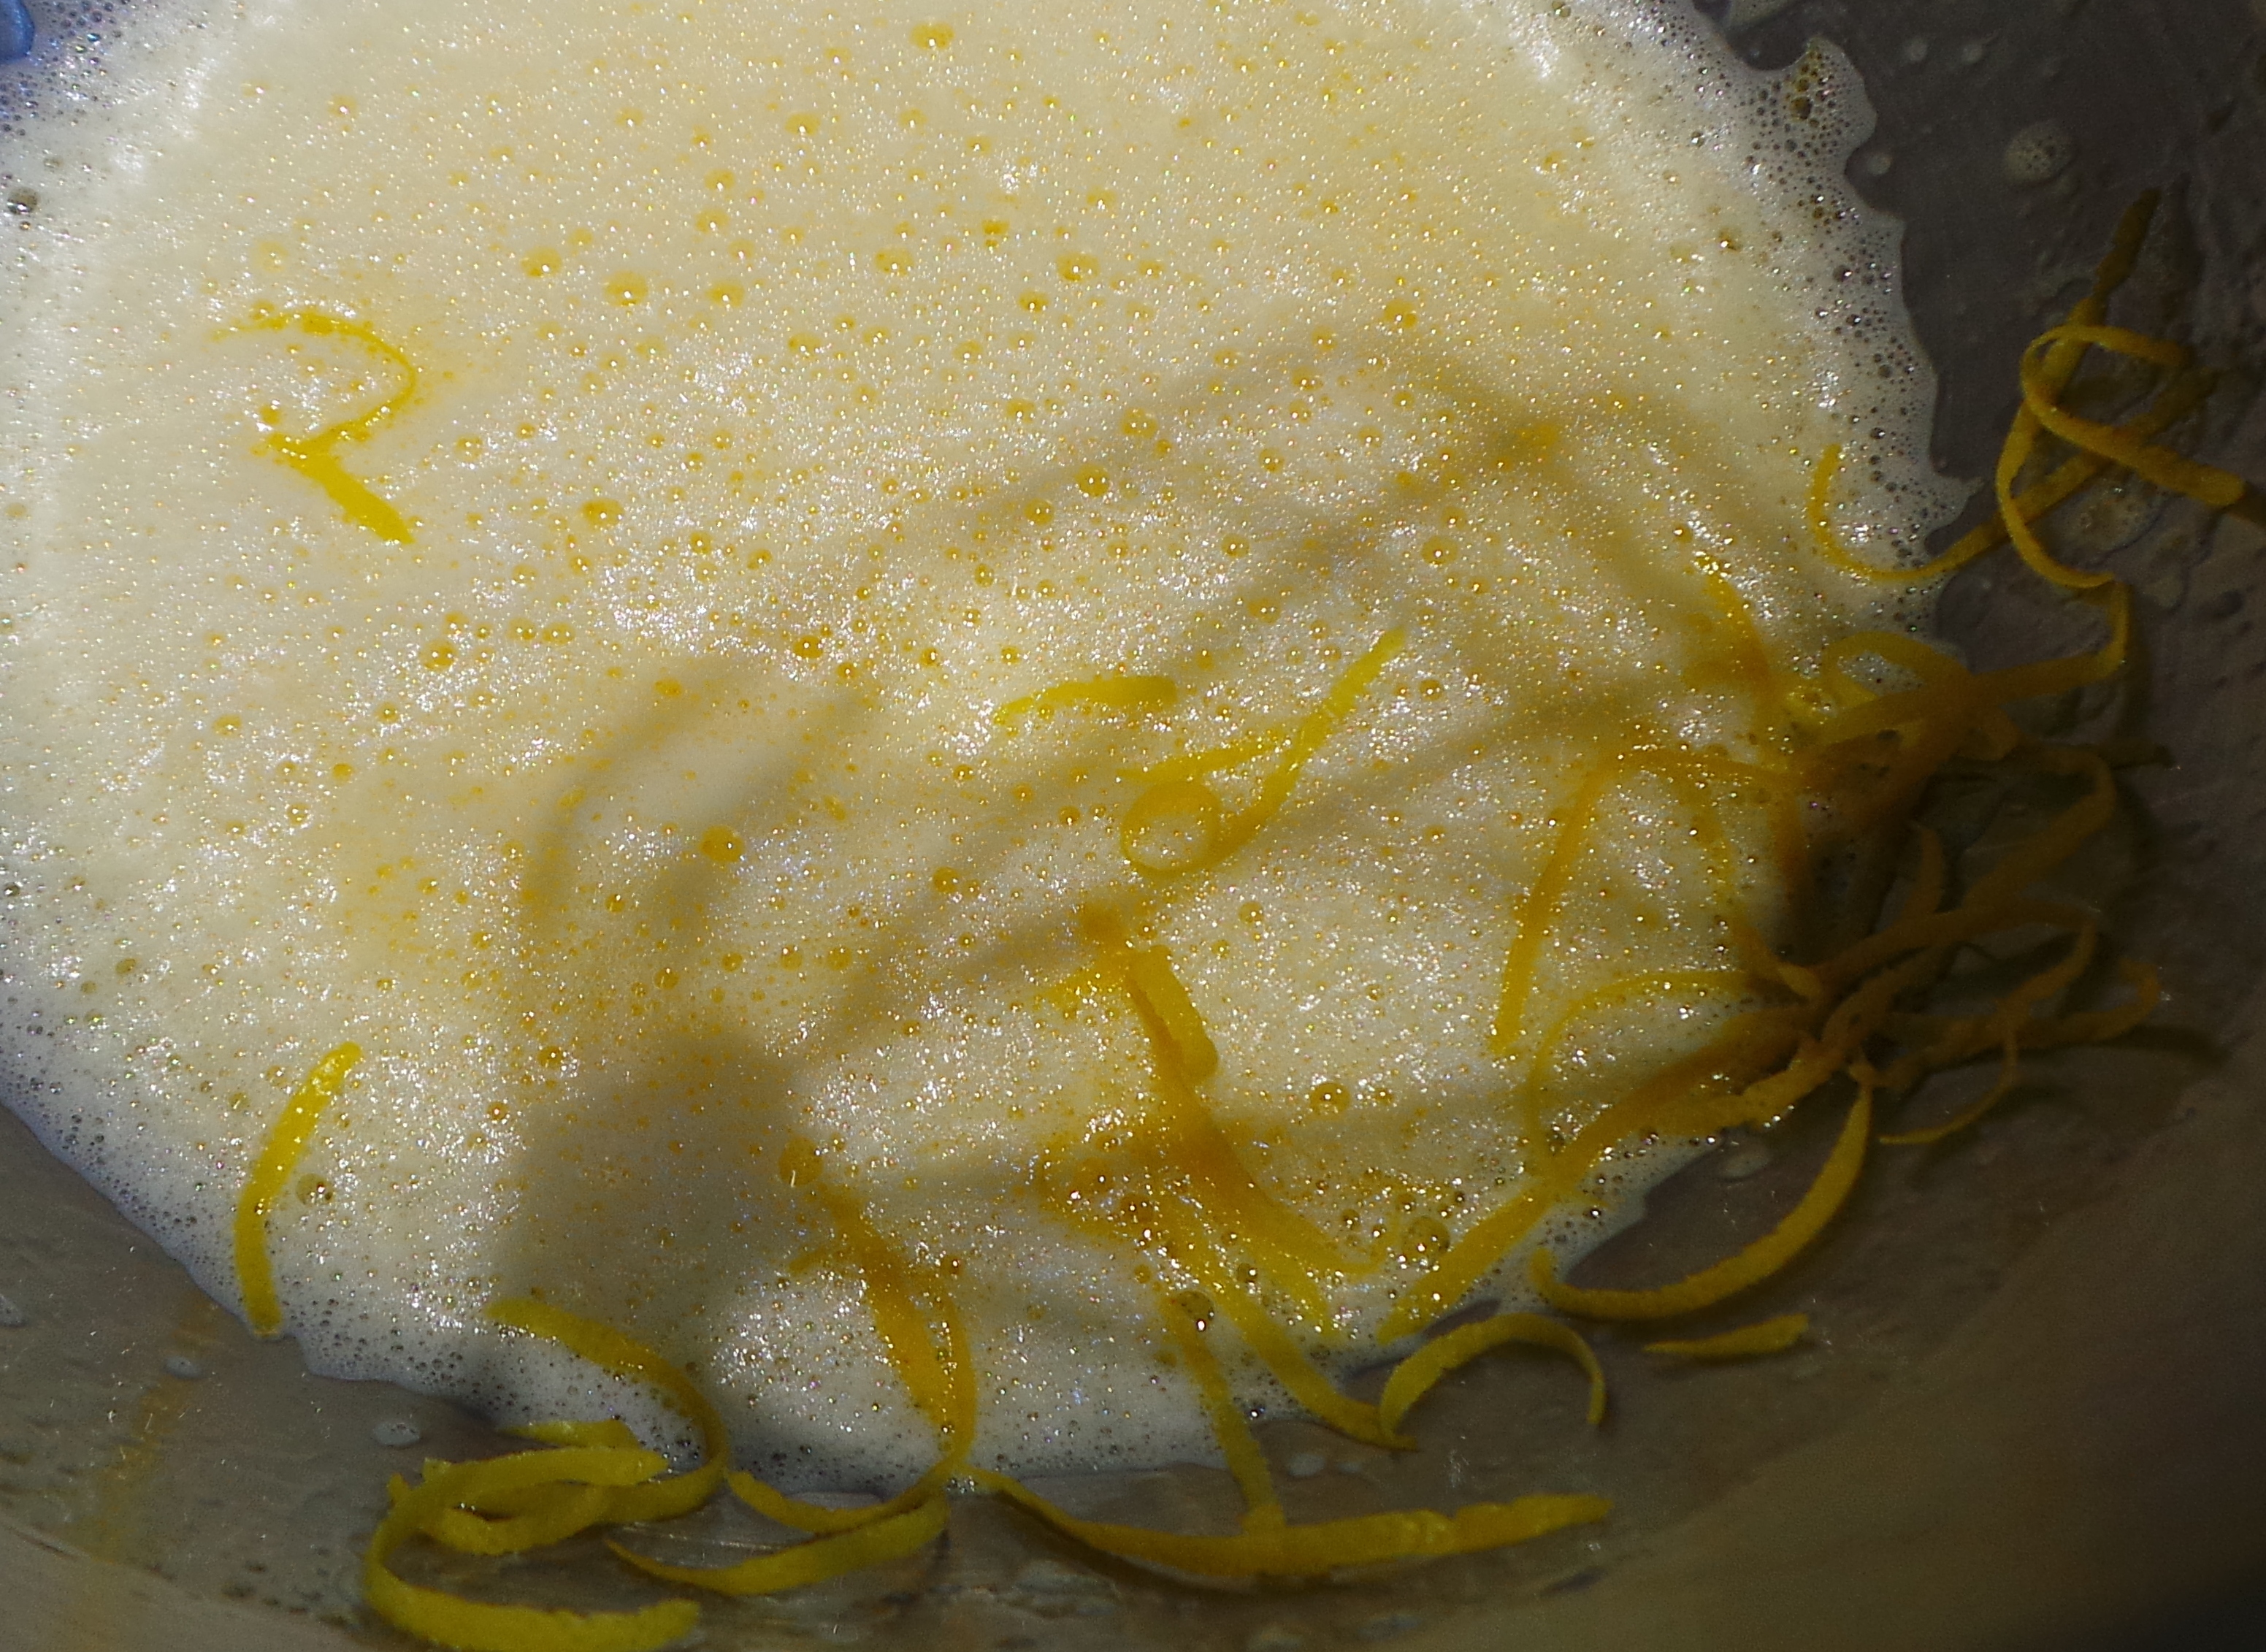
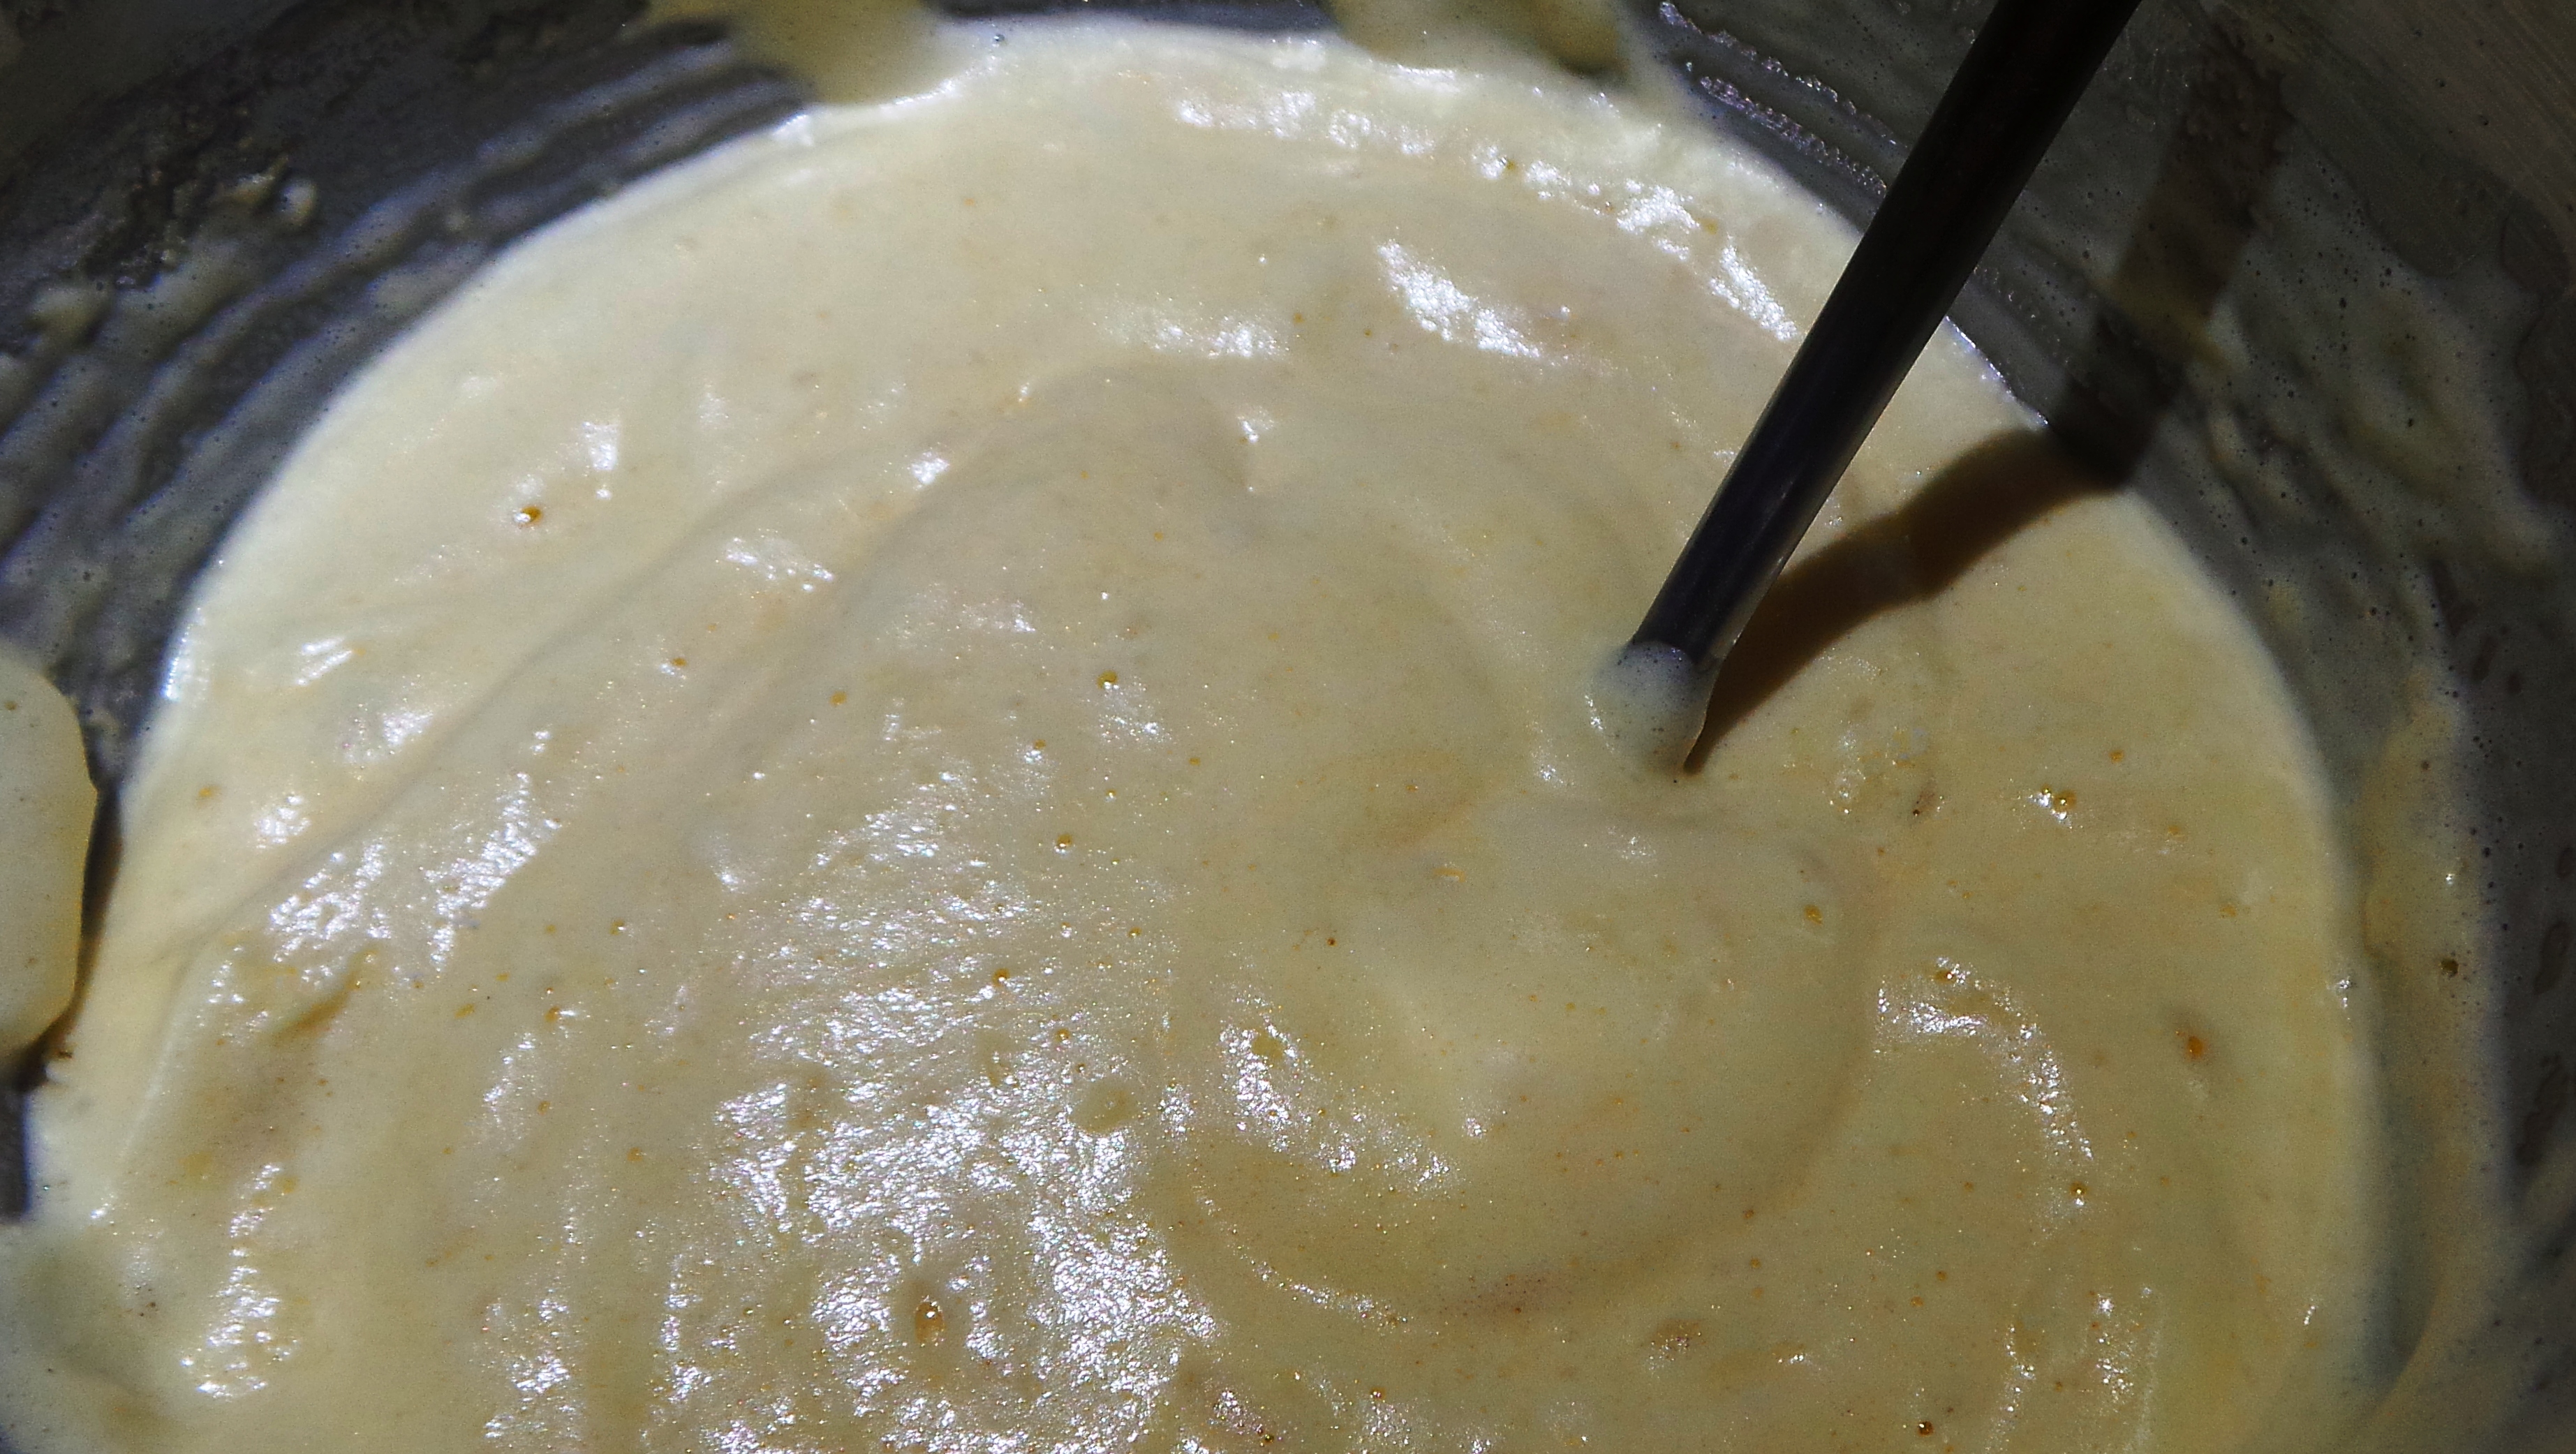
Whisk the two together until the mixture becomes thick and creamy.  This could take quite some time. I stopped at one point and decided to add some lemon zest to the batter just to tie it to the lemon butter a bit better. Not sure it made a measurable contribution in the end.

You can see it's getting a little thicker here.

You can see it’s getting a little thicker here.

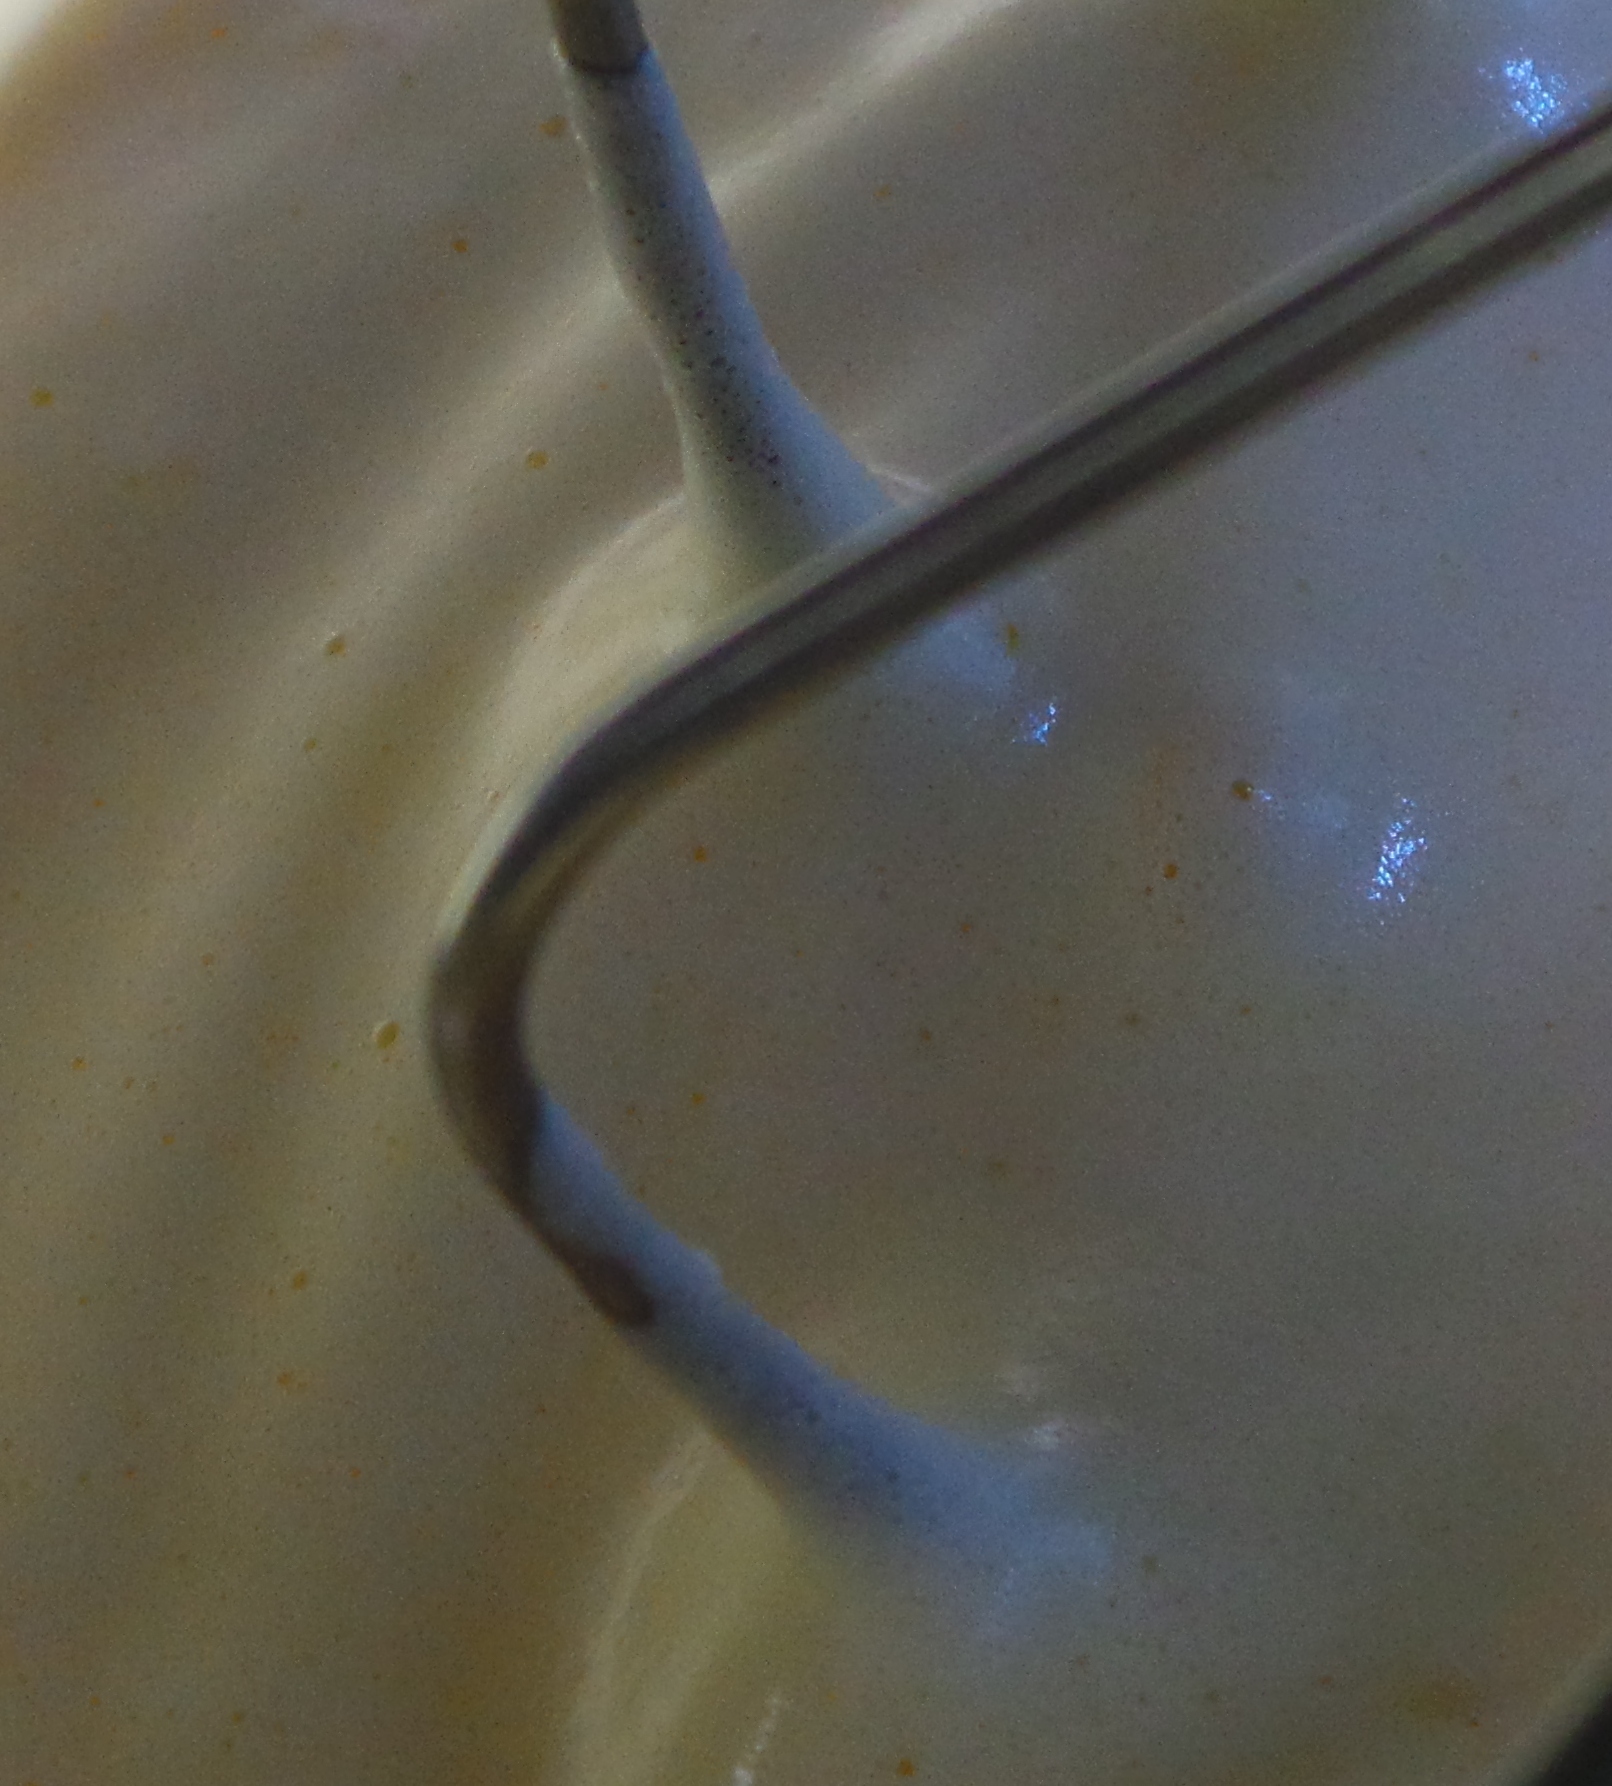
It still wasn’t thick enough though. You are looking for a thick, creamy looking batter. You’ll know you’ve reached the right point when the beaters start to leave a trail in the mixture, like this…

Can you see the ripples? That.

Can you see the ripples? That.

Put your electric beaters away; from this point on being gentle is your game plan.

Sift the Self Raising flour into a bowl and then sift it again into the mixture. Fold it through the egg mixture using a metal fork.

Gently fold in the flour.

Gently fold in the flour.

I might be the only person you know who uses a fork for this, but it works. Folding is basically the same as stirring, but in slow motion. You are trying not to beat out all the air that you have just beat into the egg mixture. Think of the flour as just being there to stabilise that structure.

Once all the flour is incorporated, stop.

2015-08-26 17.17.03

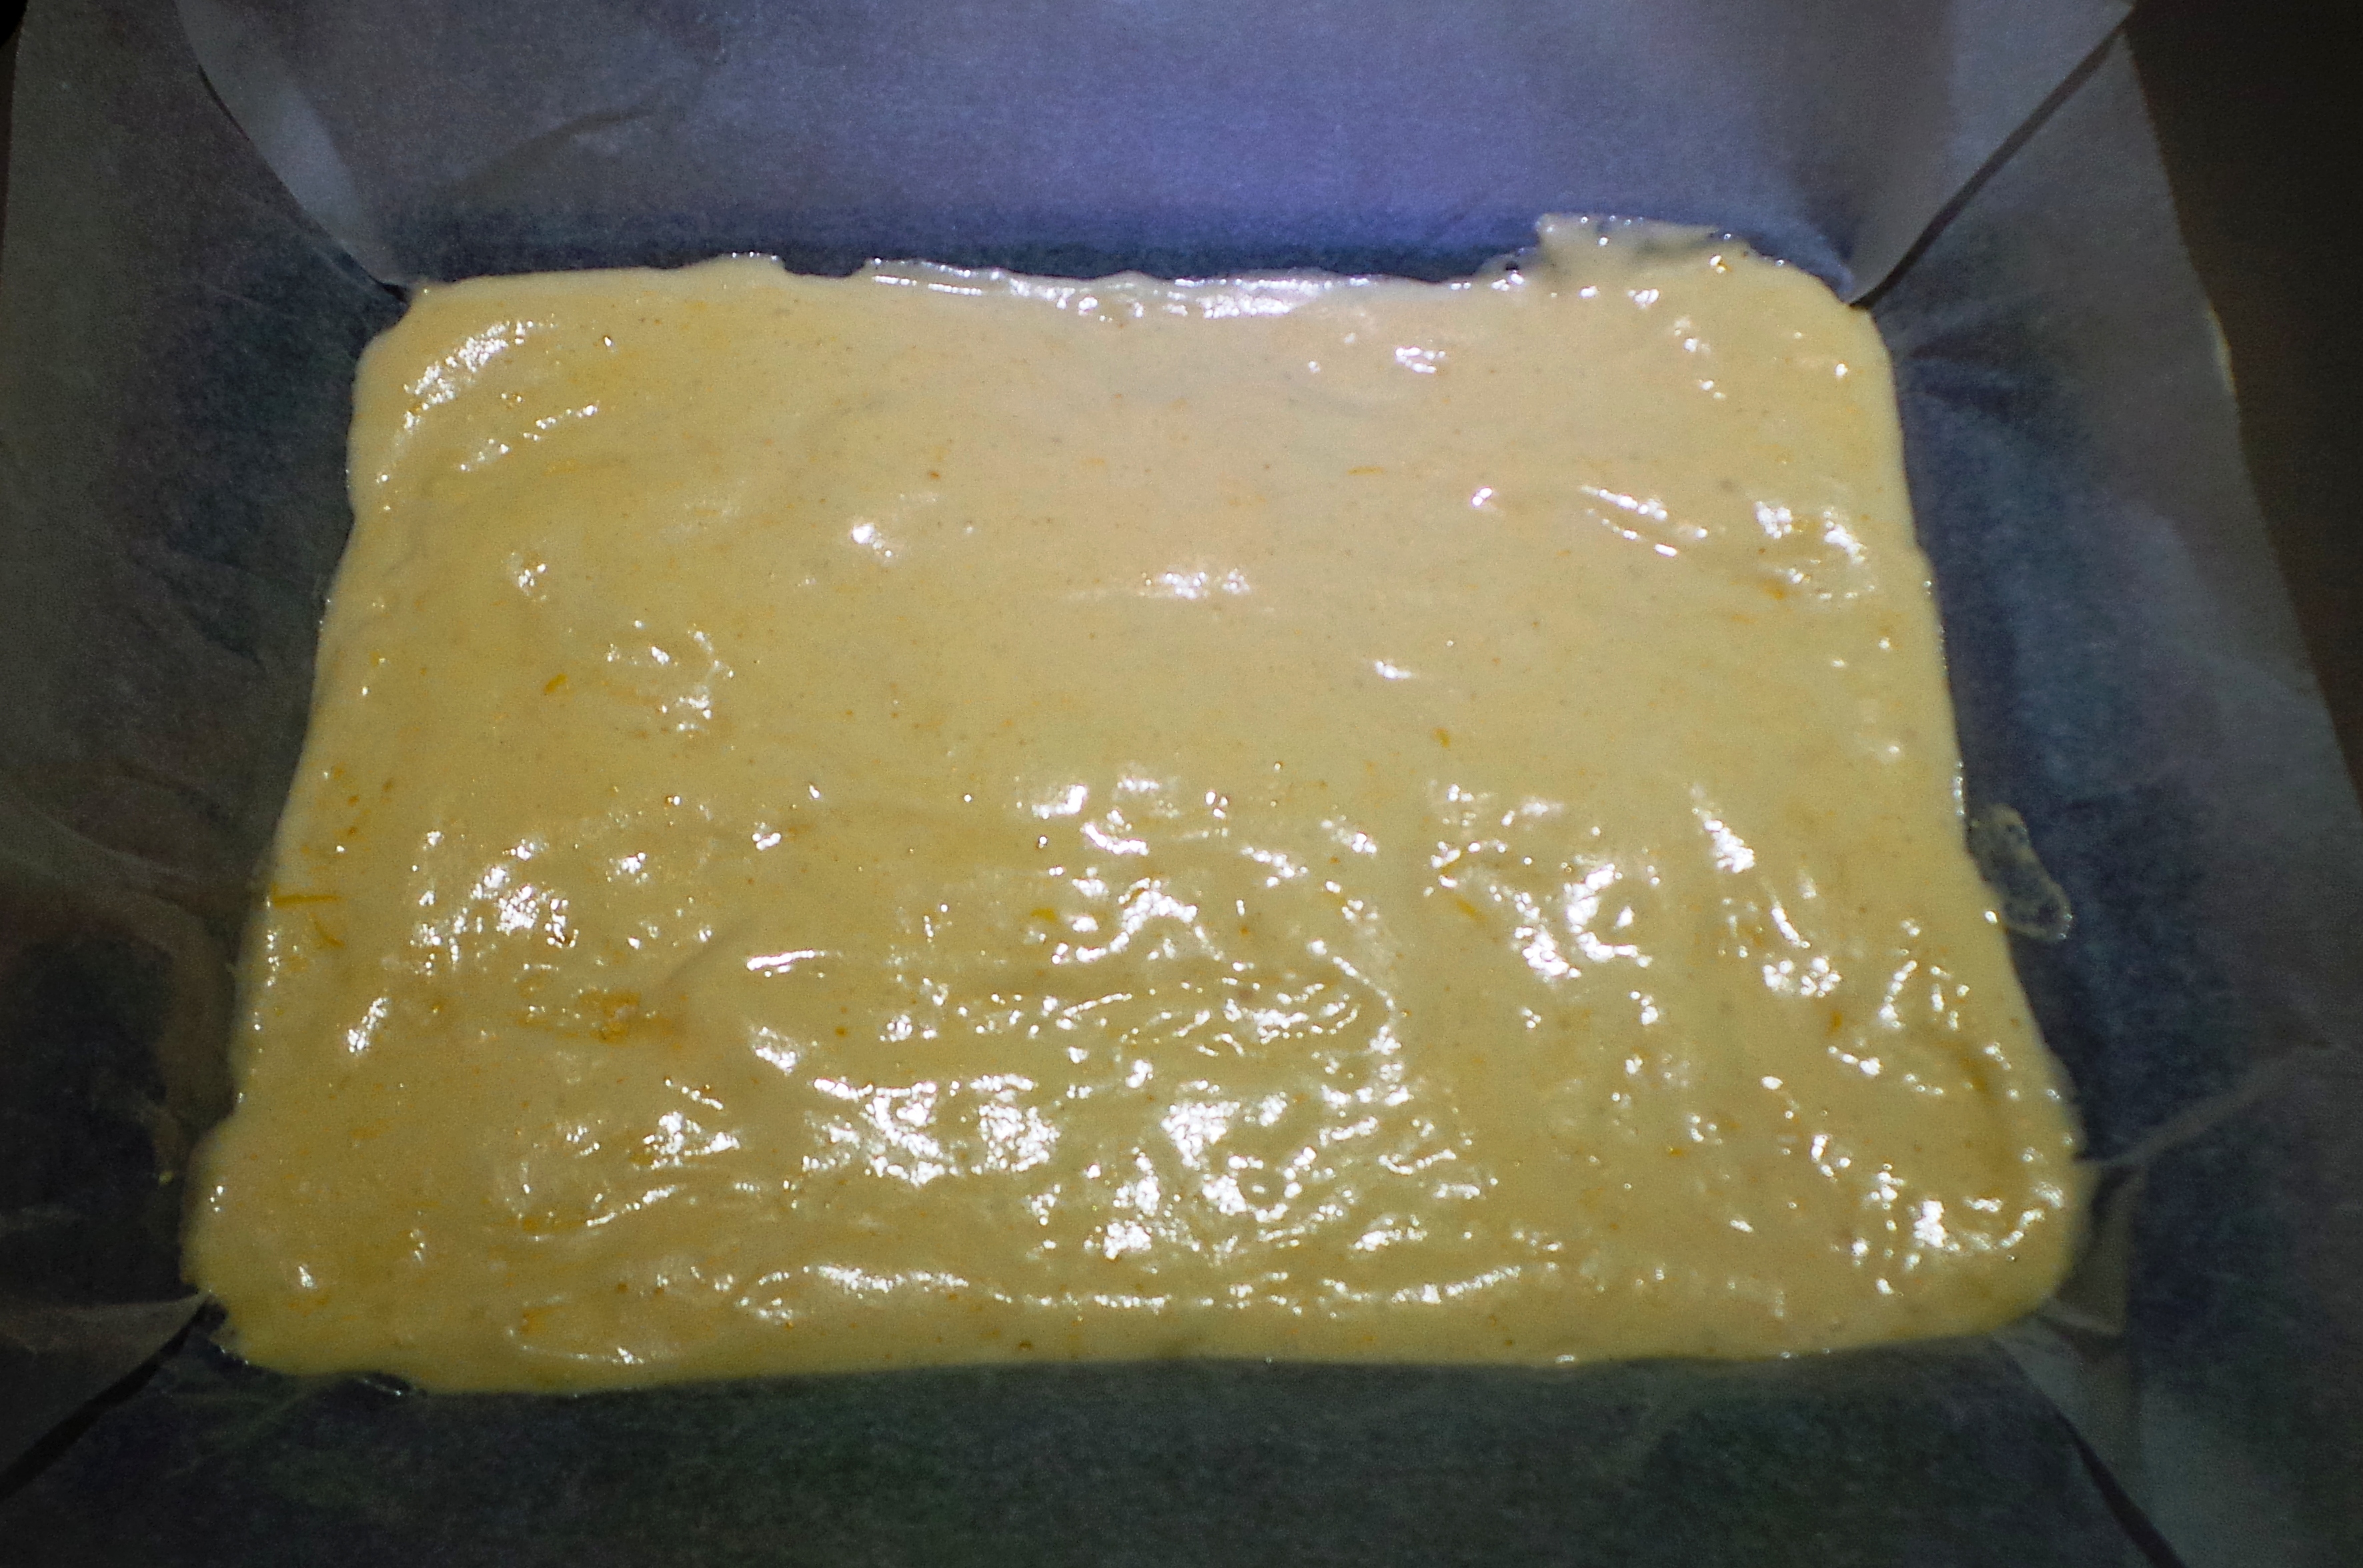
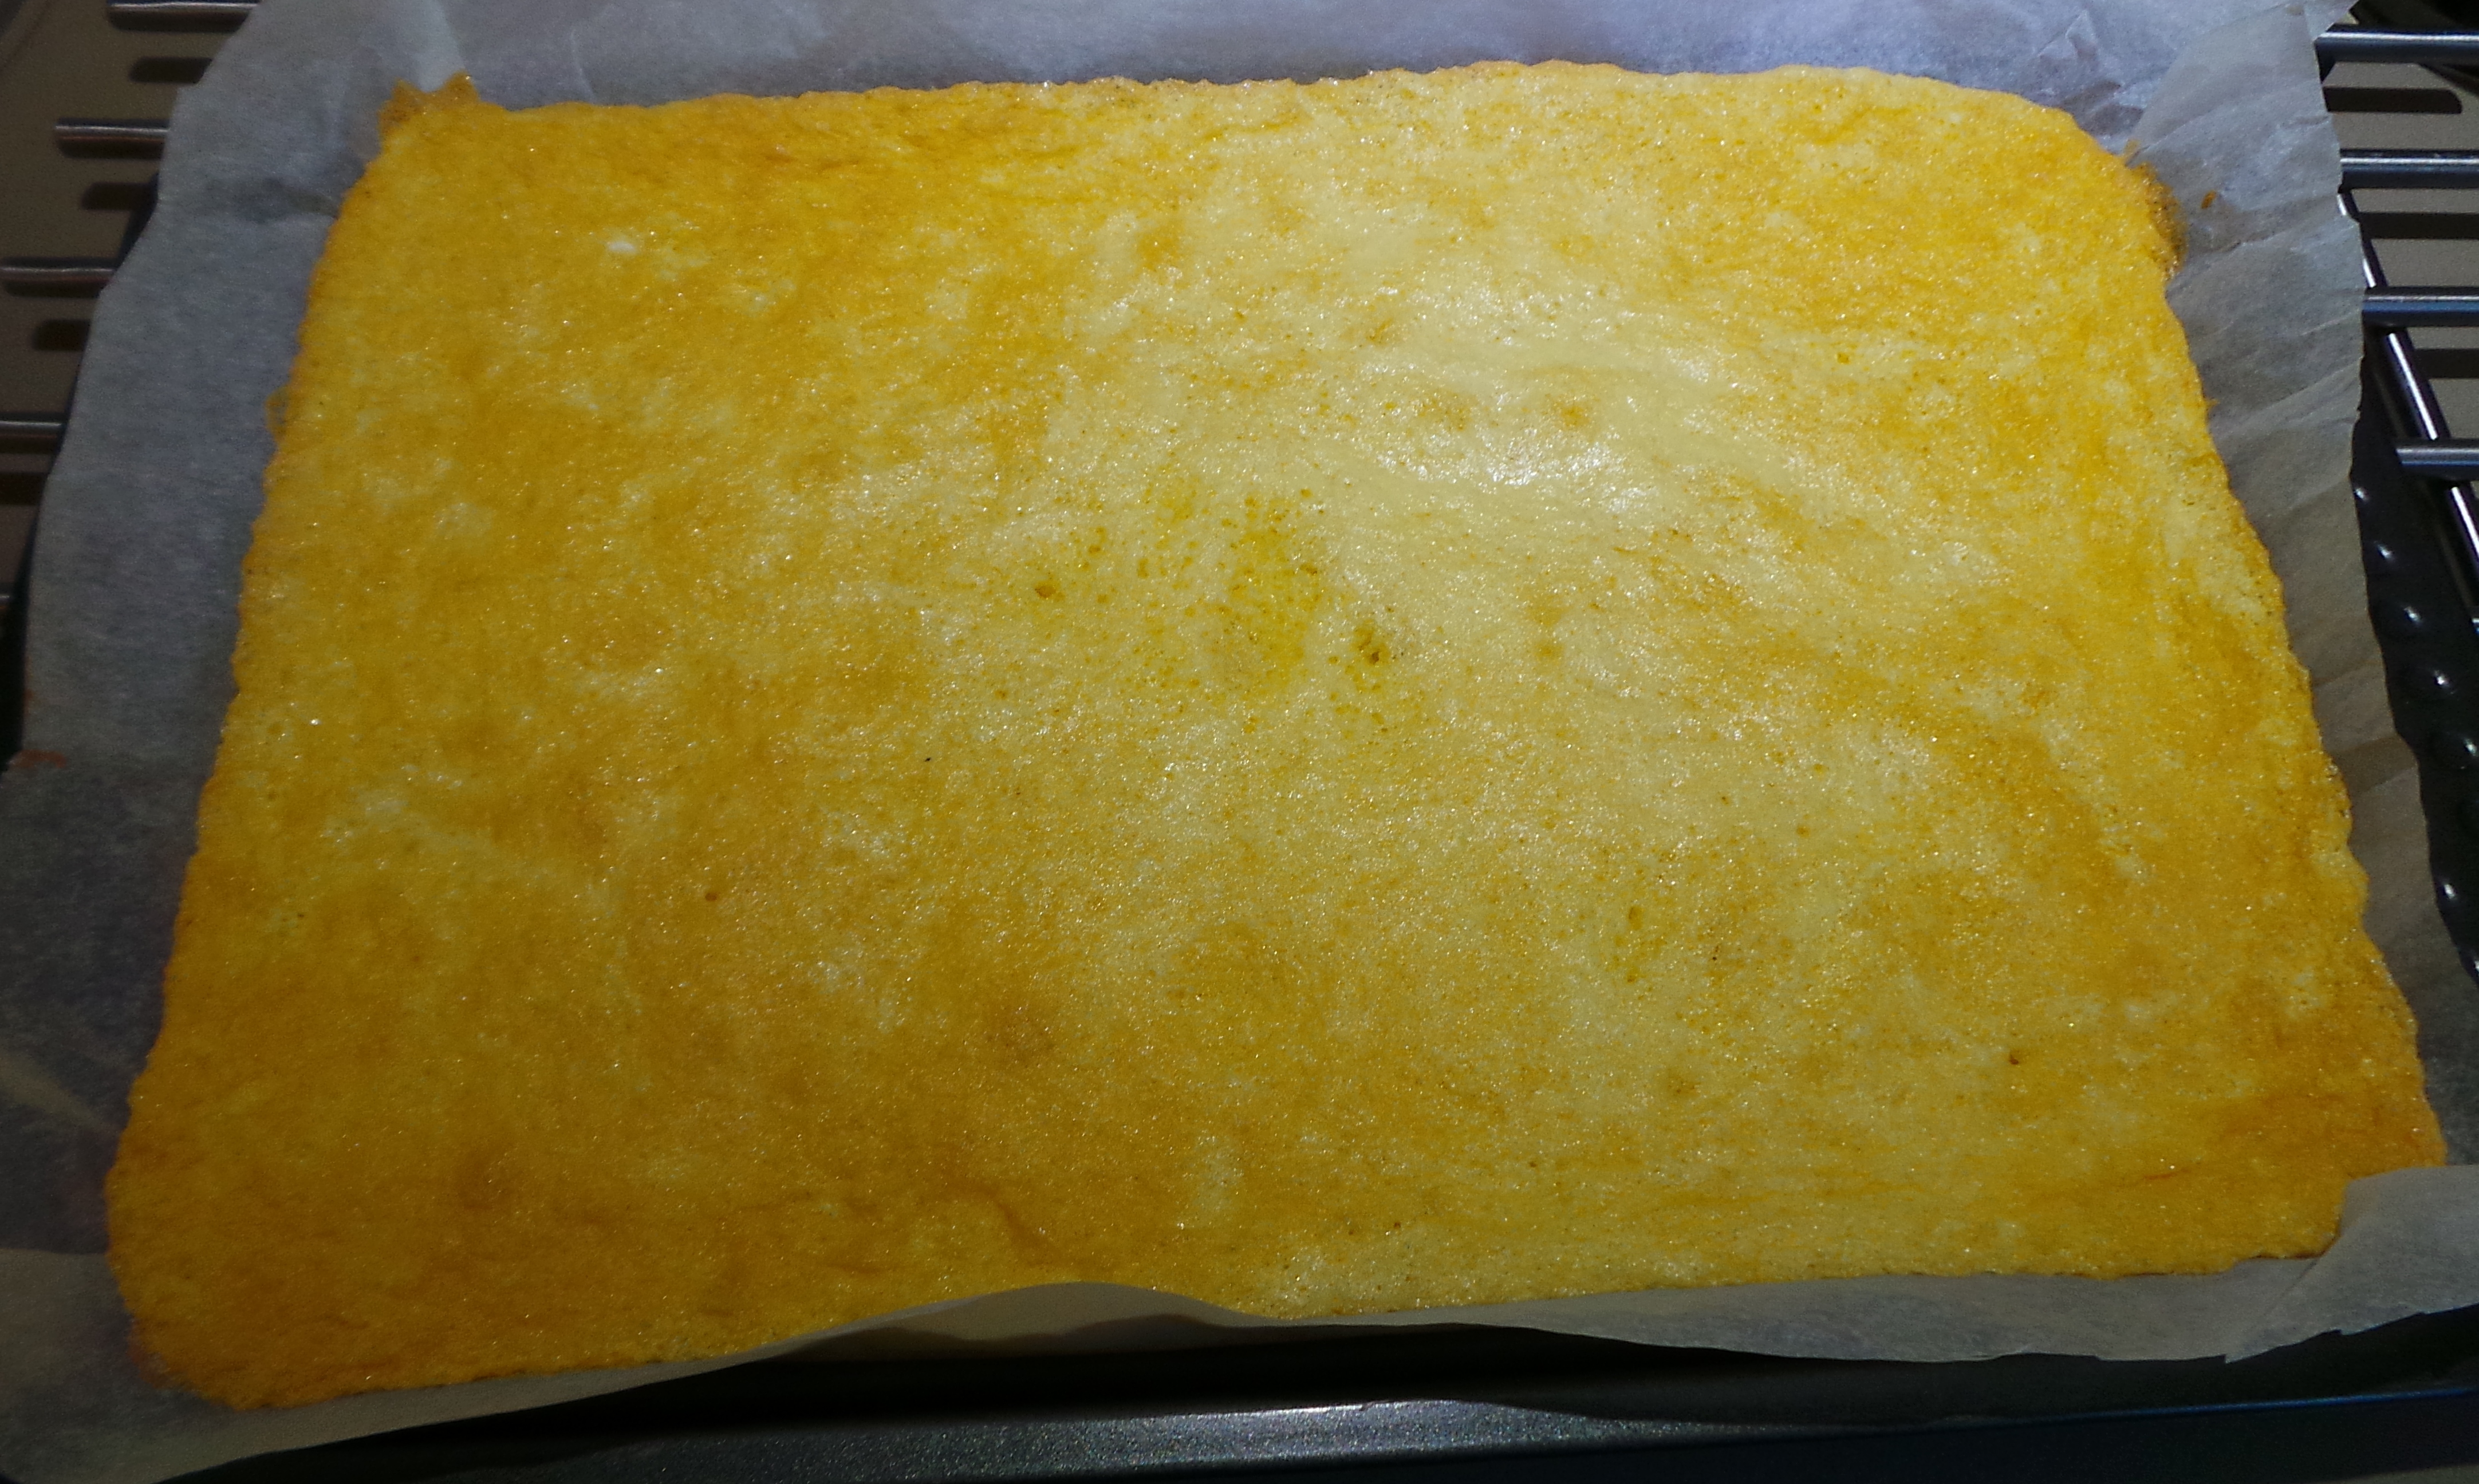
Line your Swiss roll tin. Pour the mixture into the tin and spread out with a spatula. Again, be gentle.

Trim the paper after you've filled the tin.

Trim the paper after you’ve filled the tin.

Bake for 7-8 minutes, until lightly brown and fully set.

In retrospect, I think mine could have used a few minutes more...

In retrospect, I think mine could have used a few minutes more…

Now, this here is the secret bit so listen up!  I remembered this from Home Ec. all those years ago.

Mrs Wood would be proud.

You’ve got to roll it up while it’s still warm and let it cool that way. That prevents cracks (and tears ) caused by rolling up a cold cake.

So, using the paper lining, pull the cake up out of the tin and onto a cake rack. Decide if you want to roll from the long side or the short and orient your cake accordingly. Mine was to serve a lot of people after a lot of food – small slices would do. I went for the long side roll.

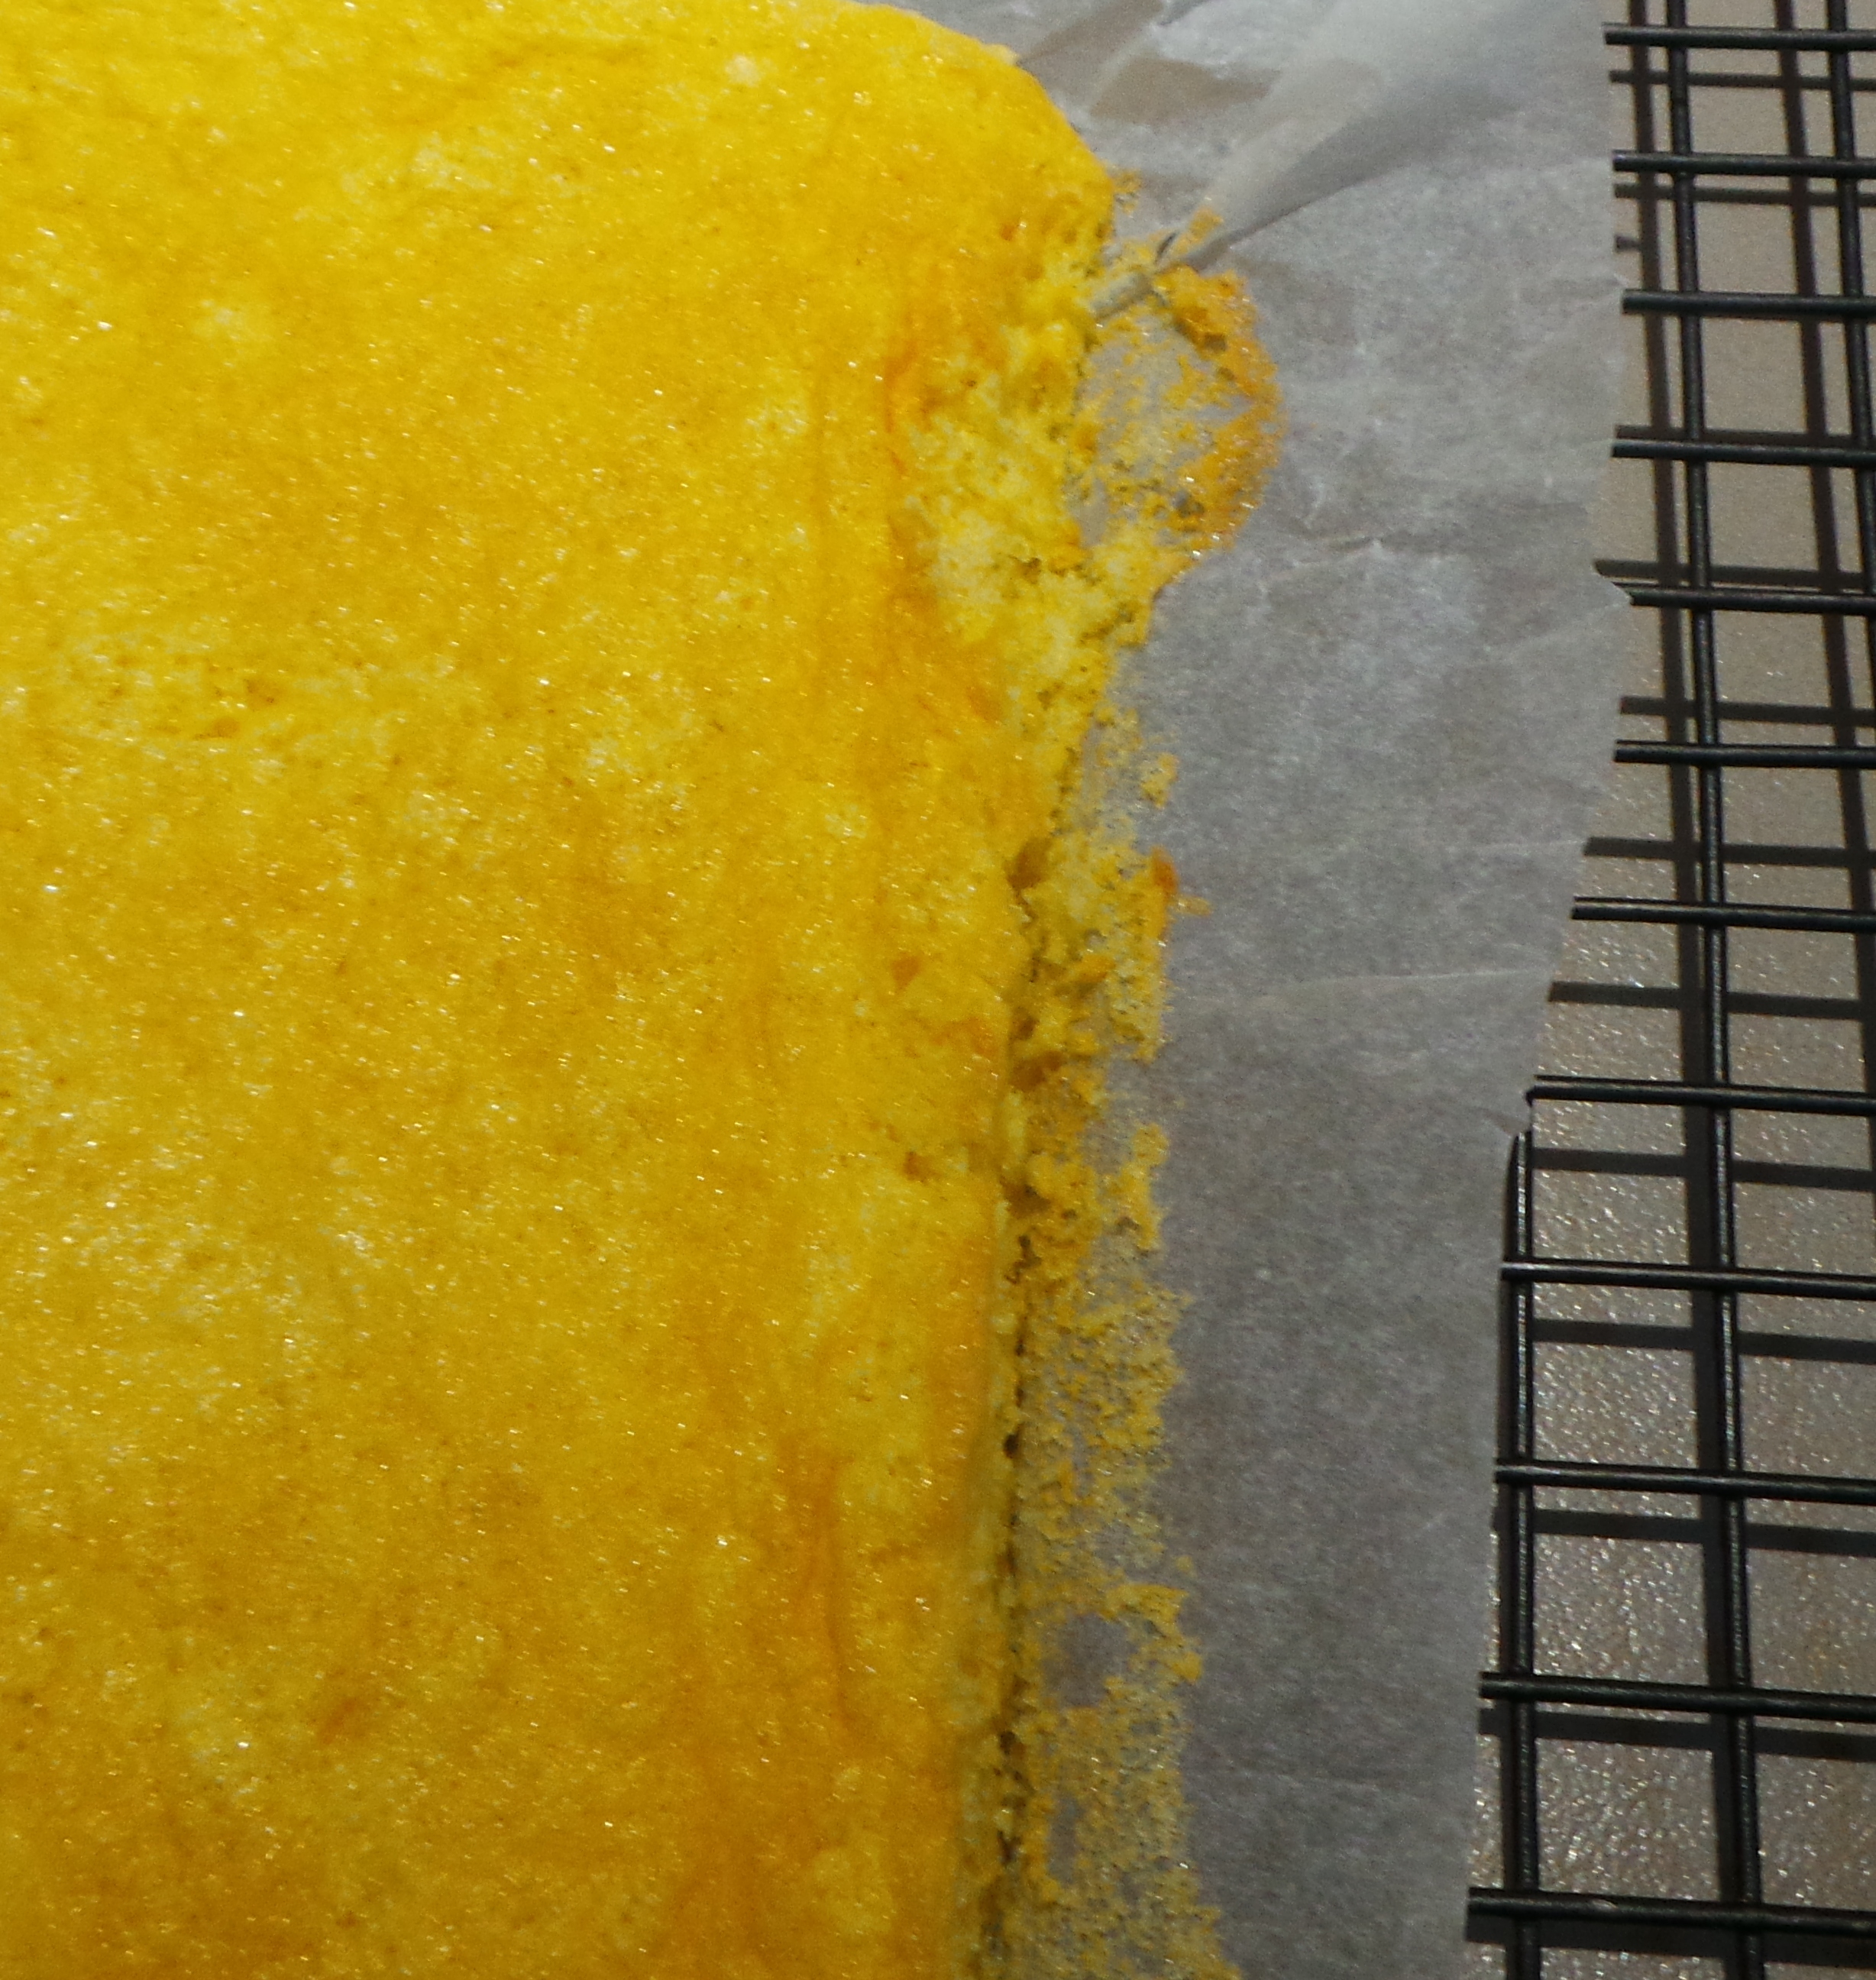
Pull the paper away from the other edges, so it doesn’t get rolled into the cake.

Pull your lining paper away from the other edges.

Pull your lining paper away from the other edges. As you can see, a few minutes more in the oven might have been in order…

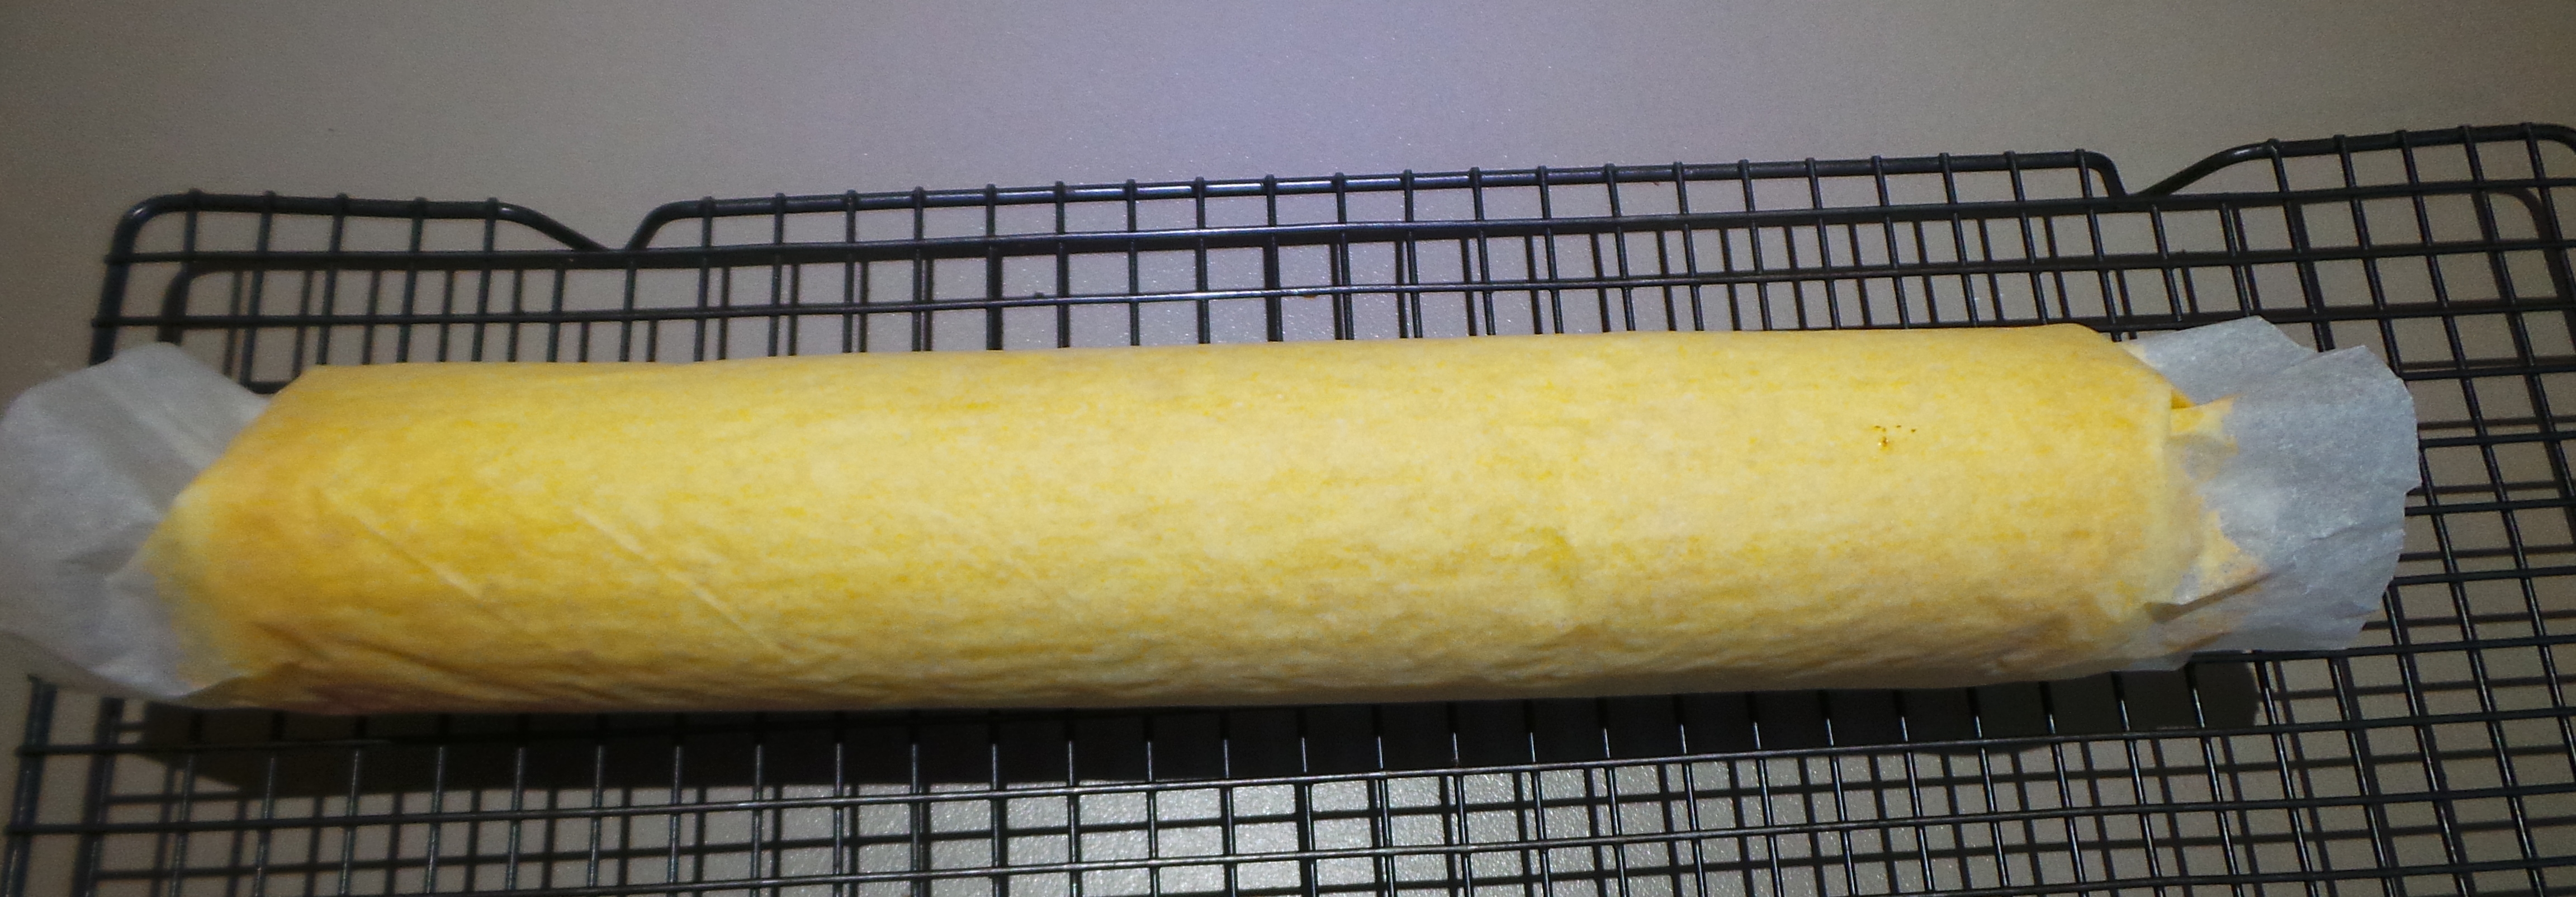
Roll up slowly with the lining paper still on. This will stop it from sticking to itself when you need to unroll it later.

Roll up your roll. (Sorry.)

Roll up your roll.

Then roll your roll up in a clean, dry tea towel. Leave it until it is completely cool.

Roll into a tea towel.

Roll into a tea towel.

Alternatively, you might wish to remove the backing paper and use a tea towel in its place so that the fabric is holding the cake apart. I didn’t have any tea towels without a pile to hand and that would have only ended badly.

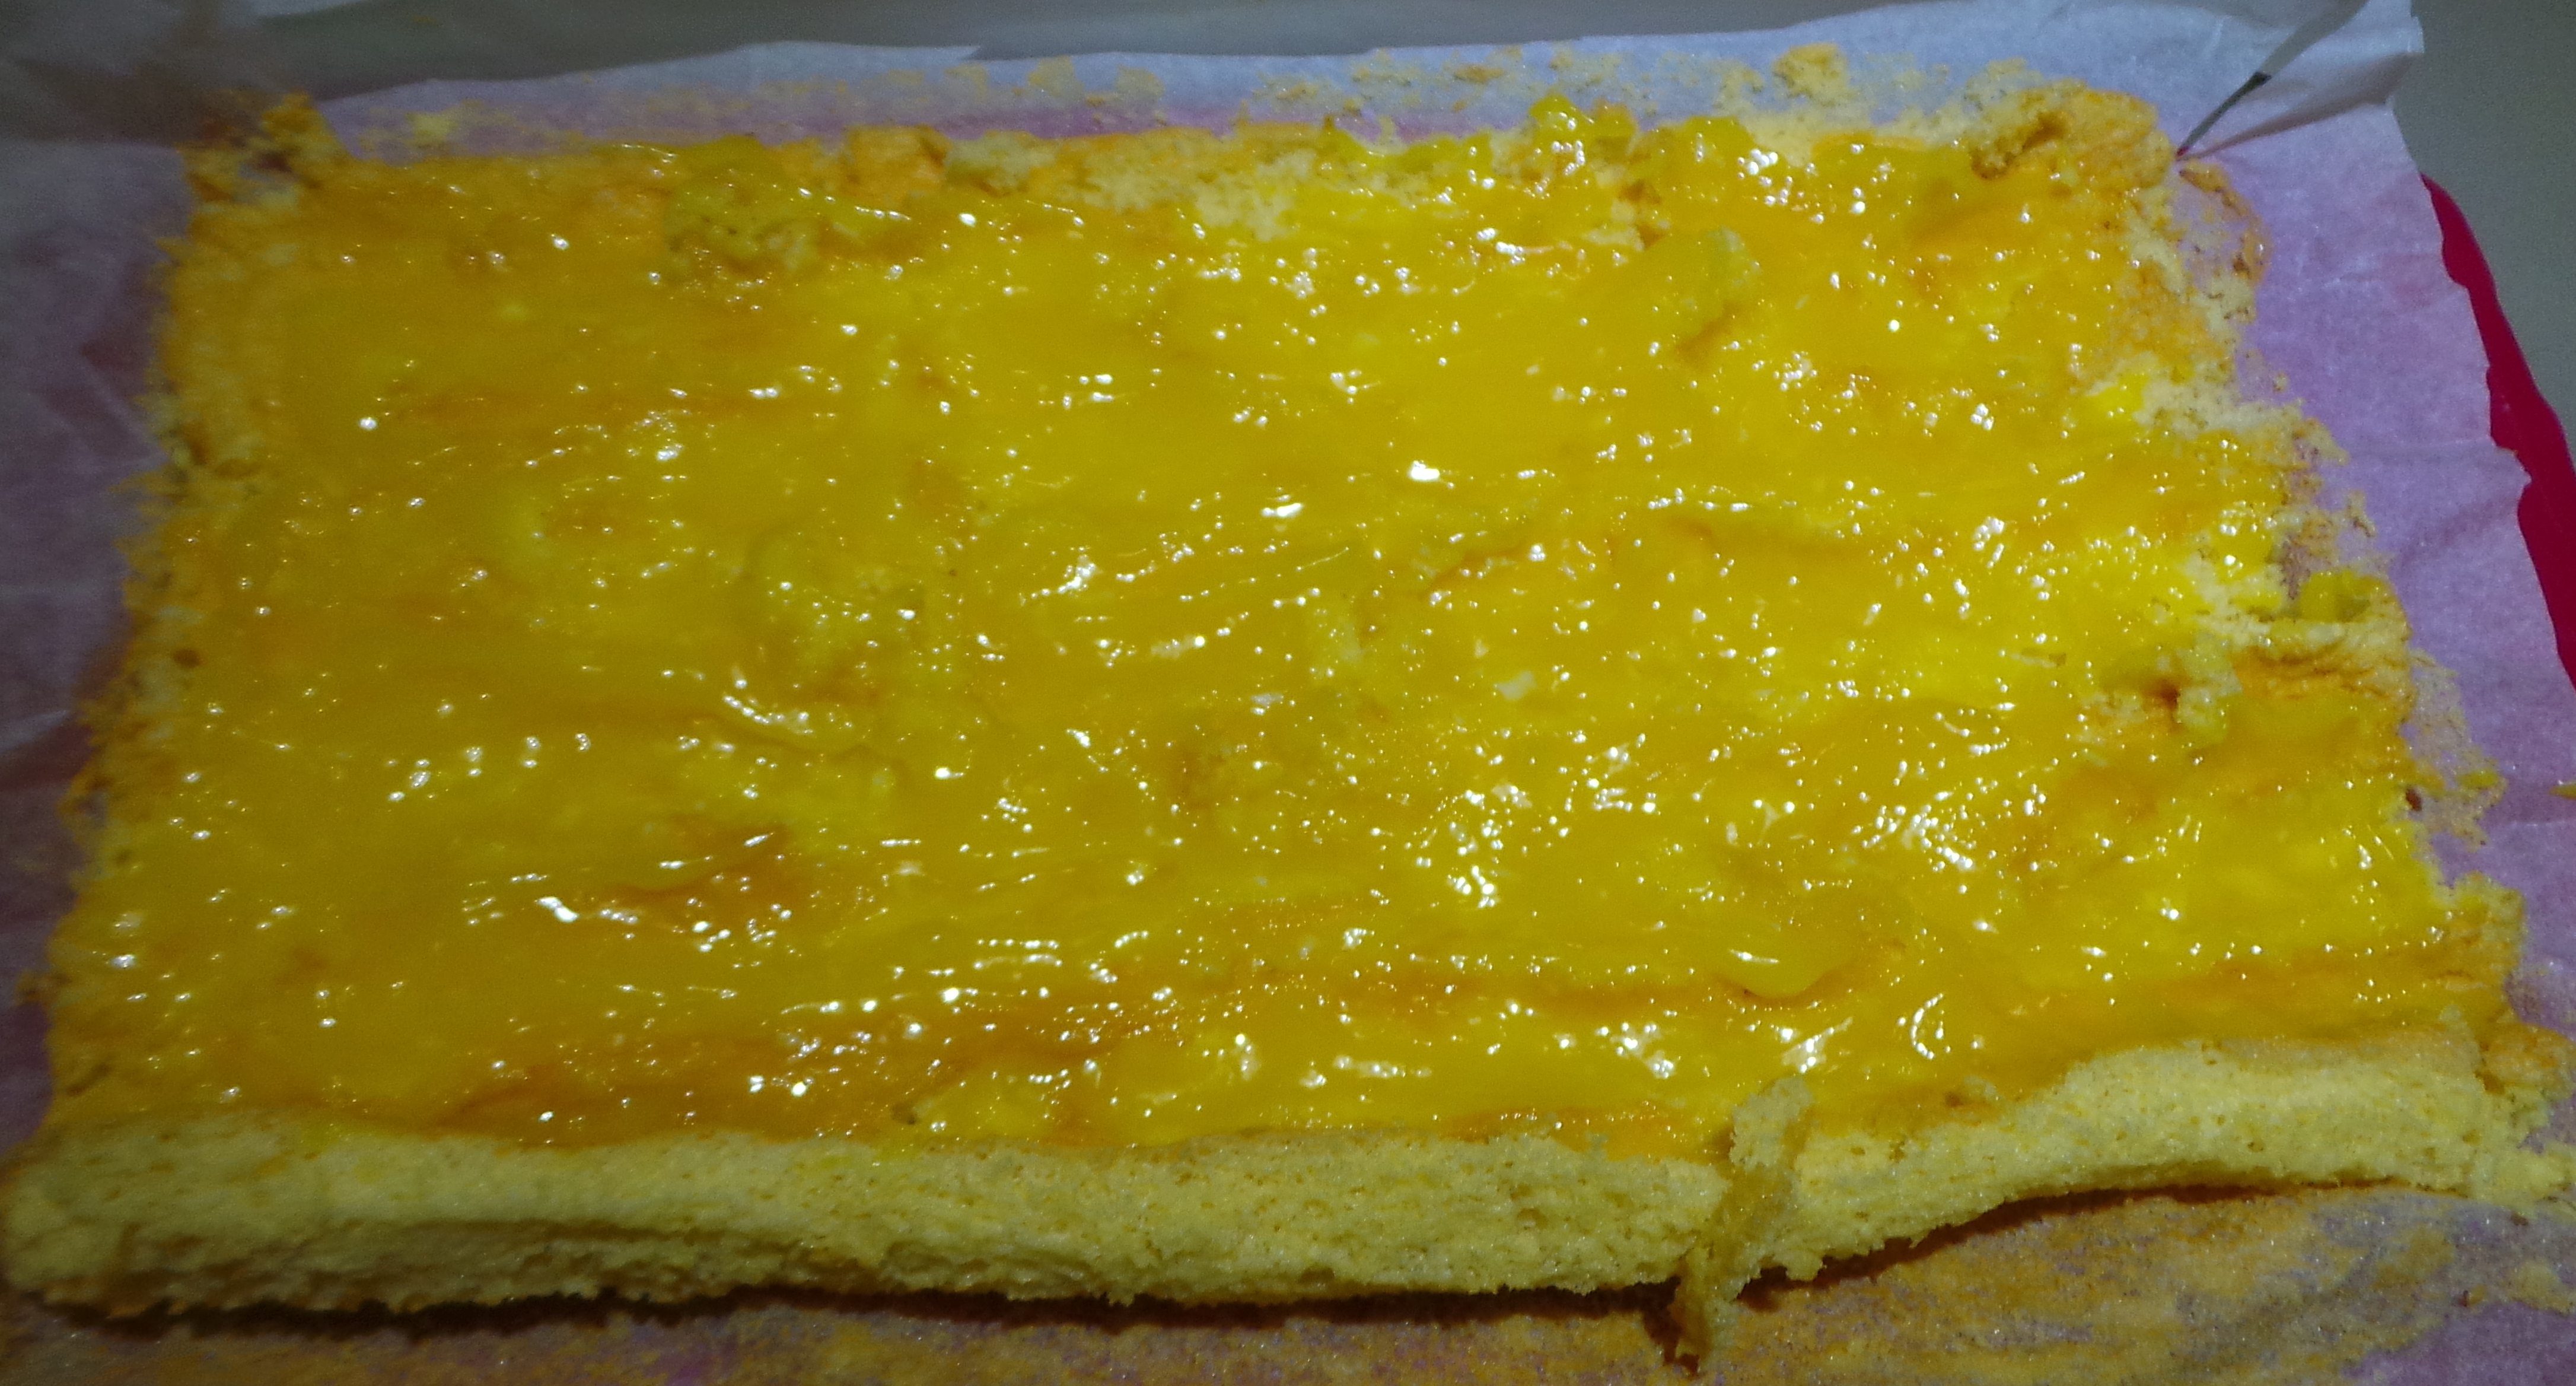
When it is completely cool, unroll and fill with lemon butter if you wish.  You might also like to use jam, or thickly whipped cream. Just remember that you need to roll it up again, so don’t slather it on or you’ll have filling oozing out everywhere.

Spread with your filling of choice.

Spread with your filling of choice.

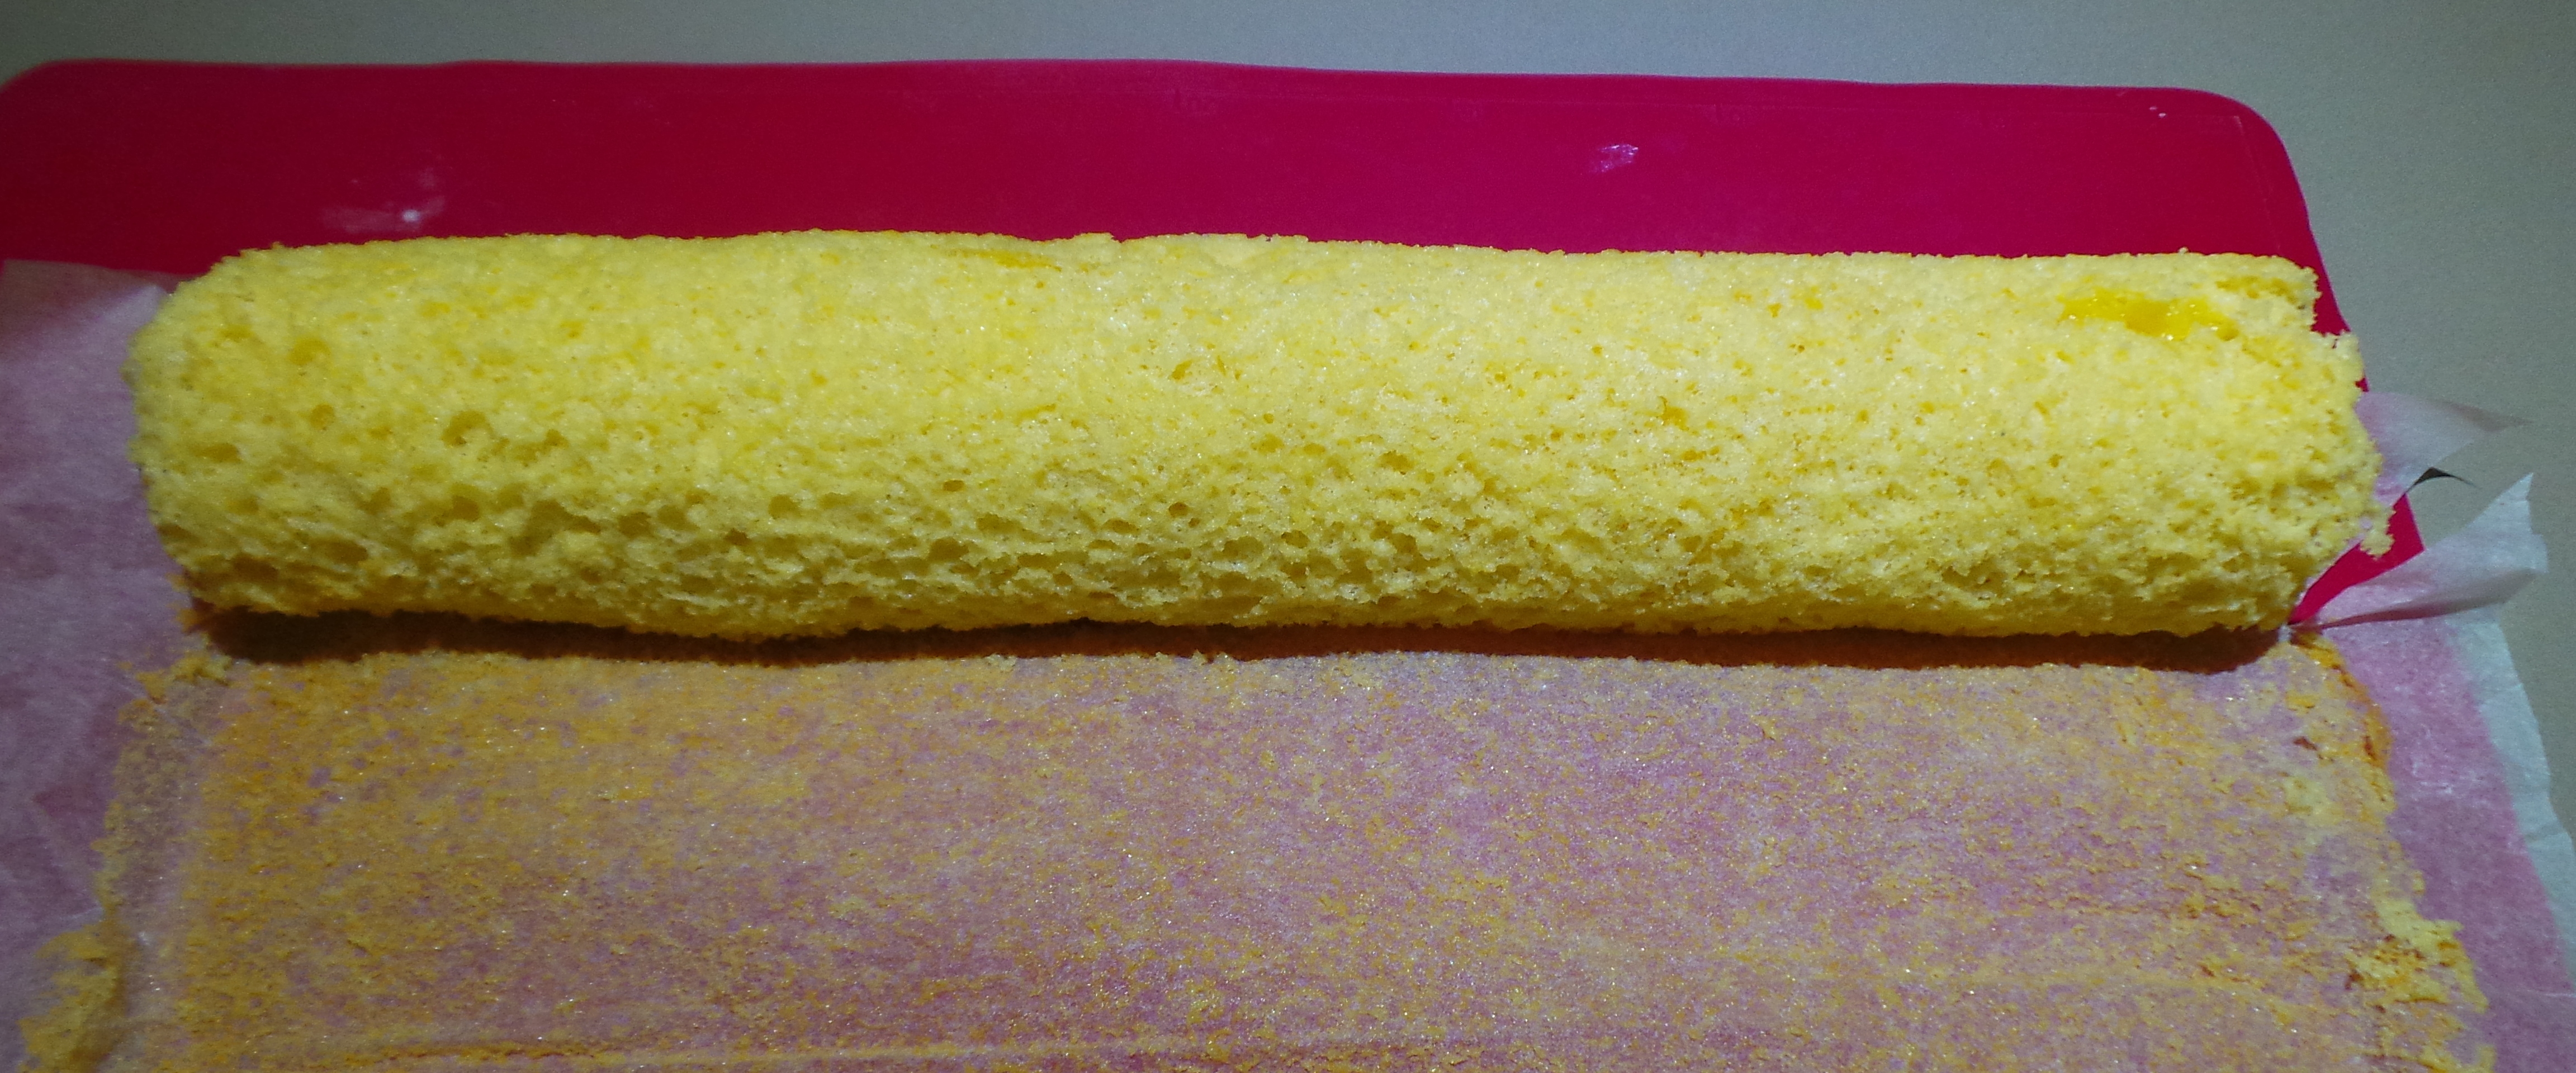
Re roll, this time leaving the paper (or tea towel) behind.

Re-roll.

Re-roll.

I wrapped mine up, sausage-like, in cling wrap and refrigerated it overnight.

Swiss Roll sausage

Swiss Roll sausage

To serve, place on a serving tray and sprinkle with icing (confectioner’s) sugar – I forgot to take a picture of this bit. Sorry.

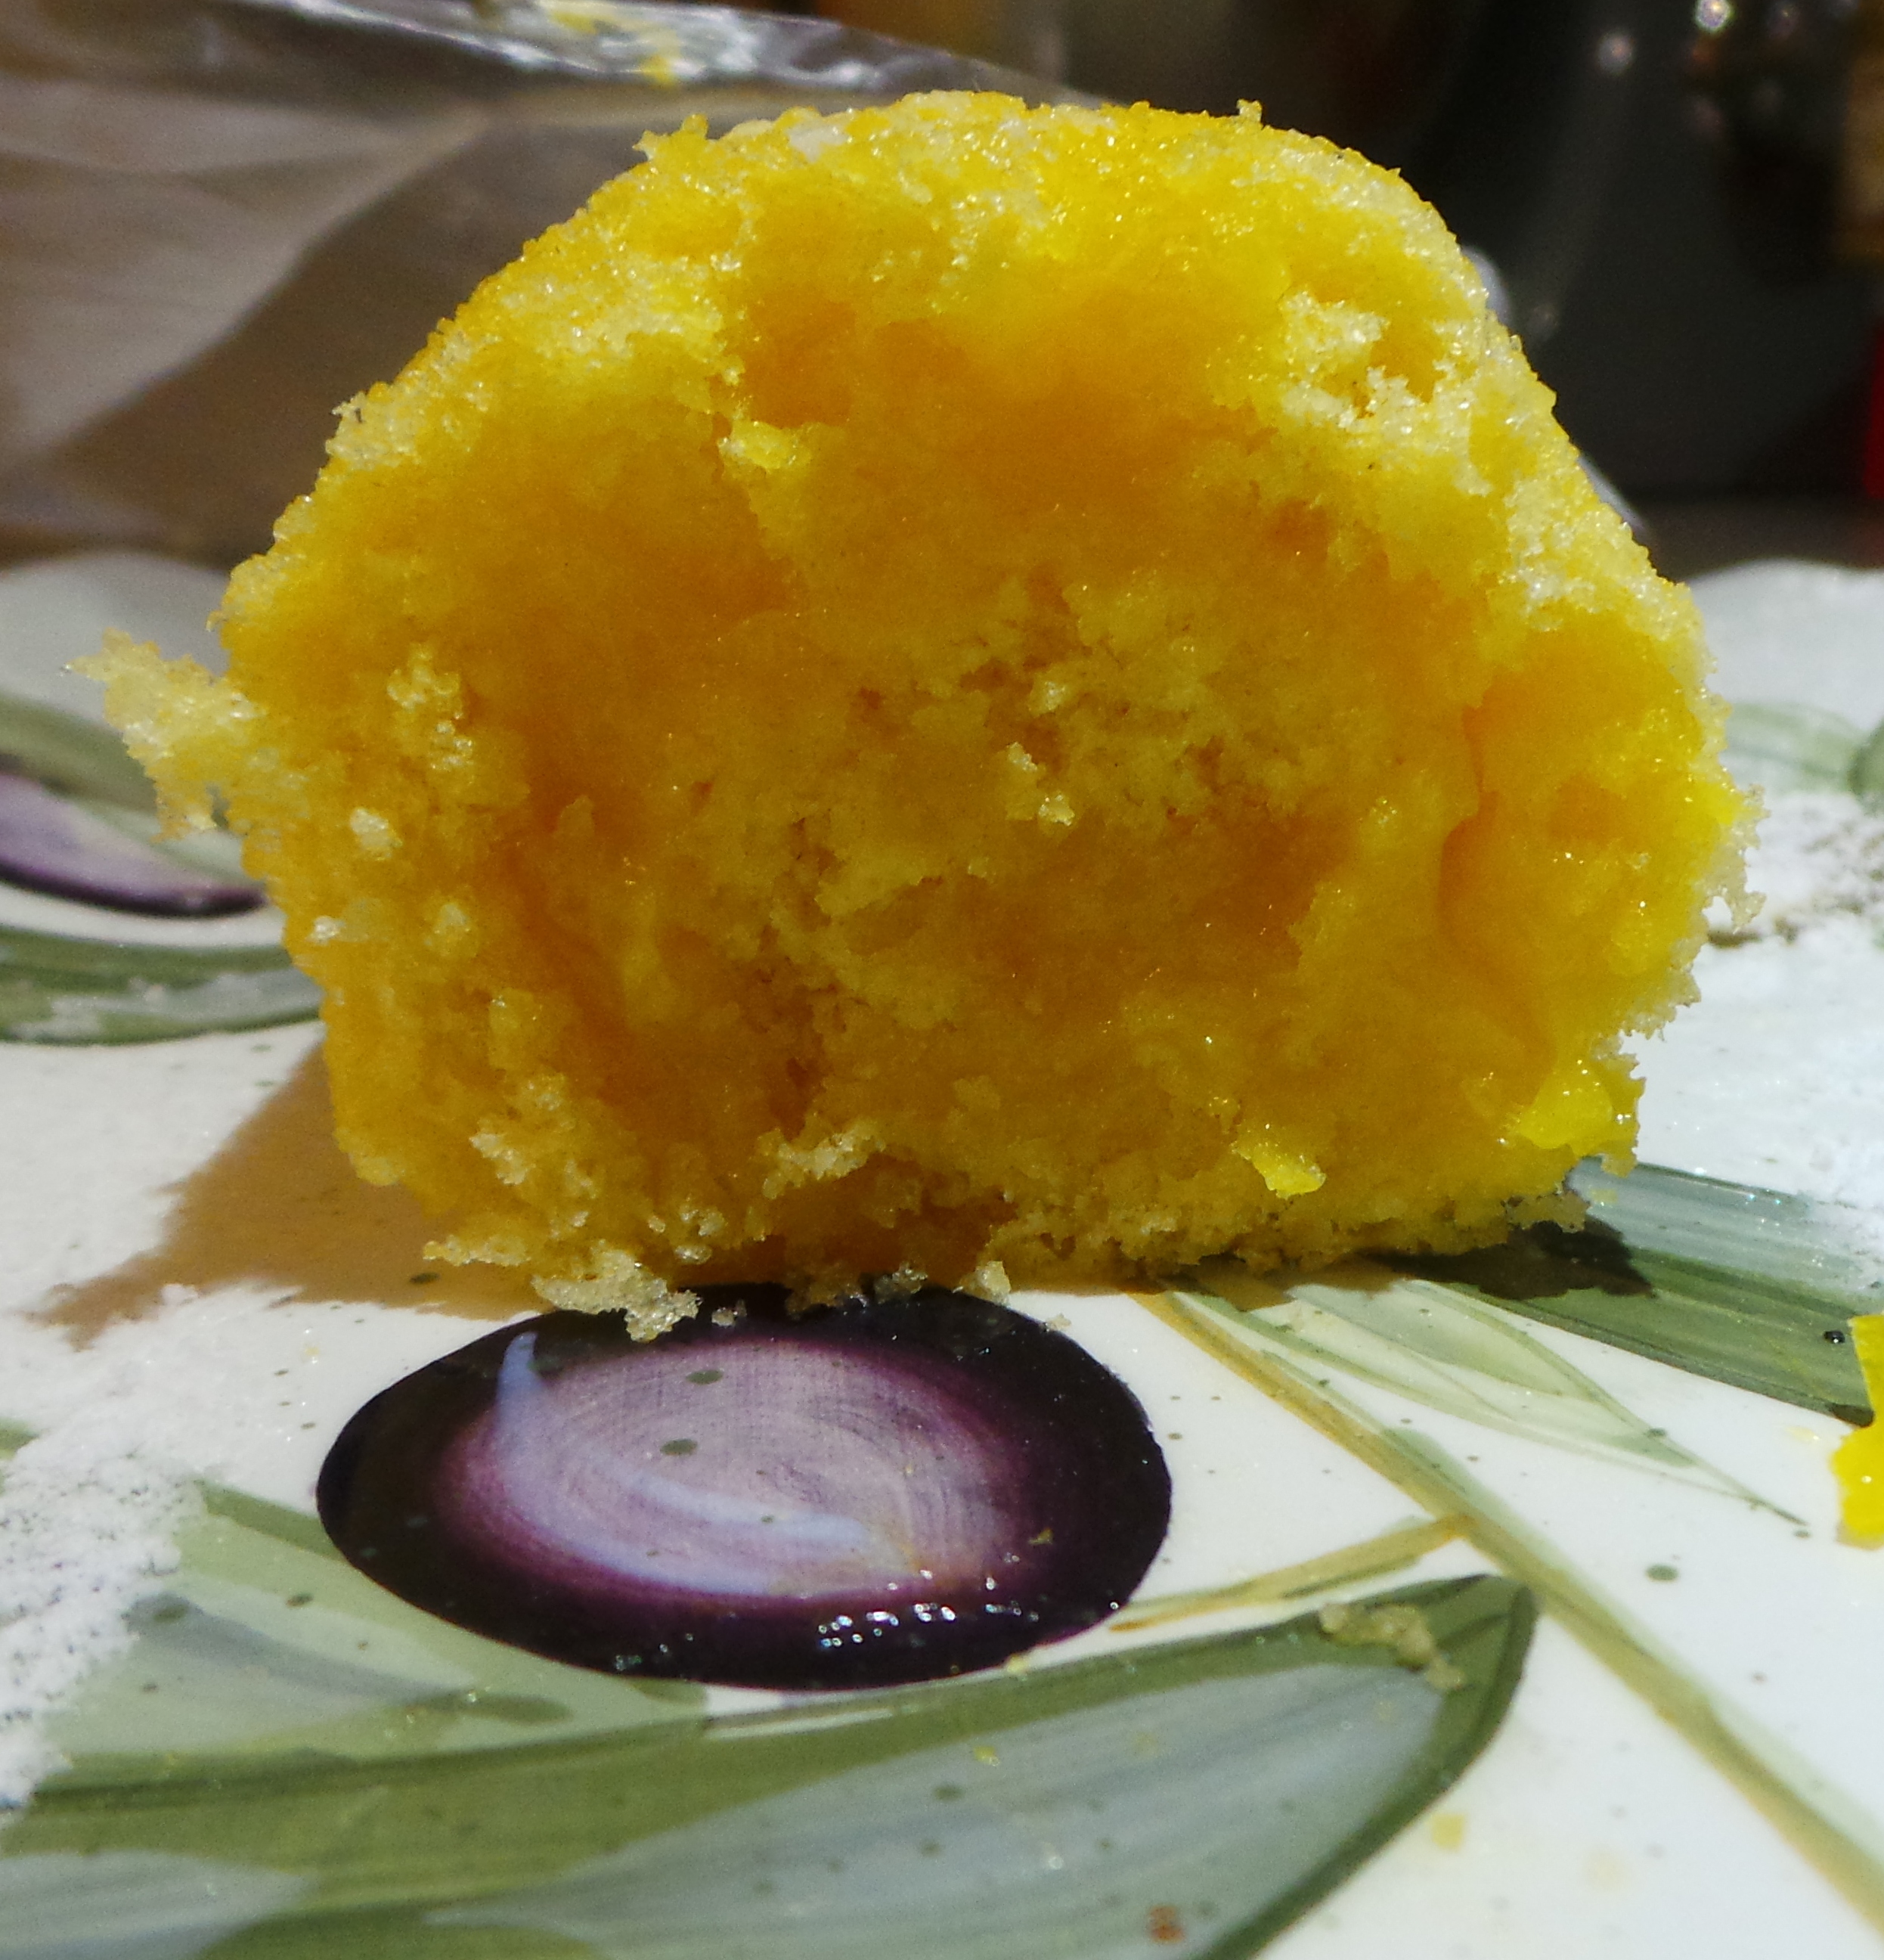
This is what it looked like after we’d eaten most of it though…

Cross-section.

Cross-section.

It was very well received.

Swiss Roll

  • Servings: 4-8
  • Difficulty: Easy
  • Print

Ingredients

3 eggs

75 g caster sugar

75 g self-raising flour

2-3 tablespoons jam/lemon curd

Method

Heat oven to 200°C/400°F.

Grease and line a Swiss Roll tin with greaseproof paper.

Sift the flour onto a plate.

Place the eggs and sift sugar into a mixing bowl.

Whisk using an electric beater until the mixture becomes thick and creamy and the beaters leave a visible trail. About 5 minutes.

Sift the flour (for a second time) into the mixing bowl and gently fold into the mixture using a fork.

Pour the mixture into the prepared tin and spread out gently with a spatula.

Bake for 7-8 minutes.

Turn out of the tin onto a cooling rack and gently remove the backing paper.

Roll up using a clean, woven tea-towel and leave until cool.

When cool, unroll and spread with your desired filling.

Re-roll. Place on serving dish with the edge of the roll on the bottom, and sprinkle with icing or confectioner’s sugar.

Slice to serve.


Microwaved Jacket Potato

I'm feeling peckish now.

There are times when you want something quick but hearty to eat, be it for dinner or lunch.

This is one of those dishes.

In fact, this is an ideal process to teach hollow-legged teenagers to follow for filling/healthy after school or school holiday snacks. Actually, it just makes an ideal Saturday/after sport/after-after-school-activity-and-I’m-too-tired-to-cook-anything-imaginative-dinner.

If you have a microwave, then you can have a baked jacket potato on your plate in mere minutes. In fact, many microwaves have a potato button…

Spot the 'Potato' button.

Spot the ‘Potato’ button.

But you can still do this even if your particular zapper doesn’t.

First, you need a potato.

This is a potato.

This is a potato.

I buy washed potatoes. I know they are cheaper unwashed, but I don’t enjoy scrubbing them and I refuse to peel potatoes on the grounds of good nutrition. So there.

When I choose my potatoes, I try to buy ones that fit nicely into the palm of my hand. That is a decent serving size for me. You might like your potatoes larger. Go for it.

Wash your potato and then prick it in several different places using the tines of a fork.

Pierce your potato's skin.

Pierce your potato’s skin.

Don’t skip this step. You need to do this or your potato will explode while you are cooking it. Now wrap it in a sheet of paper towel, like so.

Gift wrapped potato.

Gift wrapped potato.

Put it into your microwave and either use the potato program – my microwave requires me to press “potato” and then the number of items, followed by “cook” – or input cooking times yourself.

This can vary depending on the size of your spud. Try starting with 3 mins 30 sec at 80% power and work your way up from there. You’ll know your potato is cooked when the fork you used to puncture the skin will go into the flesh easily.

Warning: The potato will be HOT. Take proper precautions when handling it.

Check that it is done.

Check that it is done.

Then place it on a plate or into a bowl. You can eat it just like this, if you wish, but I like to top mine.

Cut a cross in the flattest side, opening up the potato like so:

That already looks good.

That already looks good.

We like to top ours with some home-made Baked Beans. I keep little jars of these in our freezer for meals like this, you can use store bought canned baked beans if you have them – any flavour you like.

Home-made cider baked beans.

Home-made cider baked beans.

Top your potato with the beans, cover and put it back into the microwave for a further minute at 100% power.

Ready to heat.

Ready to heat.

While it heats, get some grated cheese out of the fridge (or grate some). Top your potato and beans.

Top with a sprinkling of shredded tasty cheese or mozzarella.

Top with a sprinkling of shredded tasty cheese or mozzarella.

Return to the microwave, covered, for a further 30 seconds on 100%.

Melt your cheese.

Melt your cheese.

Eat.

Or, if you want to be really decadent, add a spoonful of sour cream and a sprinkling of mixed herbs or lemon pepper.

I'm feeling peckish now.

I’m feeling peckish now.

That, my friends, is a decent lunch in under 5 minutes.

Variations:

  • Try topping with a mixture of diced ham, cheese and pineapple for an Hawaiian Pizza feel.
  • Try a tin of three or four bean mix instead of the baked beans, add some pesto and bacon bits.
  • Try topping the baked potato with cheese and serving topped with some mixed frozen vegetables that have been cooked separately.

Corned Beef (Silverside)

The final result.

Corned Beef is one of those dishes that seems to have become a regular on my family meal rota – which is strange.

When I was a child I hated the stuff with a vengeance. Although I could be persuaded to eat it if, and only if, my mother was calling it Cane Cutter’s Ham.

I don’t know why.

I then lived alone for several decades and only attempted to cook it twice during that period. Both times were for visits by my step-father and, while he said it was great, I thought it was less than ordinary on both occasions.

I’ve got better at it in this stage of my life. Firstly, I’ve stopped cooking the vegetables that accompany it in the same pot as the meat. This means that there is a different flavour for everything on the plate, instead of a meal-wide sameness that resembles the next step to gastronomic zombieville.

Roasted veg.

Roasted veg.

I’ve also started adding a few more flavourings to the pot, some of which elevate the dish to heavenly status.

I kiddest thou not.

The best part is that I inevitably have enough leftover to make several more meals from the same piece of meat: fritters and almost fried rice spring to mind, it’s also a nifty addition to pasta bakes or on lunch box sandwiches.

One and a half kilos of meal options.

One and a half kilos of meal options.

I inevitably cook mine in a slow cooker but it can, of course, be cooked on the stove for a much shorter time. I like being able to put it on to cook of a morning and then walking away for the rest of the day until I’m ready to serve it up.

Go with your muse on this one.

So, to cook a piece of corned beef, you first need to find a pot big enough to put it in. Make sure it’s one that will take the beef, any flavourings you may use and enough water to cover the lot of it. In the photograph, I’m using a 3 litre slow cooker that has a tall, narrow crock.

First find a roomy pot.

First find a roomy pot.

I know it looks kind of yucky. This one was vacuum packed and had a fair amount of jelly around it. Don’t wash it off, just put the whole lot into your pot.

Now, generally, I would put the flavourings in first and then add the meat, But I didn’t do that for the pictures. I’m sorry if it confuses anyone. Also, none of the vegetables I’m about to add to the pot are destined to be eaten. They’re simply there to add flavour to the meat.

Got it? Good.

To the pot I add a stick of celery, cut into largish bits.

Celery.

Celery.

A carrot treated similarly.

Carrot.

Carrot.

Then an onion. All of these may be kept whole if you have the room in your pot.

Onions.

Onions.

Now add 6 peppercorns or 6 whole cloves. If you’re keen, you can add both. My mother would stud the onion with the cloves, but I don’t have the dexterity for that.

I also add some fennel seeds and a star anise.

A touch of spice.

A touch of spice.

Then a tablespoon or so (a glug) of apple cider vinegar.

Apple cider vinegar.

Apple cider vinegar.

And then the piéce de resistance!  An orange.

Yes, really. A chef former neighbour gave me this tip a year or so ago and I kiss her feet for it. (Thanks Kath!)

An orange. OMG.

An orange. OMG.

This will add a certain something that will lift your corned beef into the stratosphere of flavour. Trust me on this.

Now pop in a Bay Leaf and cover with cold water.

This is why I usually put the oranges in before the beef...

This is why I usually put the oranges in before the beef…

Put the lid on and cook on LOW for 6-8 hours or HIGH for 4-6 hours. Your kitchen will start to smell amazing.  I promise.

The final result.

The final result.

When it is done, simply remove from the pot, slice and serve. As you can see, the vegetables don’t look like you’d really want them on your plate…

Slice and serve.

Slice and serve.

Traditionally, Corned Beef is served with a white or mustard sauce. However, the other person in this household doesn’t really like sauces…

The meat does tend to dry out a little once sliced, so I simply spoon a couple of tablespoons of the cooking liquid over the meat on the plate. Not enough to drown it, mind!

It keeps the meat moist and gives a further hit of flavour.

Sunday night feast?

Sunday night feast?

Store leftovers in an airtight container in the refrigerator.

Corned Beef

  • Servings: 4-6
  • Difficulty: easy
  • Print

Ingredients

1 kg silverside/corned beef (this recipe will also work for larger cuts)

1 large onion, chopped

1 large stick of celery, chopped

1 large carrot, chopped

1 medium to large orange, quartered

6 whole cloves (these may be inserted into the onion if you wish); or

6 peppercorns – or both

1 star anise

½ tsp fennel seeds

1 tbsp apple cider vinegar

1 bay leaf

Method

Add all the ingredients to a pot large enough to hold the meat and flavourings.

Cover with cold water.

Bring slowly to the boil and simmer with the lid on until the meat is tender. (Approx. 2 hours for a 1 kg cut on the stove top)

If using a slow cooker set on LOW for 6-8 hours or on HIGH for 4-6 hours.

When cooked to your preference, remove from water, slice and serve.

May be served with a mustard sauce or with some of the pot juices spooned over the meat.

Store any leftovers in an airtight container in the refrigerator.

Variations:

This recipe will work for any pickled or salted cut of meat.


Like this? Follow us on Facebook or subscribe to receive updates by email.


Osso Buco

I have spent the vast majority of the day tucked up in my bed with a cat or two.

However, I did emerge long enough to make dinner.

The Boy had the stated objective of “making Osso Buco in the bomb” – by this he meant our pressure cooker. Unfortunately, he got sidetracked on his ‘puter and my tummy got rumbling; so I did it.

Thankfully his distraction lasted long enough that I was able to cook it, realise it needed more time, and do it over again. Which also gave me time to stir up a pot of polenta.

?????????????

Polenta

And a glorious dinner was had.

Polenta

Polenta

Now I intend to head back to bed and continue working my way through the exhaustive list of home remedies that has generously been flowing in over the last few days.

Night All.

Cough, sniffle.

I don't think Garfield would mind this.

Hello, my dears.

Last night I went to a friend’s birthday do and so didn’t cook. I believe The Boy had something from the fridge to eat – but he can’t remember what. Sigh.

Today we went to visit some peeps in another town and I made some Hidden Treasure Muffins to take with us. They seem to be on high rotation lately.

As a result, I need to add condensed milk and muffin cases to my list for next week.

When we got home, I was close to death from this virus that seems to have me in its clutches, so I really didn’t feel like preparing anything.

However, we had the leftover meat sauce from Wednesday night in the fridge and the ricotta that I didn’t use at the pasta-making class, so I combined the two.

Meat sauce in dish

Meat sauce in dish.

I layered the meat sauce with the ricotta and some pasta sheets into a lasagne-type arrangement.

Plain ricotta.

Plain ricotta.

Then I baked it for 40 minutes or so, before scattering breadcrumbs and shredded parmesan over the top.

Crunchy topping

Crunchy topping.

It was baked for a further 10 minutes and then served.  I can’t say I was impressed with it – the ricotta really didn’t hit the mark as a bechamel sauce substitute – but it was adequate.

I don't think Garfield would mind this.

I don’t think Garfield would mind this.

Our tummies were full of something wholesome and I get to go to bed happy. There are now two serves of this in the freezer as well for future unplanned-for meals.

Tomorrow I hope to publish a post on cornbread cobbler, which is a great way of stretching out a stew or chilli or even of rehashing it; as I just did with this meat sauce.

Don’t hold me to it though, my throat is on fire right now….

Asian Spiced Meatballs

These little darlings are something you can mix up in bulk and freeze in advance.

They take a tiny bit of time, and can be a little icky to prepare (especially if you don’t like handling raw meat), but are totally worth it.

These meatballs can be made as large or as small as you like and you may use any ground meat you happen to have,.

I developed this with chicken mince – mostly because I am not a fan of chicken.

Sue me.

This recipe can be doubled, tripled, or even quadrupled if you want. You might even want to enslave, exploit, encourage your children to help roll them once they’re mixed.

So, here we go. Pay attention and don’t blink or you’ll miss something…

Dump your minced/ground meat into a suitable bowl. Then add a good spoonful each of minced garlic and crushed ginger. I always have little jars of those two things in my refrigerator.

However, you can use fresh if you prefer.

Add some aromatics to your meat.

Add some aromatics to your meat.

Mix through thoroughly. You may want to use a fork for this to help you break up the meat properly and distribute the flavourings more evenly.

Then add a good shaking of whatever spices you think you’d like. My standards are ground cumin, ground coriander and a few chilli flakes – you may like to use a garam masala, or add ground ginger as well; finely chopped parsley or coriander/cilantro also make good additions.

Go for it. Use what you know you like.

Spice it up.

Spice it up.

Mix that through. You don’t need to be gentle, in fact being a little on the rough side will help to develop the proteins in the meat and make it all stick together better.

You can skip this next step if you wish, but you might like to add a generous glug of an Asian-style sauce.

Get saucy.

Get saucy.

As you can see, I used hoi sin for this batch. You could use teriyaki, soy sauce, kecap manis, oyster sauce or even sweet chilli sauce if you want. Or none at all – it’s not necessary but it does show what can be done.

Mix through with the fork again, and then give it a good stir with a spoon or spatula. You’ll notice it all start coming together nicely.

Now, with wet hands, create mandarin-sized balls of meat – wet your hands between meat balls and it will go easier. The wetness helps stop the meat from sticking.

Have a ball.

Have a ball.

You may wish to wear disposable gloves. You may even find it easier to use a large ice cream scoop to measure them out onto a plate all at once and to just finish them off in your hands.

Do what you feel comfortable with.

You can freeze them at this point, if you wish.

If you want to eat them now, then gently heat a pan or griddle that has been lightly brushed or sprayed with oil.

Oil up.

Oil up.

Then add your meat balls, pressing down lightly to flatten them slightly. Set a timer for 4 mins and then LEAVE THEM ALONE. Just let them cook while you do other things, like set the table or something.

At the four minute mark, turn them over. They should lift easily. If they stick, let them sit a minute or so more and try again. Set your timer for another 4 minutes.

Flip.

Flip.

When the timer goes off for the second time they’re ready to serve.

I like to serve with steamed rice and veggies. In this instance, I’ve tinted the rice with a touch of turmeric in the water.

Make a meal out of it.

Make a meal out of it.

They are also quite nice served as a burger.

Enjoy.

Asian-spiced meatballs

  • Servings: 4-6 balls
  • Difficulty: easy
  • Print

Ingredients

250 g ground meat (minced beef, pork or chicken)

1 tsp minced garlic (from a jar)

1 tsp crushed ginger (from a jar)

½ tsp ground coriander

½ tsp ground cumin

¼ tsp chilli flakes

(or any other spices you’d like to add)

1-2 tbsps thick Asian flavoured sauce, optional.(kecap manis, sweet chilli sauce, Hoi Sin sauce, Teriyaki sauce, etc)

Method

Place meat into a medium bowl. Add garlic and ginger and mix in well with a fork.

Add spices, and mix well.

Add sauce if wished and mix well.

Mix until the meat starts to stick together and form a large ball.

With wet hands, form into four meatballs (for this amount of meat.) If you prefer, use a large ice cream scoop to measure out and finish forming them in hands using disposable gloves.

(you can’t get around touching the meat in some way. Sorry.)

Heat a frying pan or griddle over medium heat and oil lightly. An oil spray would be ideal.

When the pan is hot, add the meatballs – pressing lightly to flatten slightly. Do not crowd the pan.

Leave to cook for 4 mins.

Turn and cook the other side for a further 4 mins.

Serve with rice and vegetables.

To flash freeze:

Cover a dinner plate with grease proof paper, such as baking parchment, and place meatballs on it so that they are not touching.

Put the dinner plate into the freezer for 30 mins. There is no need to cover the plate.

After 30 mins, remove the meatballs to a ziploc bag.

Seal and return to freezer.

By partially freezing the balls you will ensure that they won’t stick together in the bag. This means you can remove just the number you need.

Ensure they are fully defrosted before cooking.

Like this? Follow us on Facebook or subscribe to receive updates by email.


Mac Bolognese

Hello peeps.

Back again. Yesterday was a sick day and The Boy took care of things while I doctor wrangled etc.

?????????????


However, tonight the kitchen was reopened for business and we had a nice macaroni bolognese – cooked mostly in the slow cooker.

Slow cooker to the rescue again

Slow cooker to the rescue again.


Actually it was a riff on the Chilli con Carne recipe I posted the other day. I followed exactly the same process, but substituted ingredients with the aim of making an Italian-style dish.

Pork for the beef, basil pesto for the sun-dried tomato one, borlotti beans instead of kidney beans and all served over macaroni instead of rice.

It worked.

Mac Bolognese

Mac Bolognese

Want some?

Howdy All.

I have had one of those days that are emotionally and physically exhausting, so I am relying solely on last night’s leftovers for tonight’s dinner.

This is something for which I make no apologies.

We have some rice sitting in the fridge as well, so that will make a nice accompaniment.

We had Loaded Hot Potato Chips for lunch.

I have spent a bit of time this afternoon making some chocolate biscuits.

There’s enough to keep The Boy in gratuitous carbohydrates for several weeks. This is a win.

Chocolate biscuits.

Chocolate biscuits.

Tomorrow I need to do some sewing for an upcoming occasion and I’m intending to do a riff on the Chilli con Carne recipe that I posted a few days ago.

It should prove interesting.

Speak soon.