I made a yummy.

Before I forget, yesterday I left out the $11 BBQ Chicken I had bought a few days before. It has been picked clean with the meat frozen in portions, and the carcass used in stock.

The amount I have left in my food budget is therefore $11.52. So I can still get eggs if I need them…

Anyway, today I managed to not get killed in a sudden hailstorm. This made me very happy.

I was even happier when I got home and then got warm.

The decision was made to make an apple crumble using some of the Apple and Quince pie filling I made a few months ago.

Apple and Quince Crumble

Apple and Quince Crumble.

Then I decided that I would use those beautiful pork sausages you saw me freeze a few weeks back. I had started making a hot pot with them, and had just added some fennel seeds, when I remembered that fennel bulb from the vegetable shopping.

So, I made a WONDERFUL cassoulet-like dish with pork sausages, fresh fennel and cannellini beans.

I made a yummy.

I made a yummy.

My goodness it was good. And I served it on a bed of mashed, slow-cooked sweet potato. Because I could.

I’ve documented all the steps, so I shall be able to post a recipe for you soon-ish.

It made enough for four, so we got a meal’s worth of leftovers from it – for this I am grateful.

I didn’t make biscuits. That can wait until tomorrow.

That’s it for tonight, Lovelies. Speak tomorrow.


Like this? Follow us on Facebook or subscribe to receive updates by email.

Chilli con Carne (Budget Bounty style)

Dinner is served.

First off, let me get one thing clear: Chilli con Carne means Chilli with meat.

There is no such thing as Vegetarian Chilli con Carne.

There. I feel better now.

This is a dish I have adapted from one of Jamie Oliver’s recipes out of his book, Happy Days with the Naked Chef. I pretty much follow his recipe but get rid of a lot of fiddling around.

I’m sure he’d approve.

I also tend to cook it in a slow cooker, but I’m guessing that this surprises precisely no-one.

My step-father is a fiend for chilli. When I lived in Canberra, and knew he was driving up from Melbourne to see me, I would get this dish to the long simmer stage the night before and pop it in the fridge overnight. I’d put it in the slow cooker on low just before I went to work in the morning and it would be gorgeous by the time I got home to find him waiting for me.

Nowadays, I find it perfect for cold to just-bordering-on-utterly-miserable days. Put it on early and leave it to do its thing until you’re ready to eat. In the meantime, your home smells gorgeous.

Leftovers are not to be scoffed at.

Leftovers are not to be scoffed at.

You can cook this on the stove top, in the oven or in the slow cooker (3 litre size for this recipe). Whatever works for you.

It makes a whole heap, so you can feed a crowd, make a ton of leftovers to eat during the week for a singleton or individual frozen meals for future famines of inspiration.

Start with a chopping board, a knife and some vegies. If you intend to cook this on the stove or in the oven, you’ll want a Dutch oven style pot with a tight-fitting lid. Get your slow cooker set up if that’s what you’d prefer to use. In this case I also put the cooker on low and empty the tins of tomatoes into it – just to get it warmed up and going.

Get your slow cooker on-line.

Get your slow cooker on-line.

Now, dice up an onion, a stick of celery and a carrot as finely as you like (or are able).

Start by sauteeing the trinity.

Start by sauteeing the trinity.

Heat your pan over a medium heat with a little olive oil. (Use a frying pan for this stage if you intend to slow cook.)

Add your chopped vegetables and a teaspoon of crushed garlic. I don’t mind if this comes from a jar. Cook gently until the onion softens and becomes translucent.

Now add your minced beef. You’ll want about half a kilo or a pound of meat to serve four. Continue to fry, stirring gently to brown the meat almost all the way through. I like to push the vegetables aside at first, but do what works for you.

Once it is browned sufficiently, you can add a mix of ground cumin, chilli powder and fresh chilli OR you can use whatever commercial chilli blend you prefer. Make it as hot or as mild as you wish, but add the spices at this stage to fully release the aromatic oils that they contain.

Add your meat and spices.

Add your meat and spices.

Mix it all together as thoroughly as you can, just to get those flavours a little more melded.

Looking good.

Looking good.

If you are using the slow cooker, then transfer your mixture into it now. Add the contents of 2 x 400 g tins of diced tomatoes and a small jar of sun-ripened tomato pesto.

I get the latter from Aldi. It only costs $2 and is quite affordable for the punch of flavour it gives. You may wish to drain off some of the oil from the top of the jar, but this isn’t necessary. It’s a matter of taste.

Sun-ripened tomato pesto.

Sun-ripened tomato pesto.

Mix together well, add a half glass of water and a stick of cinnamon (yes, really) and season to taste. (Leave out the water if slow cooking.)

Stick of cinnamon.

Stick of cinnamon.

Bring the mixture to the boil and place a piece of greaseproof paper between the pot and the lid. Turn the heat down to simmer on the stove for 1-1½ hours. Alternatively, transfer to the oven for the same amount of time.

Add the tinned kidneys beans about 30 minutes before serving to allow them to warm through.

I forgot to strain the oil off the pesto - can you tell?

I forgot to strain the oil off the pesto – can you tell?

Serve with crusty bread, on plain steamed rice, on boiled pasta as a meat sauce, on mashed potatoes, over corn chips, topped with a cornbread cobbler (recipe coming soon) or in tacos or burritos. Have your way with it.  Goodness, you could even top it with mashed spud and call it Shepherd’s Pie if you want.

It’s a really versatile dish.  Enjoy.

Chilli con Carne (stove and oven)

  • Servings: 4-6
  • Difficulty: moderate
  • Print

Ingredients

2 medium onions, diced

1 stick celery, diced

1 carrot, diced

1 clove garlic, crushed

olive oil

2 level tsps chilli powder

1 fresh red chilli, deseeded and finely chopped

1 heaped teaspoon ground cumin

sea salt and freshly ground black pepper

500 g minced beef (err toward the leaner cuts)

I x 190 g jar sundried tomato pesto, excess oil drained from top and discarded.

2 x 400 g tins diced tomatoes

2 x 400 g tins kidney beans, drained and rinsed

1 stick cinnamon

Method

Preheat oven to 150°C/ 300° F, if using.

In a metal pan or casserole with a tight-fitting lid, heat olive oil gently.

Add diced vegetables and garlic until onions are softened and translucent.

Add the minced beef and sauté gently until browned through. Add the spices or substitute any low-salt tex-mex style blend you prefer.

Add the contents of the jar of pesto and the two tins of diced tomatoes with a small glass of water. Stir well and add cinnamon stick.

Bring to a boil, cover with a sheet of greaseproof paper and the lid and reduce heat to a simmer.

Cook for 1½ hours on the stove top or transfer to the oven for 1½ hours.

At the 1 hour point, add the kidneys beans and stir thoroughly to warm through.

Variation:

Slow cooker:

Prepare a 3 – 4 litre (quart) slow cooker.

Follow directions as above to the using a medium sized frying pan.

Transfer contents of pan to slow-cooker and add the contents of the jar of pesto and the two tins of diced tomatoes.

Stir well and add cinnamon stick.

Bring to a boil on High, then reduce heat to LOW.

Cook for 3-6 hours, stirring occasionally to prevent sticking.

30 minutes before serving, add the kidney beans to heat through.

If the mixture is too wet, sauce may be thickened using cornflour, or soaked up using a cobbler topping.

Hungry yet?

Hungry yet?

I’m sorry I wasn’t on yesterday, everyone.

The Boy suddenly reappeared unannounced from his camping trip while I was engaged with the pressure canner and frightened the life out of me. He bought me dinner from here to make up for nearly giving me a heart attack.

This morning I attended a Pasta-making workshop at the Ballarat Community Garden, but it required rather large amounts of kit and supplies.

Not my pasta...

Not my pasta…

So, I spent my blogging time packing the car instead.

Never mind. I’m here now!

So onto the shopping.

The Aldi shopping.

The Aldi shopping.

From Aldi was purchased the following:

  • 2 x 1 litre UHT milk                                    $1.90
  • 1  x 1 kg Frozen peas                                 $1.99
  • 1 kg full cream milk powder                  $5.69
  • 1 kg brown sugar                                        $3.19
  • 2 x 420 g tins Creamed Corn                  $1.78
  • 1 x jar Indian simmer sauce                   $2.99
  • 1 jar Basil pesto                                           $1.99
  • 1 jar sundried tomato pesto                  $1.99
  • 1 jar capsicum pesto                                 $1.99
  • 3 x tins diced tomatoes                           $2.97
  • 1 x tin evaporated milk                           $1.89
  • 2 x packets Droste Dutch cocoa        $12.98
  • 1 packet shredded tasty cheese          $5.49
  • 1 packet shredded pizza cheese         $4.49
  • 1 packet steakhouse fries                      $2.49
  • 1 packets wholemeal tortilla wraps  $1.99
  • 1 punnet mushrooms                              $2.91
  • 1 kg brown onions                                     $1.49
  • sweet potatoes                                           $3.16
  • full bunch celery                                         $1.99
  • 700g chuck steak                                        $8.42

Total = $68.63

Now, I’ve highlighted the cocoa that’s included in there for a reason. This stuff is great. It’s also expensive. I used two packets of it last year so, now it’s back on special at Aldi, I thought I’d stock up. If I find any still in the store next time I do my shopping, then I might buy another packet. I consider it a worthwhile indulgence.

I had to stock up on cheese again because I’d used all of the mozzarella I had when I made the pizza lunch for my Thursday group. The tasty cheese was exhausted when I made the mac and cheese during the week.

The greengrocer sold me these things:

Fresh stuff

Fresh stuff.

  • zucchini                       $2.15
  • apples                           $1.60
  • prepacked carrots   $0.79
  • mandarins                   $1.13
  • bananas                       $1.71
  • bulb of fennel            $1.49

Total = $8.85

The fennel is my ‘fun’ thing this fortnight. I’ve not cooked with it a lot, but I want to try some more things with it. I saw it there, so I thought I’d go for it. I don’t actually have a plan for it right now, but give me a day or so.;-)

Anyway, that gives me a total spend of $77.48.

The remaining $22.52 I had intended to spend on beans at the Farmers’ Market down by the Lake Wendouree this morning, but I slept too late and had to get to the workshop. Sad face.

However, I have exhausted my supply of mason jars and really can’t justify a further purchase right now. I am very proud that I have now pressure-canned all my chicken stock and made a lot more space in my freezer, as well as making some mexican beans too.

My first ever canning!

My first ever canning!

Today bread was also made and dinner tonight will be fried rice made with the leftover roast beef from earlier in the week.

Tomorrow some baking will need to be done, but I’m too tired to think about it right now.

See you all soon.

ttfn


Chocolate ‘Ice Cream’ (with bananas)

Chocolate soft serve ice-cream.

You know when you buy a hand of bananas and suddenly they’re all too ripe and no-one wants to eat them and you get annoyed because you’ve spent the money and now it’s being wasted and it doesn’t matter what you do it seems like you can never get it right and why is life so unfair?

Take a breath. Calm down.

Firstly, freeze your bananas. If they’re getting past the eating-as-a-fresh-banana stage, then peel them and pop them into a ziploc bag and put them in the freezer. They can be defrosted and used in cakes and muffins and what-not at a later stage.

If you don’t want them to stick together, so you can take out one or two at a time, then freeze them separately before you place them in the bag. They will live in there quite happily for many months.

And don't they look attractive?

And don’t they look attractive?

Then you can make ice cream out of them.

Yes. I said ice cream. Frozen bananas can be used to make a soft serve ice cream which is wonderful for those with a lactose intolerance. Cold affects the performance of your taste buds, so the banana flavour fades right away and you are left with a cold, creamy substance that you can add other flavours to. Like chocolate.

This requires a food processor with a metal blade. I’m sorry, there’s really not an alternative to the use of an appliance for this.

The metal blade of a food processor is the secret ingredient here.

The metal blade of a food processor is the secret ingredient here.

Also, I had quite a few bananas I wanted to use as I wanted the freezer space. So the pictures you see here will be of about three times the quantity that will be made from the recipe provided.

Making the actual dessert is super simple. Get the kids involved (just don’t let them lick the blade…)

Cut your bananas into chunks and put them into the processor bowl.

Chunky bananas.

Chunky bananas.

Now sift in a couple of tablespoons of cocoa powder. I used Dutch process cocoa because that’s what I had. If you’re an Aussie and you have some to spare, then try using Milo instead.

Add cocoa.

Add cocoa.

Now add some vanilla extract and a touch of salt. The salt will help to accent the sweetness of the bananas.

I used sea salt flakes - you don't have to.

I used sea salt flakes – you don’t have to.

Then add a dollop of sweetener if you really want to. I added a touch of honey, but it’s really not necessary. Bananas are full of natural sugars – don’t for a moment start thinking of this as a low calorie alternative to regular dairy ice-creams.

*Diabetics be warned, this will make your sugars spike.*

I added some totally unnecessary honey.

I added some totally unnecessary honey.

You may like to add a few tablespoons of a nut butter here. Peanut butter works fine, or you can try almond or sunflower butter instead. The oils in the butter give the final dessert a smoother texture and “mouth feel.” I didn’t have any, so I didn’t.

I did find that it wasn’t blending as smoothly as I would have liked, so I drizzled in some buttermilk that I had in the refrigerator. Adding yoghurt would also work – and this can be dairy, soy or coconut – or you could just add a little vegetable oil.

None of these things is absolutely vital.

Put the lid on your processor and pulse a few times to get it going.

It will form a thick paste.

It will form a thick paste.

Keep blending until you reach the desired texture. I wanted a smoother blend and added a drizzle of buttermilk to loosen it up a little. I stopped blending when it looked like this.

Chocolate soft serve Icecream

Chocolate soft serve Icecream

You may serve it immediately. If you are making it with kids, you’ll probably have to serve it immediately.

Otherwise, place it in a sealed container and re-freeze.

Put in a container and freeze. Temporarily.

Put in a container and freeze. Temporarily.

When the time comes to serve it up, remove it from the freezer at least 15 minutes beforehand to soften.  You may end up with a sprained wrist otherwise.

Enjoy.

Chocolate 'Ice-cream' (banana)

  • Servings: 2-3
  • Difficulty: easy
  • Print

Ingredients

3 medium bananas, peeled, cut in chunks and frozen

½ tsp vanilla extract

pinch salt

3 Tbsp cocoa powder

optional:

  • sweetener such as honey or maple syrup
  • 3-5 tbsps peanut butter or similar
  • 2-3 tbsps Greek yoghurt or buttermilk

Method

Place the metal ‘S’ blade in a food processor.

Combine the first four ingredients in the bowl and blend until smooth. Add the optional ingredients if you wish.

Serve immediately.

May be stored in a sealed container in the freezer, but remove at least 15 minutes before serving if you do so. The warmer the ice-cream the more it will resemble soft serve.

Variations:

  • Mix through chopped nuts or choc chips.
  • Use another frozen fruit e.g. strawberries, blueberries, frozen mango etc., instead of the cocoa powder for a fruit flavoured dessert.


Chocolate soft serve ice-cream.

I spent yesterday in various parts of Melbourne, so there was very little done in the Budget Bounty kitchen. Although I did pop into one company to price containers for some food-based products I’m thinking of selling in the future. Maybe. Perhaps.

Anyway, leftovers were the order of the day when we got home and we were very happy to have those porcupine meatballs to warm up and serve with a quick mashed potato. This is a picture from the night before, when we dished them up onto a bed of sweet potato that we had cooked in the slow cooker.

Porcupine meatballs, cooked in the pressure cooker.

Porcupine meatballs, cooked in the pressure cooker.

Both times they were yummy!

Today I kept myself a little busier. I have been given more lemons, so more lemon butter was made (natch!).

Lemon butter anyone?

Lemon butter, anyone?

I made a double batch, because I wanted to give some away and I wanted to make these. Hidden Treasure Muffins, but made using the lemon butter instead of Dulce de Leche this time. The Boy was keen to take some into the office tomorrow.

I wanted something low fuss for dinner, so I filled my small crock pot with my Lentil and Barley Hot Pot.

That’s smelling luscious and I’m looking forward to tucking in soonish. I also decided to do something with a bag of frozen, over-ripe bananas that are taking up space in my freezer and annoying me.

And don't they look attractive?

And don’t they look attractive?

So I turned them into chocolate ice-cream. The Boy came in as I was finishing and decided it was his duty as The Man of The House to lick the bowl.

Chocolate soft serve ice-cream.

Chocolate soft serve ice-cream.

He declared it to be “good.”

Yes. I will be posting instructions for this very soon. I’m going to have my dinner first though.

See you all soon!

Bringing home the bacon...

I didn’t post yesterday due to an existential crisis.

So, today I’m posting about what I did yesterday – welcome to time travel.

I had planned to head off to the local Farmers’ Market down at Lake Wendouree, and so I did.

I spent about $15 there on this lot.

My treasure from the market.

My treasure from the market.

What? It doesn’t look all that exciting? Really?  Huh.

Let me go through what I’ve got here. In that bag at the front, in the bottom left hand corner, there are Golden Linseeds.

Golden Linseeds or Flaxseeds.

Golden Linseeds or Flaxseed.

I like to add a couple of tablespoonfuls of that to my bread mix. There are already linseeds in the mix that we buy, but I like to boost it. Linseed is full of fibre and Omega 3s. However, unless you grind it, the Omega 3s aren’t available to you and the seeds pass through your body undigested.

So, I use a small electric coffee grinder to break them up a bit and add them through the nut/seed/fruit dispenser in my bread machine.

Next, there are Navy Beans. I buy a lot of these – usually 500g at a time.

Navy Beans

Navy Beans.

They cost around $8 a kilogram. Now with that 500 g, or 1 pound, I can make a batch of baked beans to keep in my freezer for quick and nutritious lunches. That batch will make about 2 litres worth of beans.

The Boy and I are in discussions about maybe buying a pressure canner so I can keep them in my pantry instead…. stay tuned.

Next, we have black lentils.

Black lentils.

Black lentils.

I love to add lentils to mince meat dishes or any slow-cooked dish. My collection of different colours and textures is slowly growing and is so different from the large brown and green lentils that used to be all that was available in Australia. (Yay!)

Next, you’ll see some Red Basmati Rice.

Red Basmati Rice.

Red Basmati Rice.

I hadn’t ever seen this before, so I grabbed 250 g of it. Basmati rice is a little lower on the Glycaemic Index (GI), which makes it much better for keeping my blood sugars stable (and yours too).  I have no idea what it tastes like and I’m looking forward to finding out.

Lastly, there is black barley.

Black barley.

Black barley.

I was really happy with how it turned out in my Barley and Lentil Hotpot and have decided it needs to be a pantry staple in the Budget Bounty household. So there.

I had a few dollars left from the $20 I had been prepared to spend, so I bought some Bok Choy as well.

Then I came home and saw to the meat. The chuck steak was diced, placed in a zip lock bag and frozen as is. I already have a few bags of marinaded diced chuck in the freezer, so I thought I’d leave this lot plain for now.

Diced chuck. (Sorry, Chuck!)

Diced chuck. (Sorry, Chuck!)

The Osso Buco was also frozen as was. It’s there ready for a nice, warming casserole in the future.

Osso Buco

Osso Buco

The sausages were placed into a large ziploc bag – being sure they weren’t touching – and frozen. Once they were frozen through, the bag was shaken down and folded over.

Pork Sausages

Pork Sausages

By freezing the snags like this, I will be able to remove one or two at a time without having to defrost the whole lot. With this style of sausage, I’ll only need a small number to feed the two of us.

Bacon pieces

Bacon pieces

Then, I processed the bacon rashers, cutting off the tails and dicing them and leaving the “eye” part whole. They were frozen in separate bags and small portions.

Although one portion was immediately used to counter the Antarctic vortex currently enveloping most of southern Australia. I added them to a fine luncheon of Loaded Hot Potato Chips. Yum! They really hit the spot!

Bringing home the bacon...

Bringing home the bacon…

Bread was made, as was a batch of Apple and Oat Bars. I dined on leftover risotto and The Boy ate chicken soup.

Tonight he is making Porcupine meatballs in the pressure cooker and using some of the red basmati in it too!

Eat well, everyone.


Apple and Oat Bars

Stay calm and eat Apple and Oat Bars...

Last night, The Boy declared – out of the blue – that I should do a muesli (granola) bar recipe. Because school goes back next week or something and this could be useful to people.

I think he just wanted muesli bars.

I also think he could have told me before I did the fortnight’s shopping and could stock up on the expensive stuff that goes into these snacks.

So, I compromised. I’m good at that.

I made these little Apple and Oat Bars from stuff I already had and which – most likely – you already have too. Because that is how we roll in the Budget Bounty kitchen.

Simple AND good-for-you-ish.

Simple AND good-for-you-ish.

The recipe for these came from one of the first cookbooks I ever bought for my now massive collection. It’s called Good Cooking by the people at Good Housekeeping and was published way back in 1988. Which is why I have changed one of the ingredients from margarine to butter…

It’s a recipe that literally takes only minutes to put together and which you could quite easily do with smaller versions of yourself HELPING.  Ahem.

You will need some butter, some honey, some brown sugar, some rolled oats and an apple or two. Also a bowl, a baking tin and a microwave proof jug and spatula.  Sound complicated?

After setting your oven to 190°C get out a set of scales and your microwave proof jug. Into your jug measure your butter, brown sugar and honey, like so:

Melt these things together.

Melt these things together.

Heat them for 1 minute at a time at 80% power until the butter is melted. You can do this in a saucepan on the stove, if you wish.

While it is melting, measure the oats into a medium sized mixing bowl and line a baking tin with parchment. The original recipe called for an 18 cm/7 inch square cake tin.

Pour your now liquid ingredients into the oats and mix well.

Add the wet to the dry. Stir.

Add the wet to the dry. Stir.

Press half this mixture into the base of your tin. Do NOT do what I did and use a silicon tray. You want the oats to crisp up and they just get soggy if you follow my example. Honestly.

Press half your oats into something that isn't silicon and is preferably metal...

Press half your oats into something that isn’t silicon and is preferably metal…

Now get a large cooking apple (around 250 g worth), peel it and slice it thinly.  Arrange the apple slices in overlapping rows to cover the oat base.

Cover your base with overlapping slices of apple.

Cover your base with overlapping slices of apple.

Sprinkle your slices with cinnamon. I was cooking for an adult who likes it, so I also used ground ginger on mine.

Sprinkle with your choice of spice.

Sprinkle with your choice of spice.

Top with the rest of the oats, press down firmly and bake for 30 to 40 minutes or until golden brown and crisp.

Cut it into portions while still hot and in the pan. Leave in the tin to cool. You want your butter and honey to set before you try to move anything, or it will all fall apart.

Elevenses, Anyone?

Elevenses, Anyone?

Store in an airtight container somewhere cool. Wrap in cling film and send as part of a school lunch, serve as an after school snack or use to accompany a much deserved cuppa.

Easy. Affordable. Tasty.

Apple and Oat Bars

  • Servings: 12 -15
  • Difficulty: easy
  • Print

Ingredients

100 g/4 oz butter

60 g/2½ oz brown sugar

2 tbsp honey

225 g/8 oz rolled oats

1 large cooking apple (250 g/9 oz) peeled, cored and thinly sliced

ground cinnamon.

Method

Heat oven to 190°C/ 375°F.

Lightly grease or line an 18 cm/ 7 inch square shallow baking tin.

In a microwave proof jug or bowl, combine the first three ingredients and heat at 80% power for 1 minute intervals until melted. Stir together. This may be done in a small saucepan on the stove top if wished.

Measure the oats into a medium-sized bowl. Pour liquid ingredients over the oats and mix well.

Divide the mixture in two and press half into the base of your prepared tin.

Arrange the sliced apple over the top of the oats in overlapping rows.

Sprinkle with cinnamon.

Top with the remaining oats and press down gently.

Bake for 30-40 minutes until golden brown and crisp.

Cut into slices while still hot and then leave in the tin until cool.

Variations:

  • For a gluten-free version, substitute a gluten free muesli or granola mix for the rolled oats.
  • Try using different spices for variety. A Pumpkin Pie spice mix might be just the thing for you.
  • Sprinkle a handful of sultanas over with the cinnamon.
  • Add a scattering of choc chips over the apple for a special treat.


It is absolutely FREEEEEEEZING here today. I mean it’s really cold, and I’m inside with ducted heating!

Good grief.

Anyway, my hands are icy, so this shall be short.

I wanted a change of texture for dinner tonight. So, I rescued one of my Asian flavoured beef meals from the freezer and popped it into the crockpot frozen.

Doesn't look all that tasty, does it?

Doesn’t look all that tasty, does it?

But this is how it looks now, after 10 hours on low and with the addition of some frozen peas and corn and some cornflour to thicken it up.

And the after" pic.

And the after” pic.

I’ve just put a rather nice, jazzed-up Apple Crumble in the oven – to keep the whole warm, comfort food, vibe going. I’ve added ground ginger, sultanas and choc chips to the filling…because, why not?

I think I neglected to mention yesterday that I’d made another loaf of bread, so I’ll do that now.

Also, I just served the last of the instant hot chocolate mix to The Boy, who has sequestered himself in his warm study, so I’ll be making more of that tomorrow. I could quite easily do it now, but my kitchen is the coldest room in the house on a decent day.

I’m looking forward to moving – you have no idea.

Hot chilli oil.

Hot chilli oil.

I also decanted the Spicy Chilli and Garlic oil I put aside to infuse a few weeks ago. It’s to be a gift for my step-father who will hopefully be visiting some time this week.  He just had a birthday and loves things HOT.

So, I’m logging off now and snuggling up with a cat or two. On the bright side, today marks the Winter Solstice. It’s going to get warmer from now on, or so they tell me.

Until tomorrow.


Slow cooker beef with Asian flavours (from scratch)

Asian-flavoured slow-cooked beef

Okay, so some of you may have clicked over from here. You may find some repetition in this post, so bear with me. Please?

This little concoction is my answer to the “I don’t know what to cook, but I’ll probably be hungry later —and tired—, so this will do” situation.

I’m sure you know what I mean.

Asian-flavoured slow-cooked beef

Asian-flavoured slow-cooked beef

This is something I can get into the slow cooker in minutes and serve a few hours later – filling my home with gorgeous smells in the intervening period.

I own several slow cookers but the one I use the most has got to be my smallest one. It’s a 1.5 litre or 1 quart sized appliance and it’s perfect for meals for two. All the photos in this post have been taken with this device.

Feel free to double or triple what I do here and then cook it in a larger slow-cooker. It will take longer than the few hours a small one would use to cook the smaller portion, but not much longer.

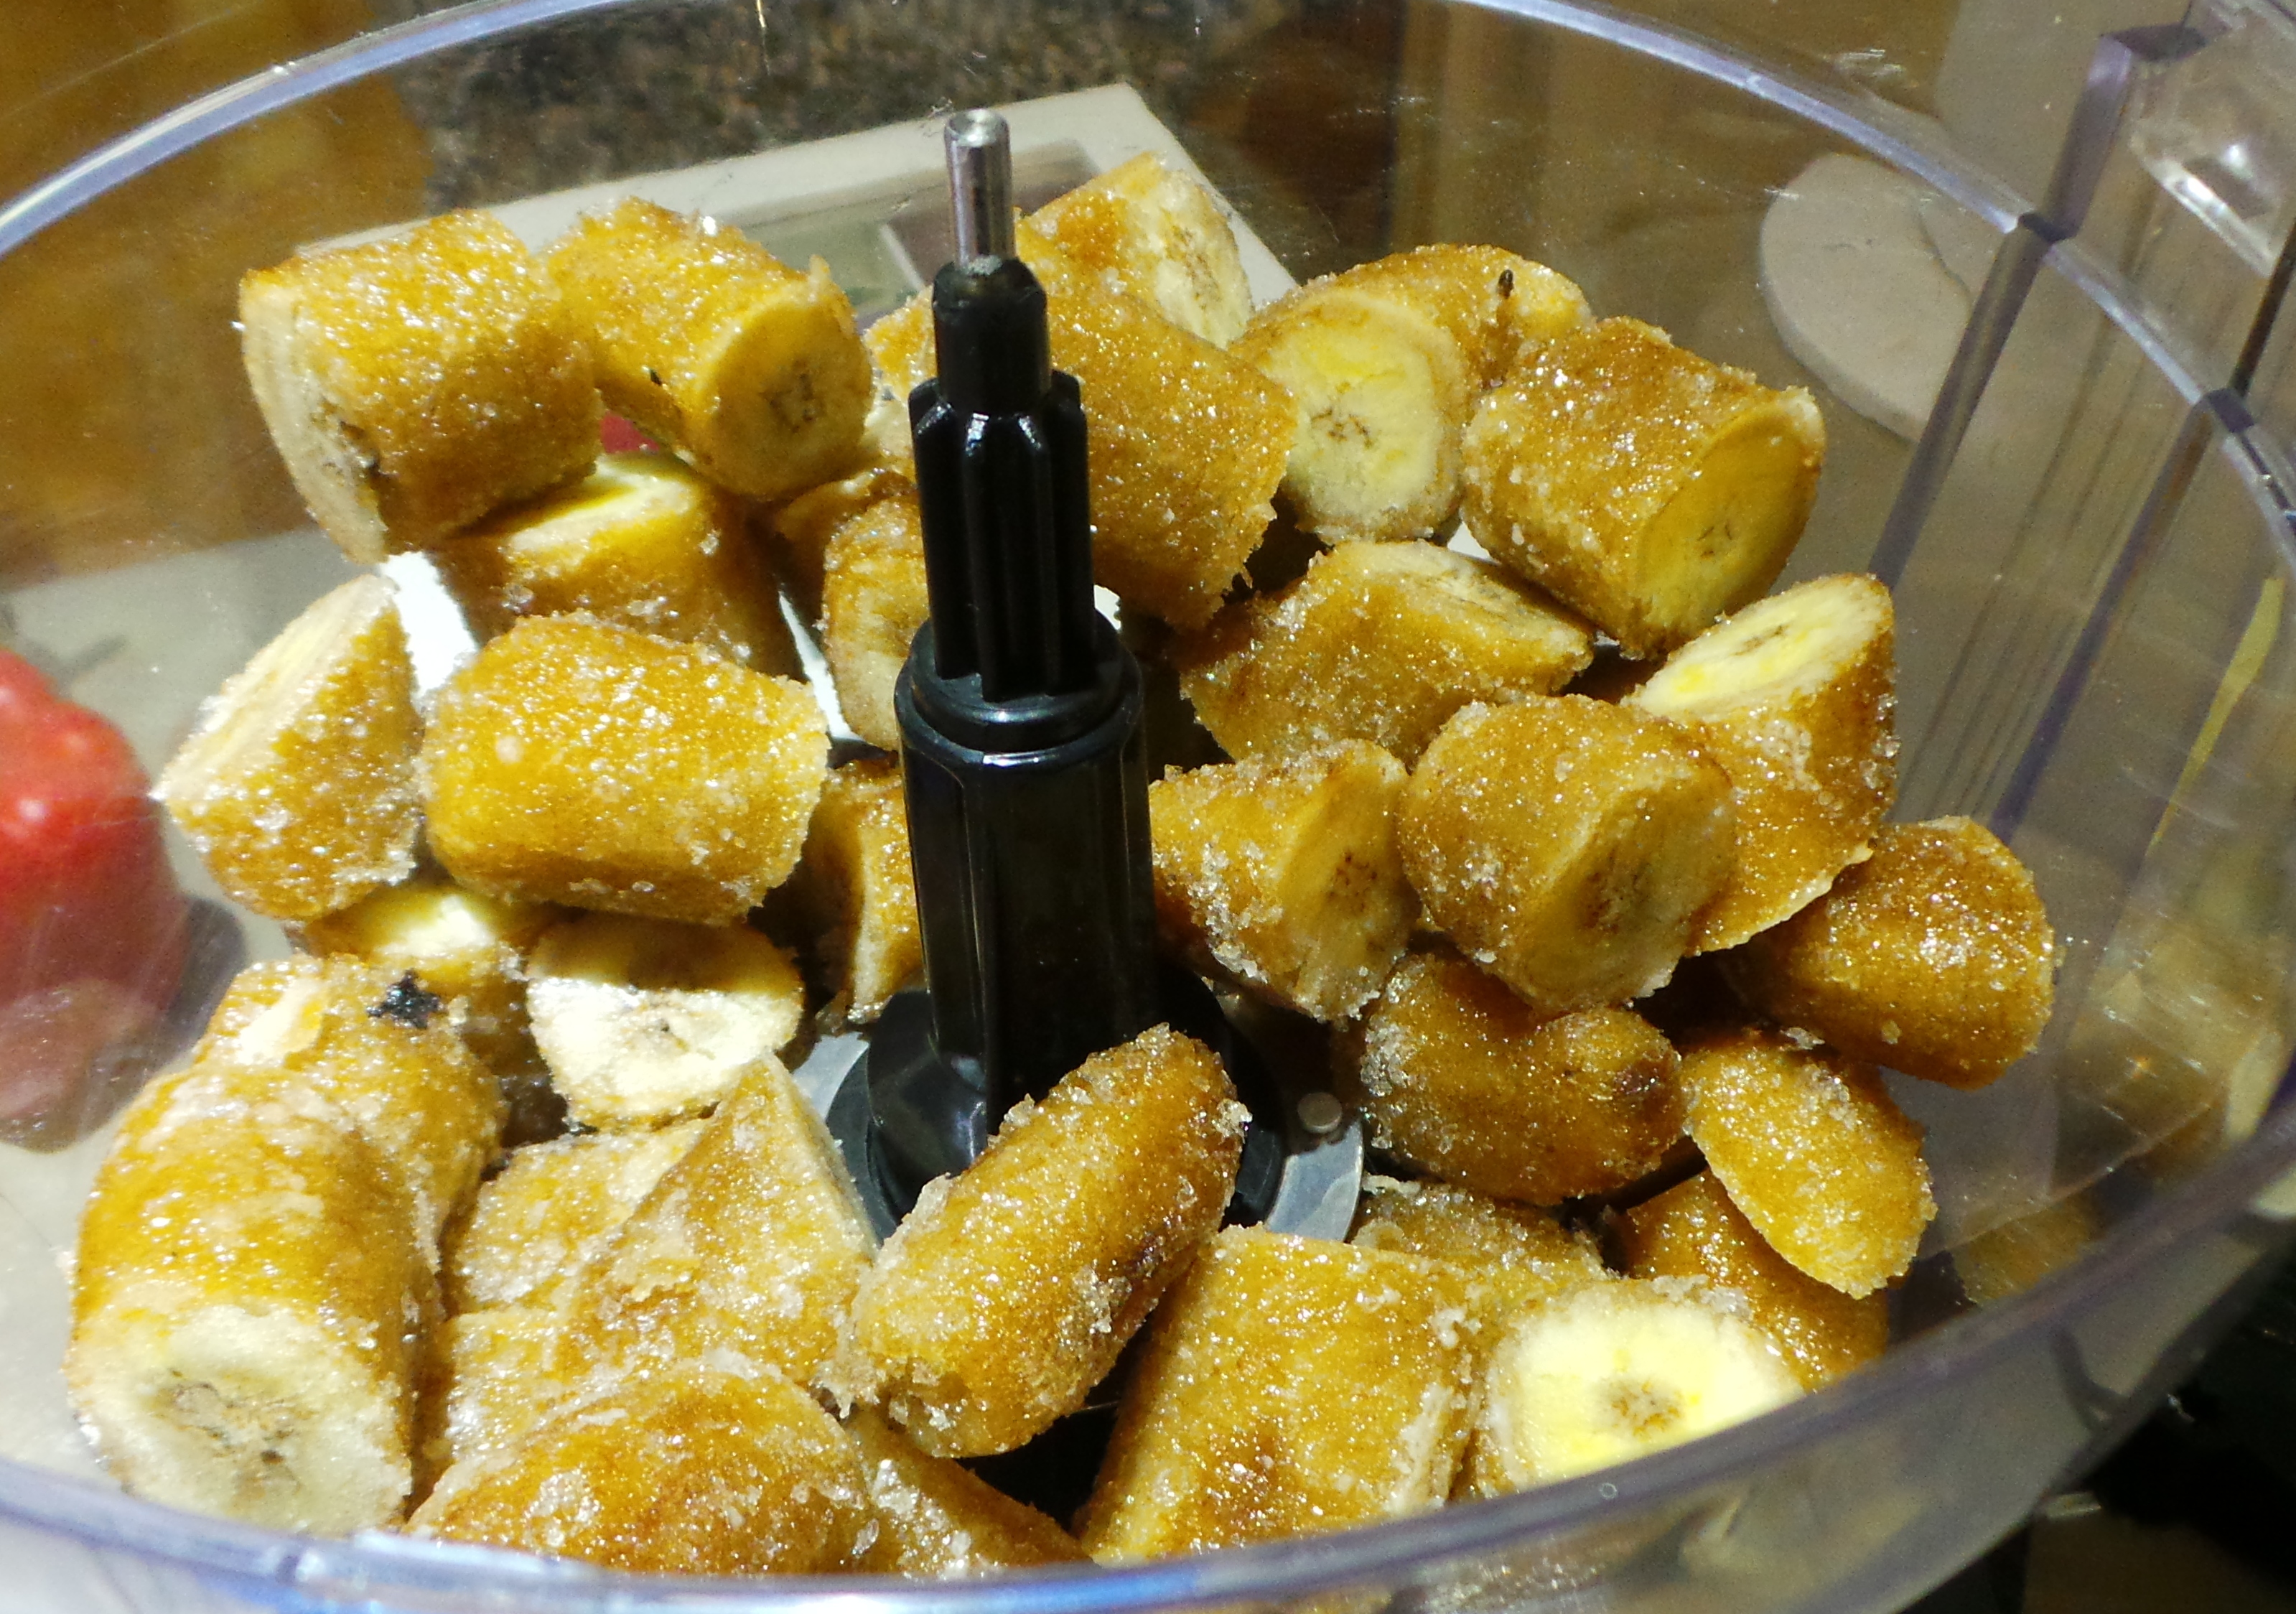
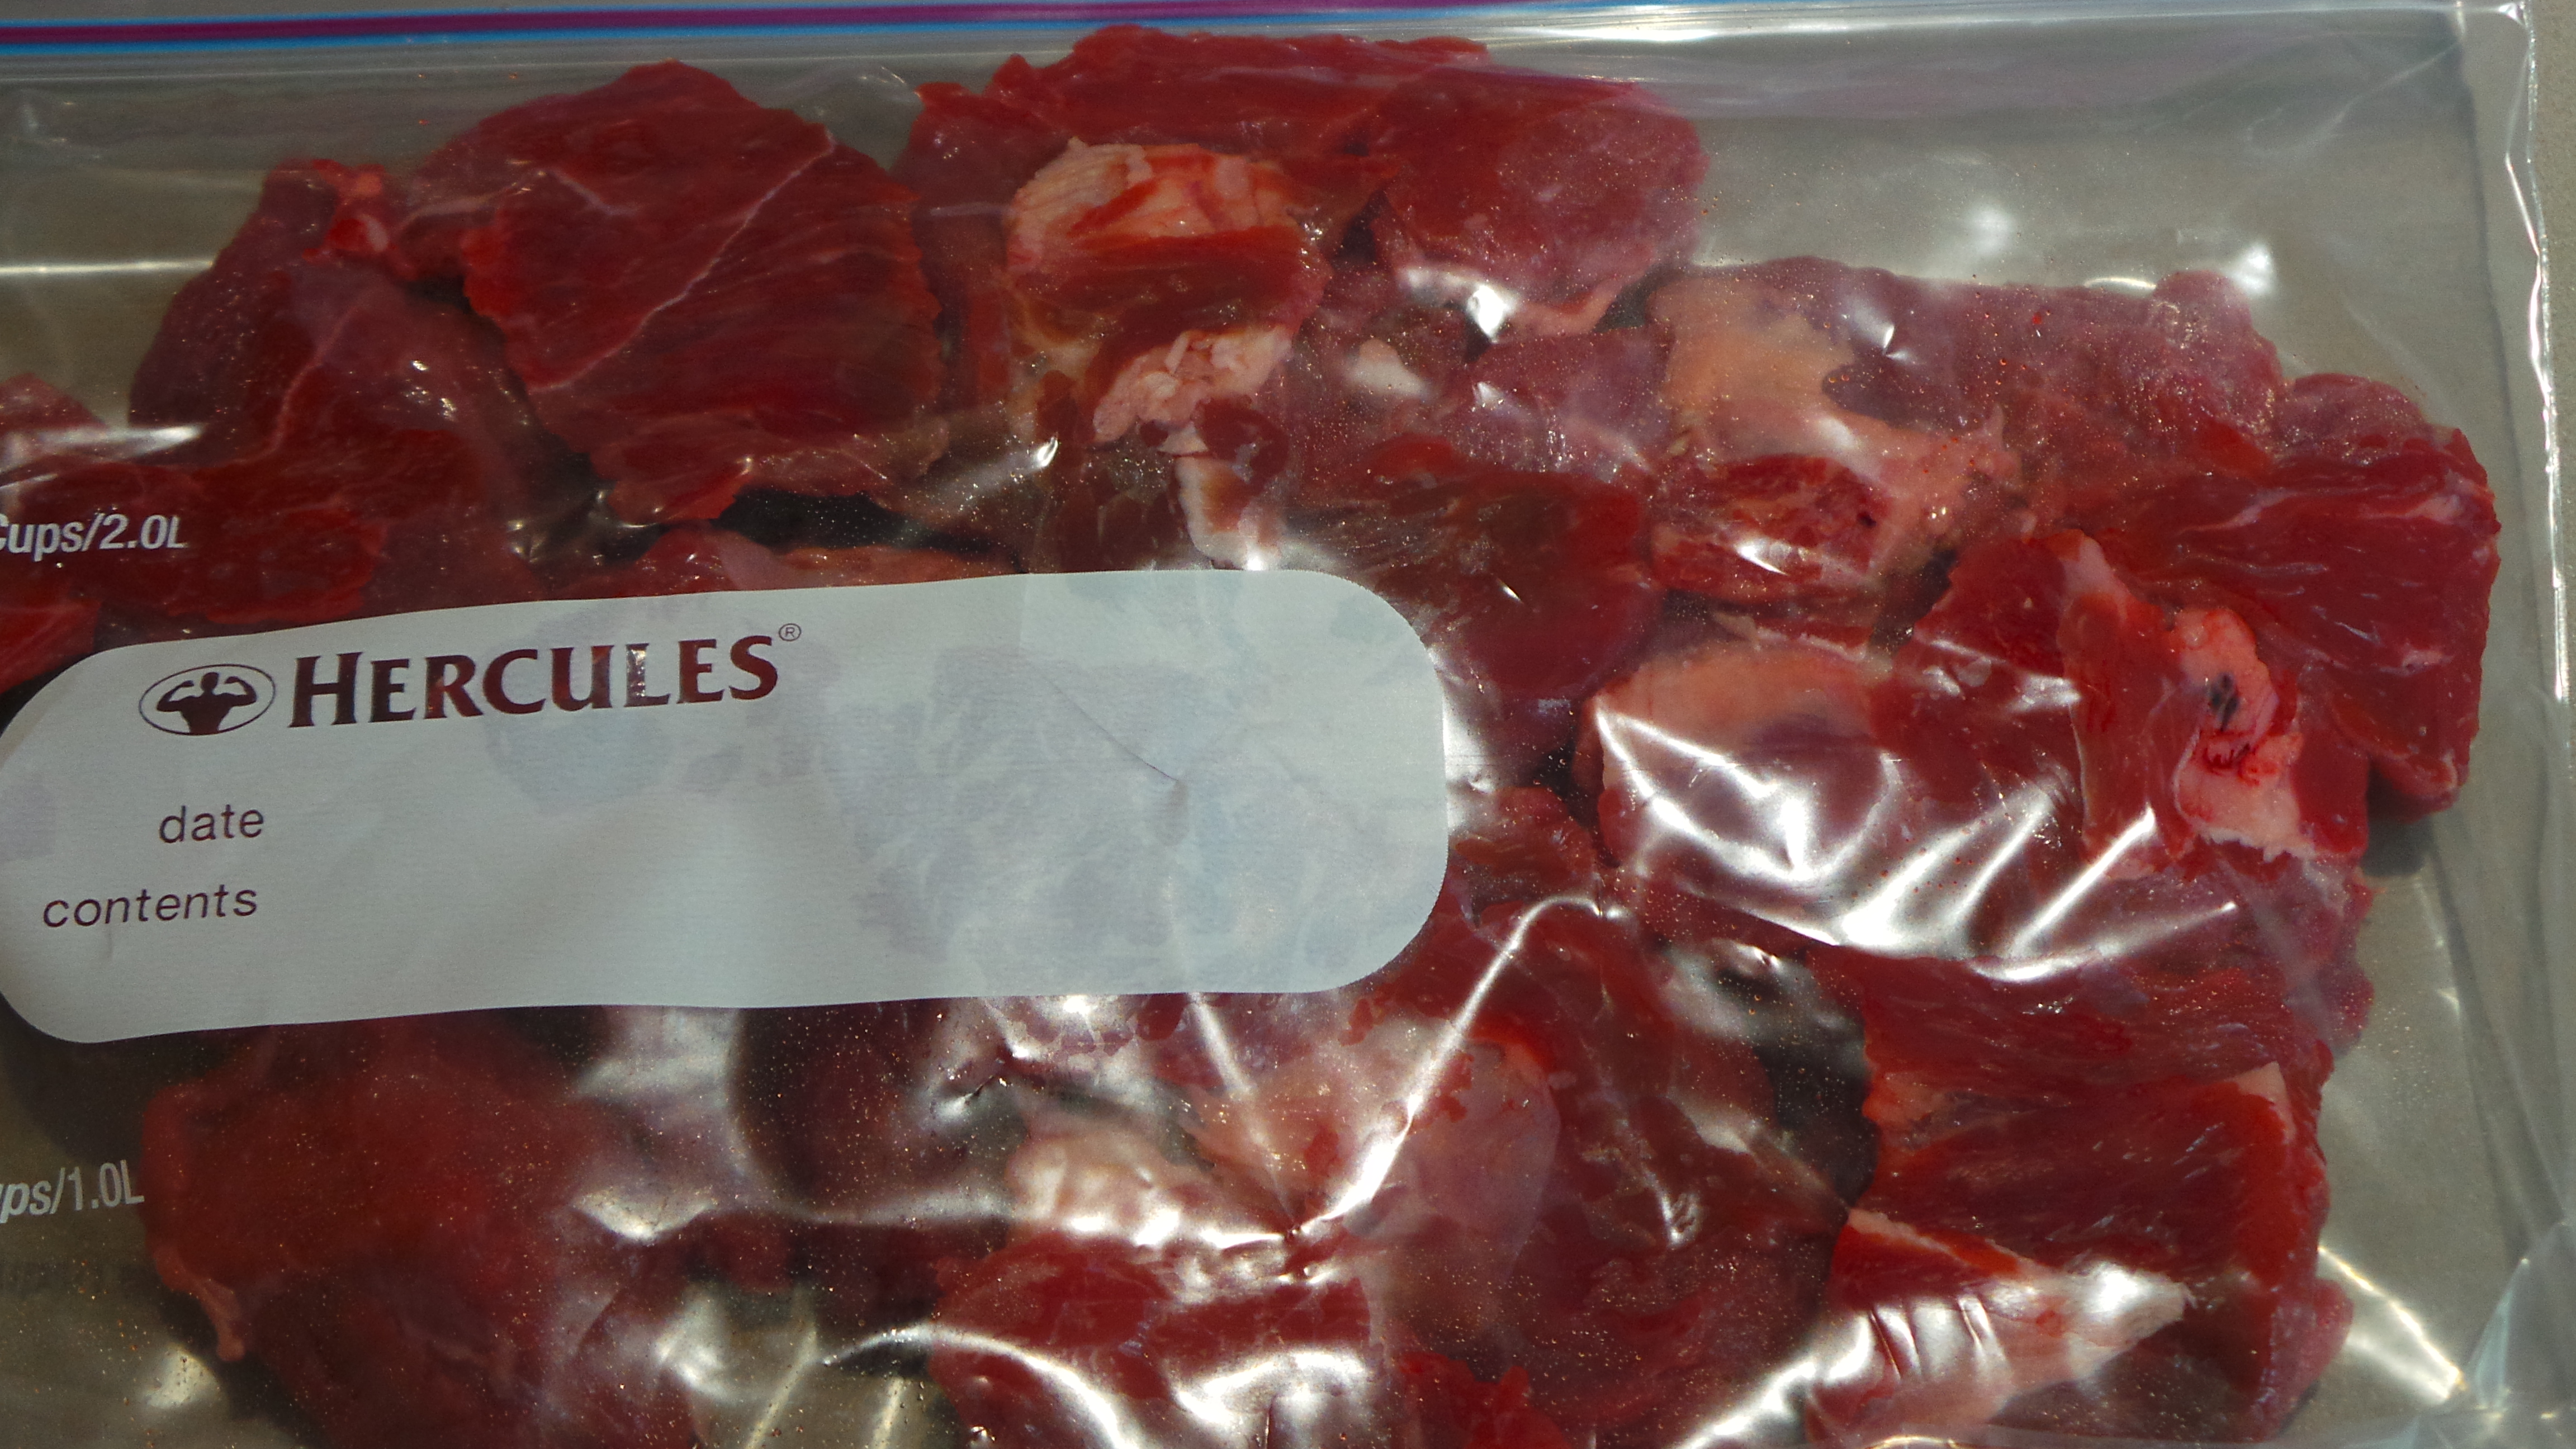
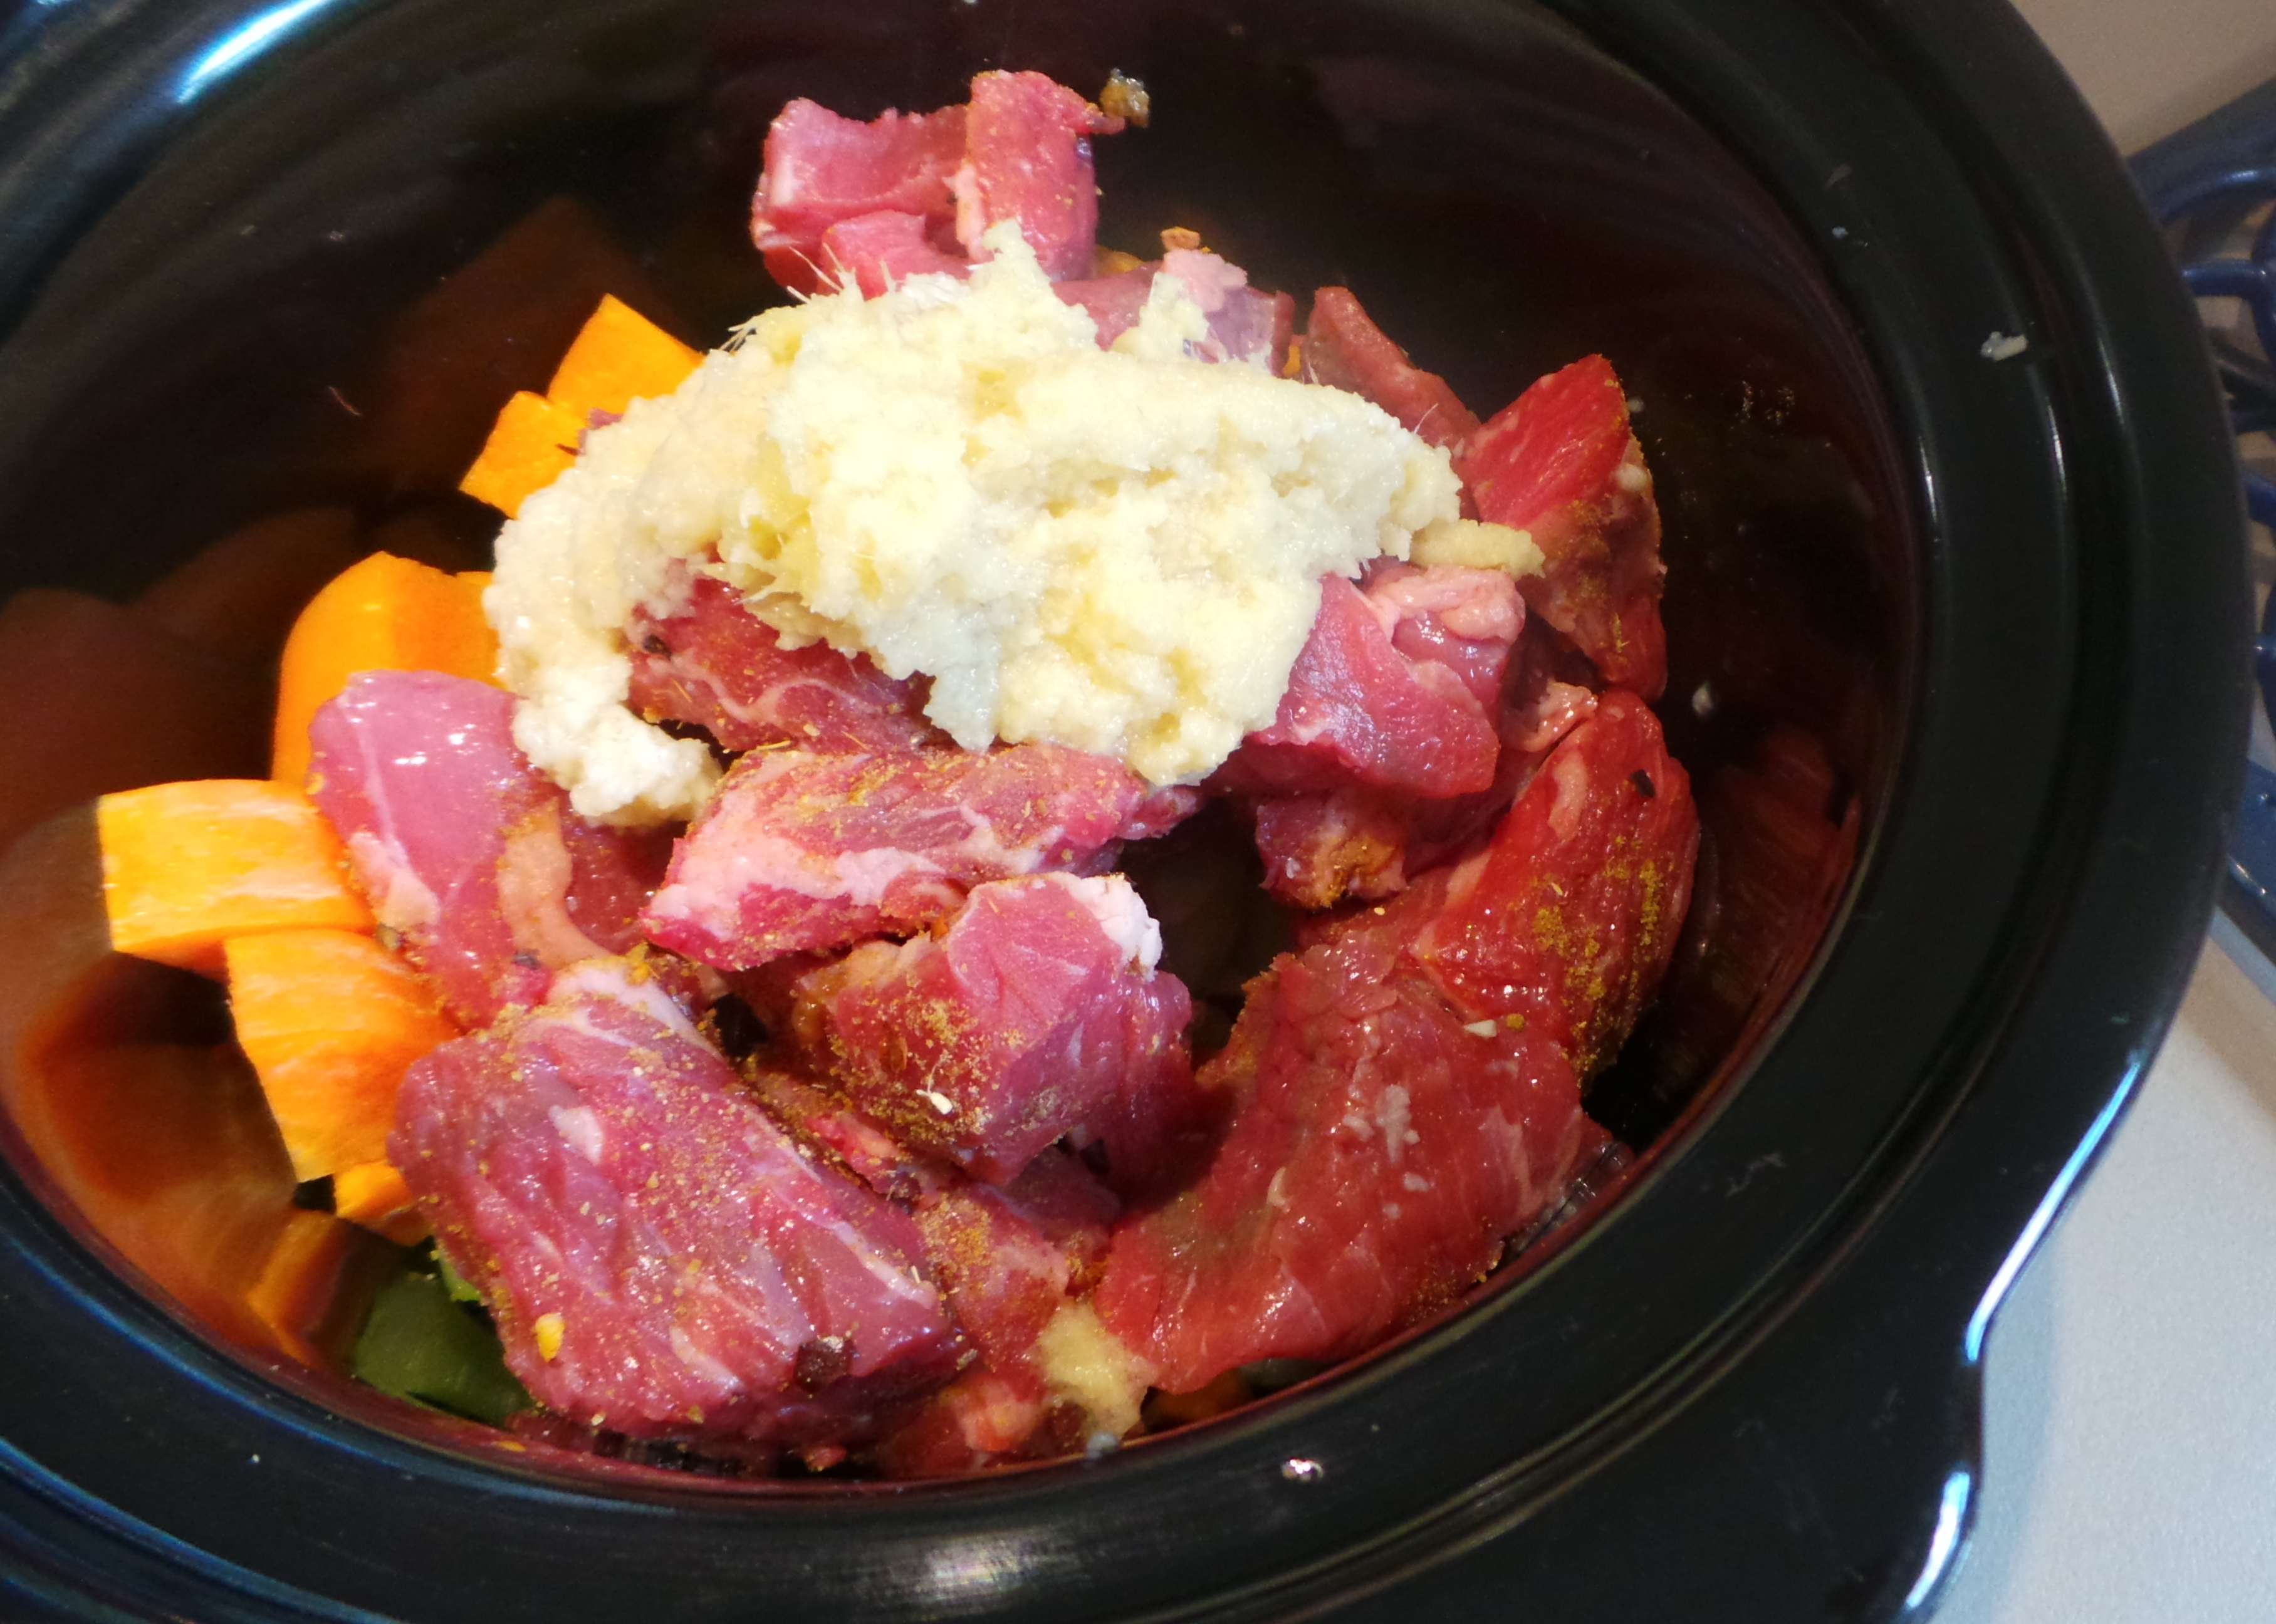
Start with half a kilo or a pound of chuck steak and cut into large cubes.

Cut into large cubes.

Cut into large cubes.

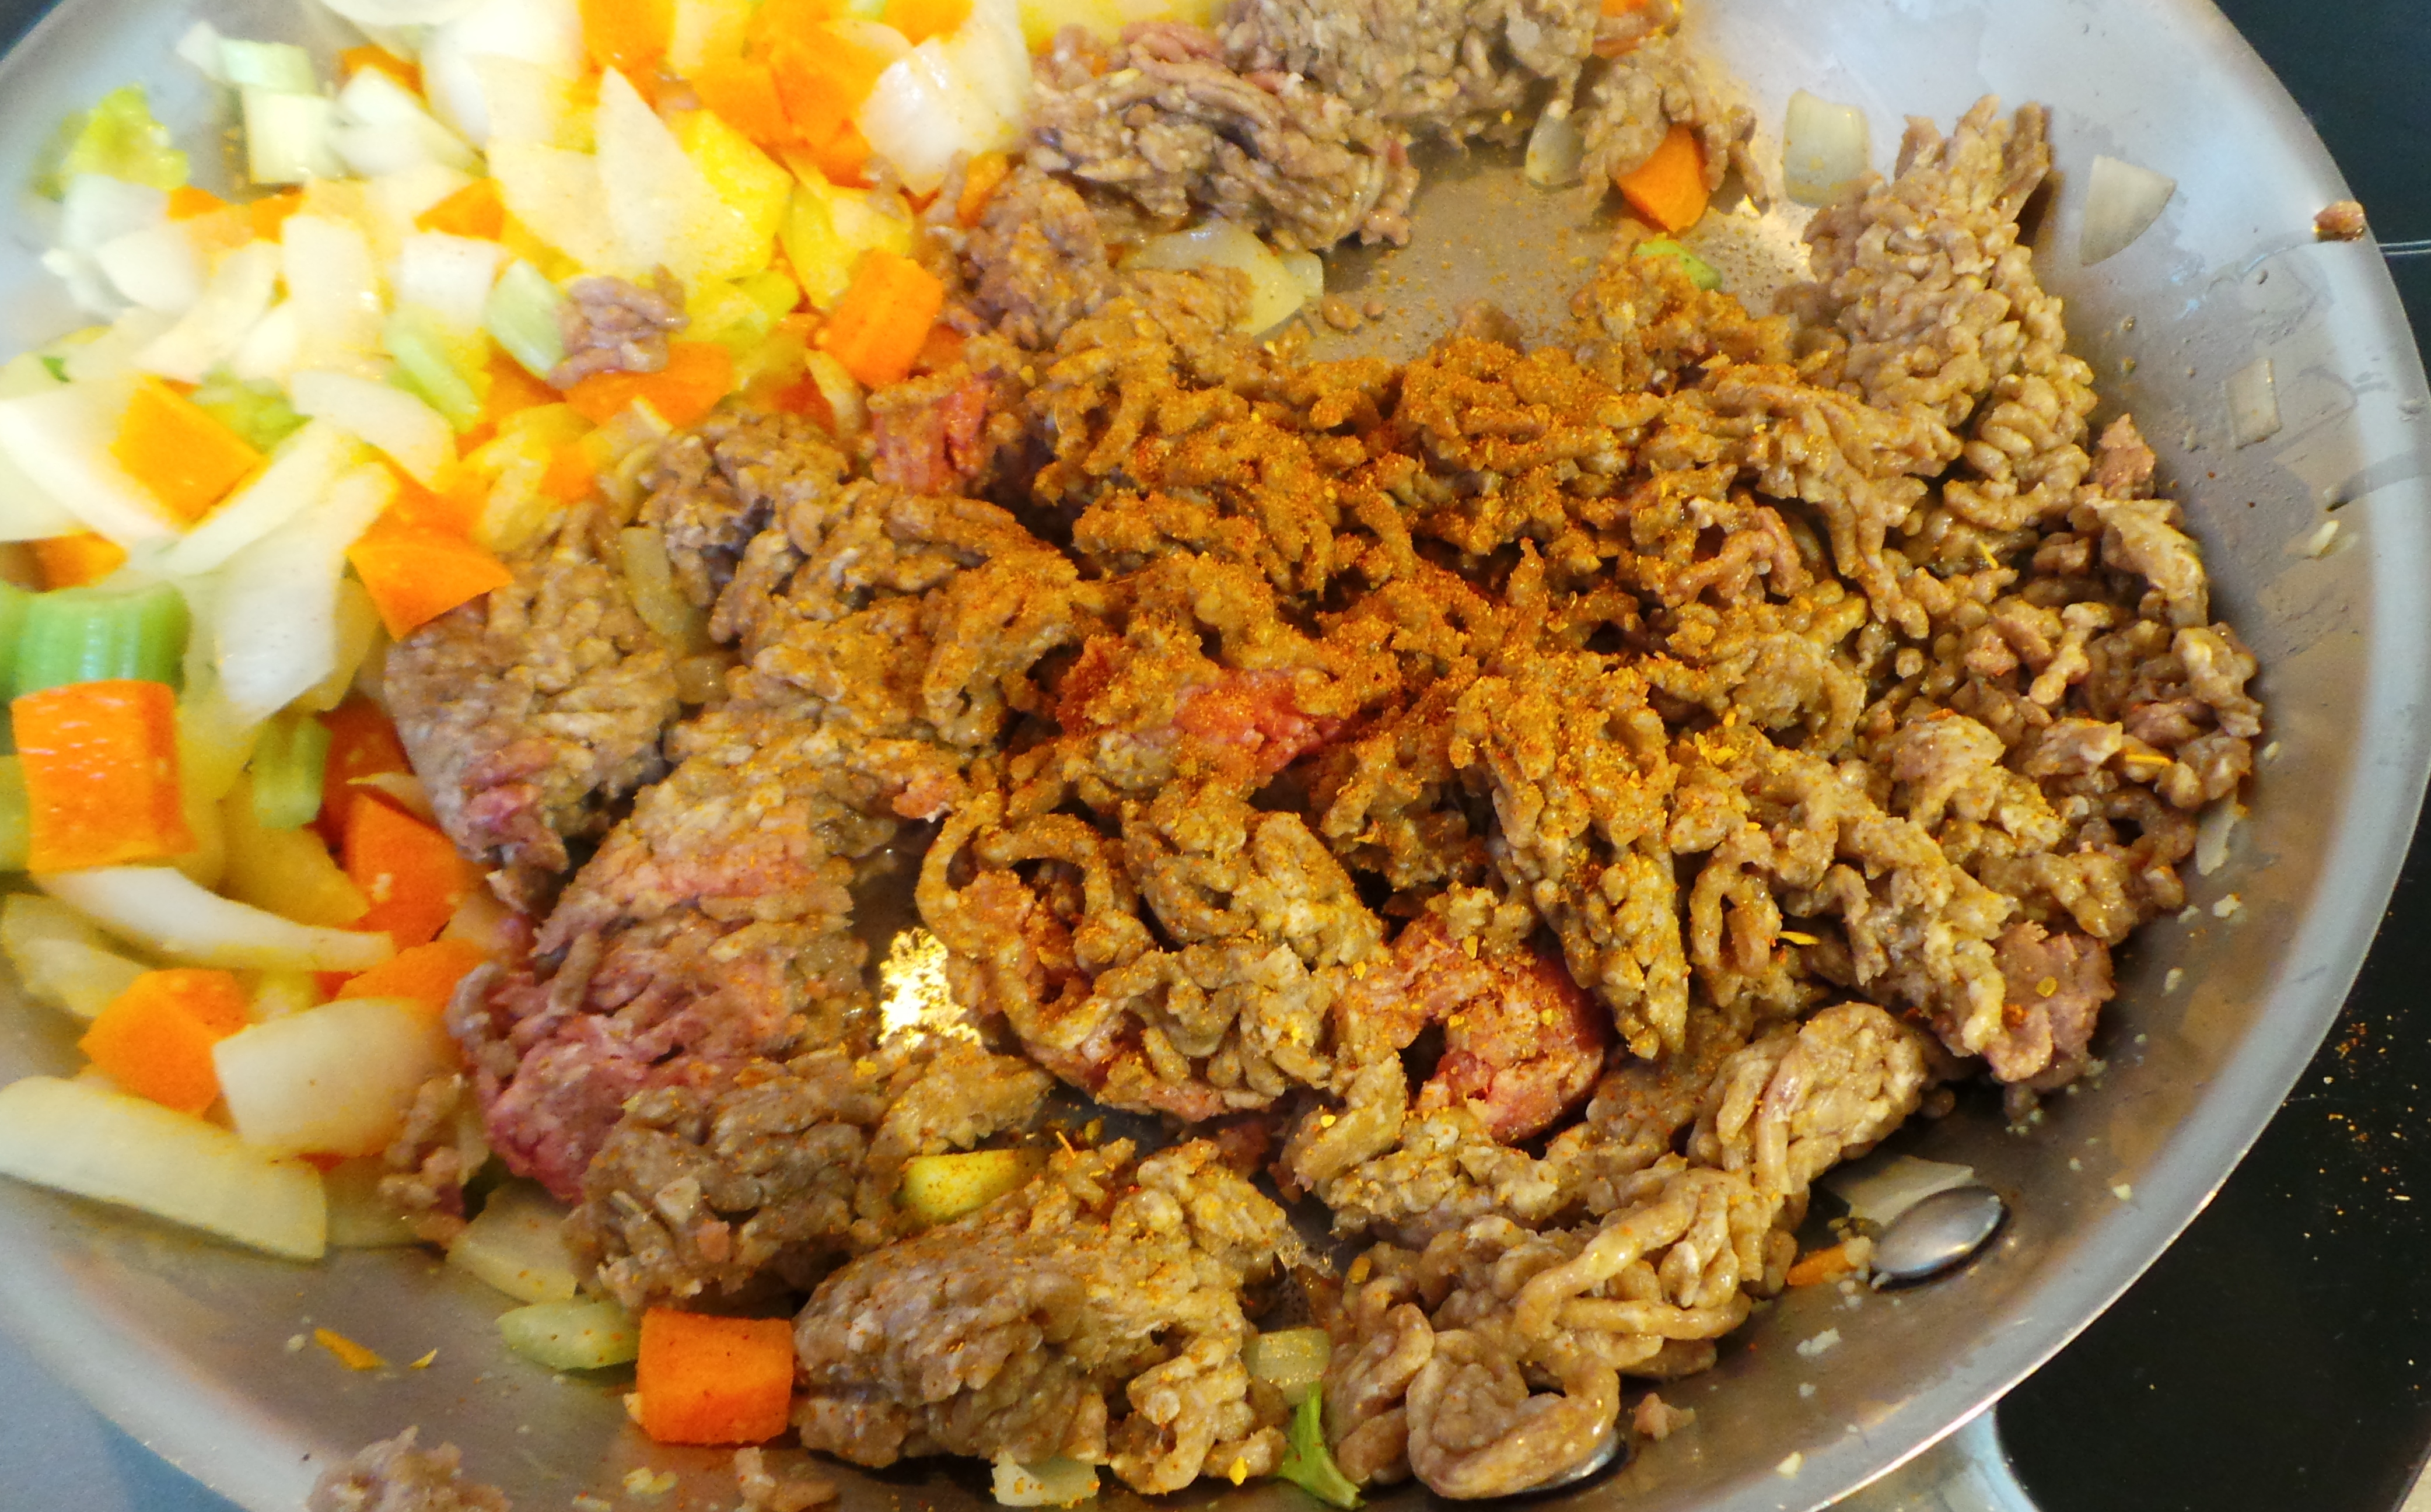
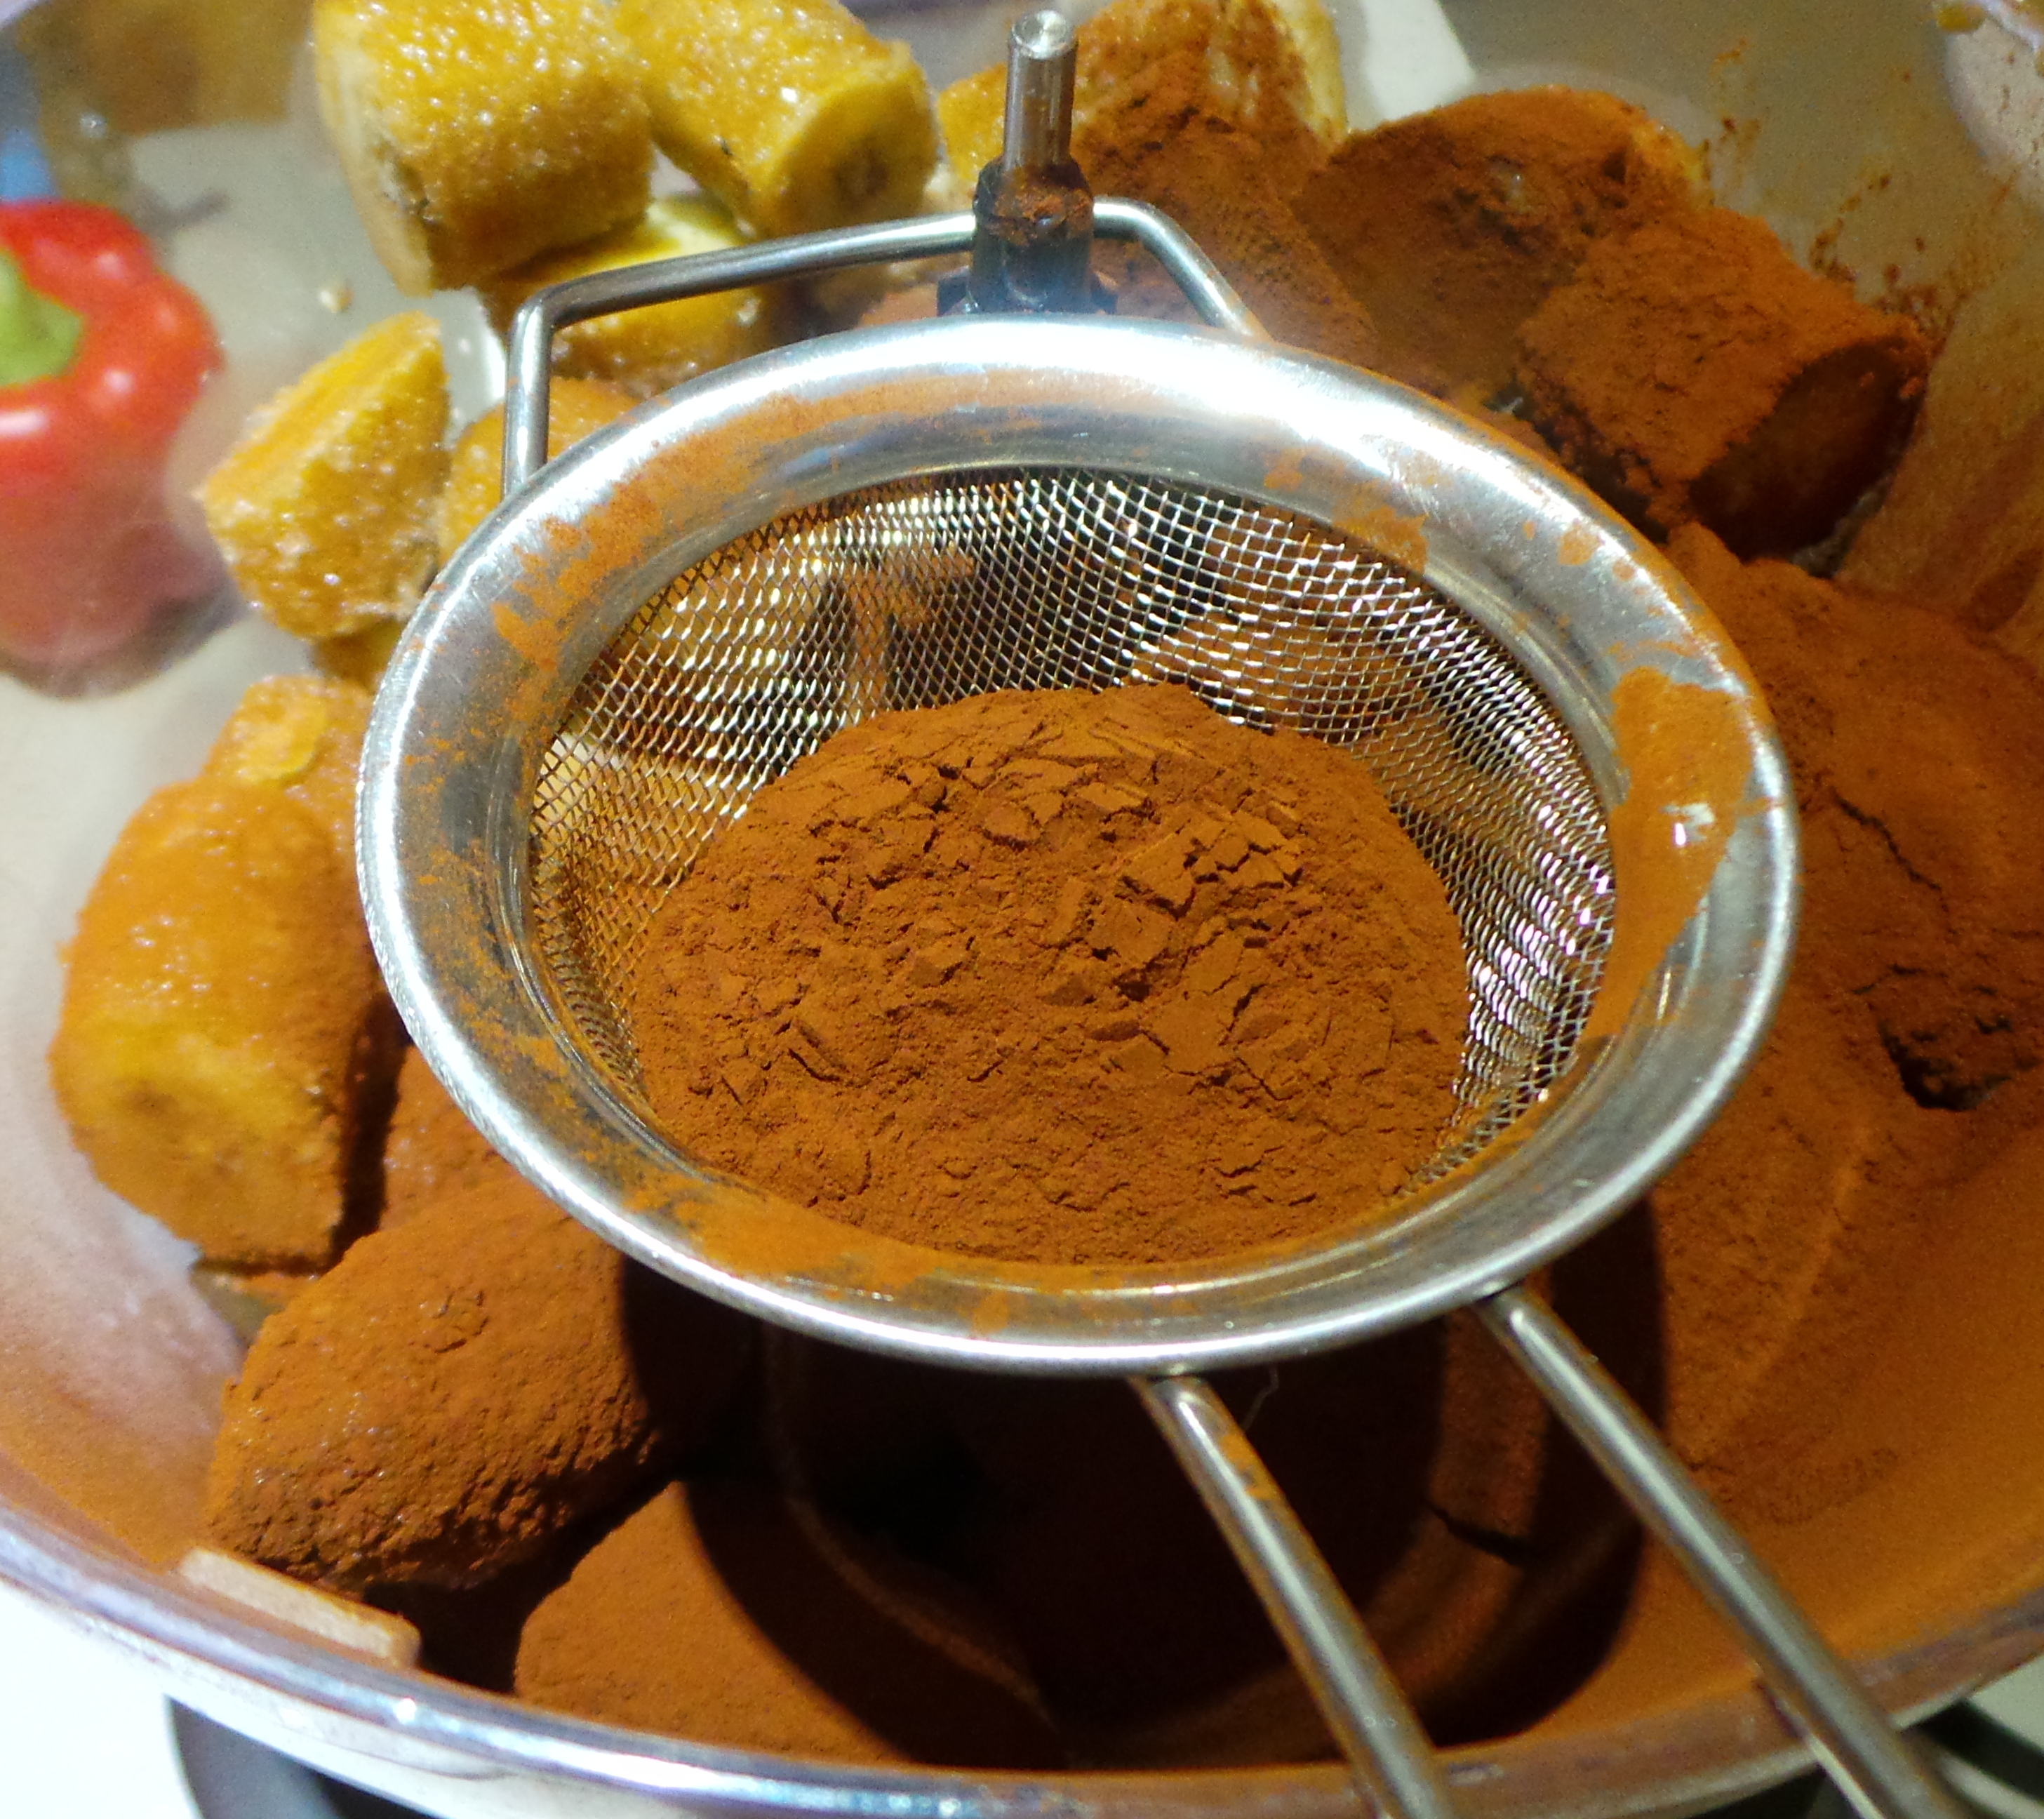
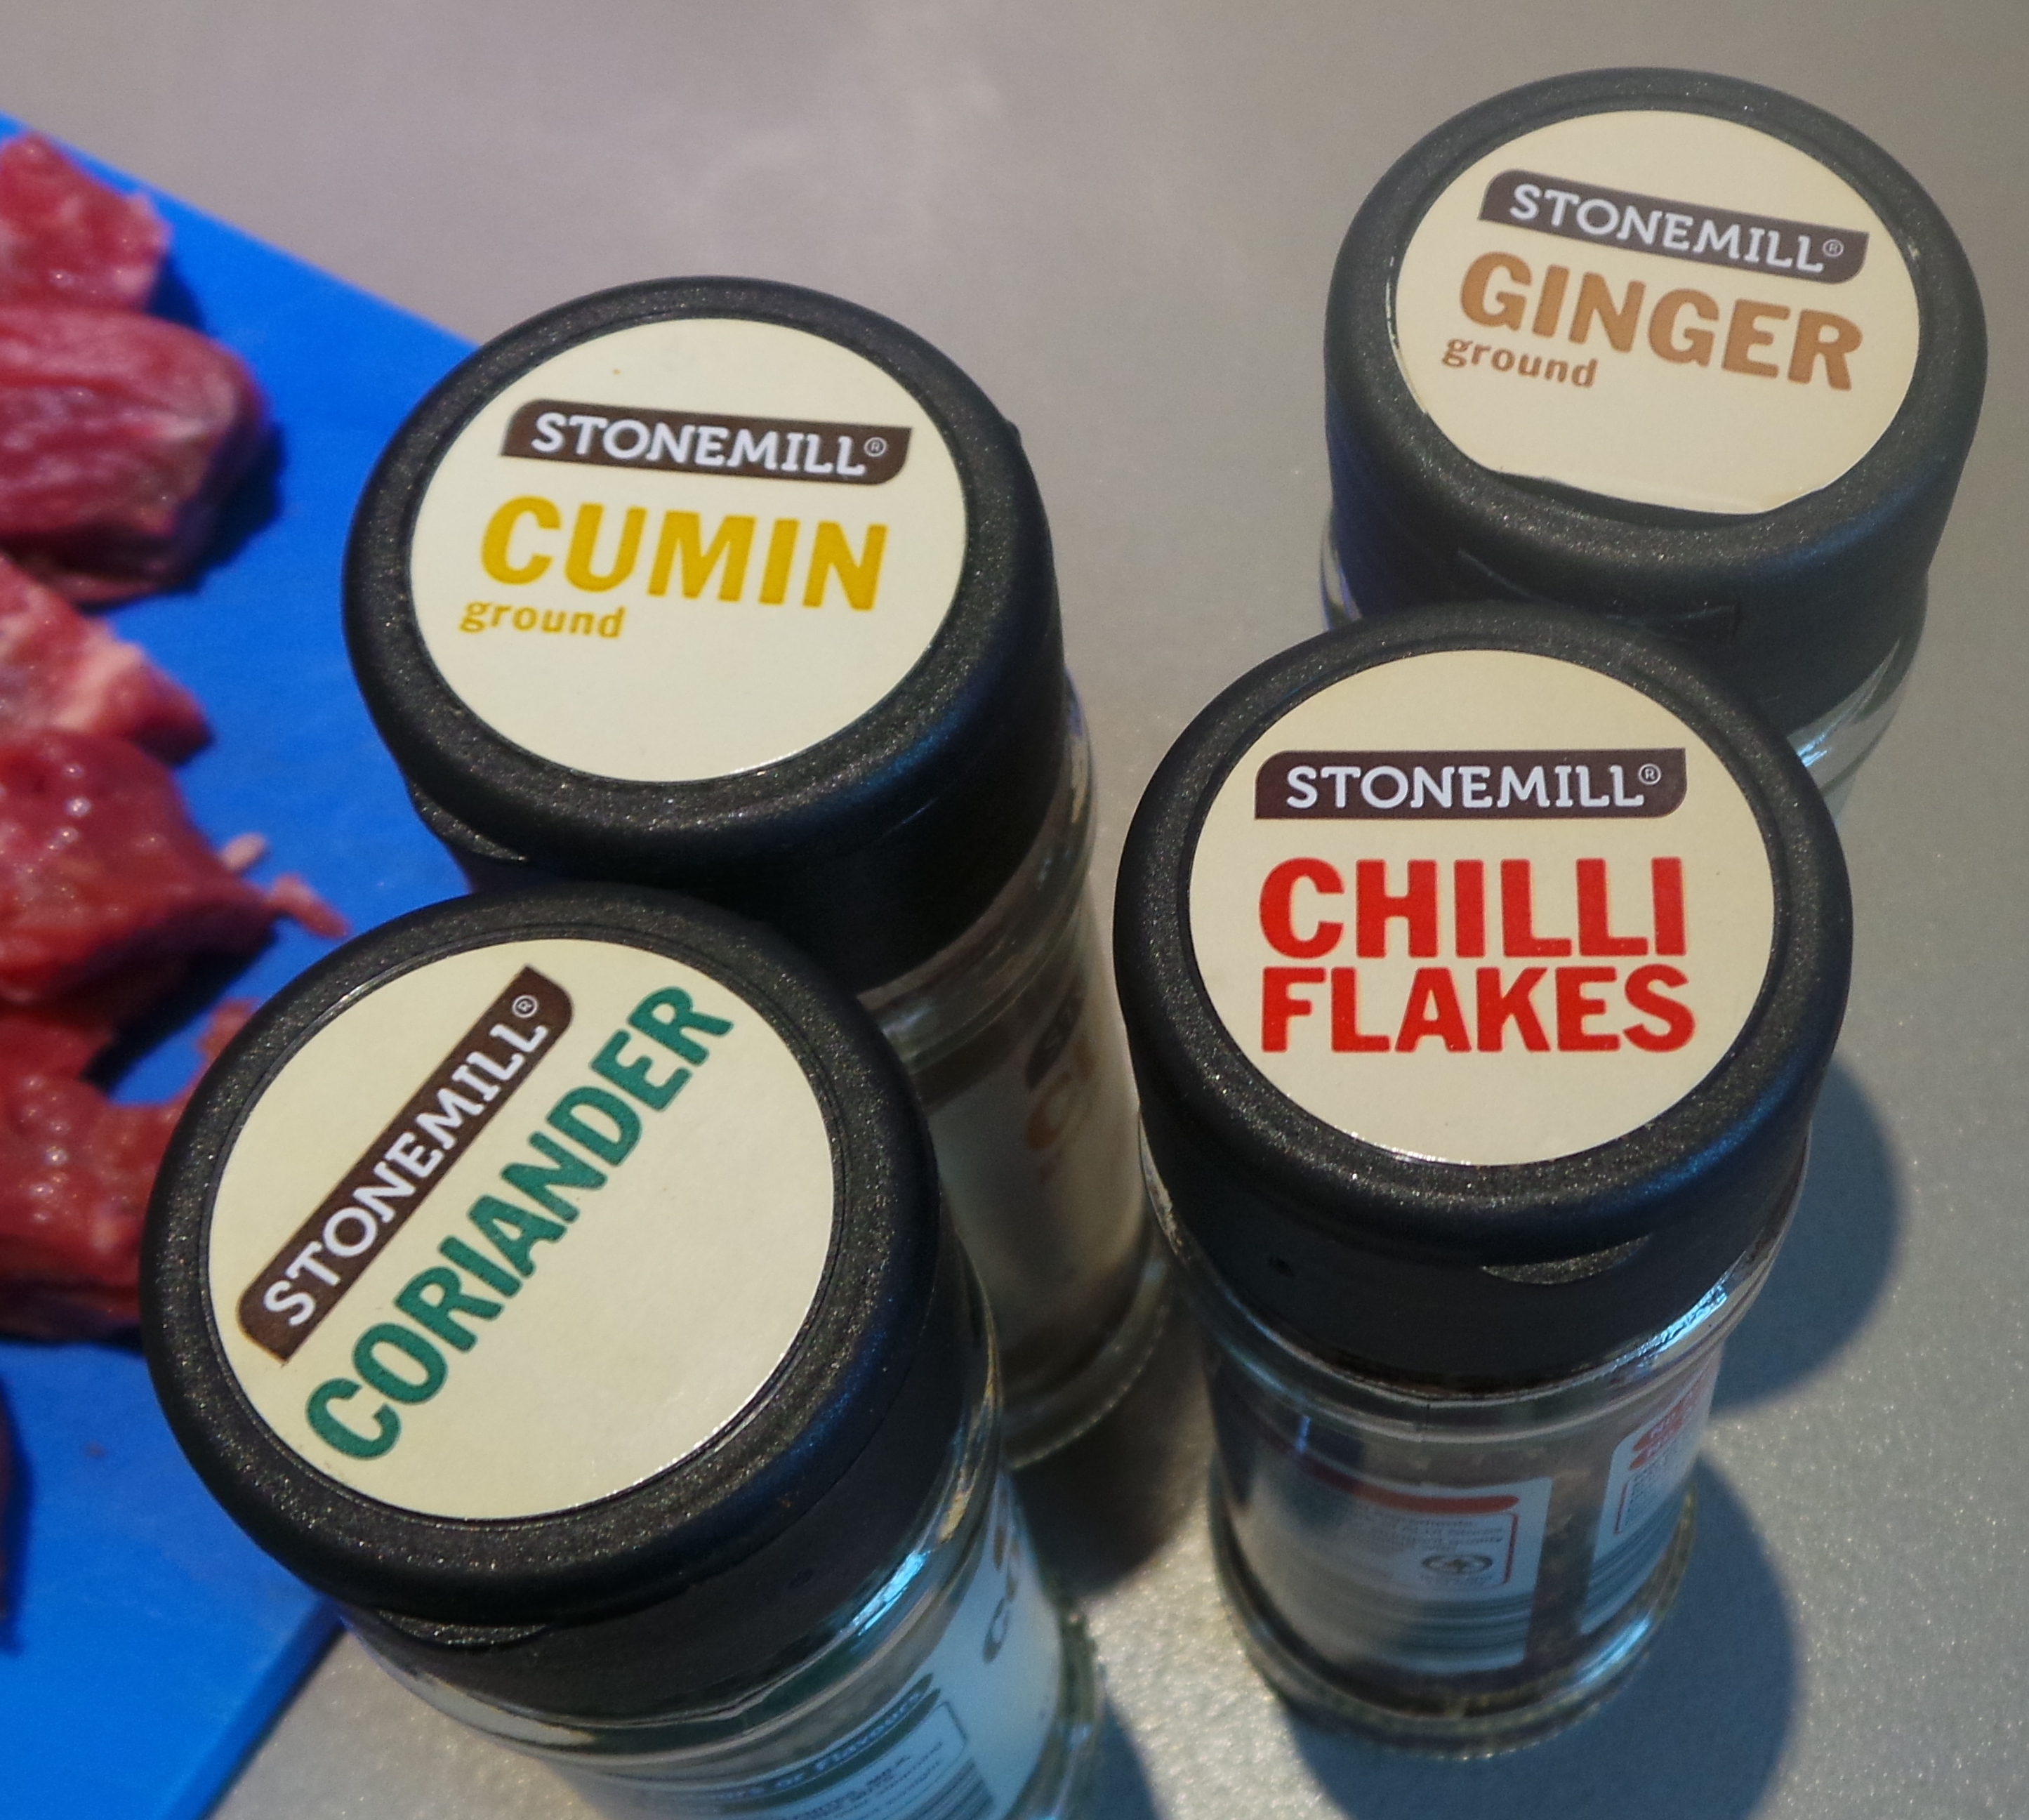
Add your spices to the meat on the cutting board. You can measure them carefully if you wish, I just tend to give each a good shake until I think the meat looks covered enough. I’ve had readers *demand* I give an actual measurement though, so start with a teaspoon of each and then decide if future versions need more or less. It’s completely up to you.

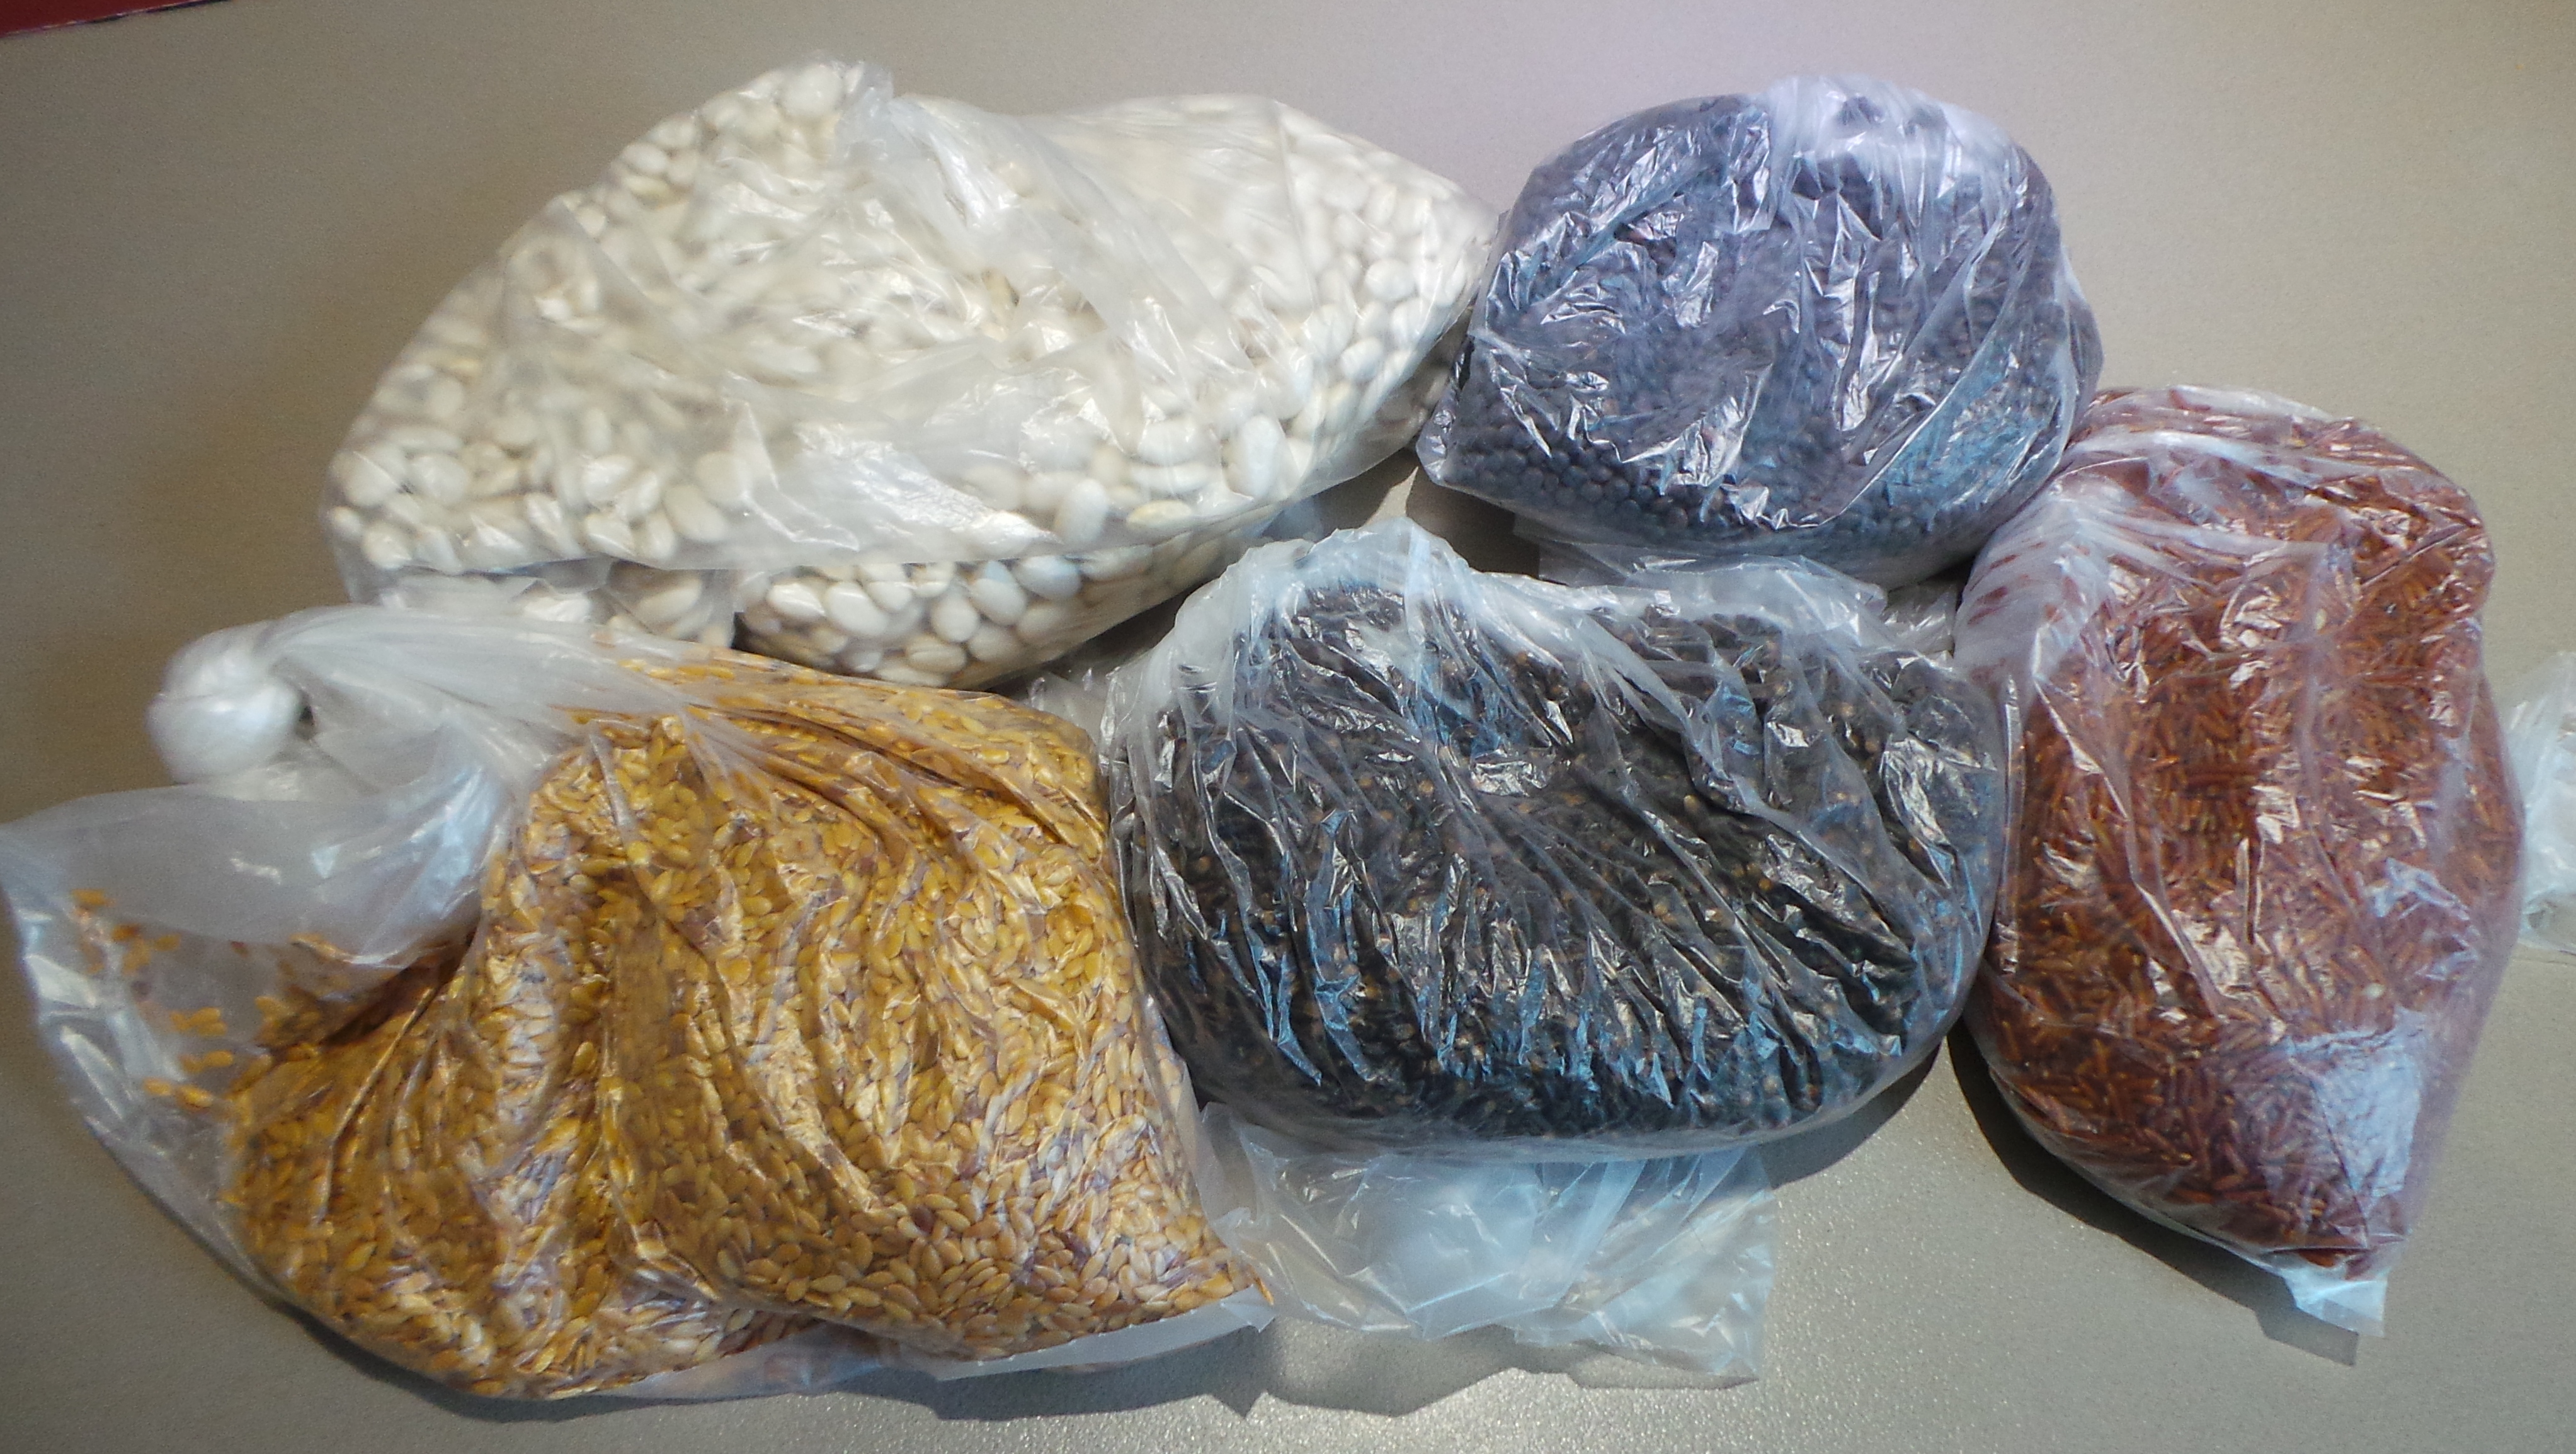
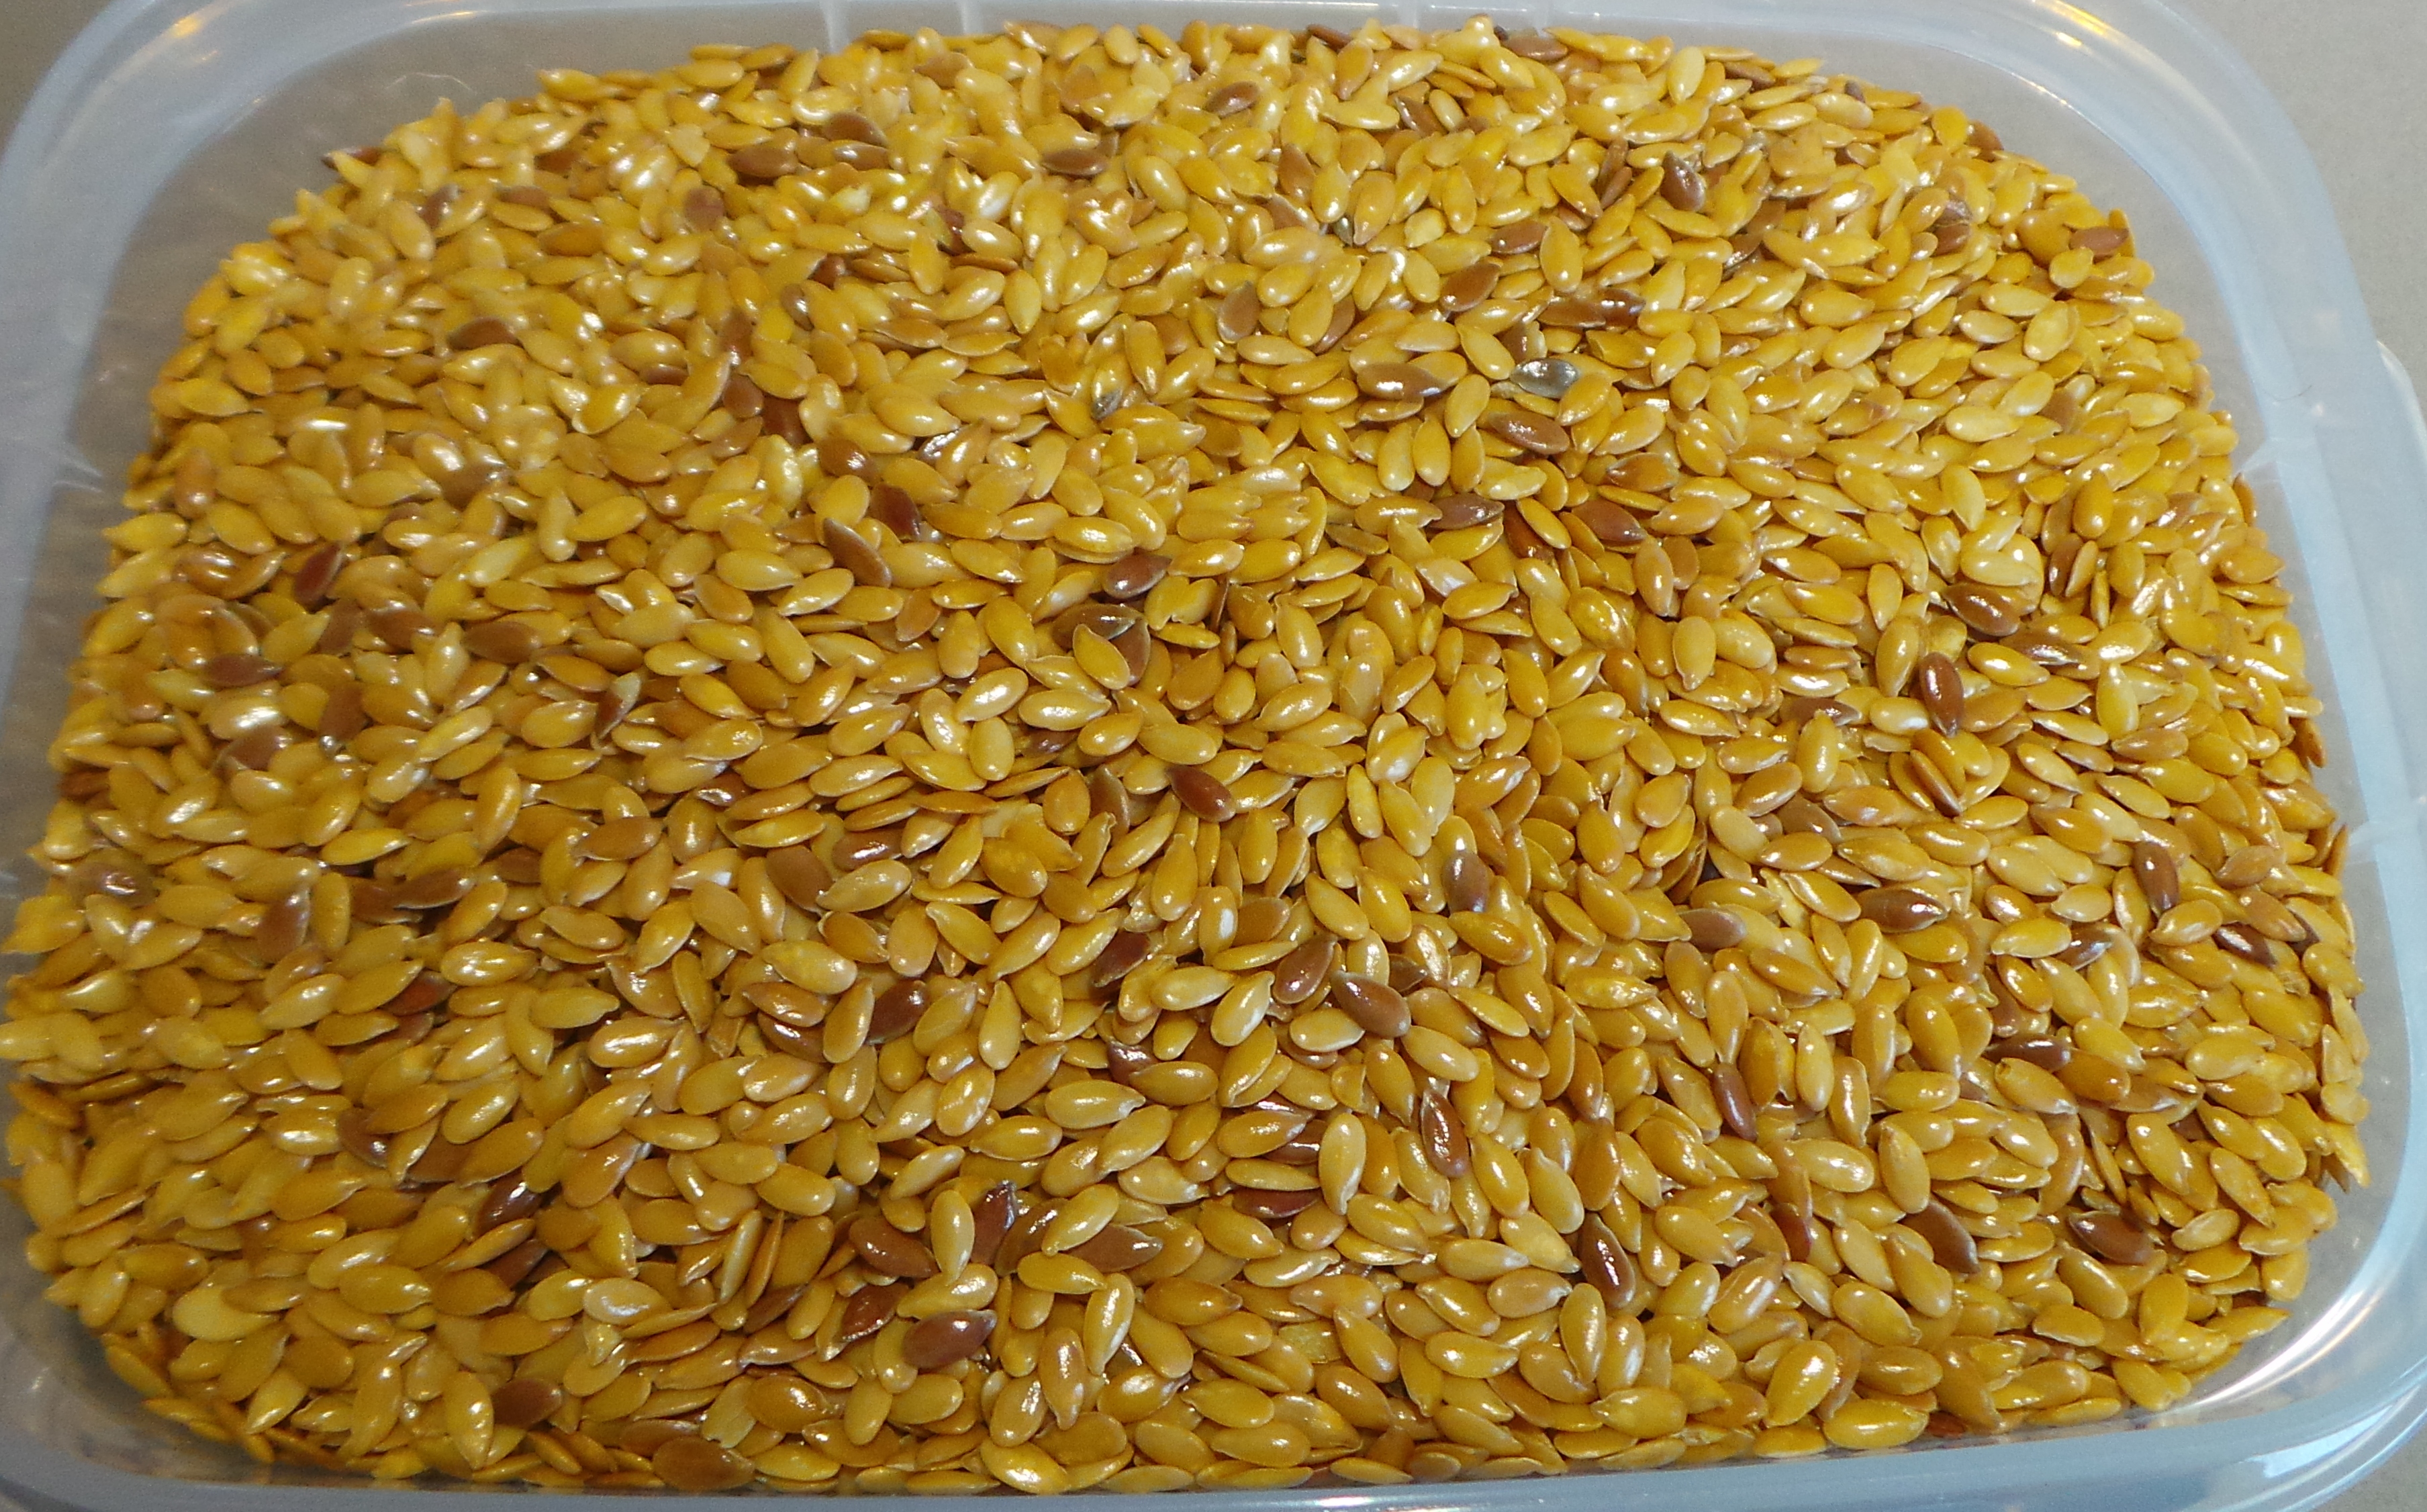
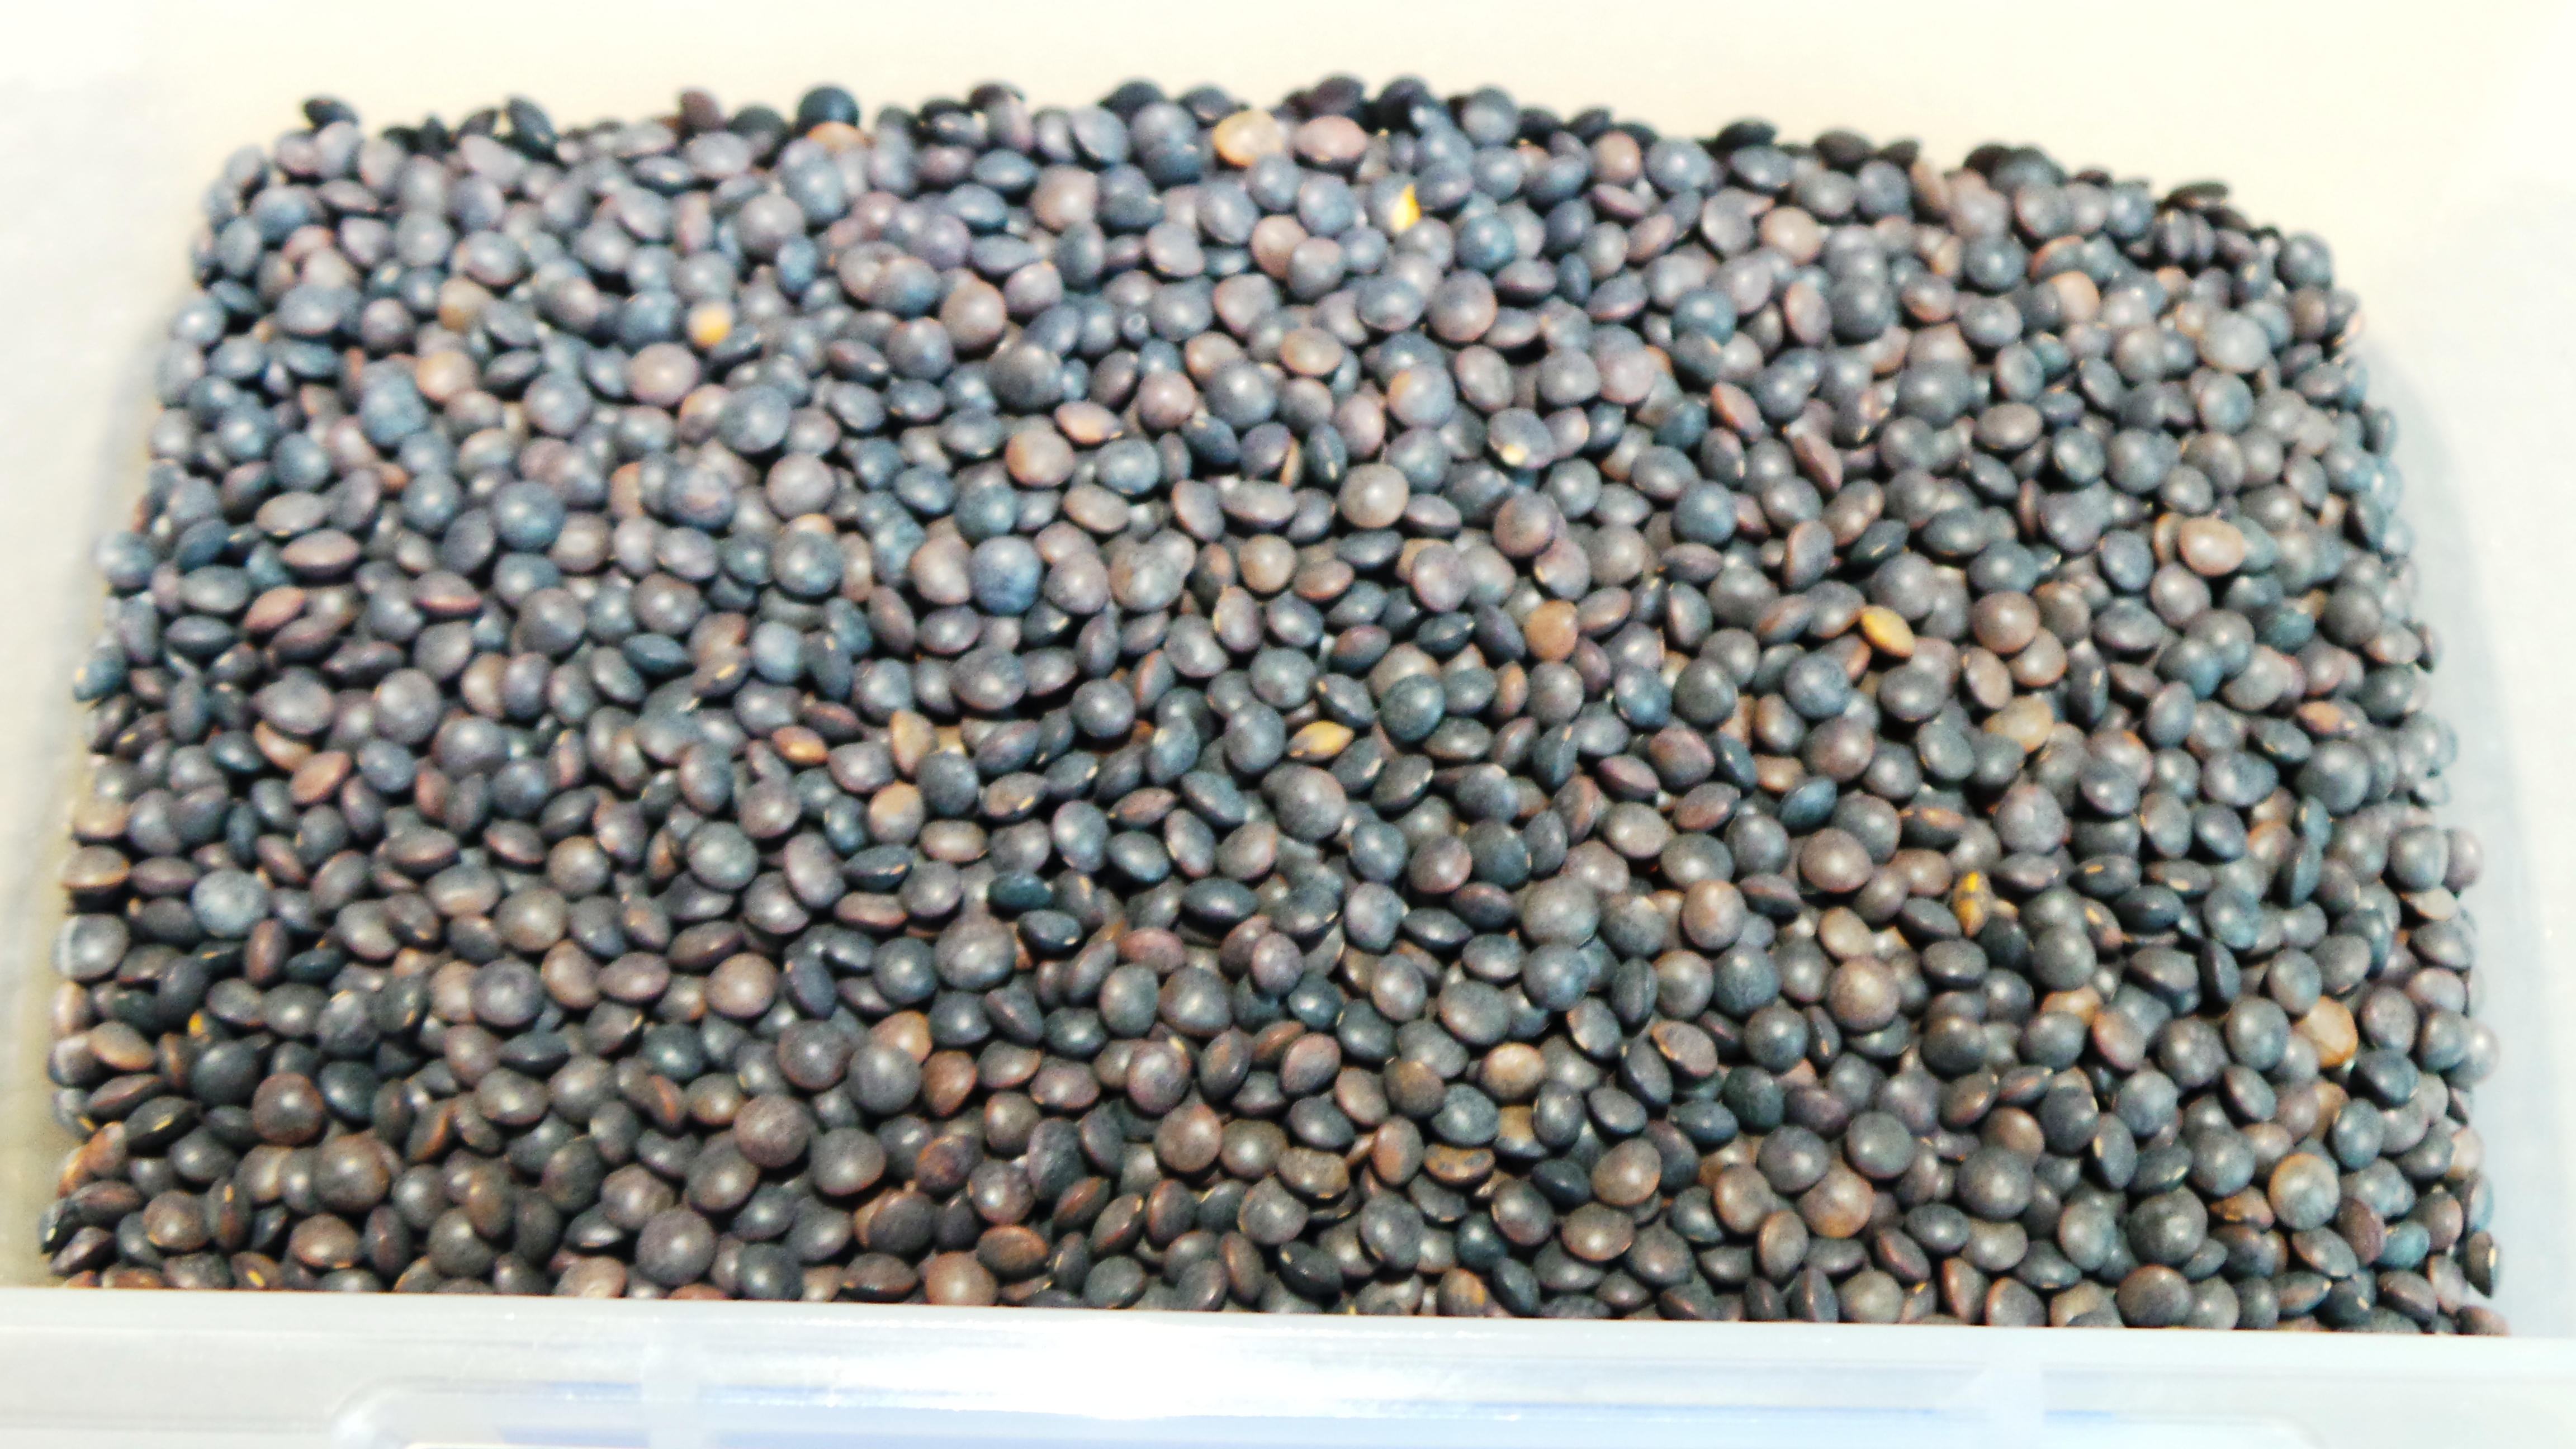
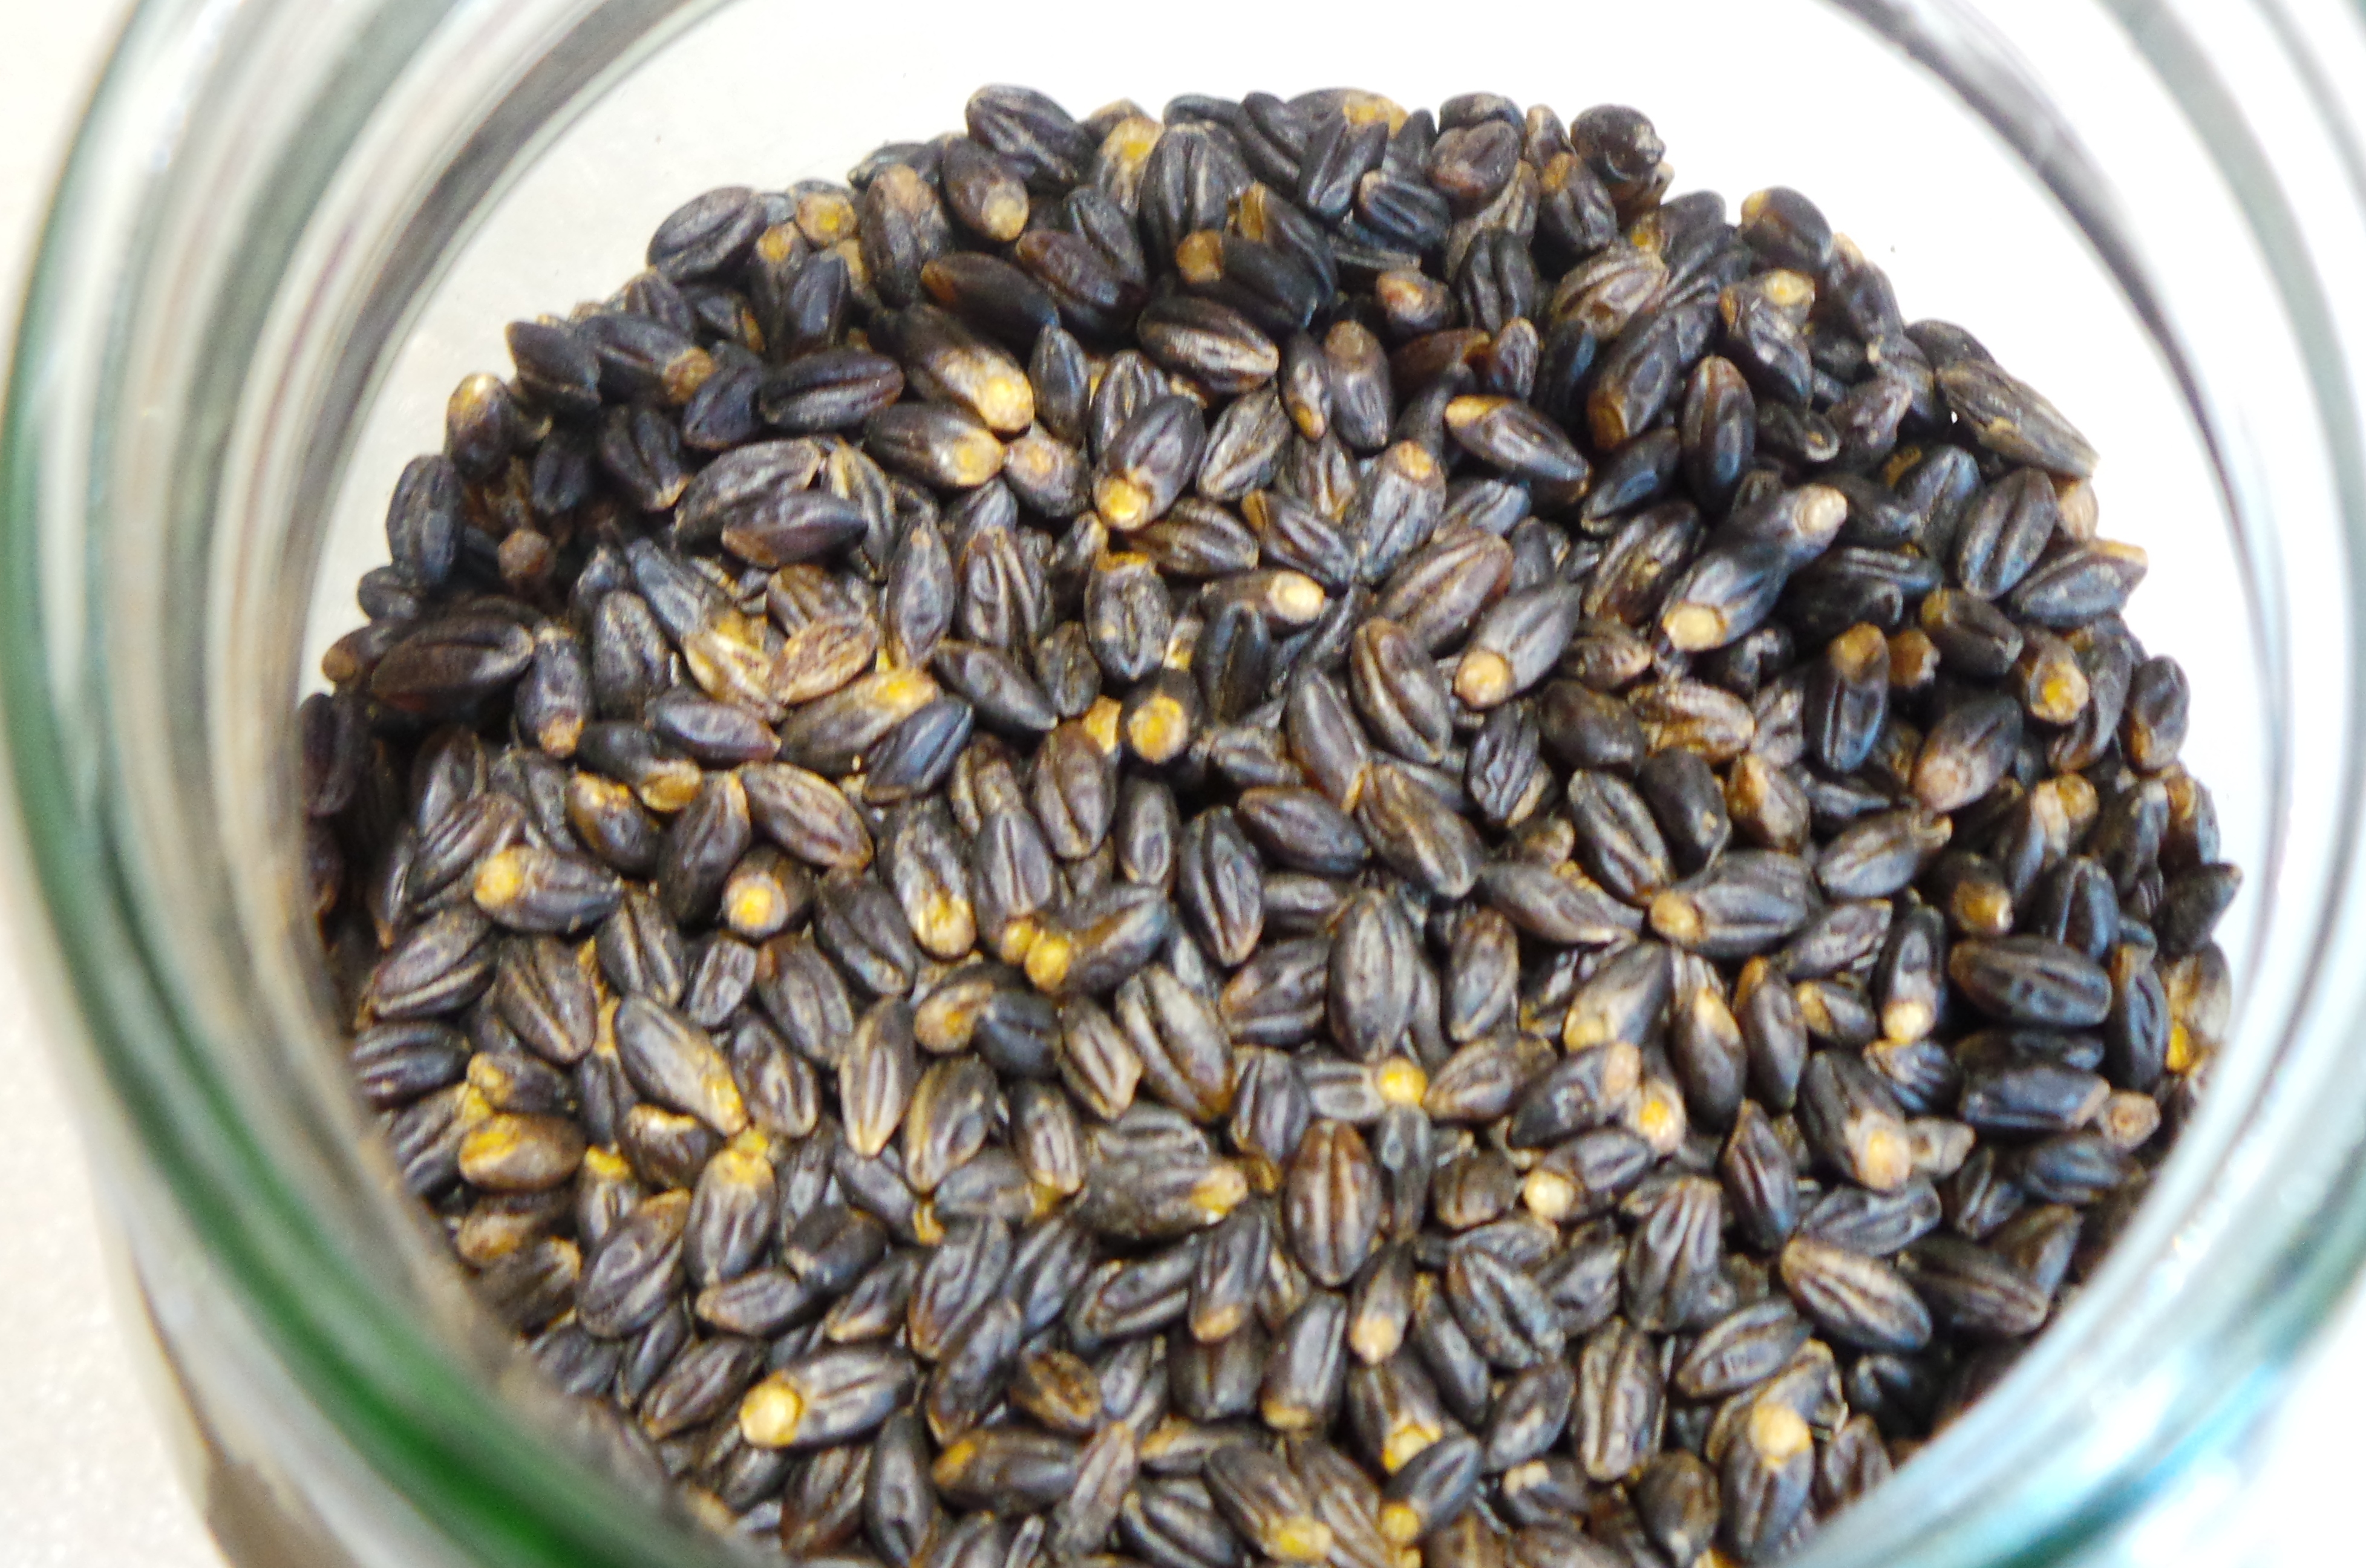
I used these spices:

This is a nice blend of flavours

This is a nice blend of flavours

I find ground cumin, ground coriander and ground ginger combine really well as an accompaniment to beef. It’s a combination that you’ll find often on these pages, but that doesn’t mean you have to use them. If you don’t like ginger, leave it out, it’s your meal after all.

On the other hand, if you are new to this cooking lark, give it a shot and see how you go. You never know, it may win you over.

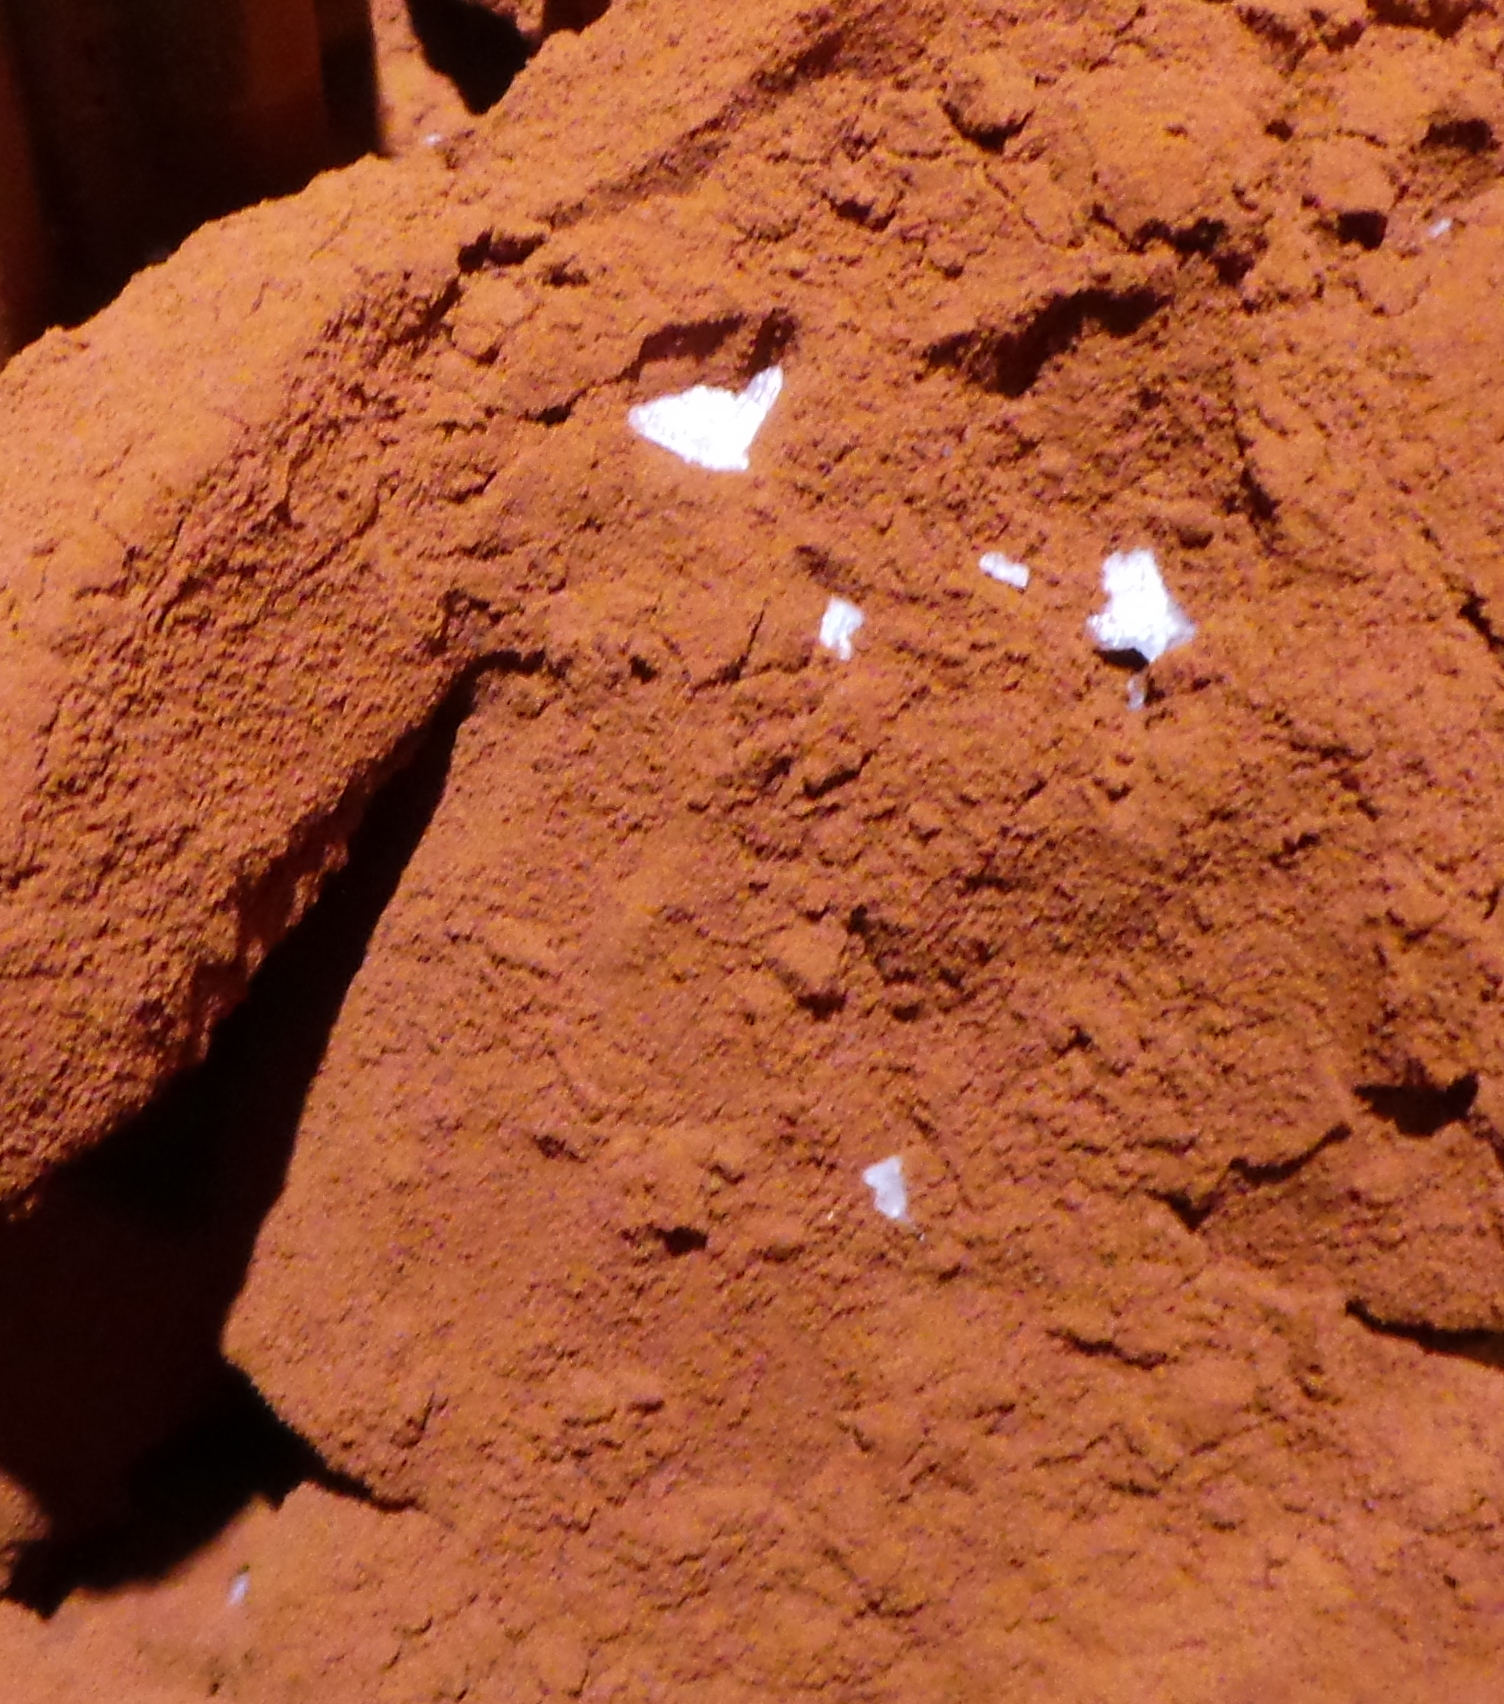
I add a smattering of chilli flakes just to add a little heat without taking over the dish. I find it easier to control how much I dispense by shaking when I use flakes, chilli powder can be disastrous …

Spice your meat

Spice your meat

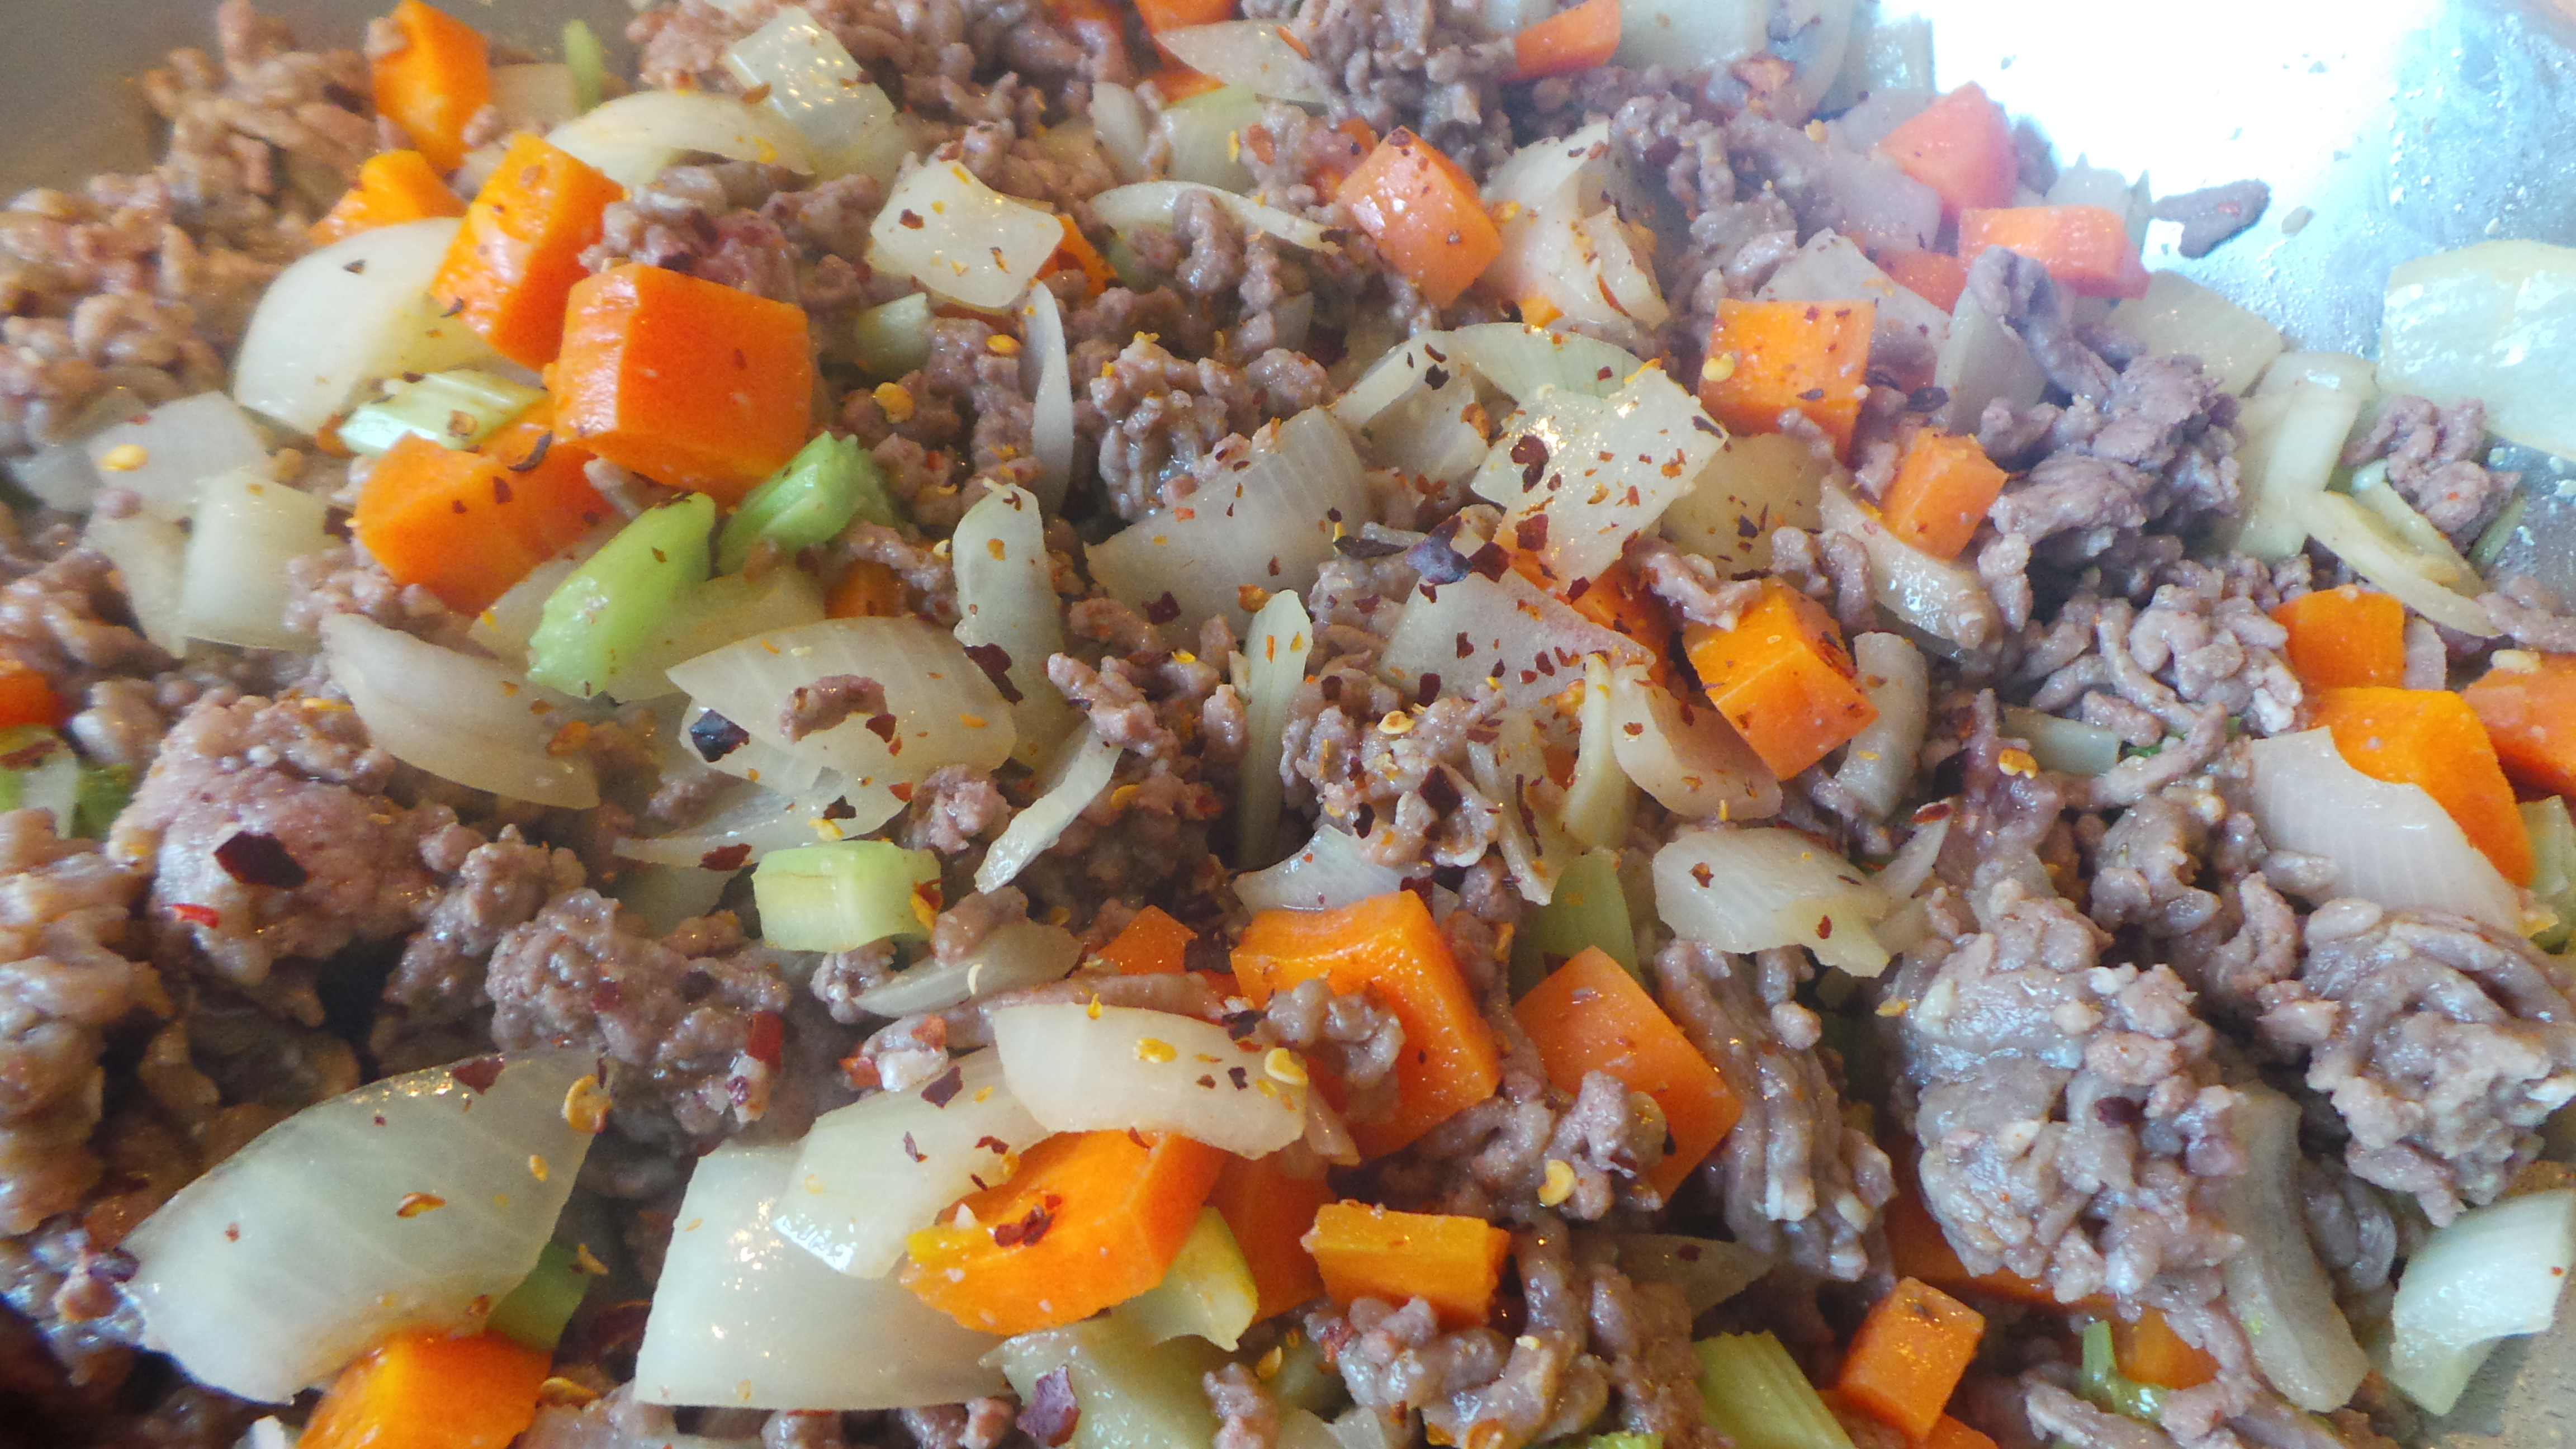
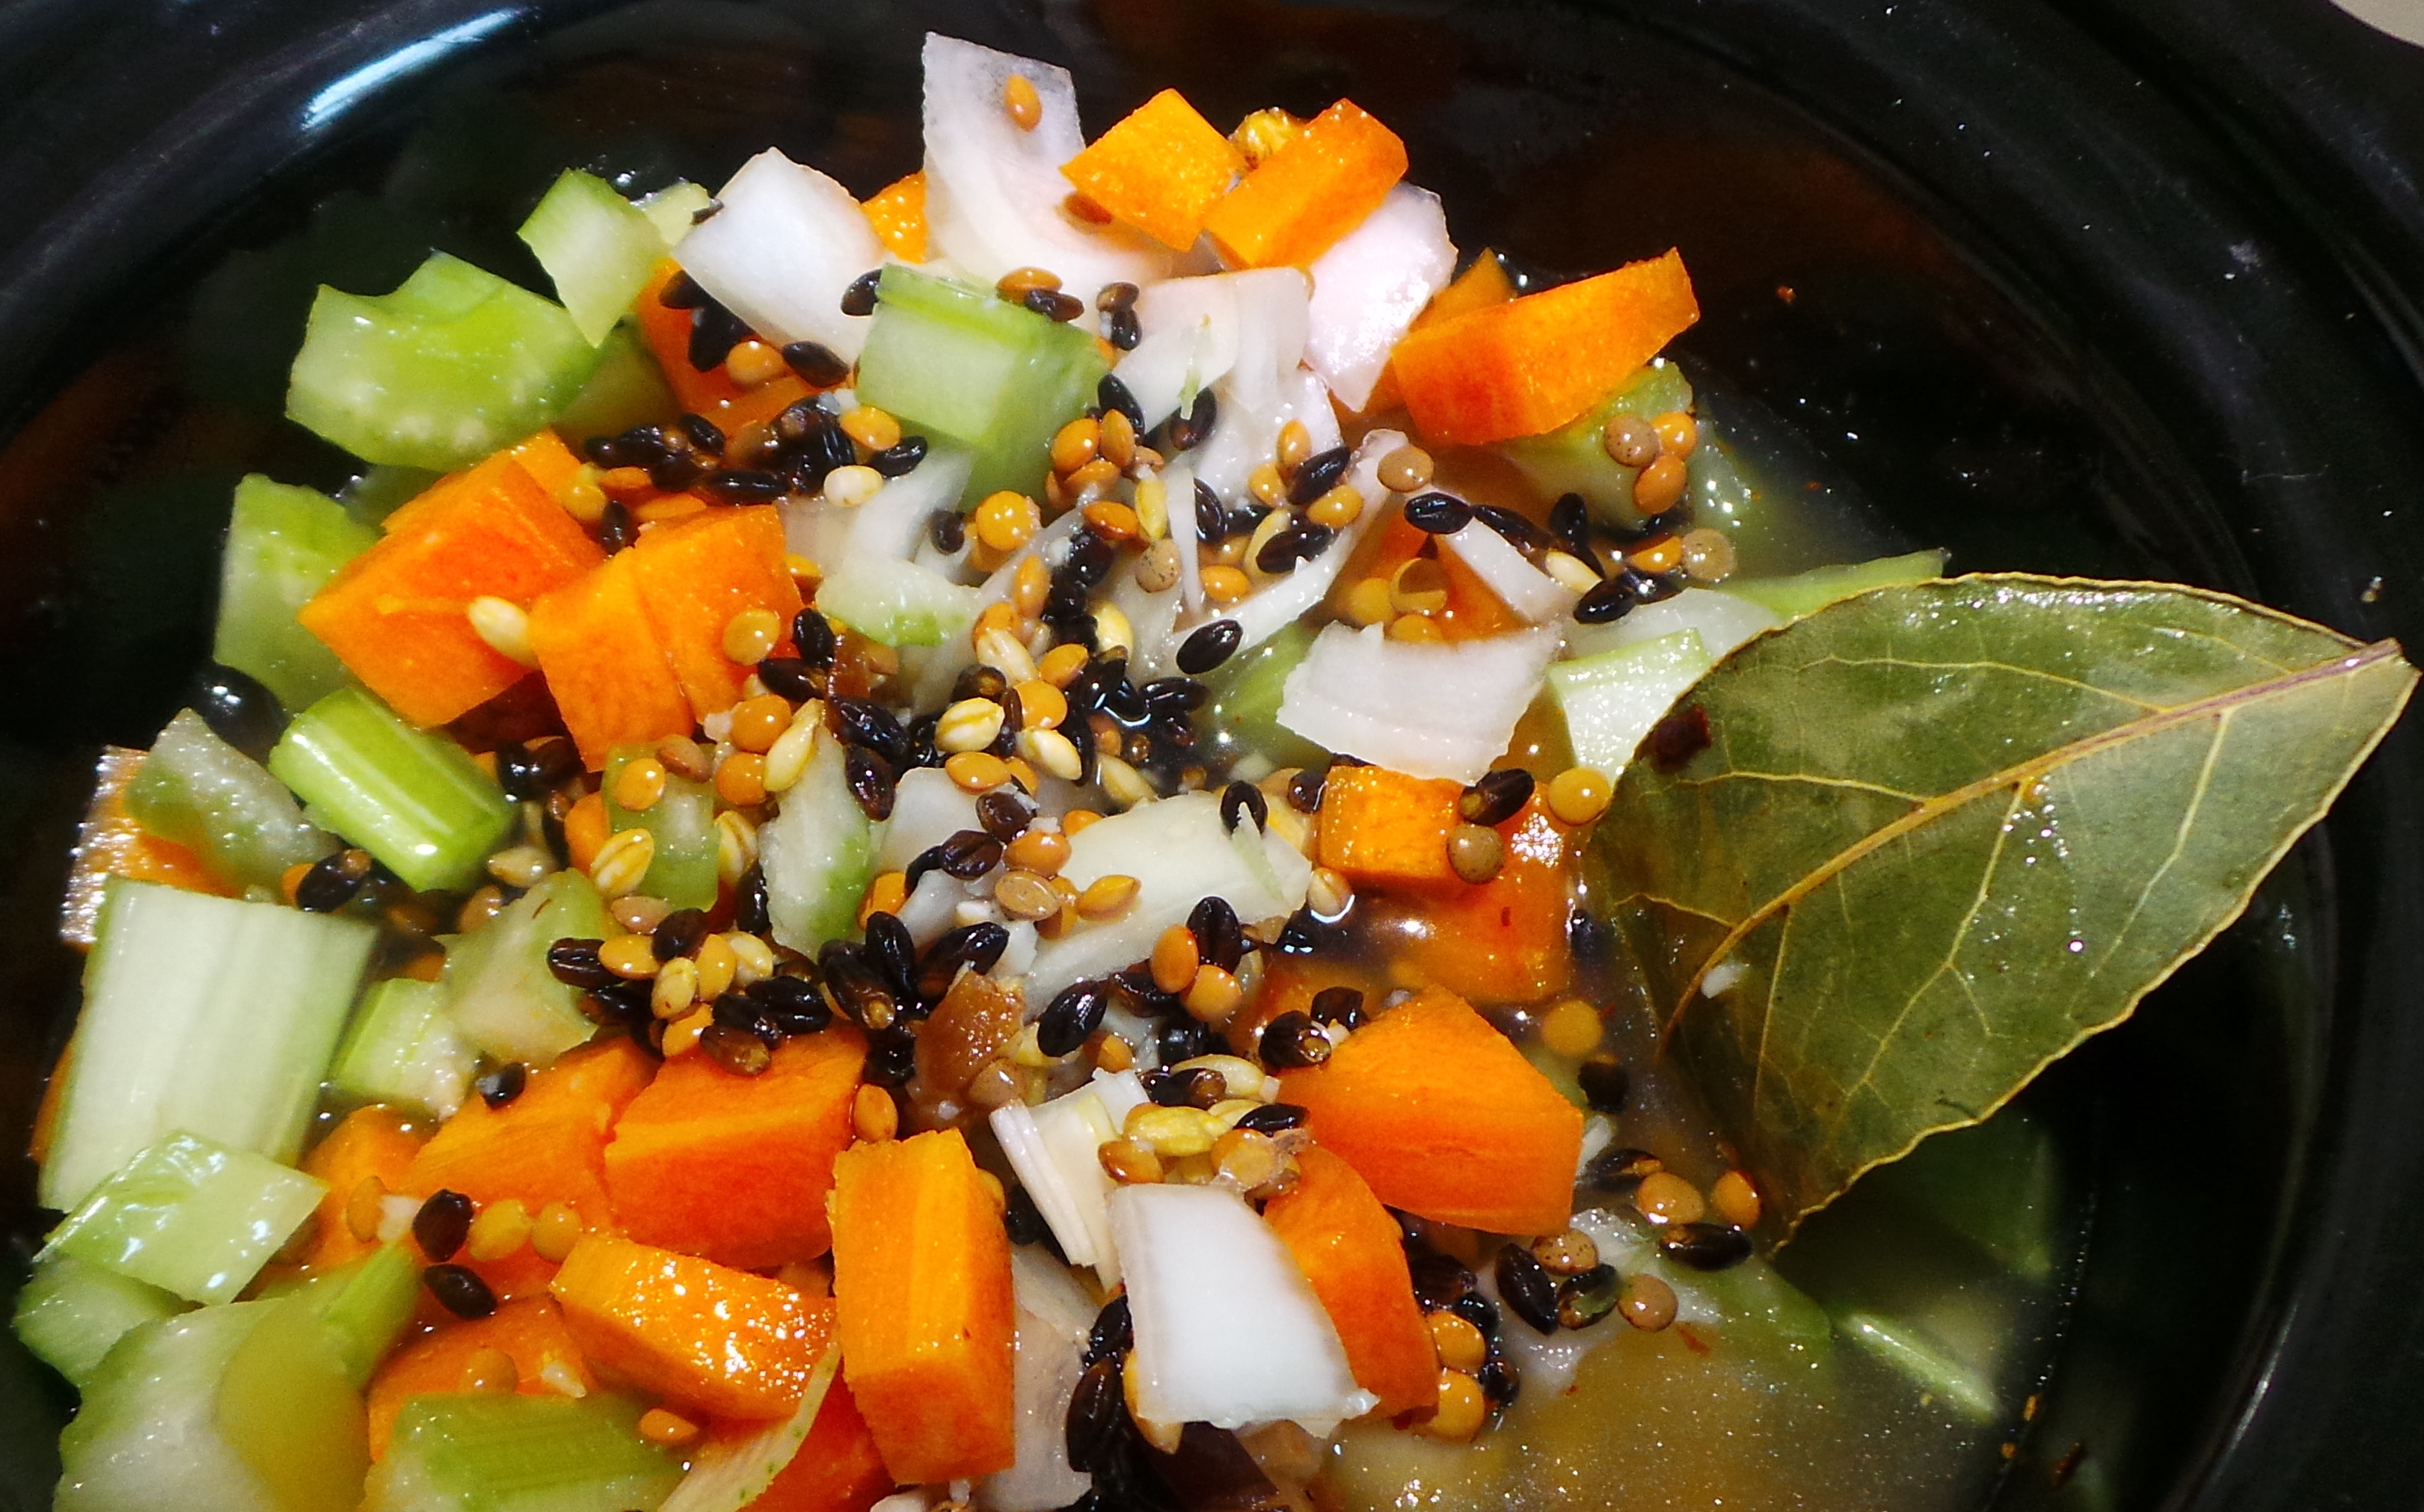
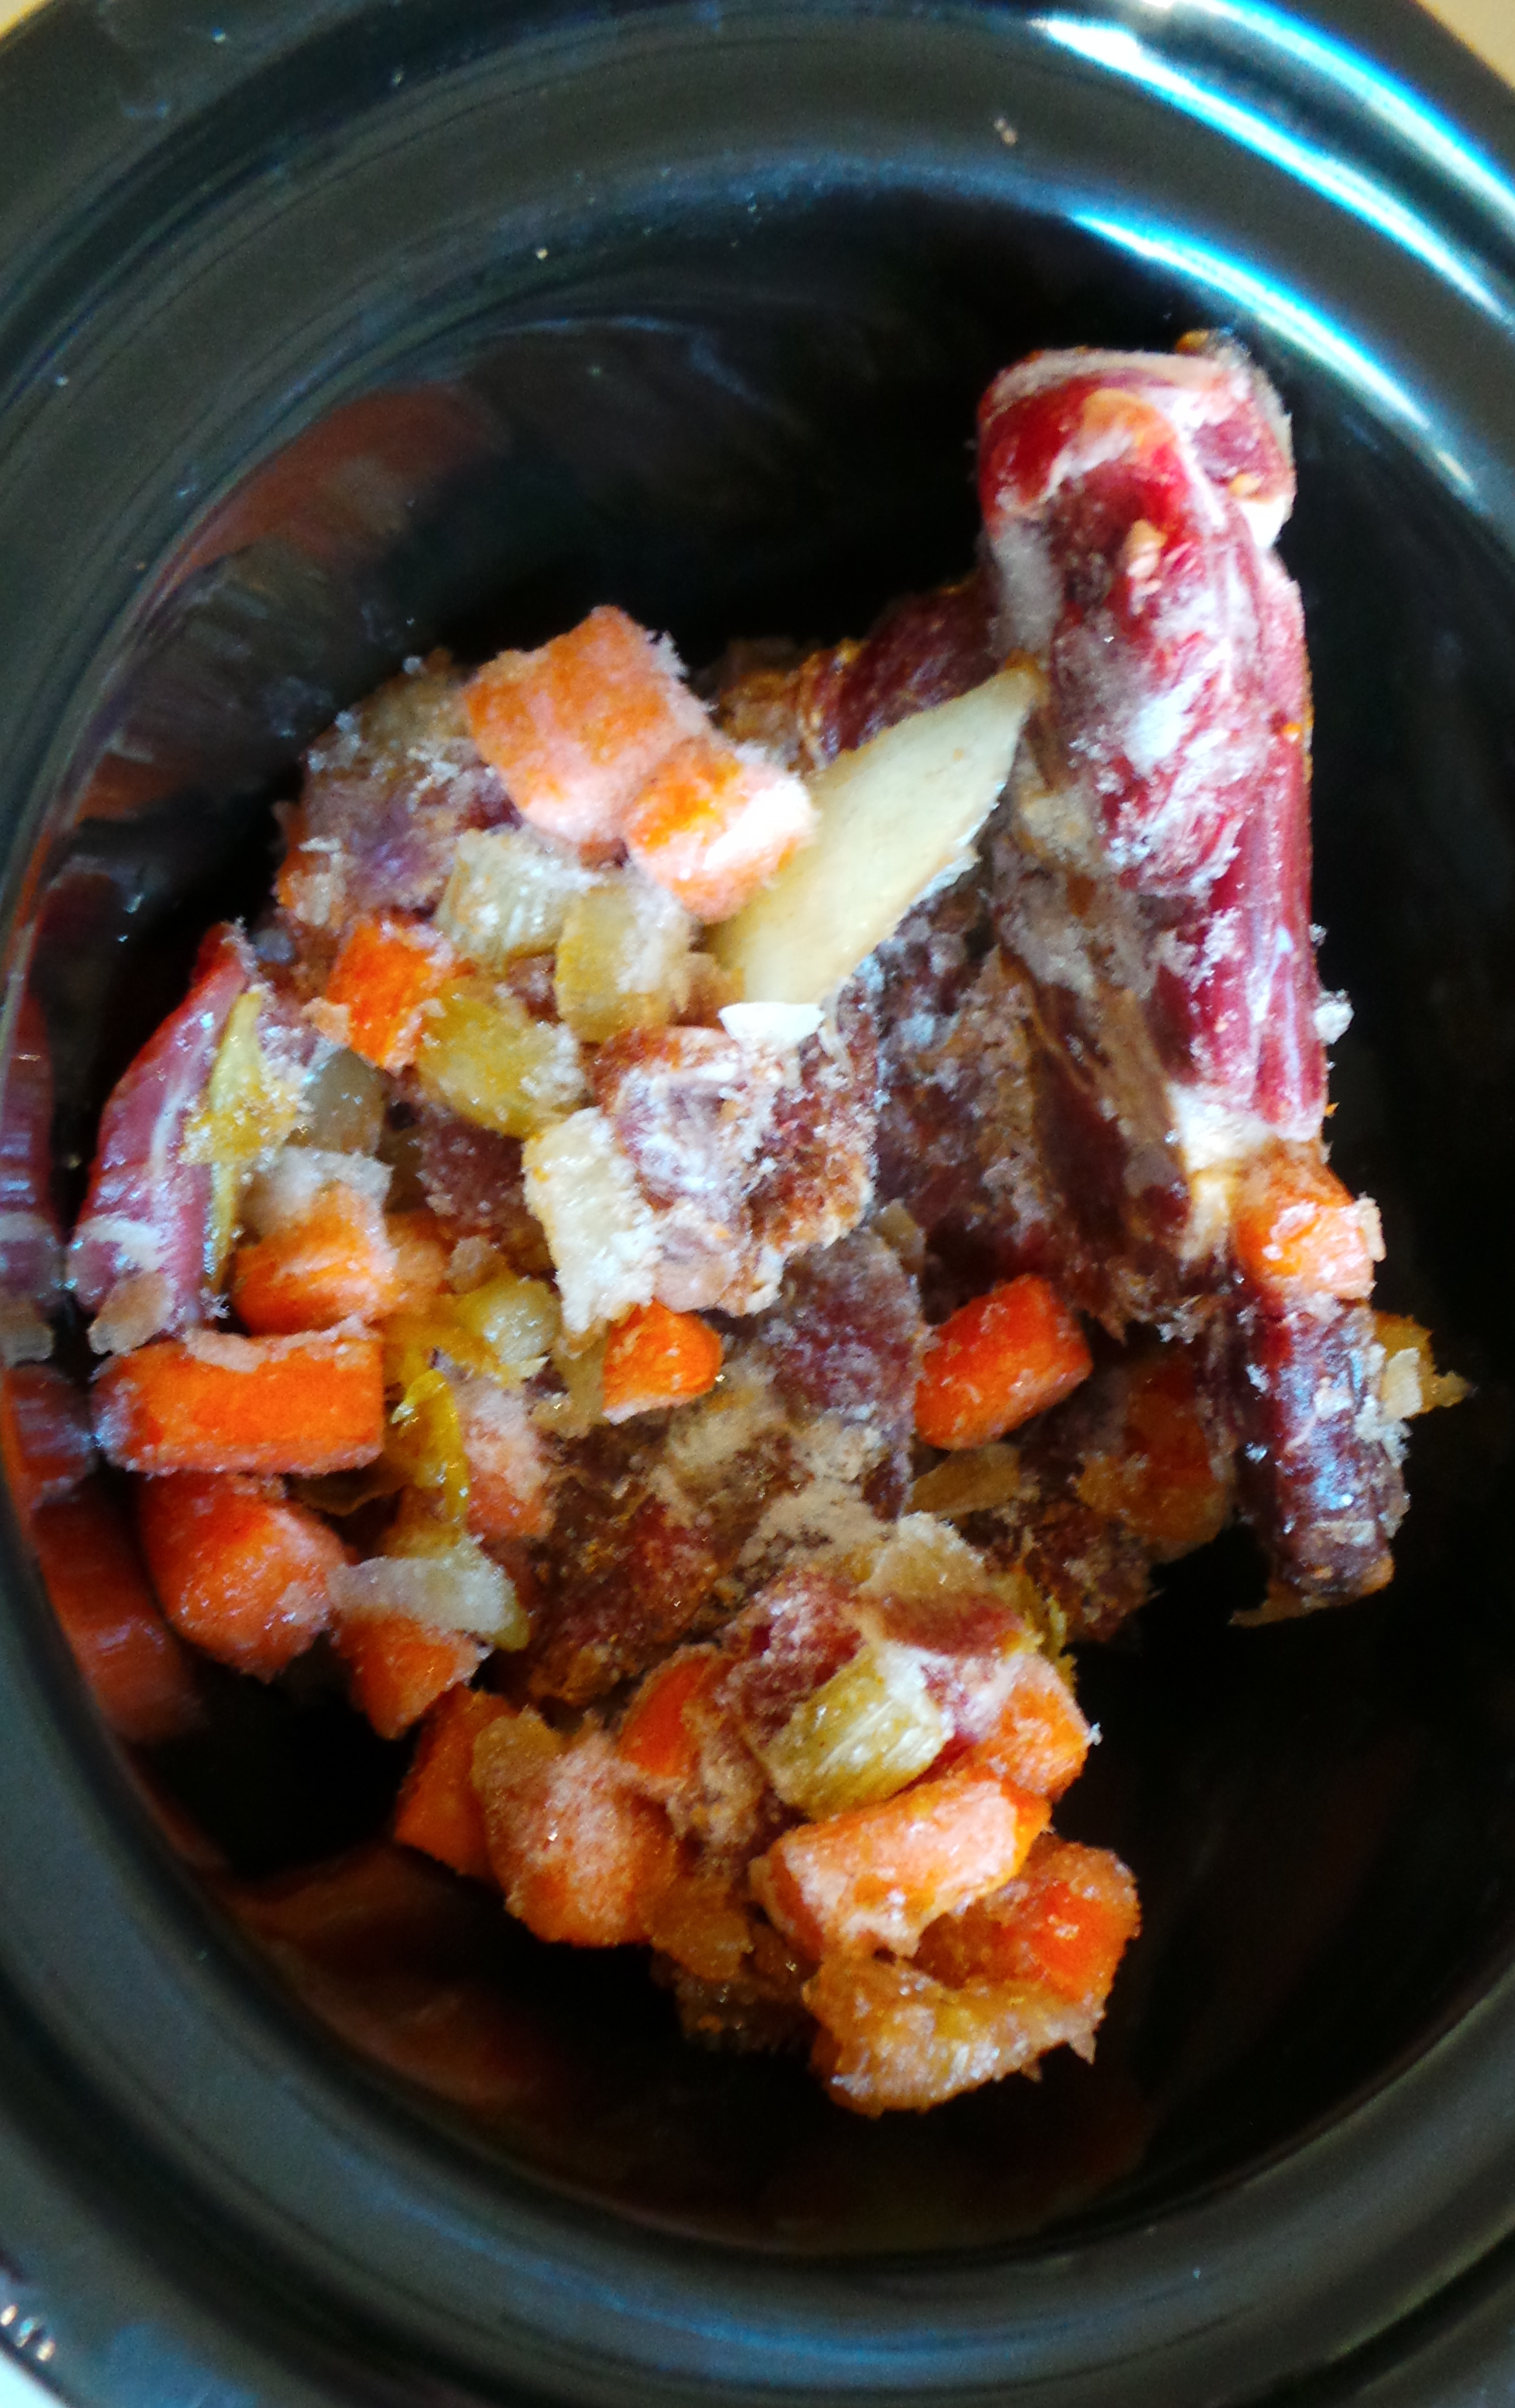
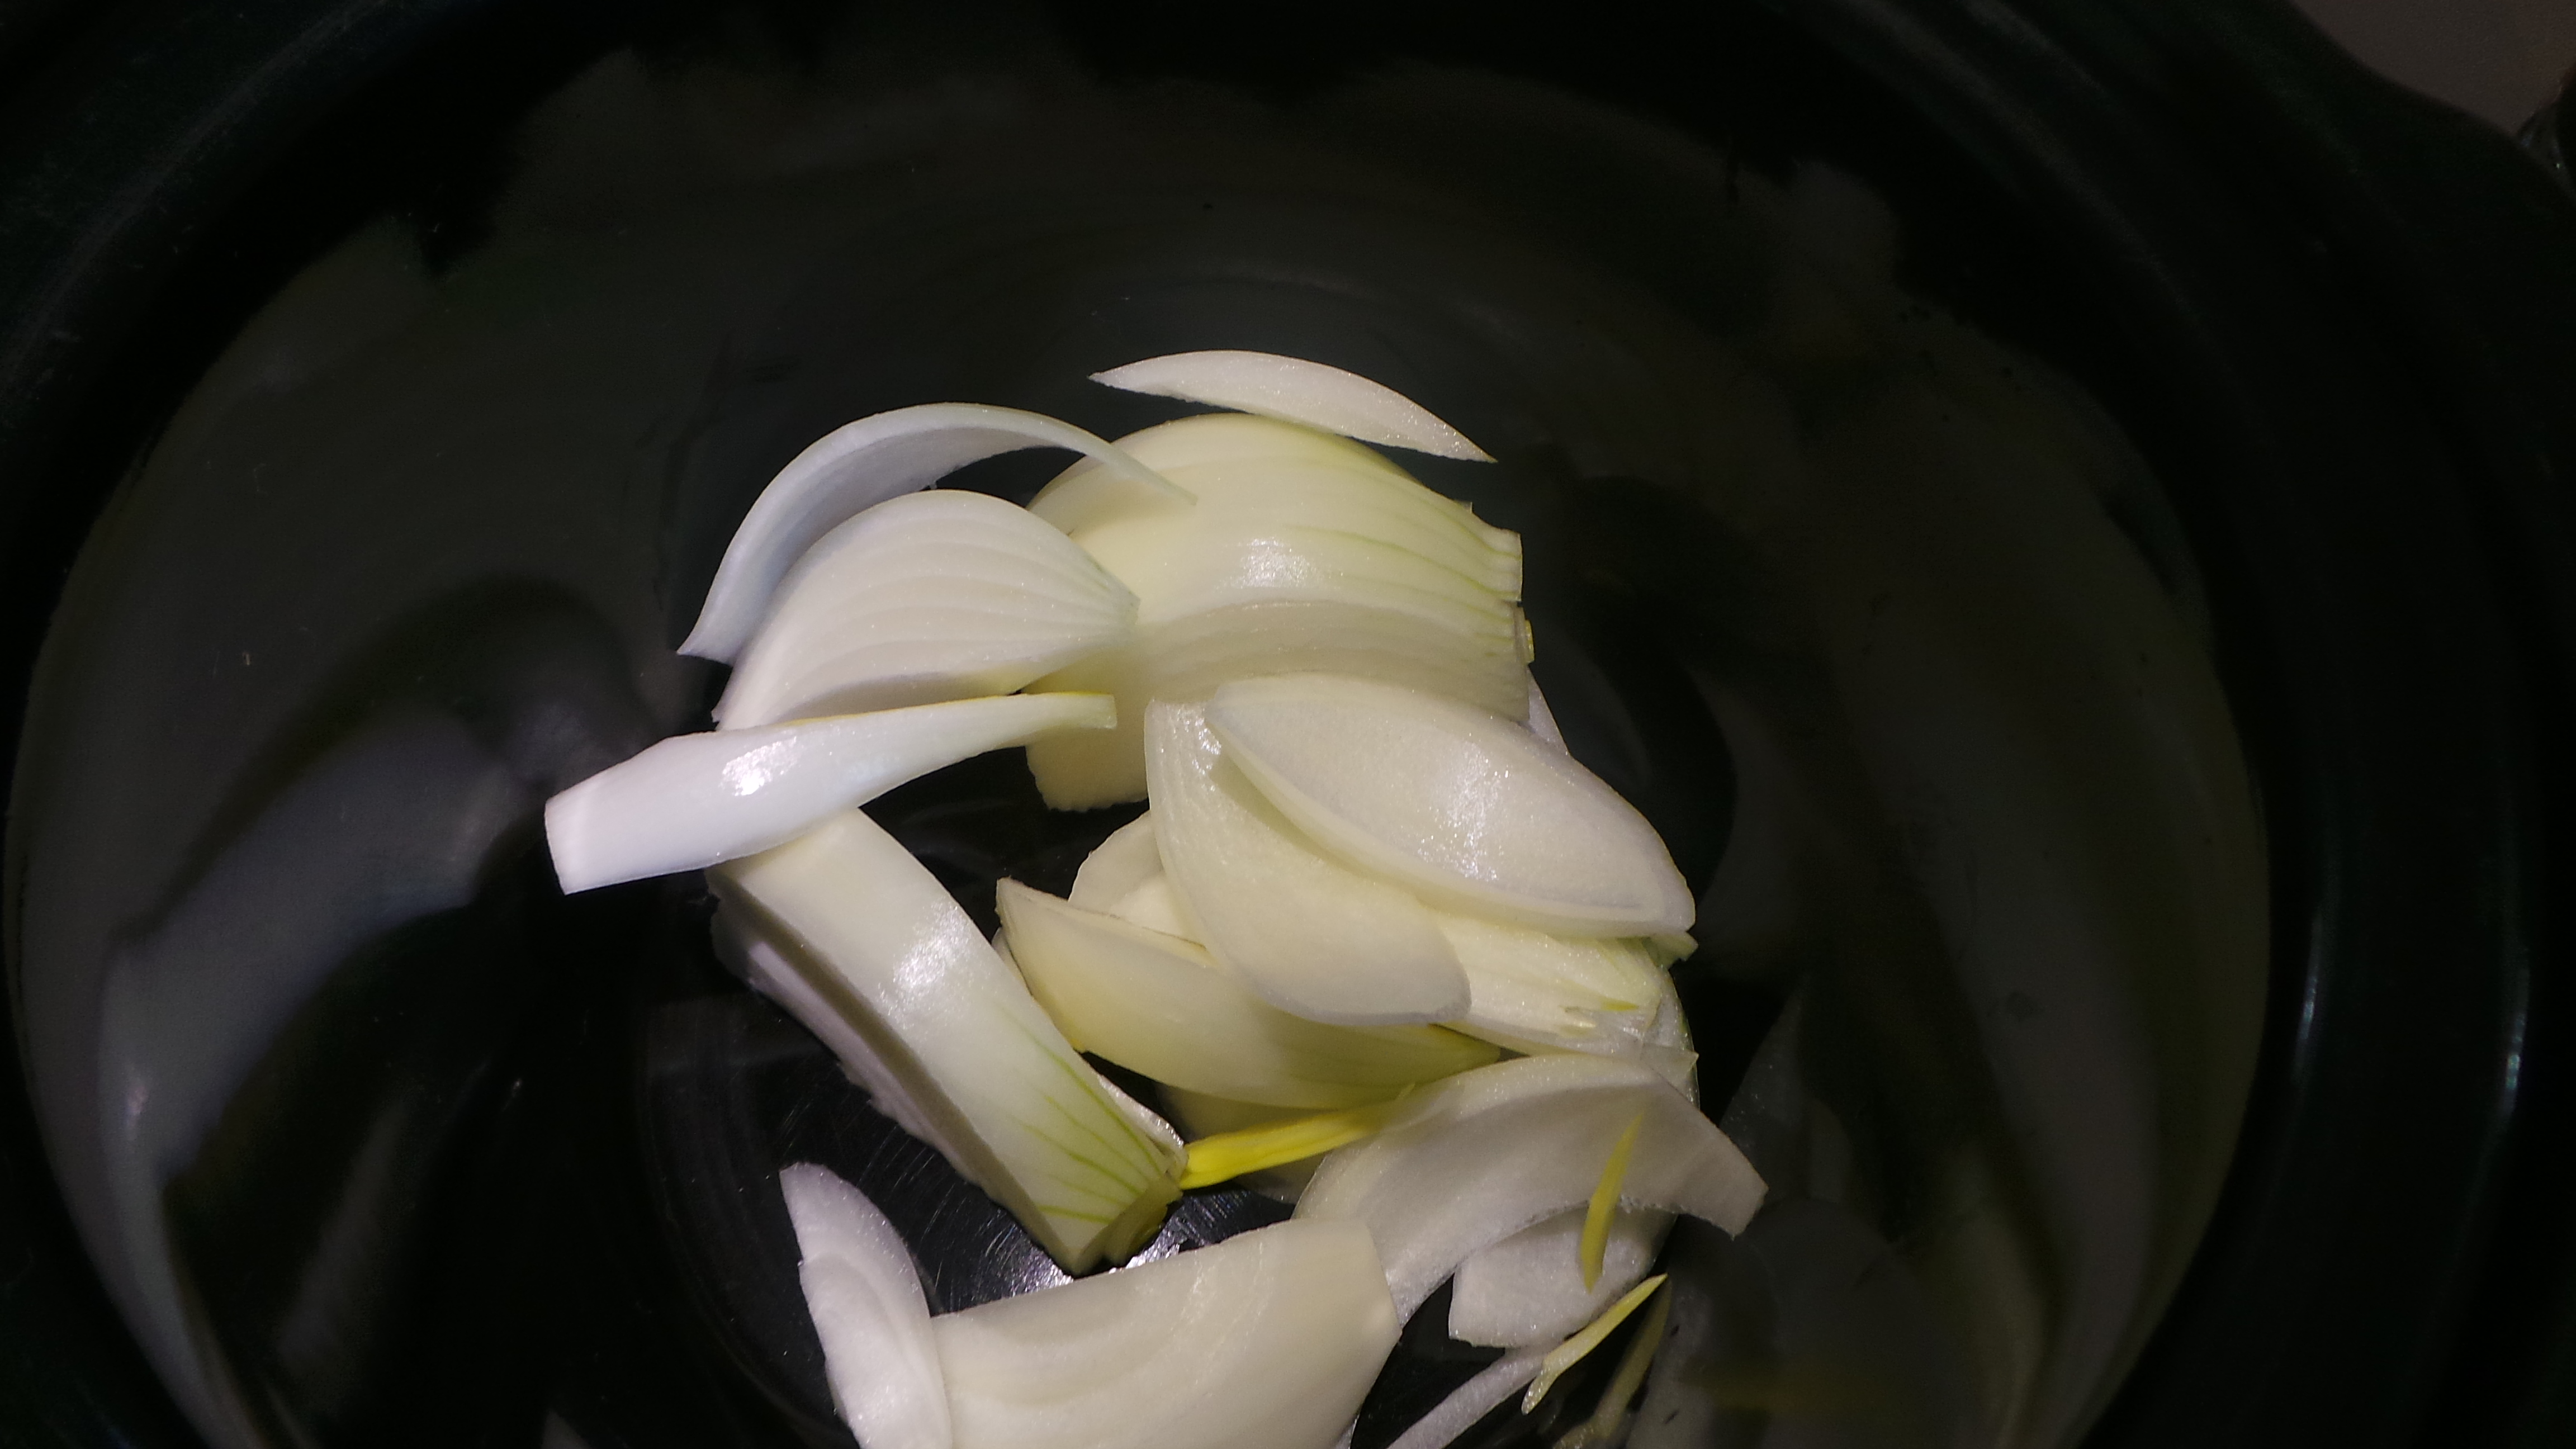
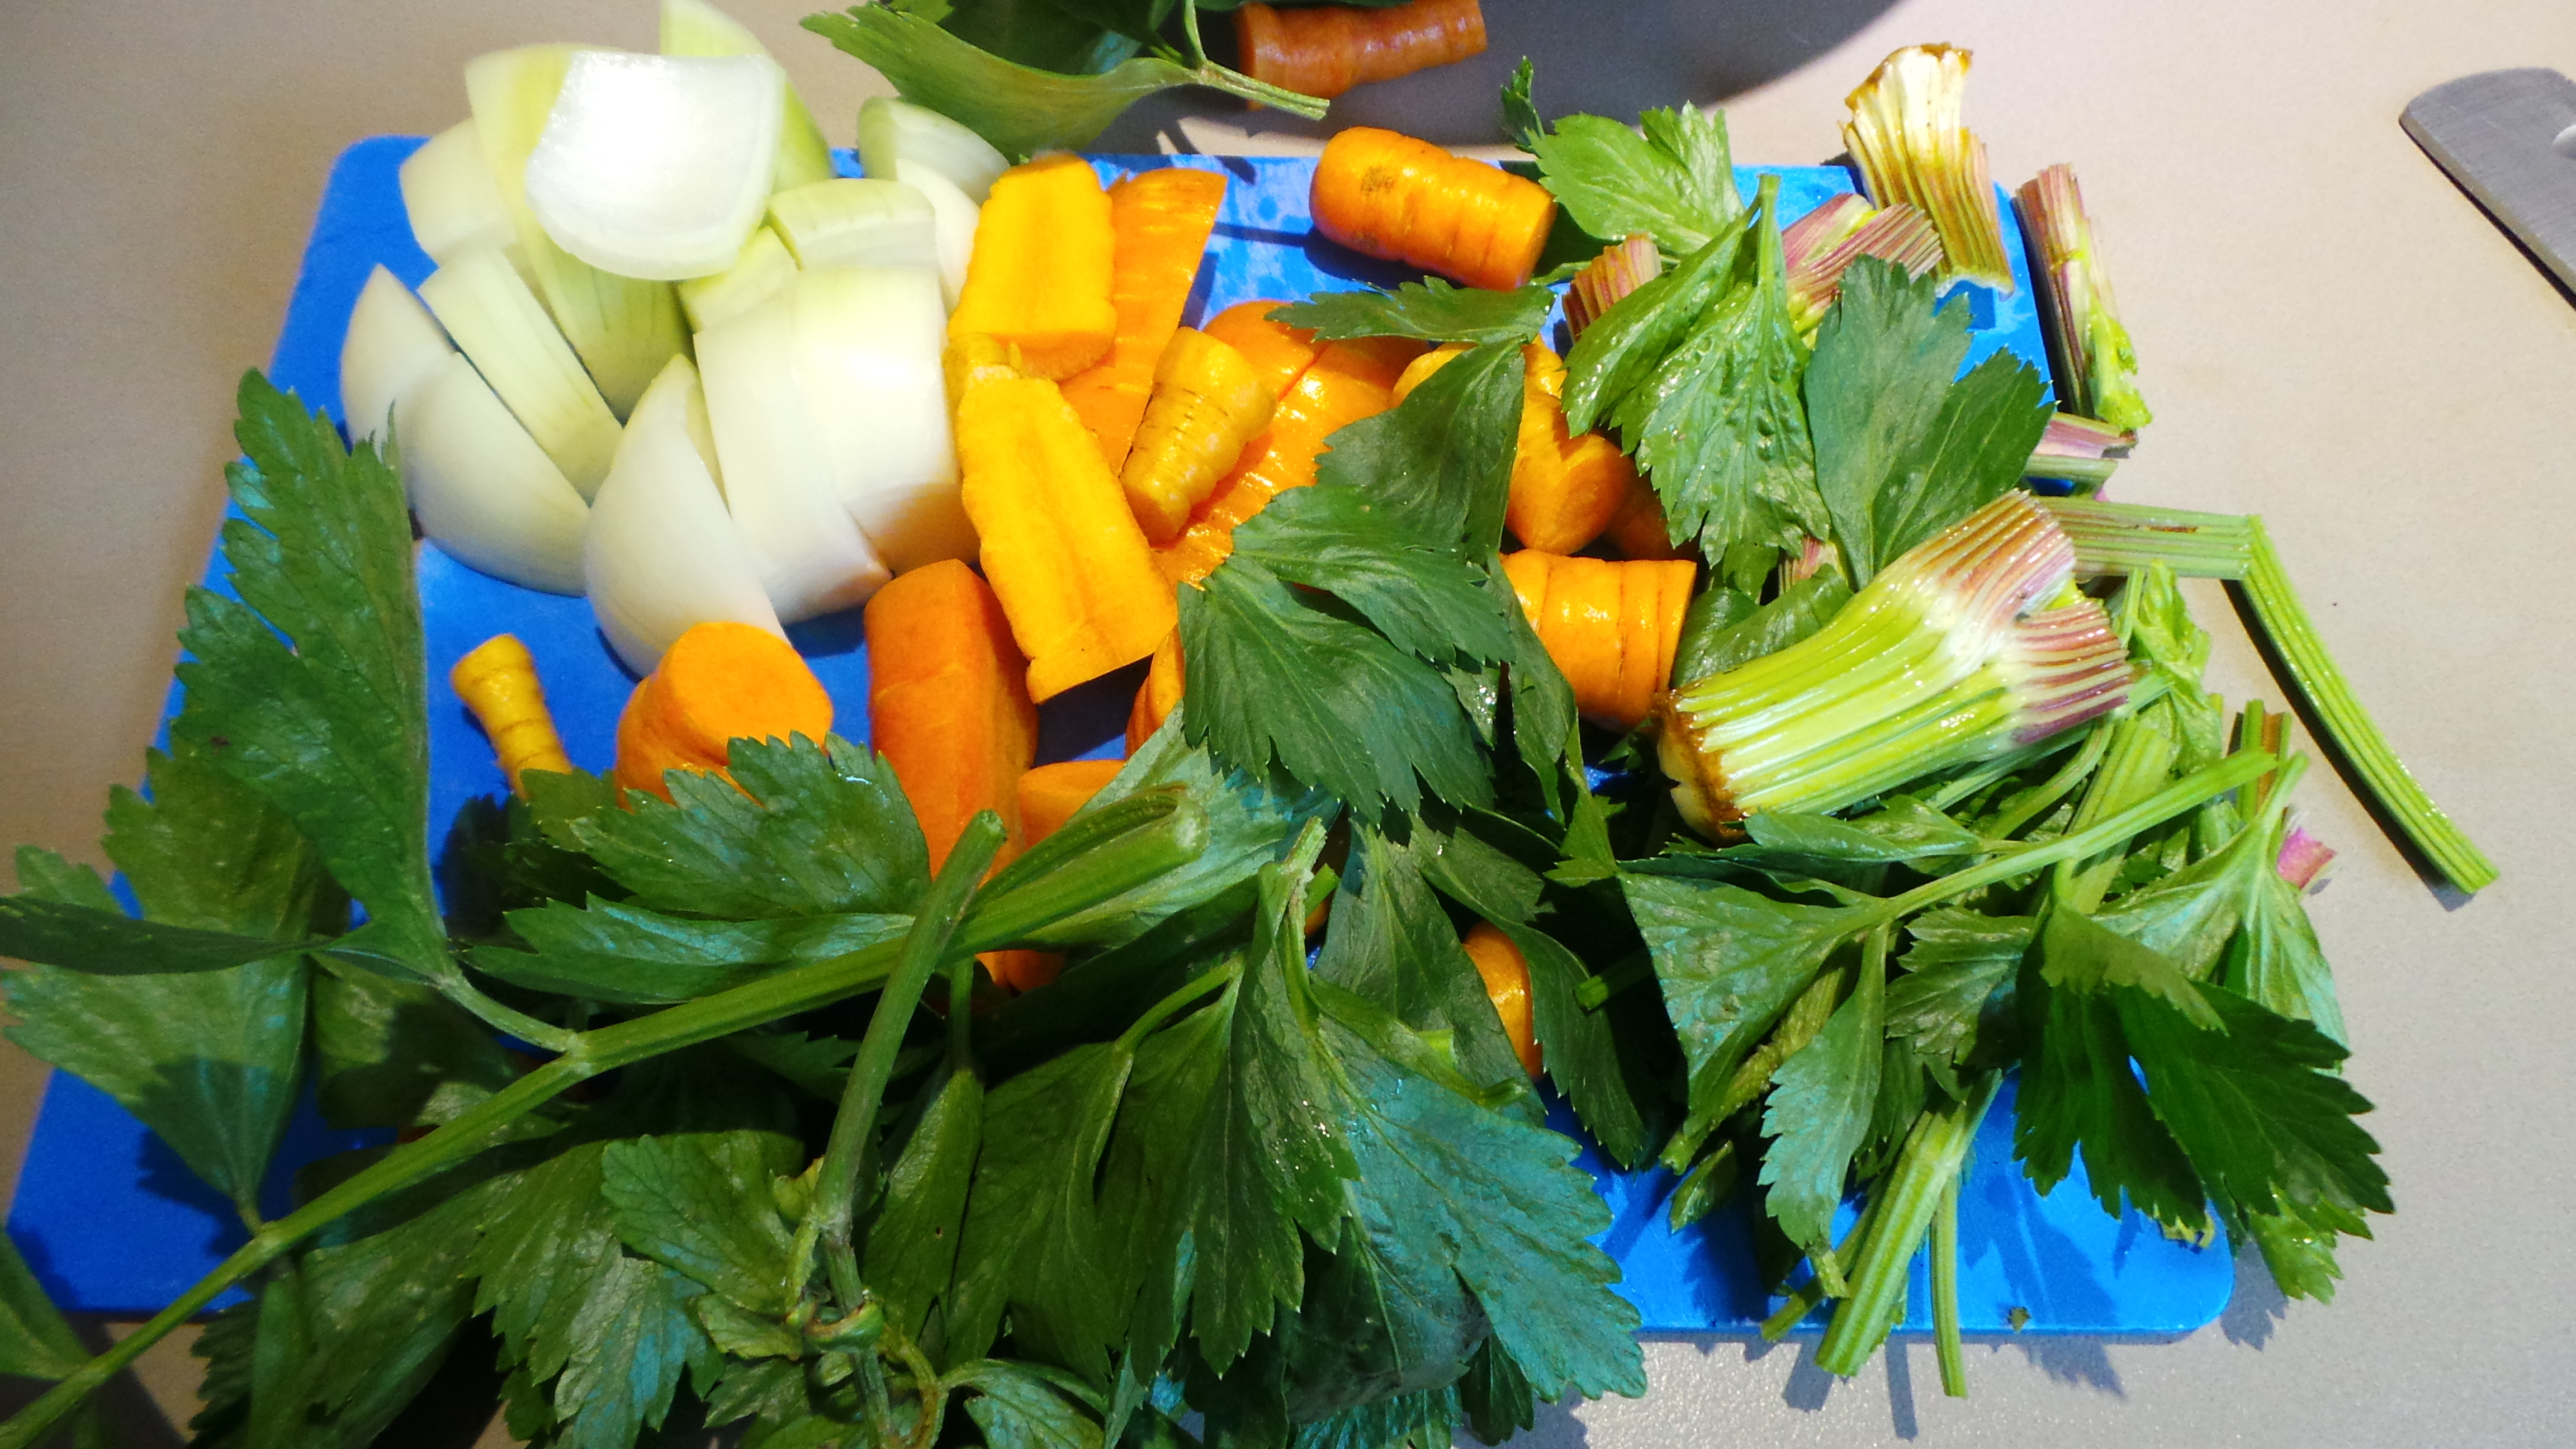
Now, I prepare some vegetables for the pot. It’s a very simple, very traditional combination of an onion, a carrot and a little celery.

Cut your onion into crescents.

Little crescent moons of onions

Little crescent moons of onions

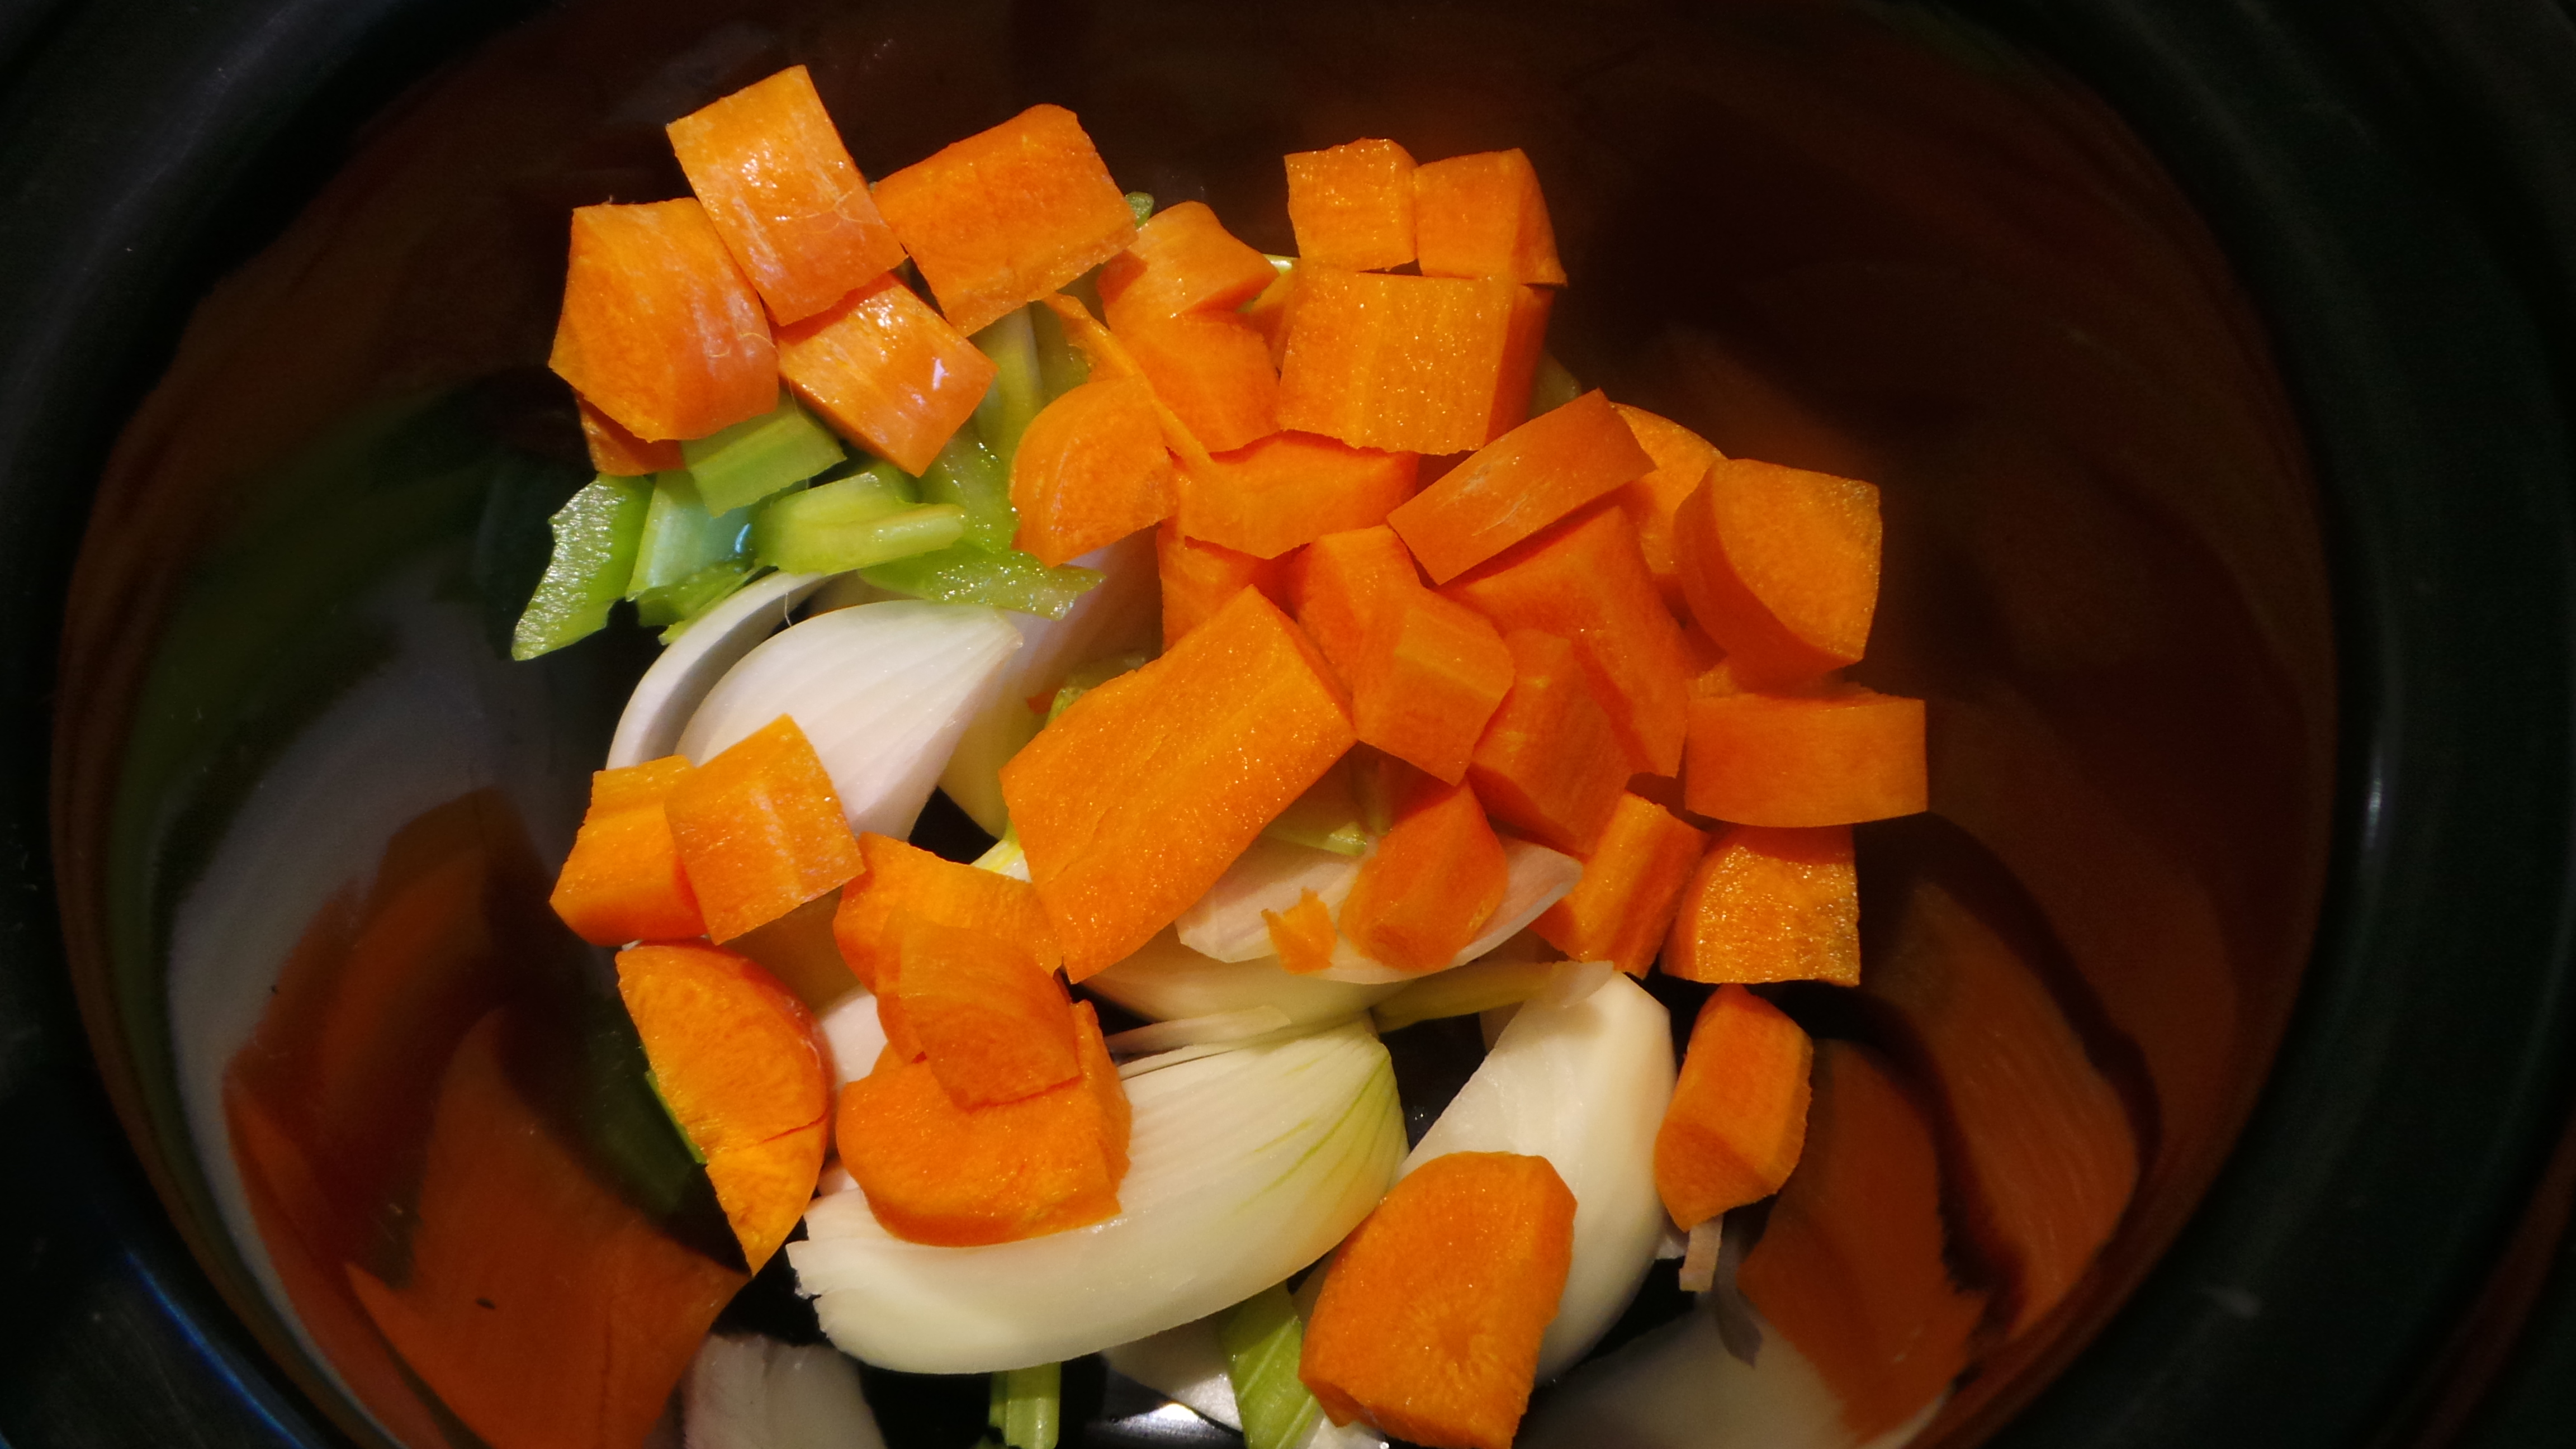
Add to the base of the slow cooker.

Dice your carrots and celery and add them as well.

Add carrots and celery.

Add carrots and celery.

Again, you can use whatever combination you like. However, I find that these are three that I always have to hand and they form a very good base for most main meal dishes. It’s a mix that is often referred to as the ‘Holy Trinity’ of cooking, so let’s just go with the flow…

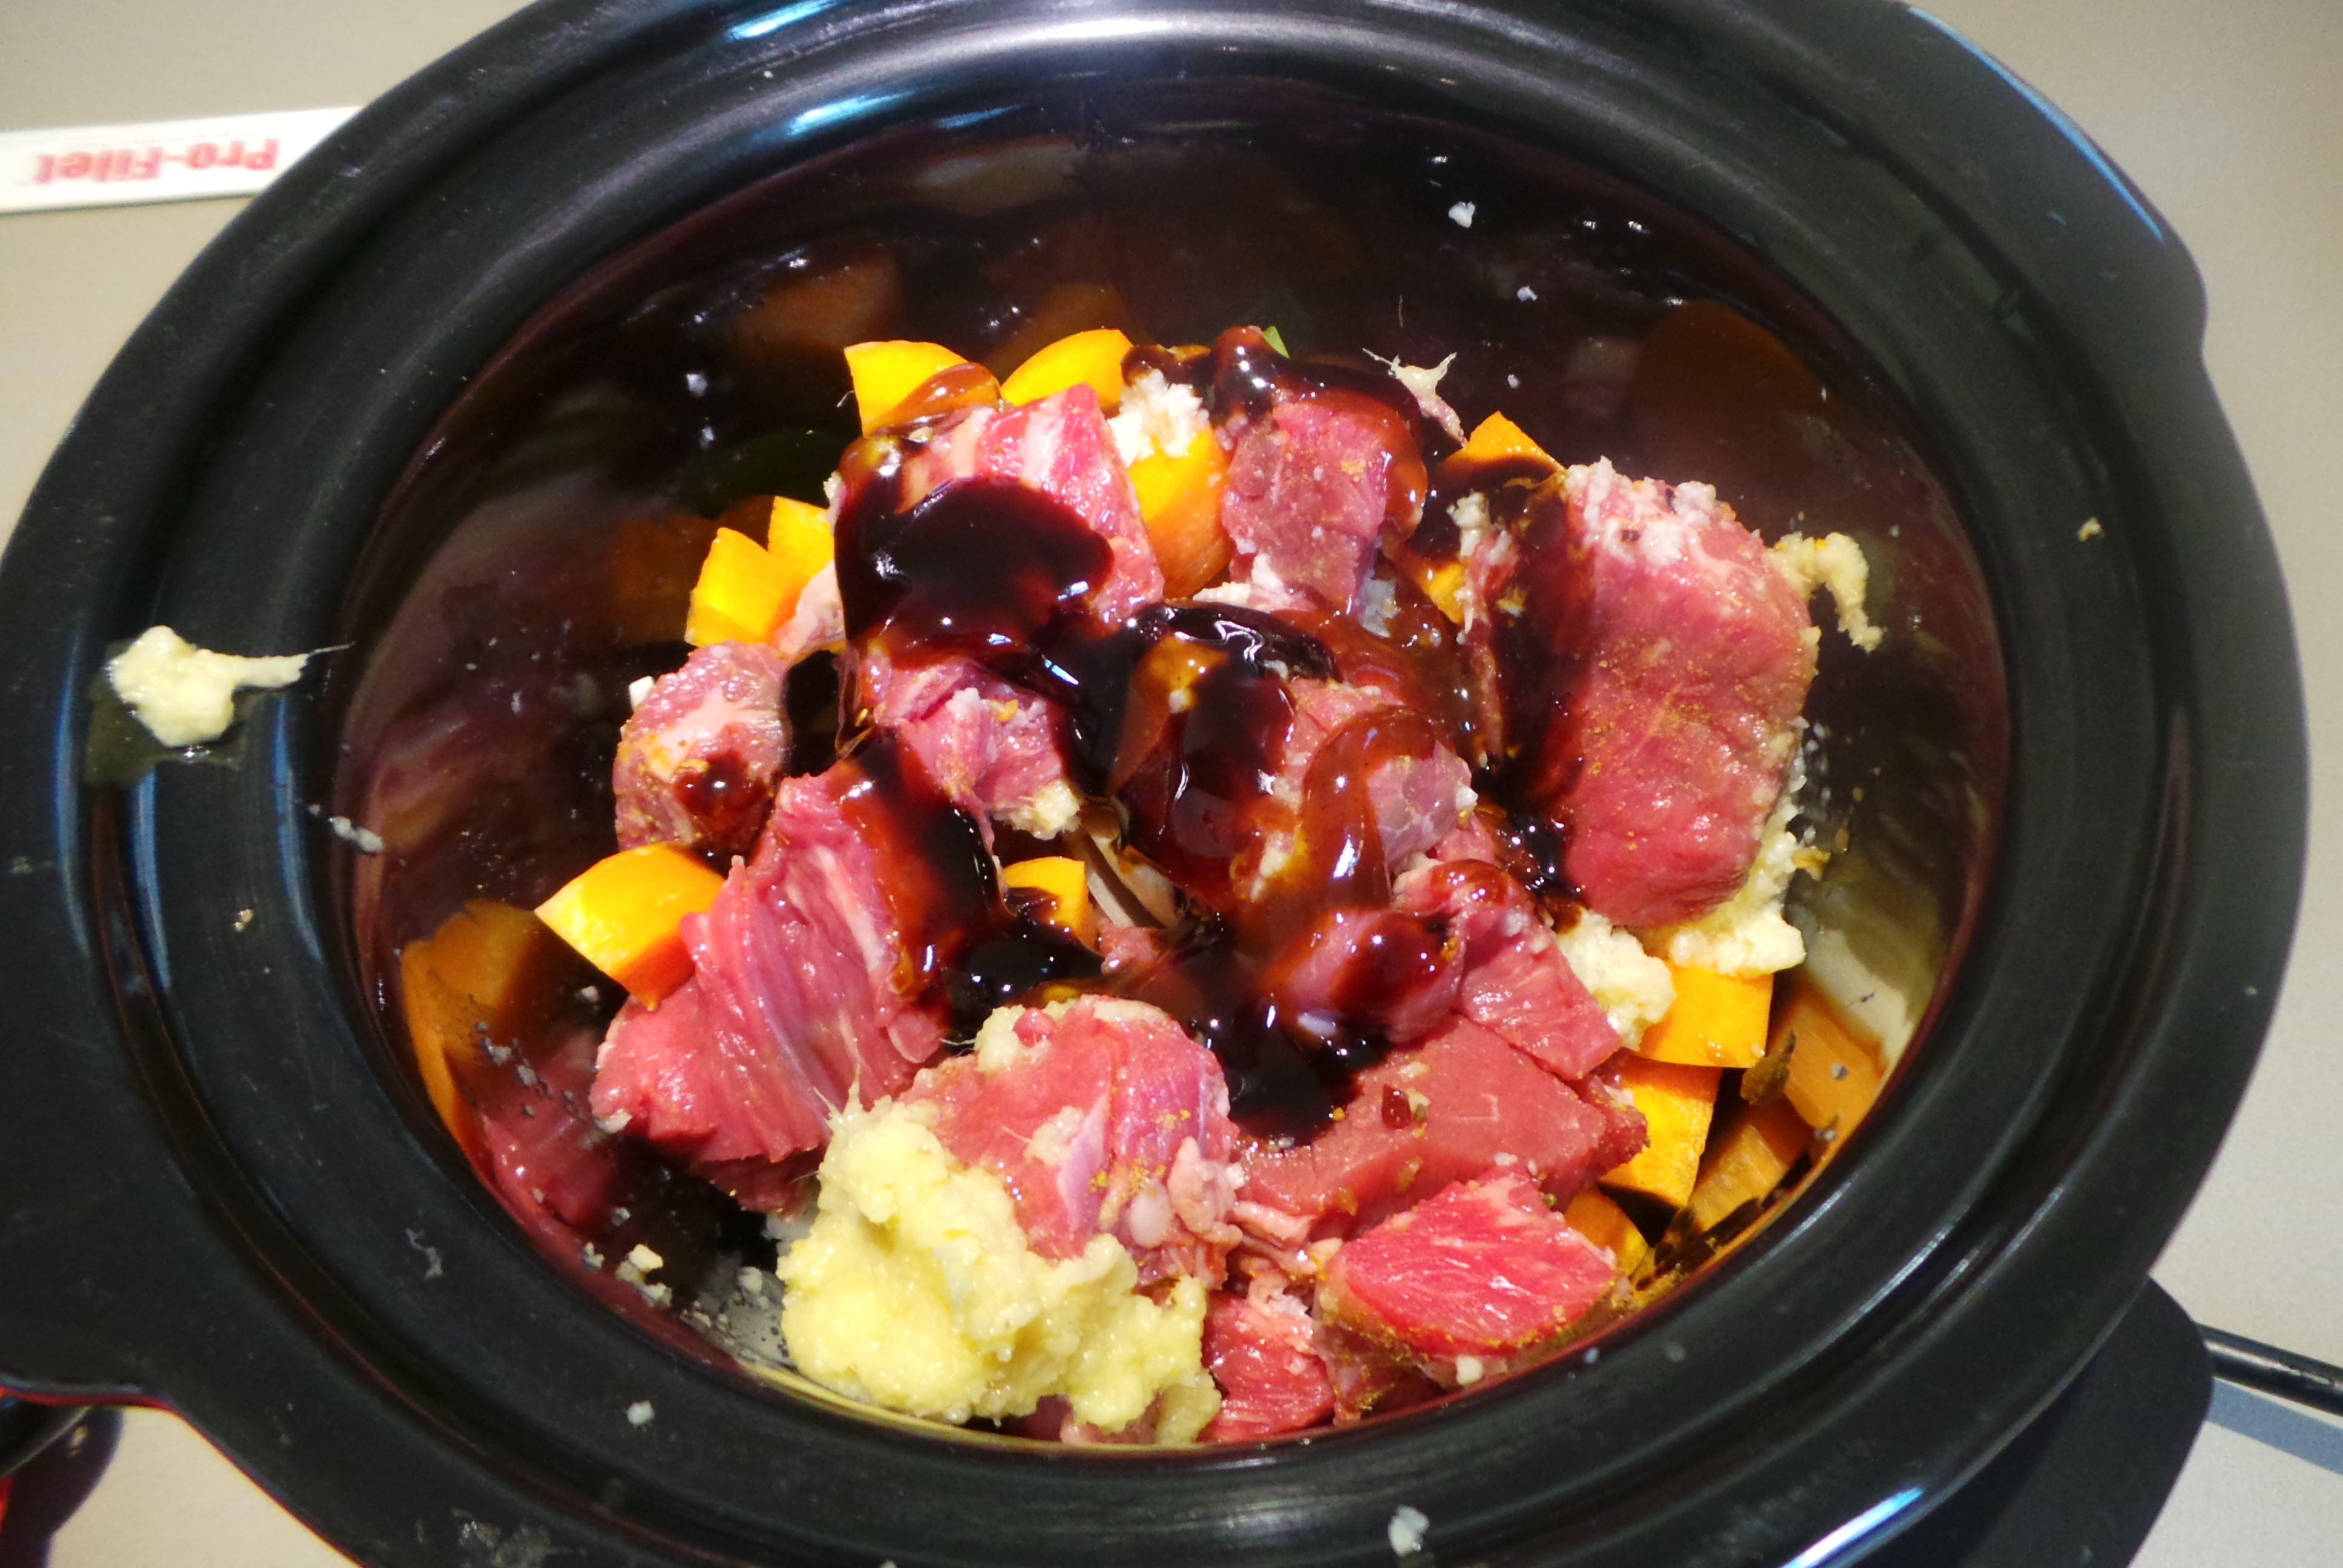
Now place your spiced meat into the pot, on top of the vegetables. Don’t stir yet!

I always keep these guys in my refrigerator, add a good teaspoonful of each to the pot.

Refrigerator staples.

Refrigerator staples.

Up the flavour with some fresh ginger and garlic.

Up the flavour with some fresh ginger and garlic.

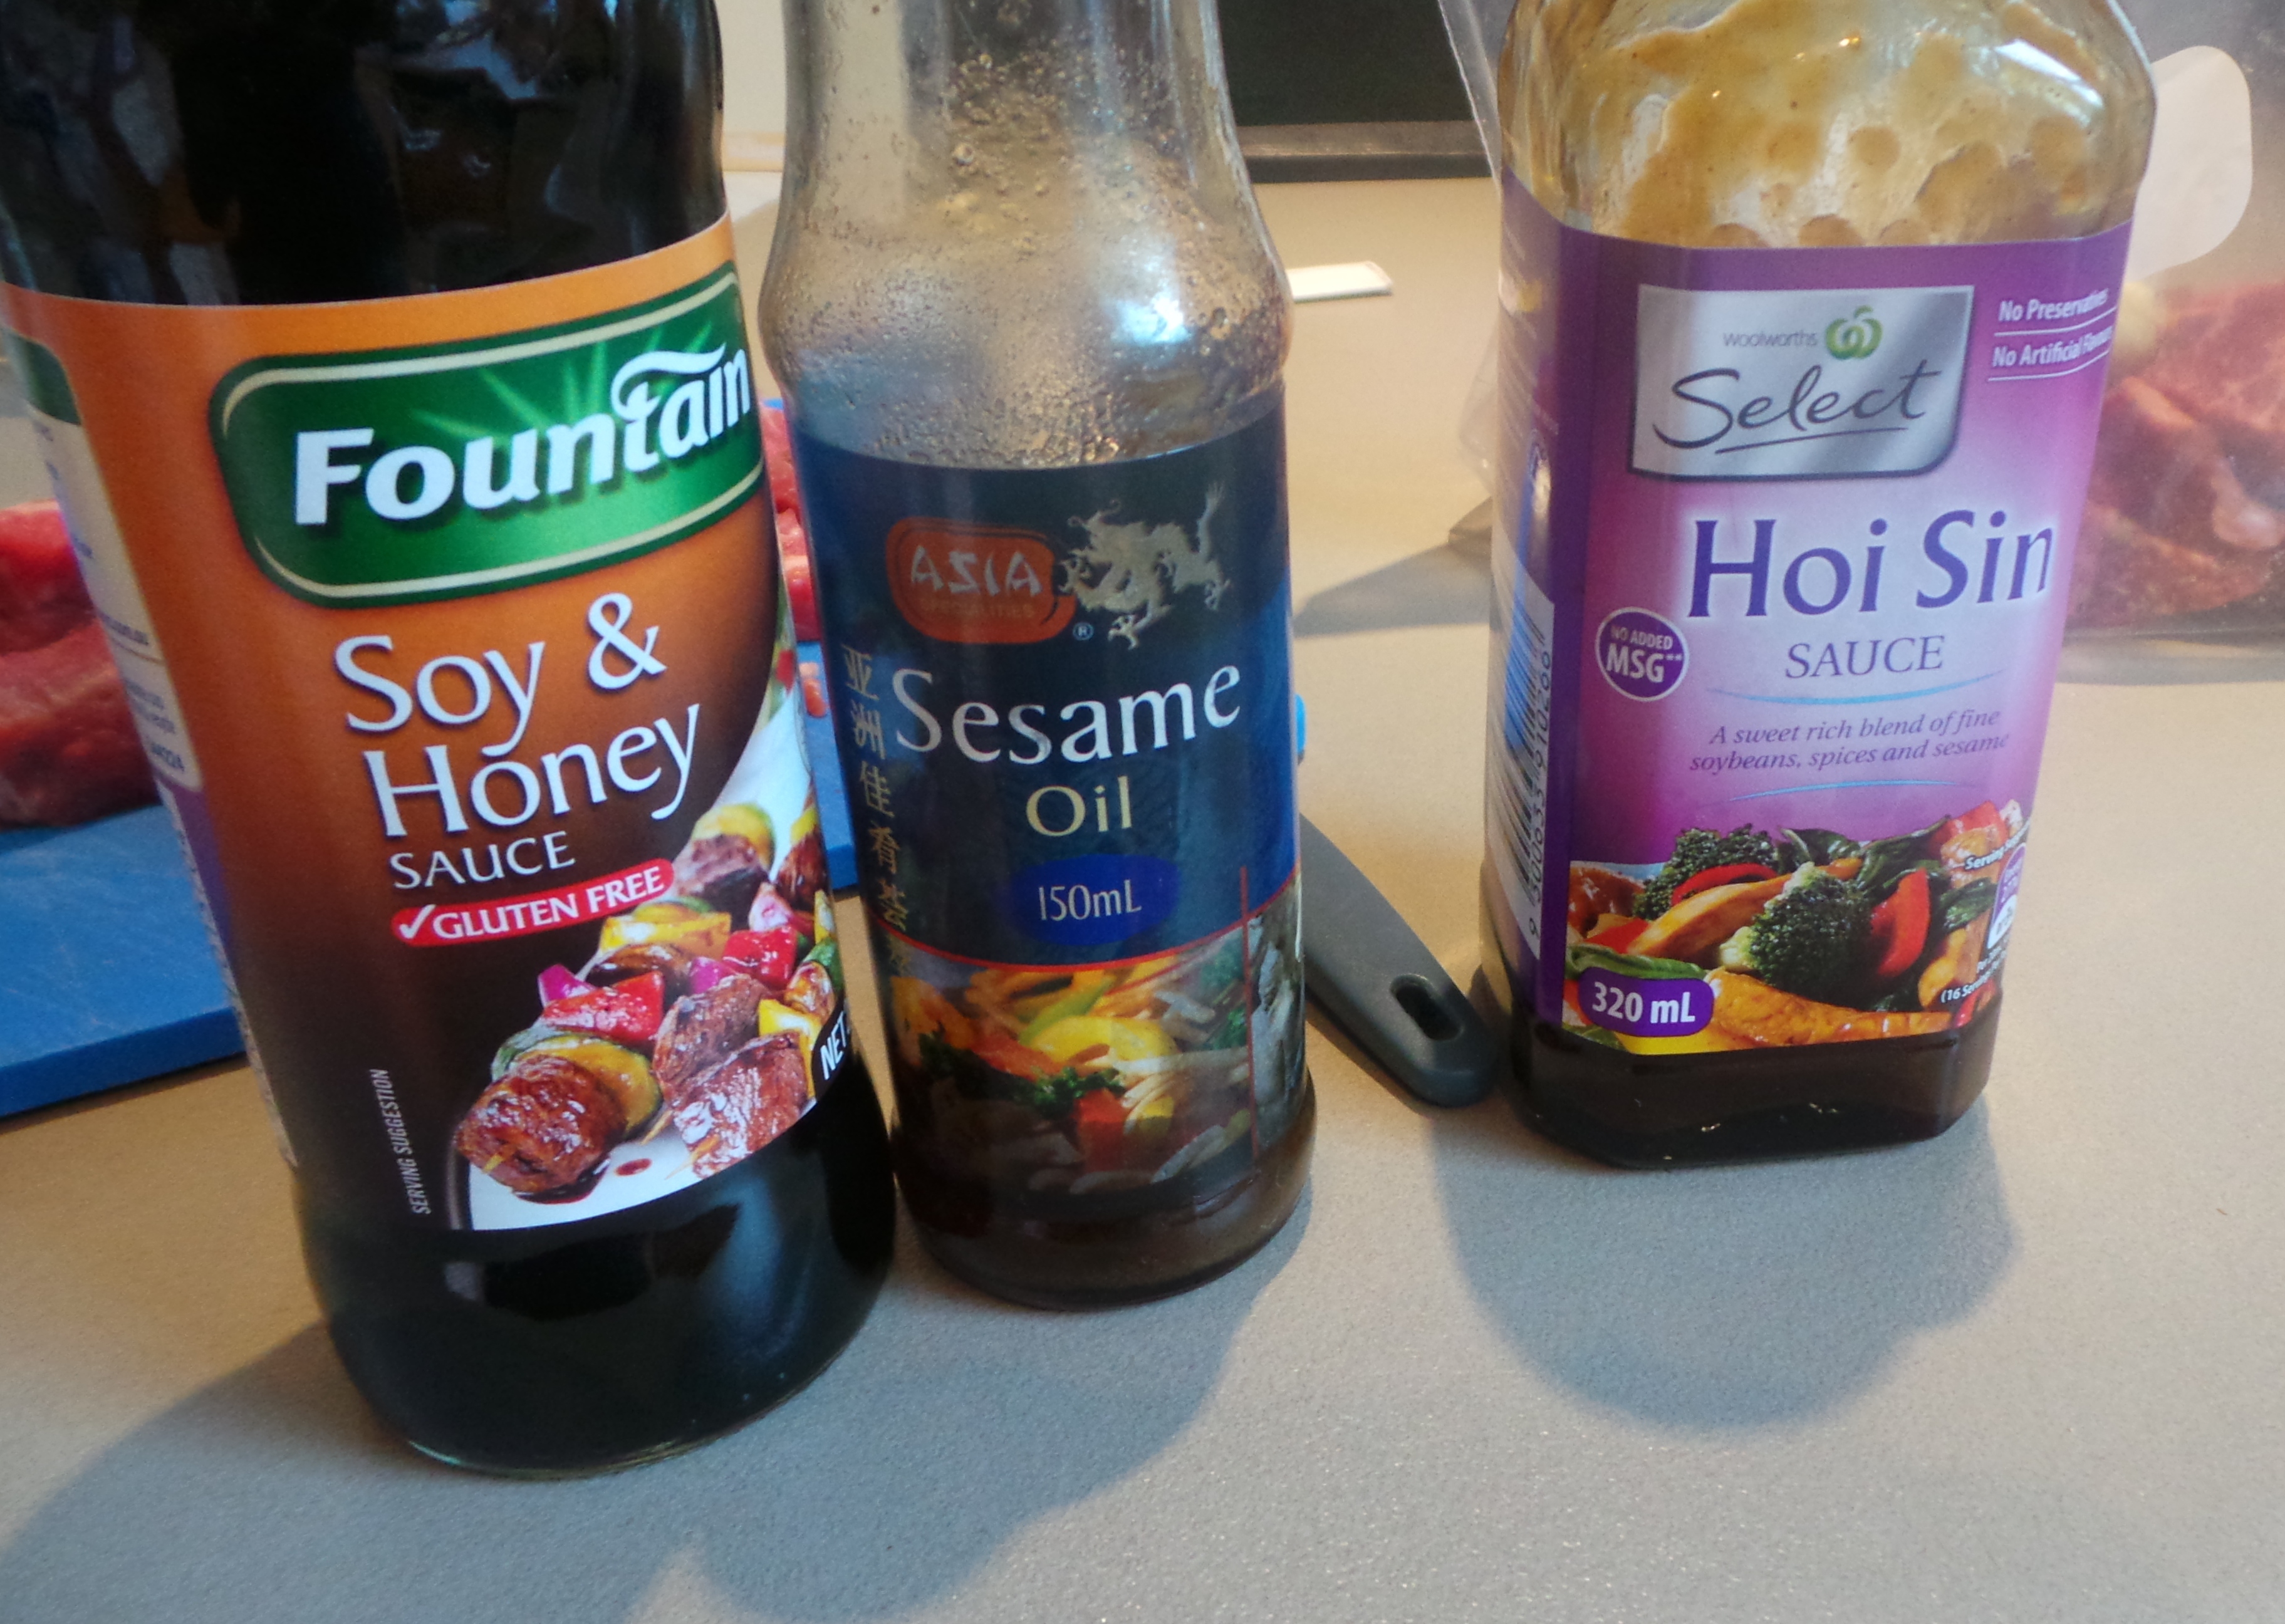
Now add a good glug of the sauces you’d like to use.  On this occasion, I had these in my refrigerator door: Soy & Honey sauce, Hoi Sin and some sesame oil.

*A ‘glug’ may be translated as a tablespoon or so. You’re just adding flavours, not creating a cooking medium.

Choose your sauces

Choose your sauces

Add some glugs to the pot

Add a few glugs of whatever sauces you wish to the pot.

You may wish to use plain soy sauce, black bean, teriyaki, sweet chilli, oyster sauce, kecap manis…the list goes on. You don’t have to use a mix, you may use just one if you prefer (or if that is all you have).
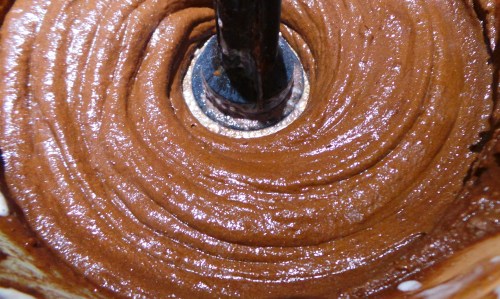
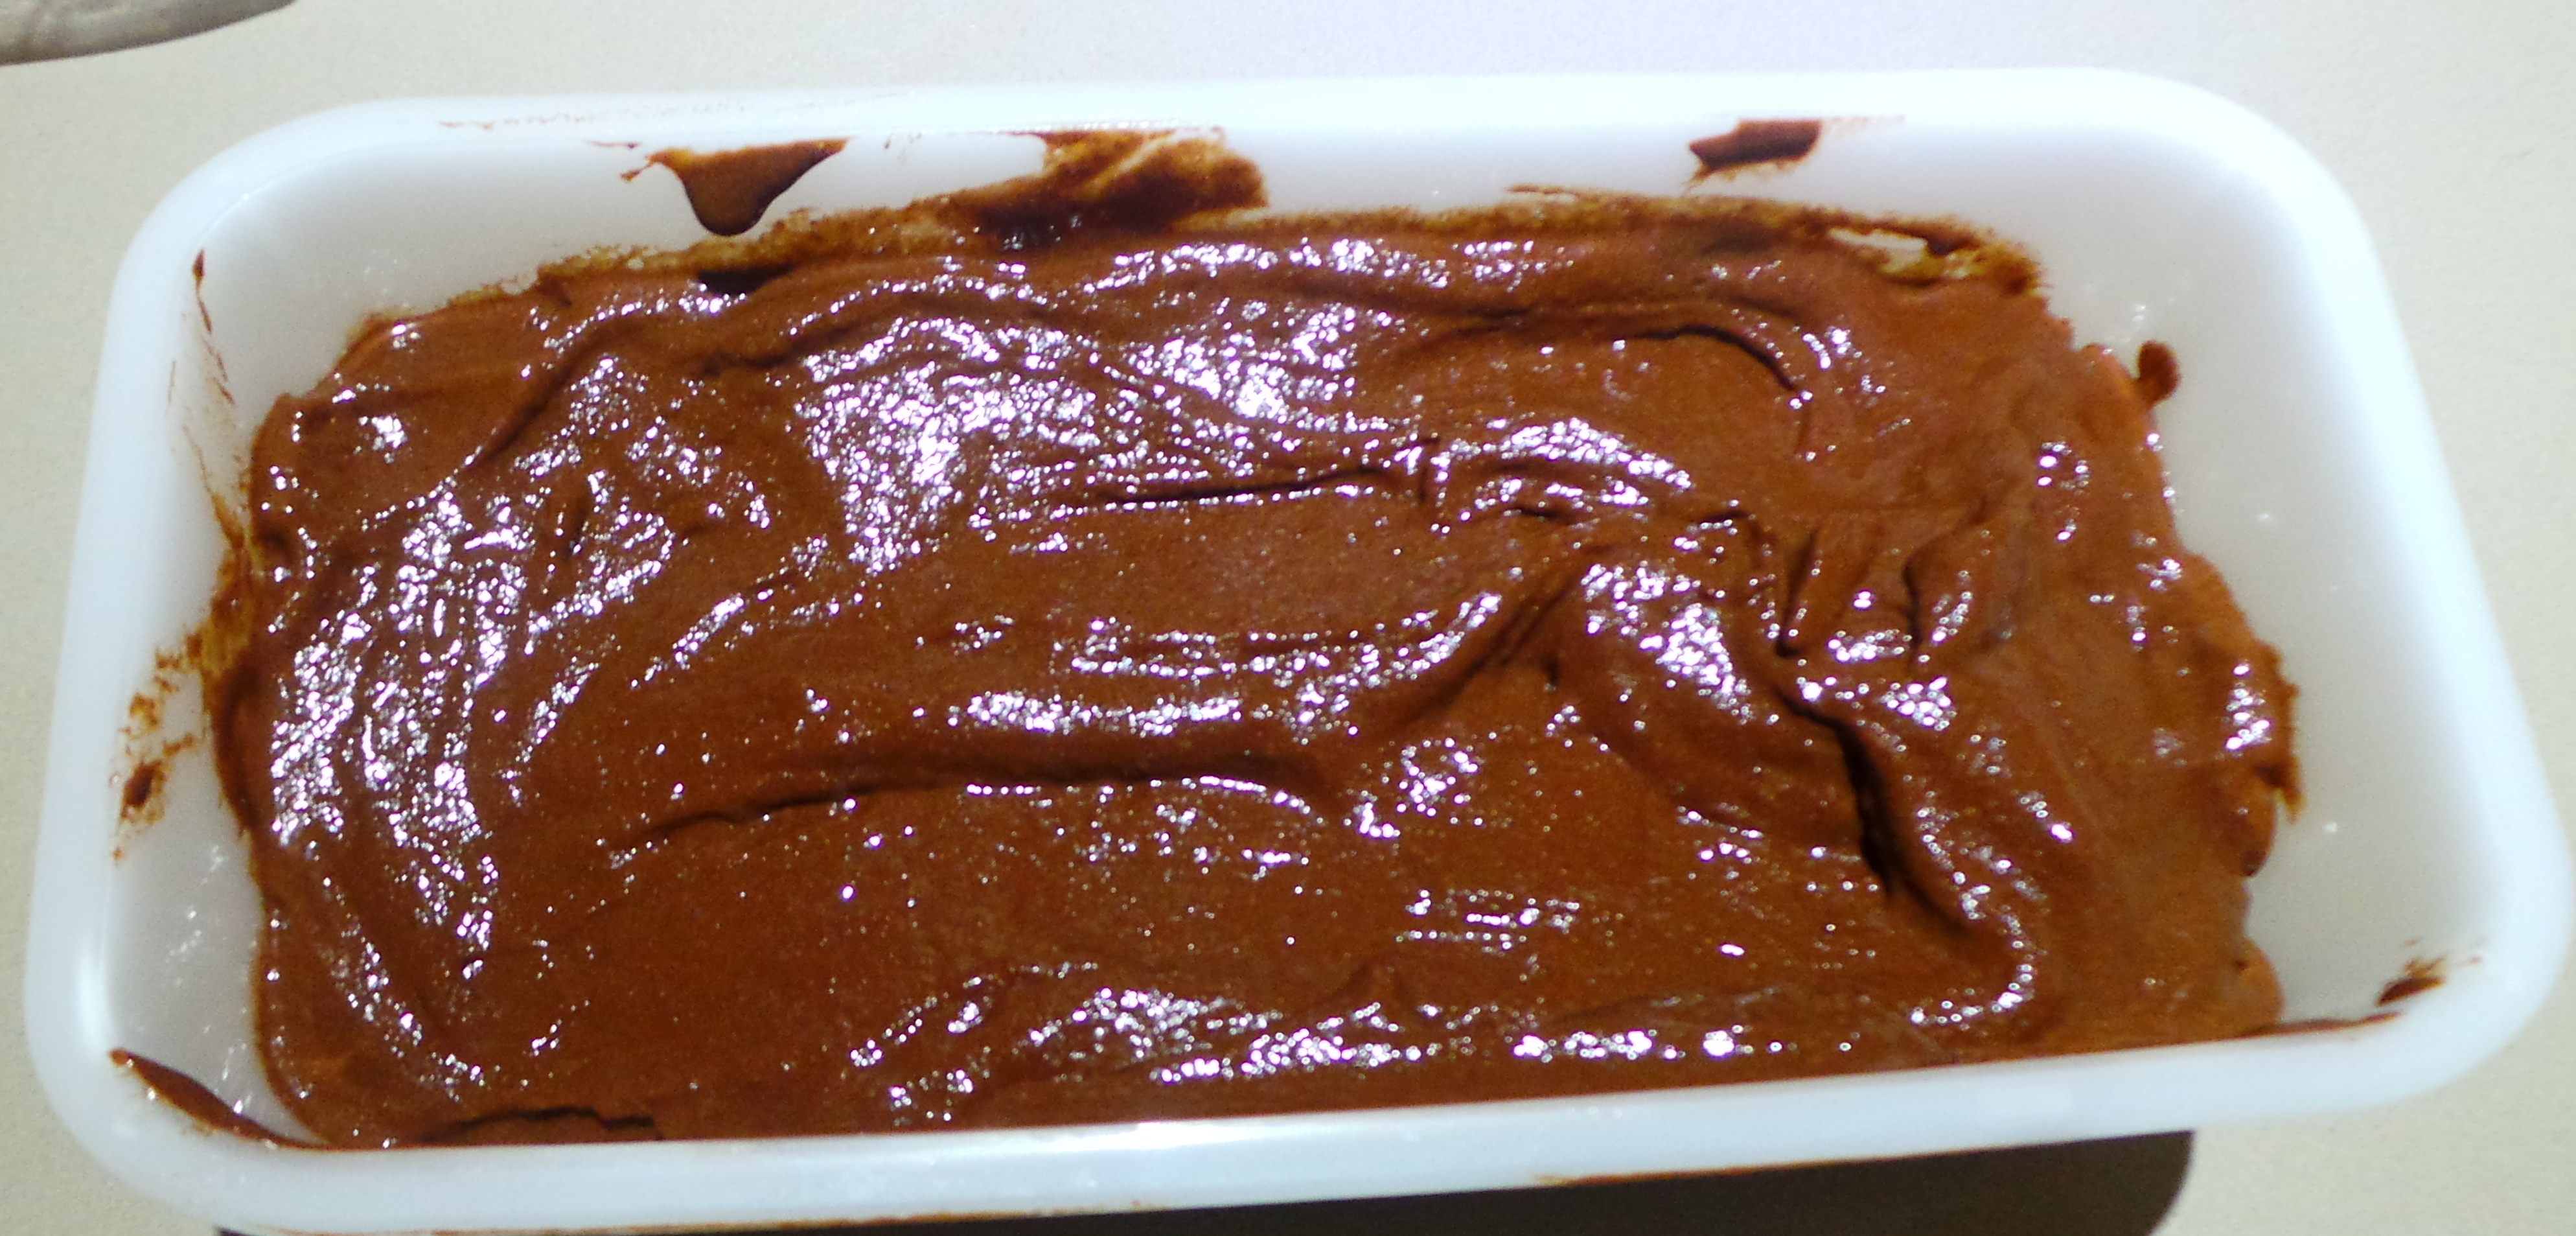
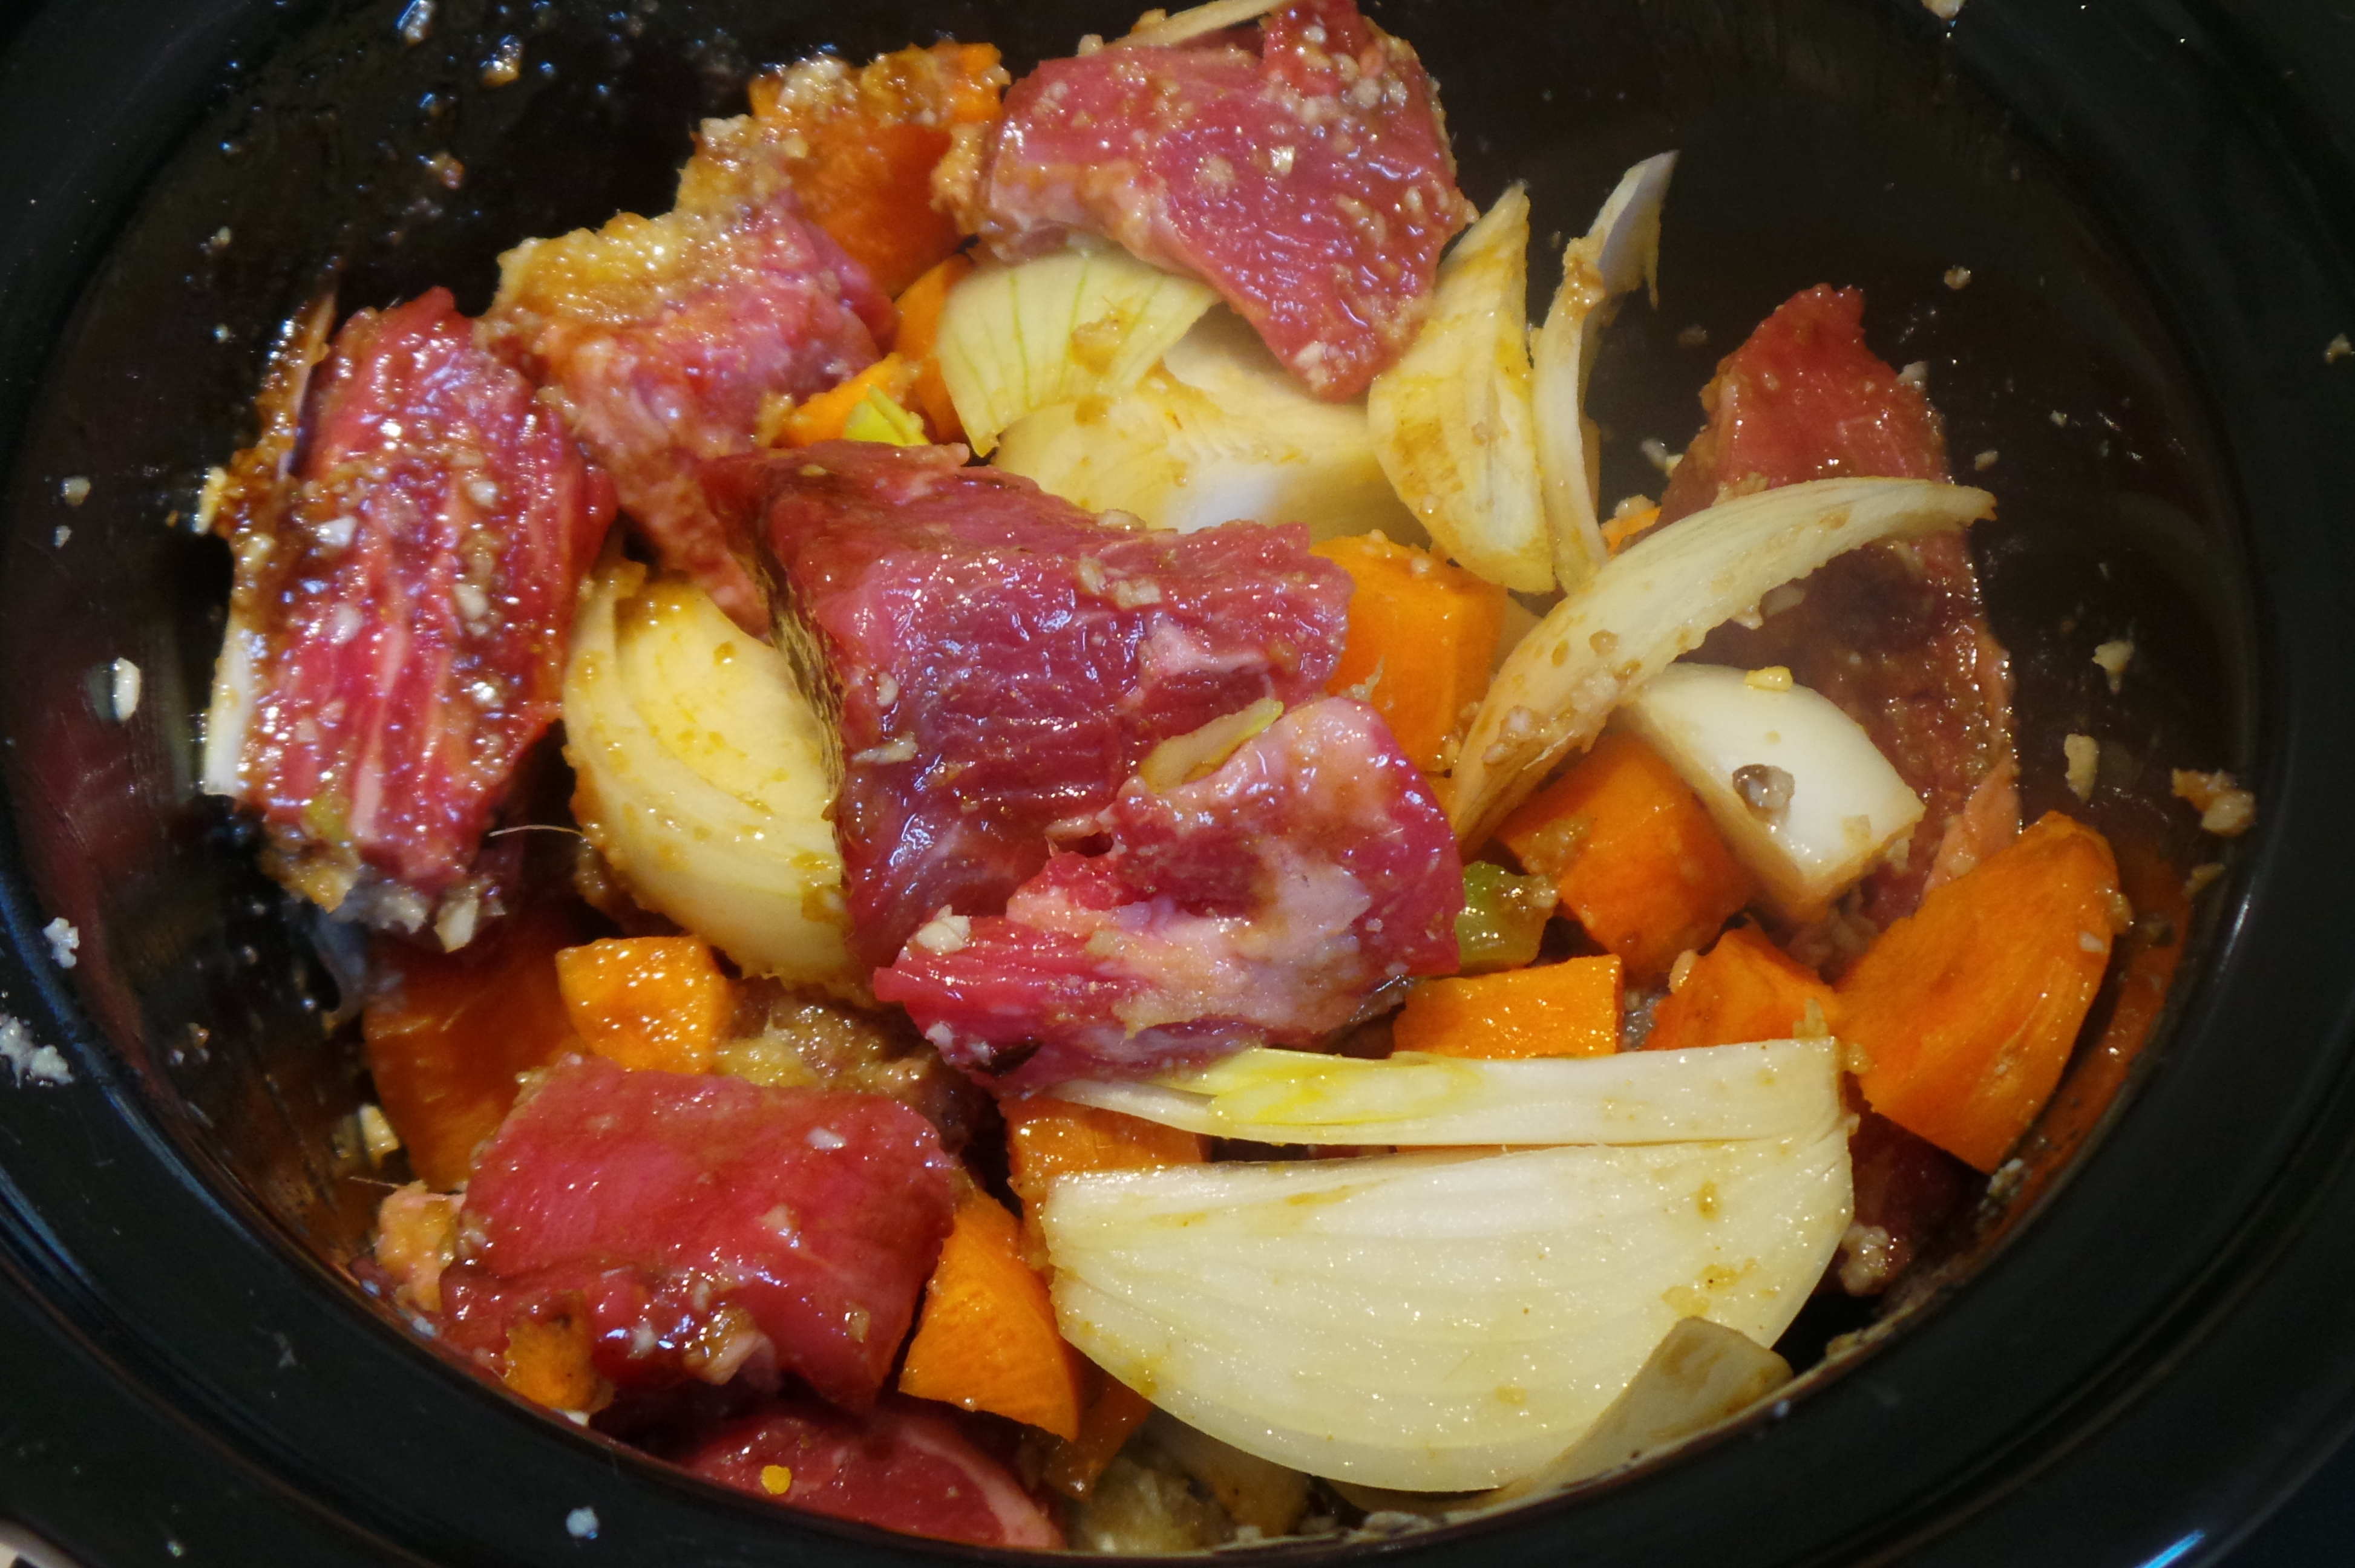
Now stir.

Stir it all together.

Stir it all together.

As you can see from the picture above, the meat and other ingredients are only lightly coated by the sauces and spices.

Using a slow cooker is a very ‘wet’ method of cooking. As the ingredients release their own juices, they are captured via condensation on the lid and then drip down into the pot to further aid cooking. Think of it as your very own little Greenhouse Effect…

Place your pot on either low or high, depending on how quickly you wish to eat. This took my small slow cooker only 2.5 hours on low. If you are making a larger amount of this in a larger slow cooker, it will take longer – possibly 4 -6 hours on low.

Several hours later...

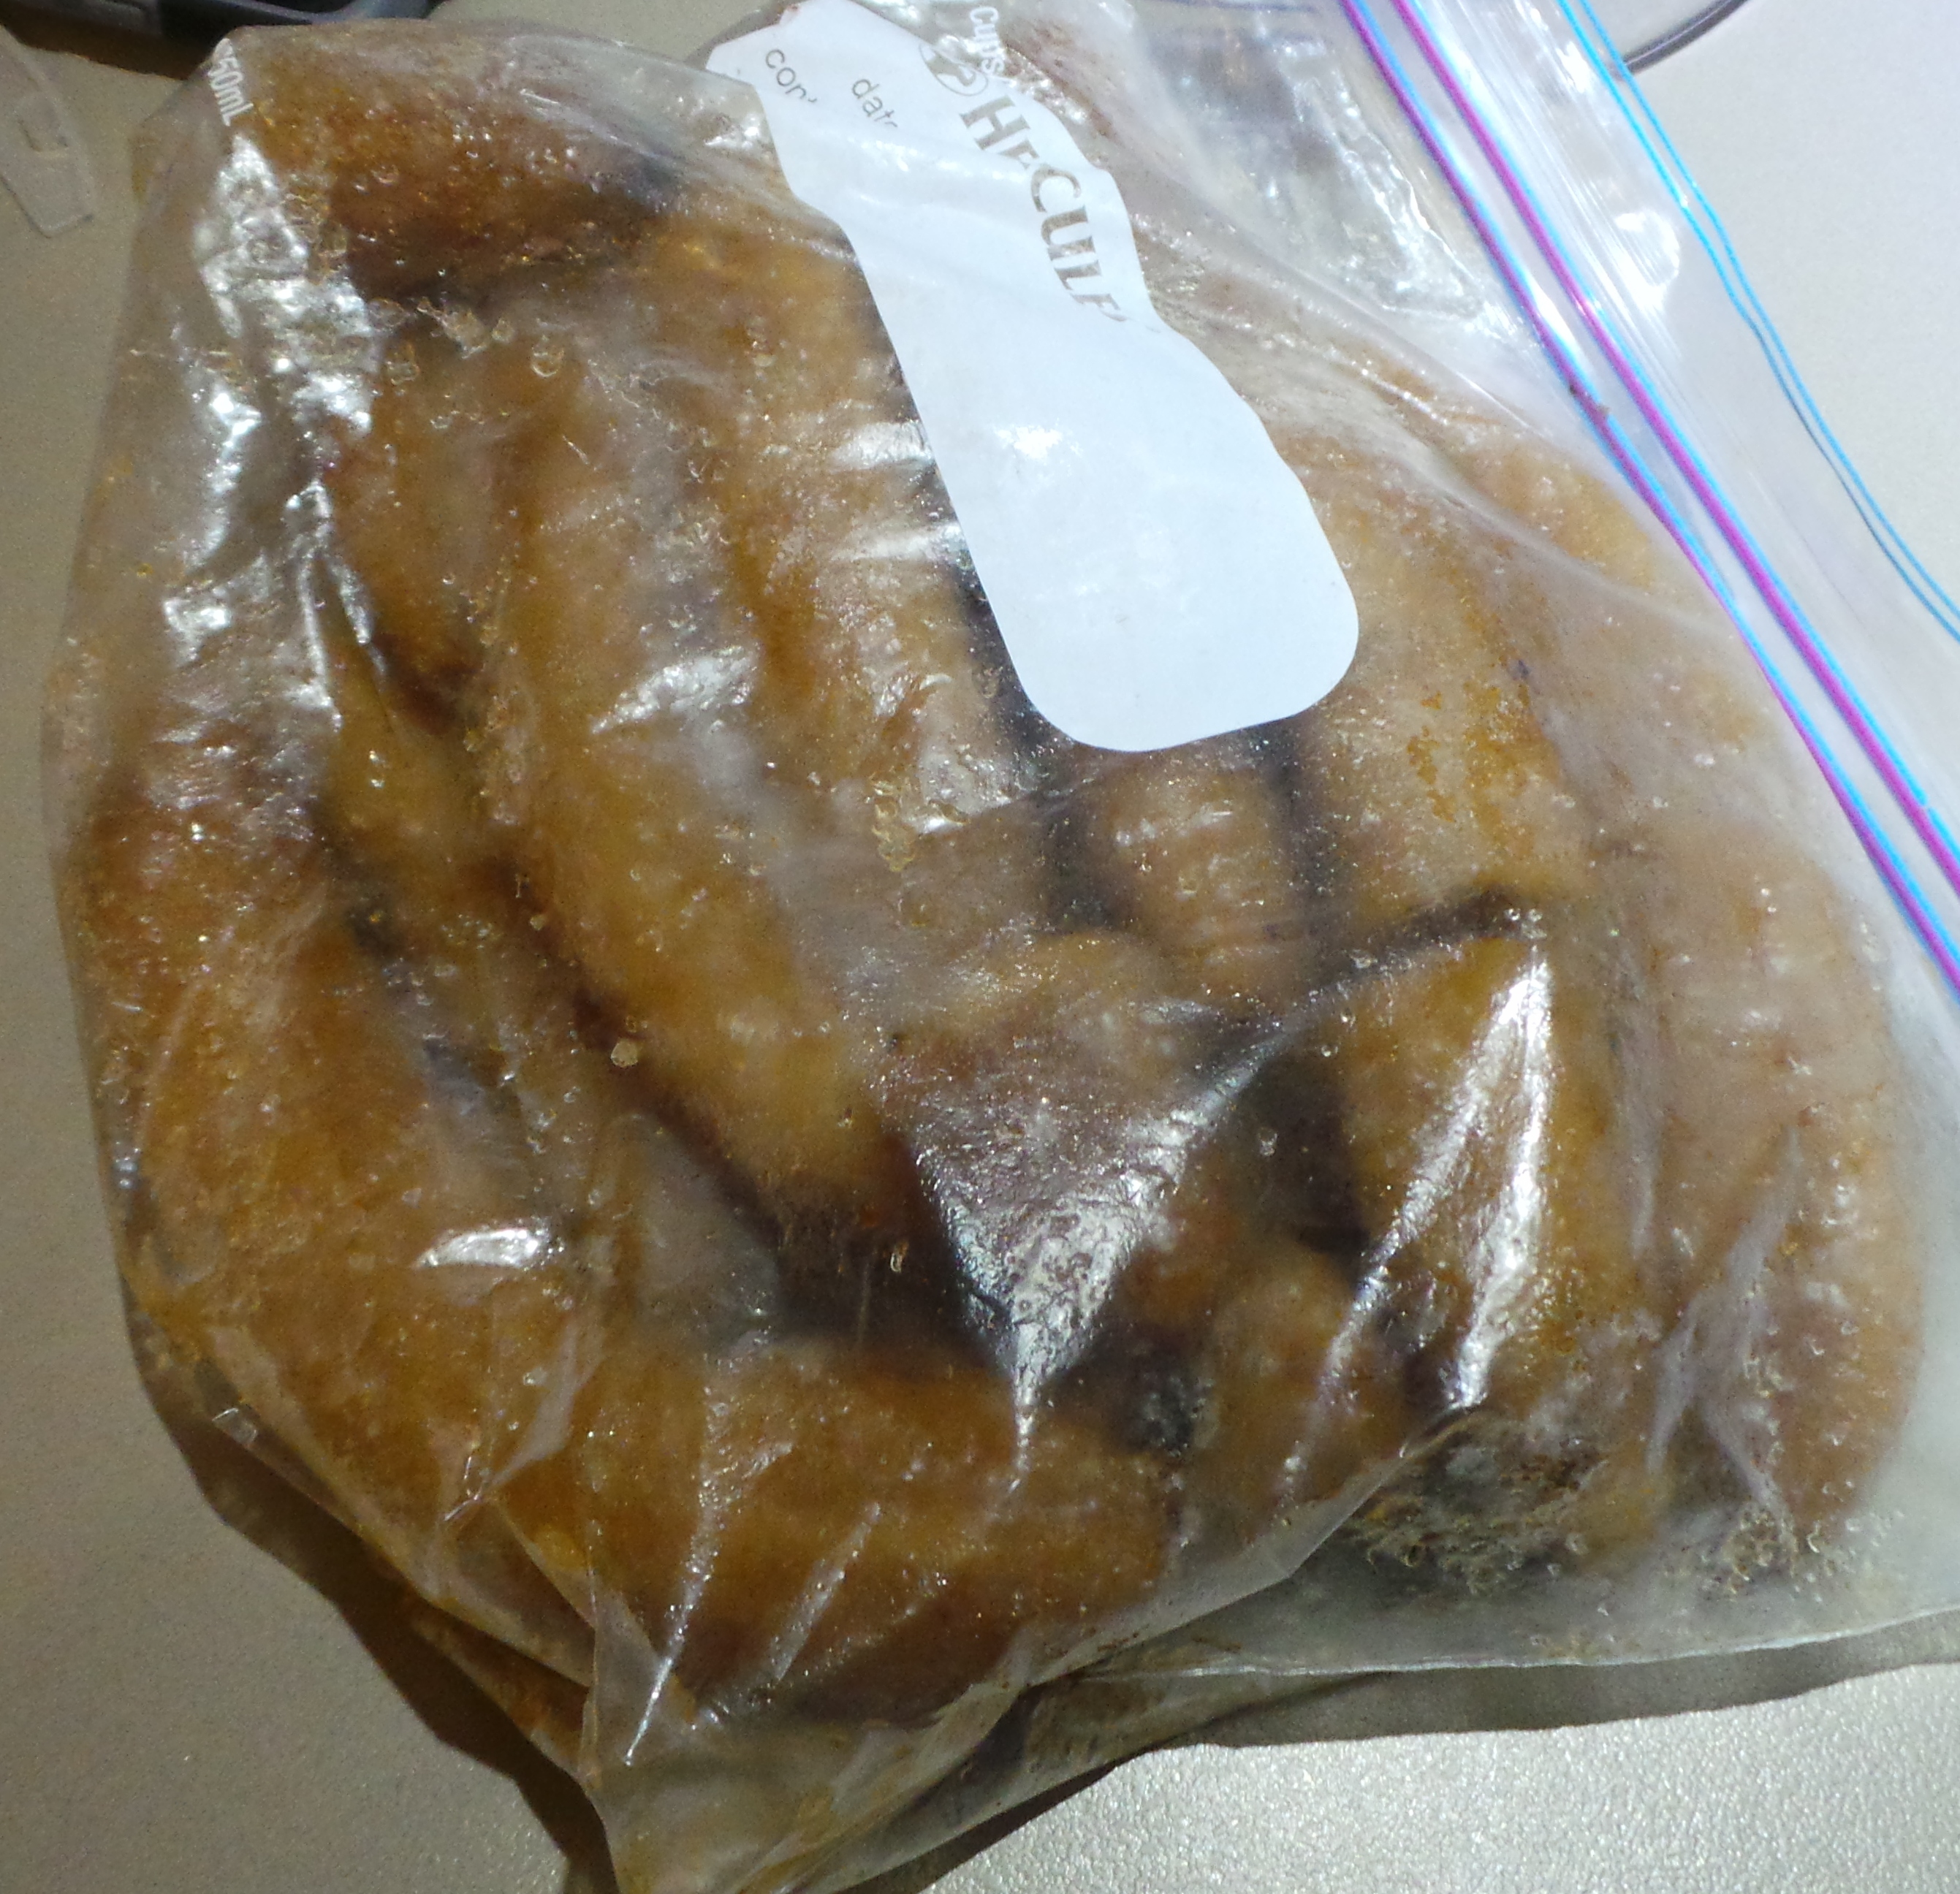
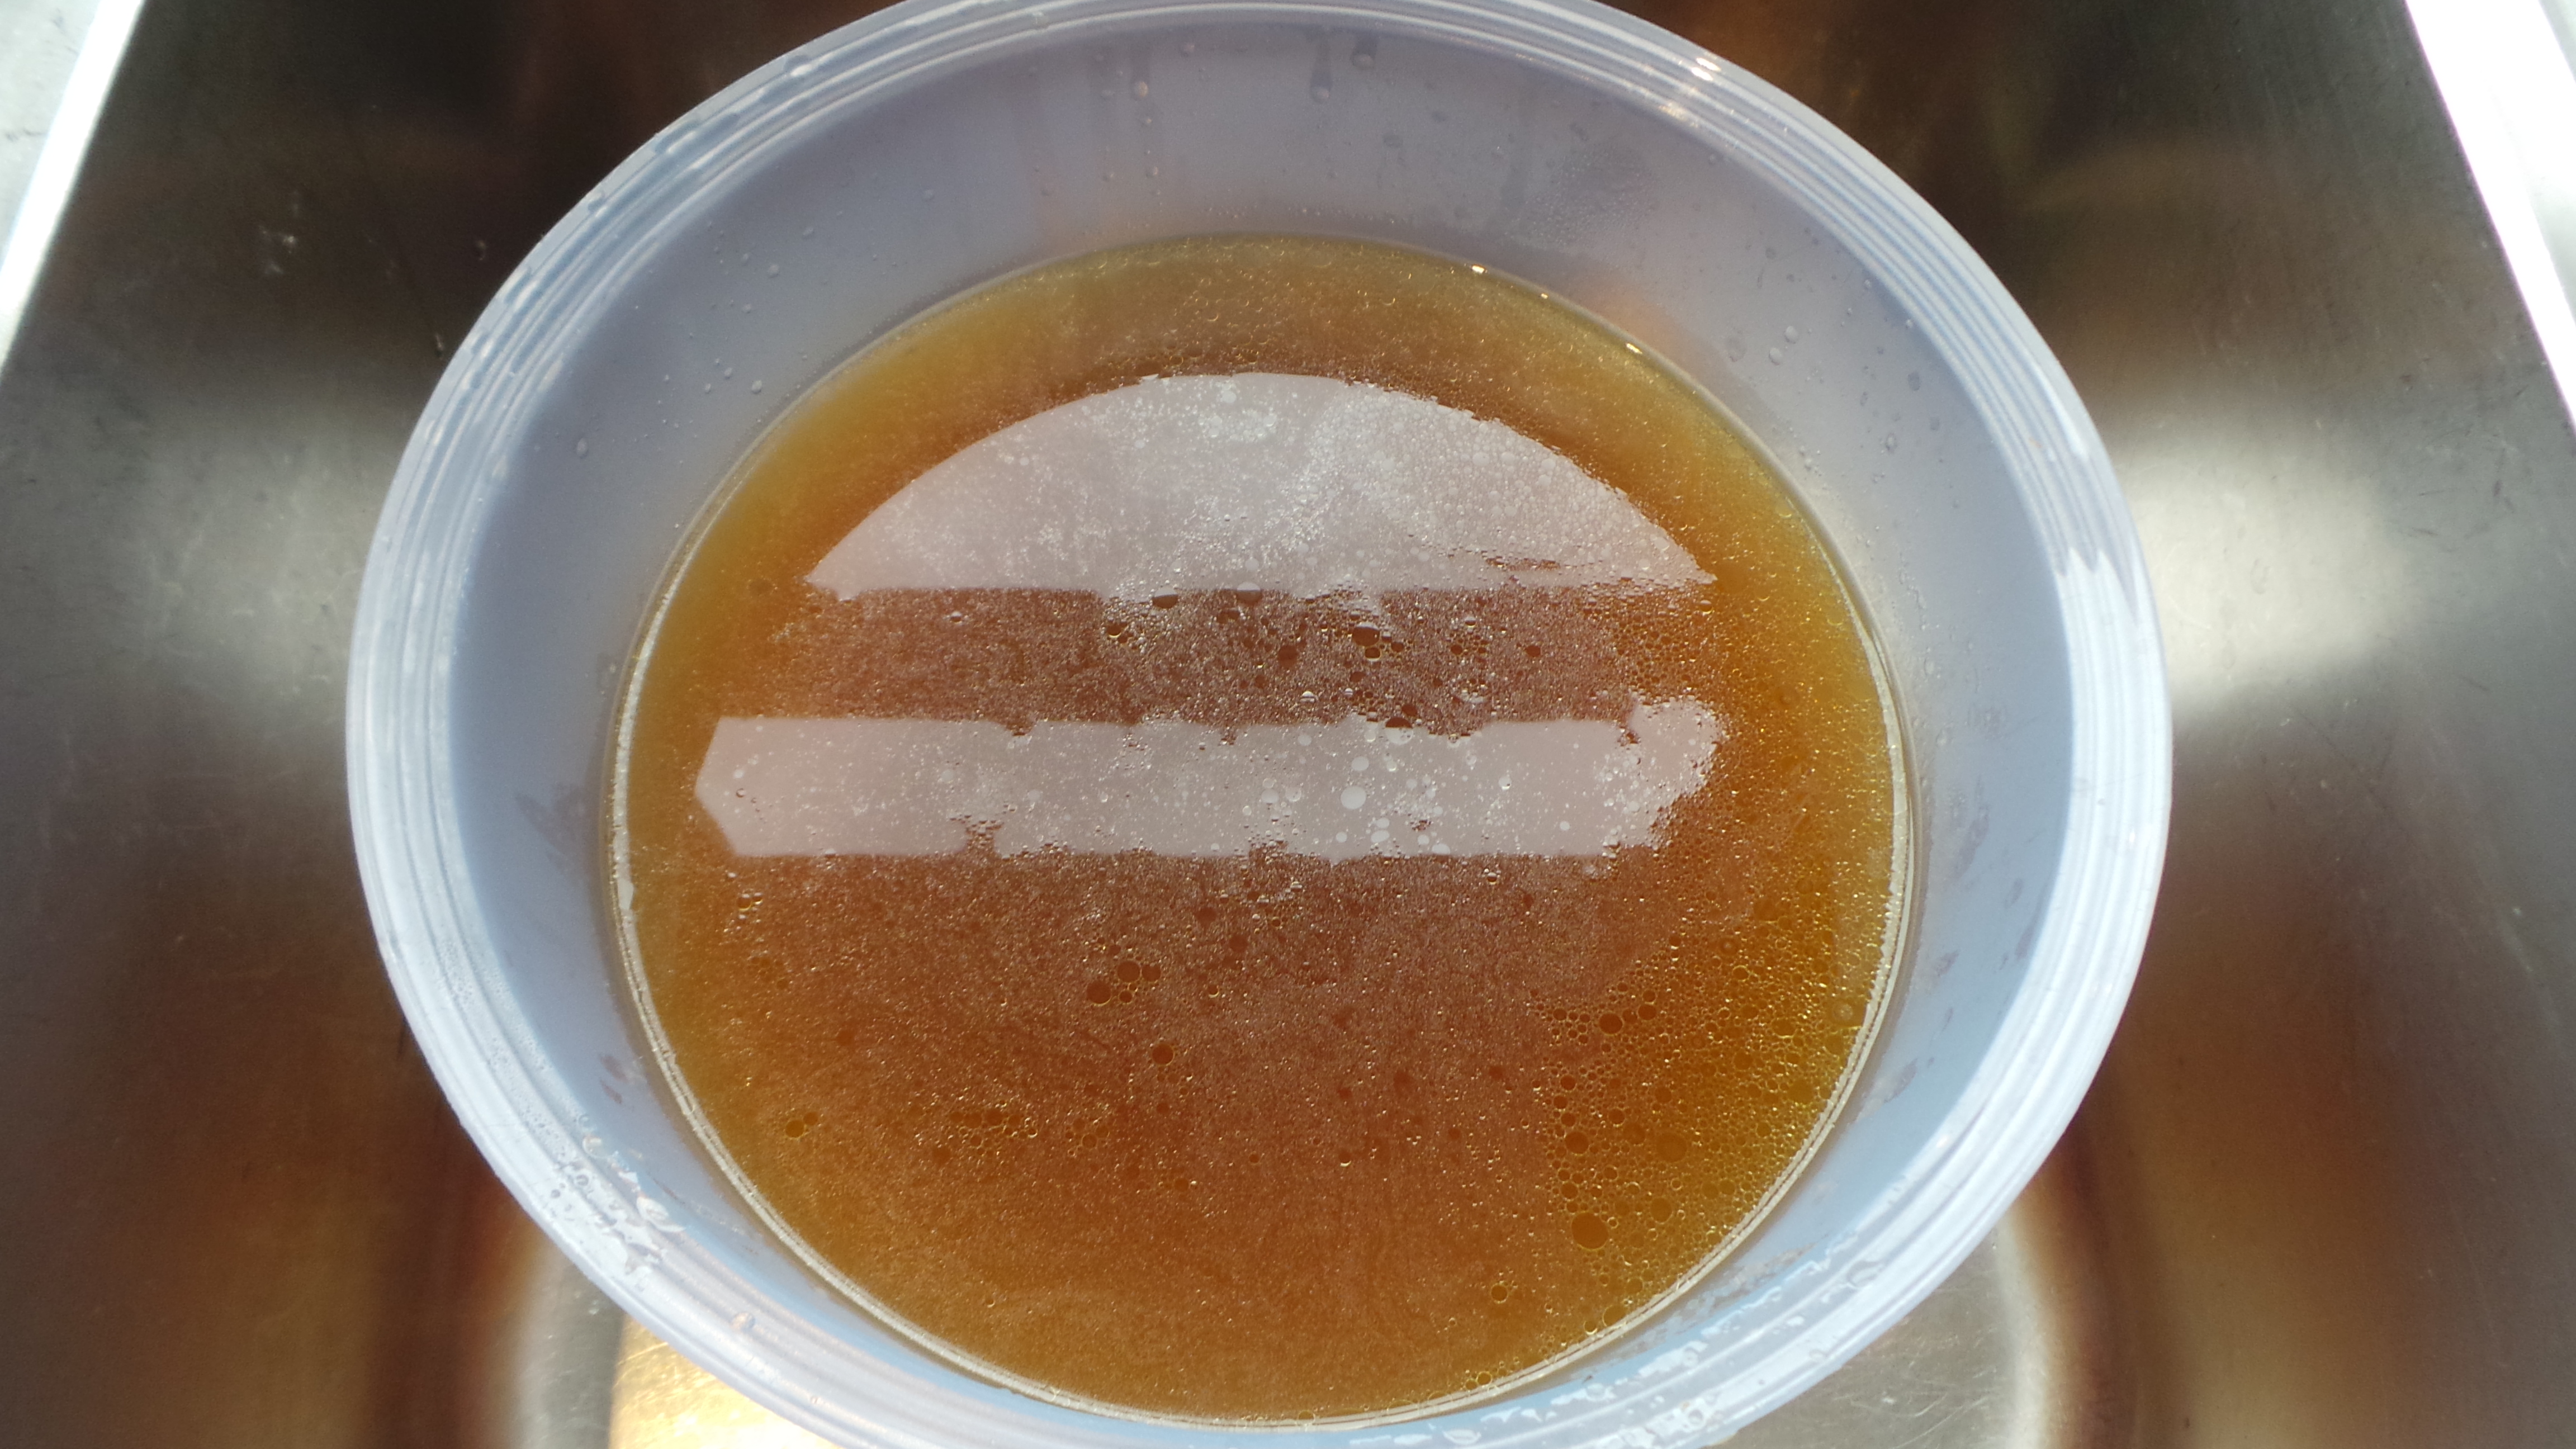
Several hours later…

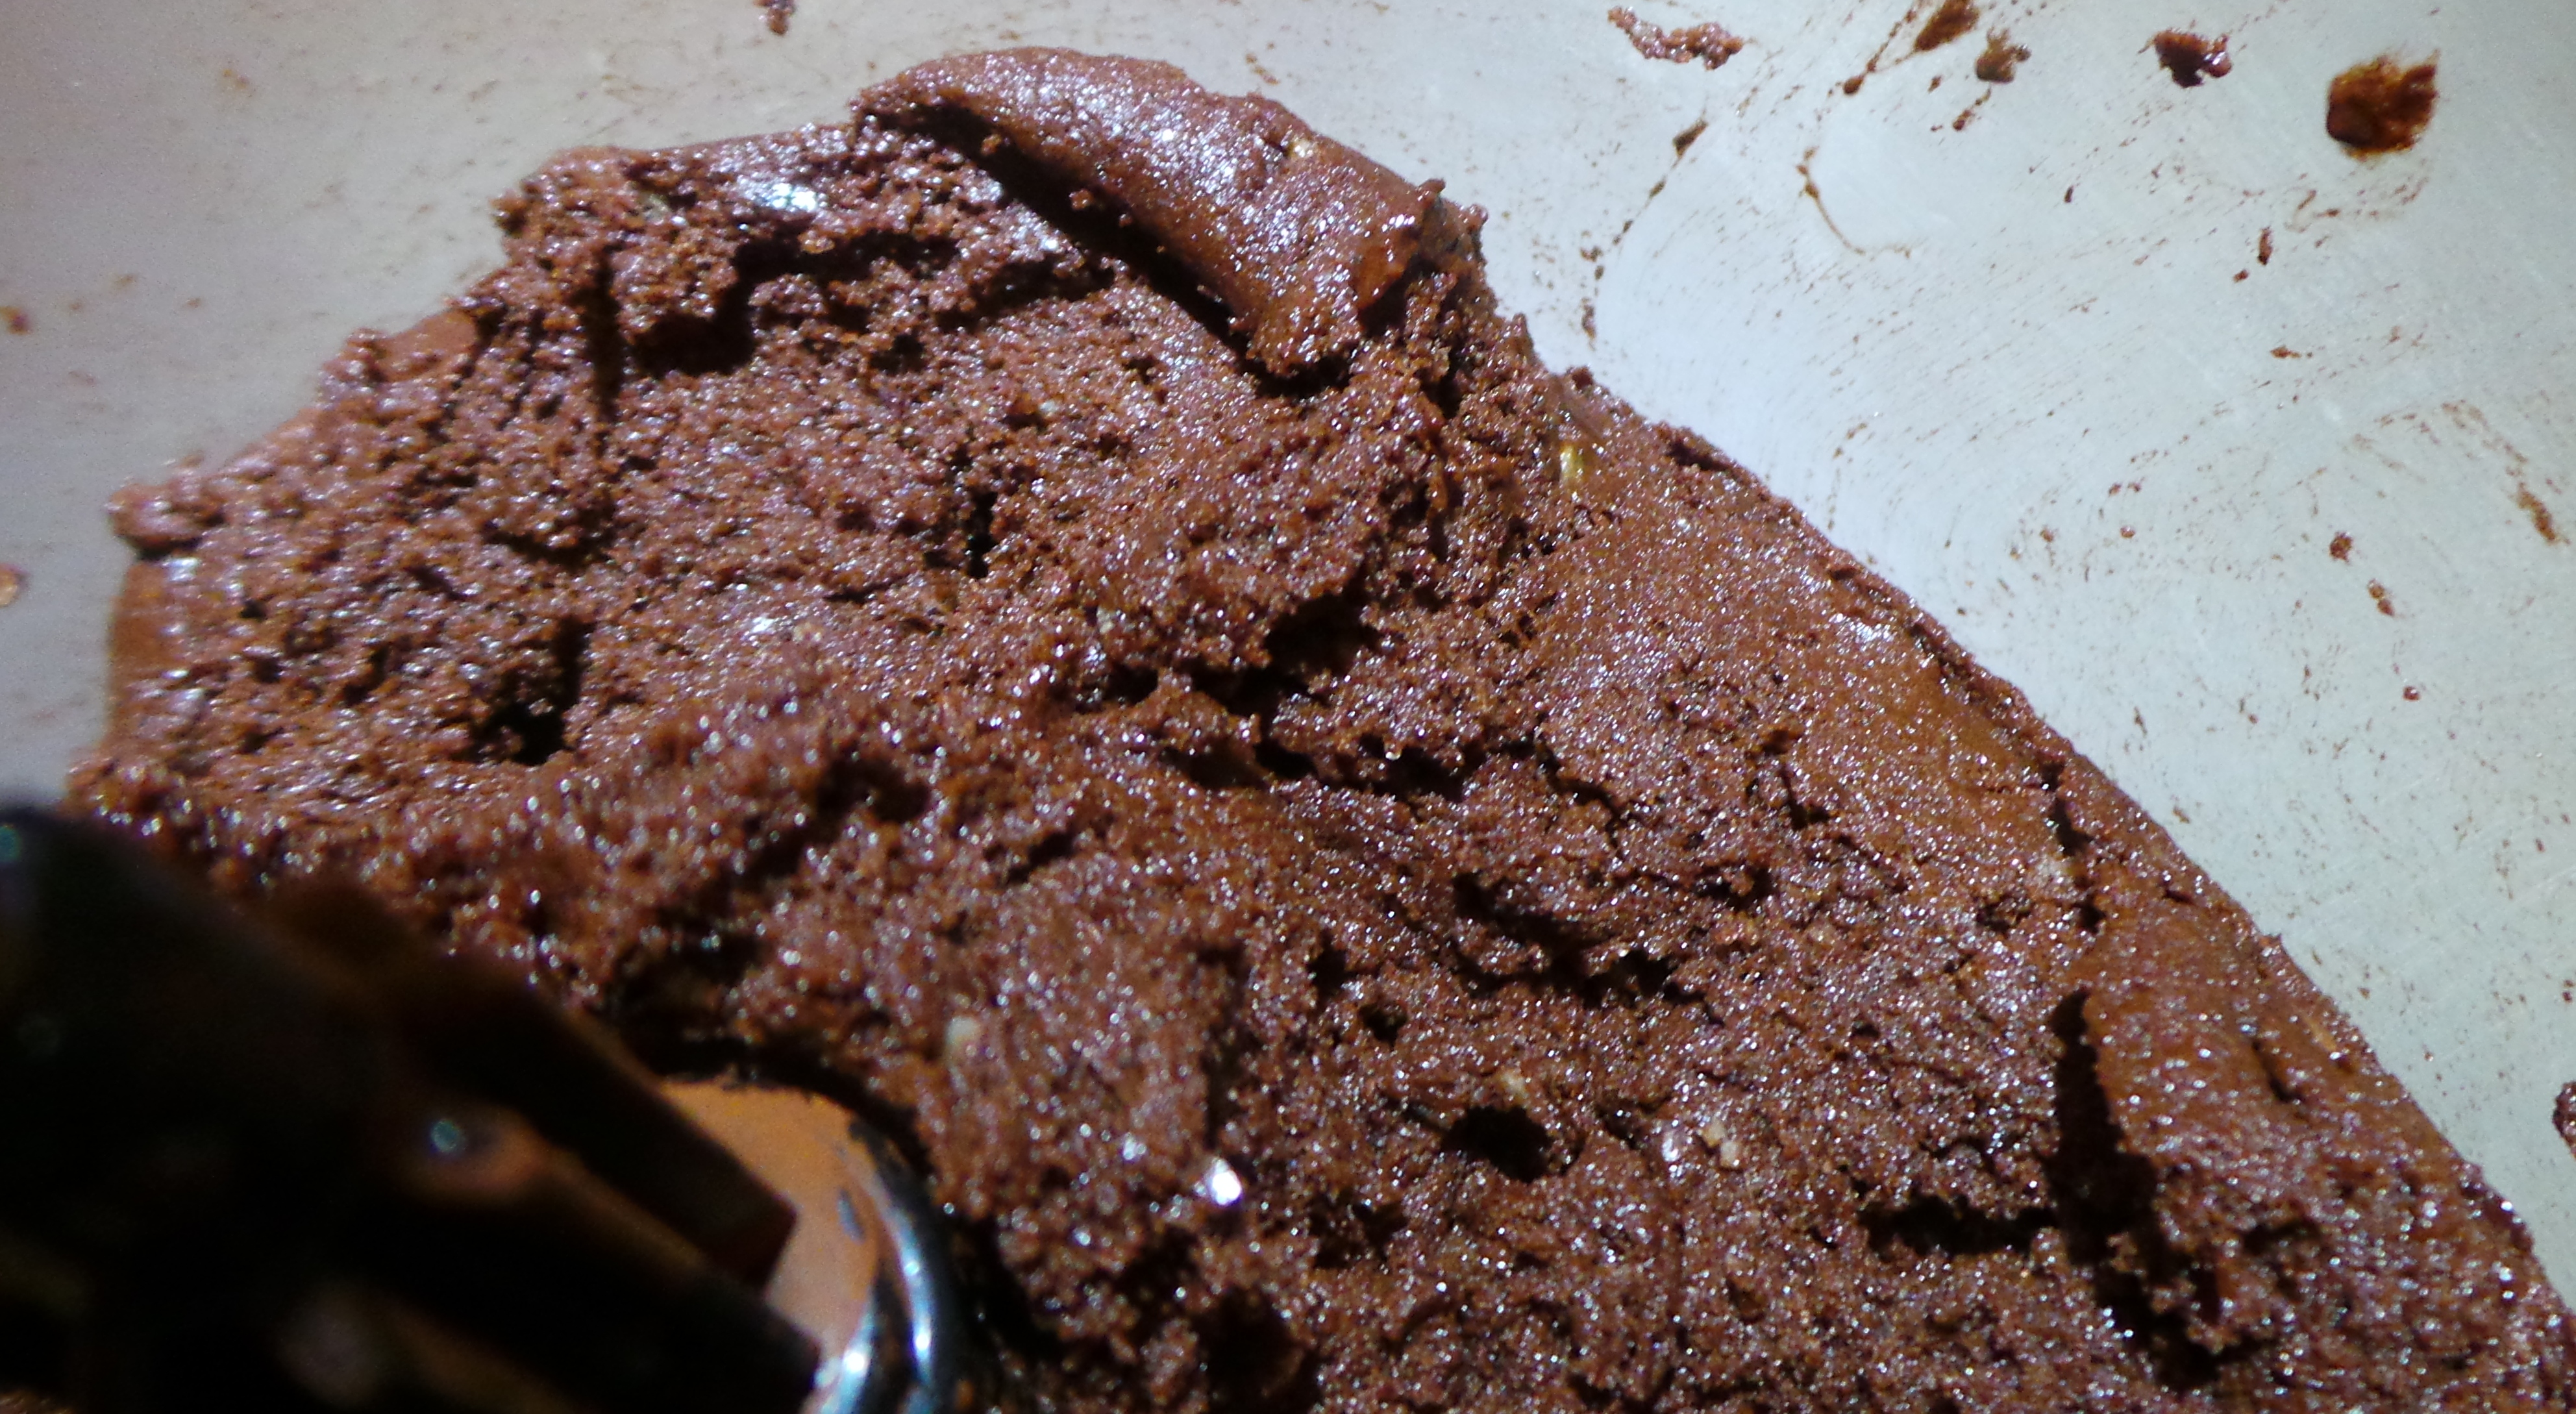
As you can see, there is quite a bit of liquid in the bowl. This can be left as it is, or thickened with some cornflour. Instructions on how to do this can be found here.

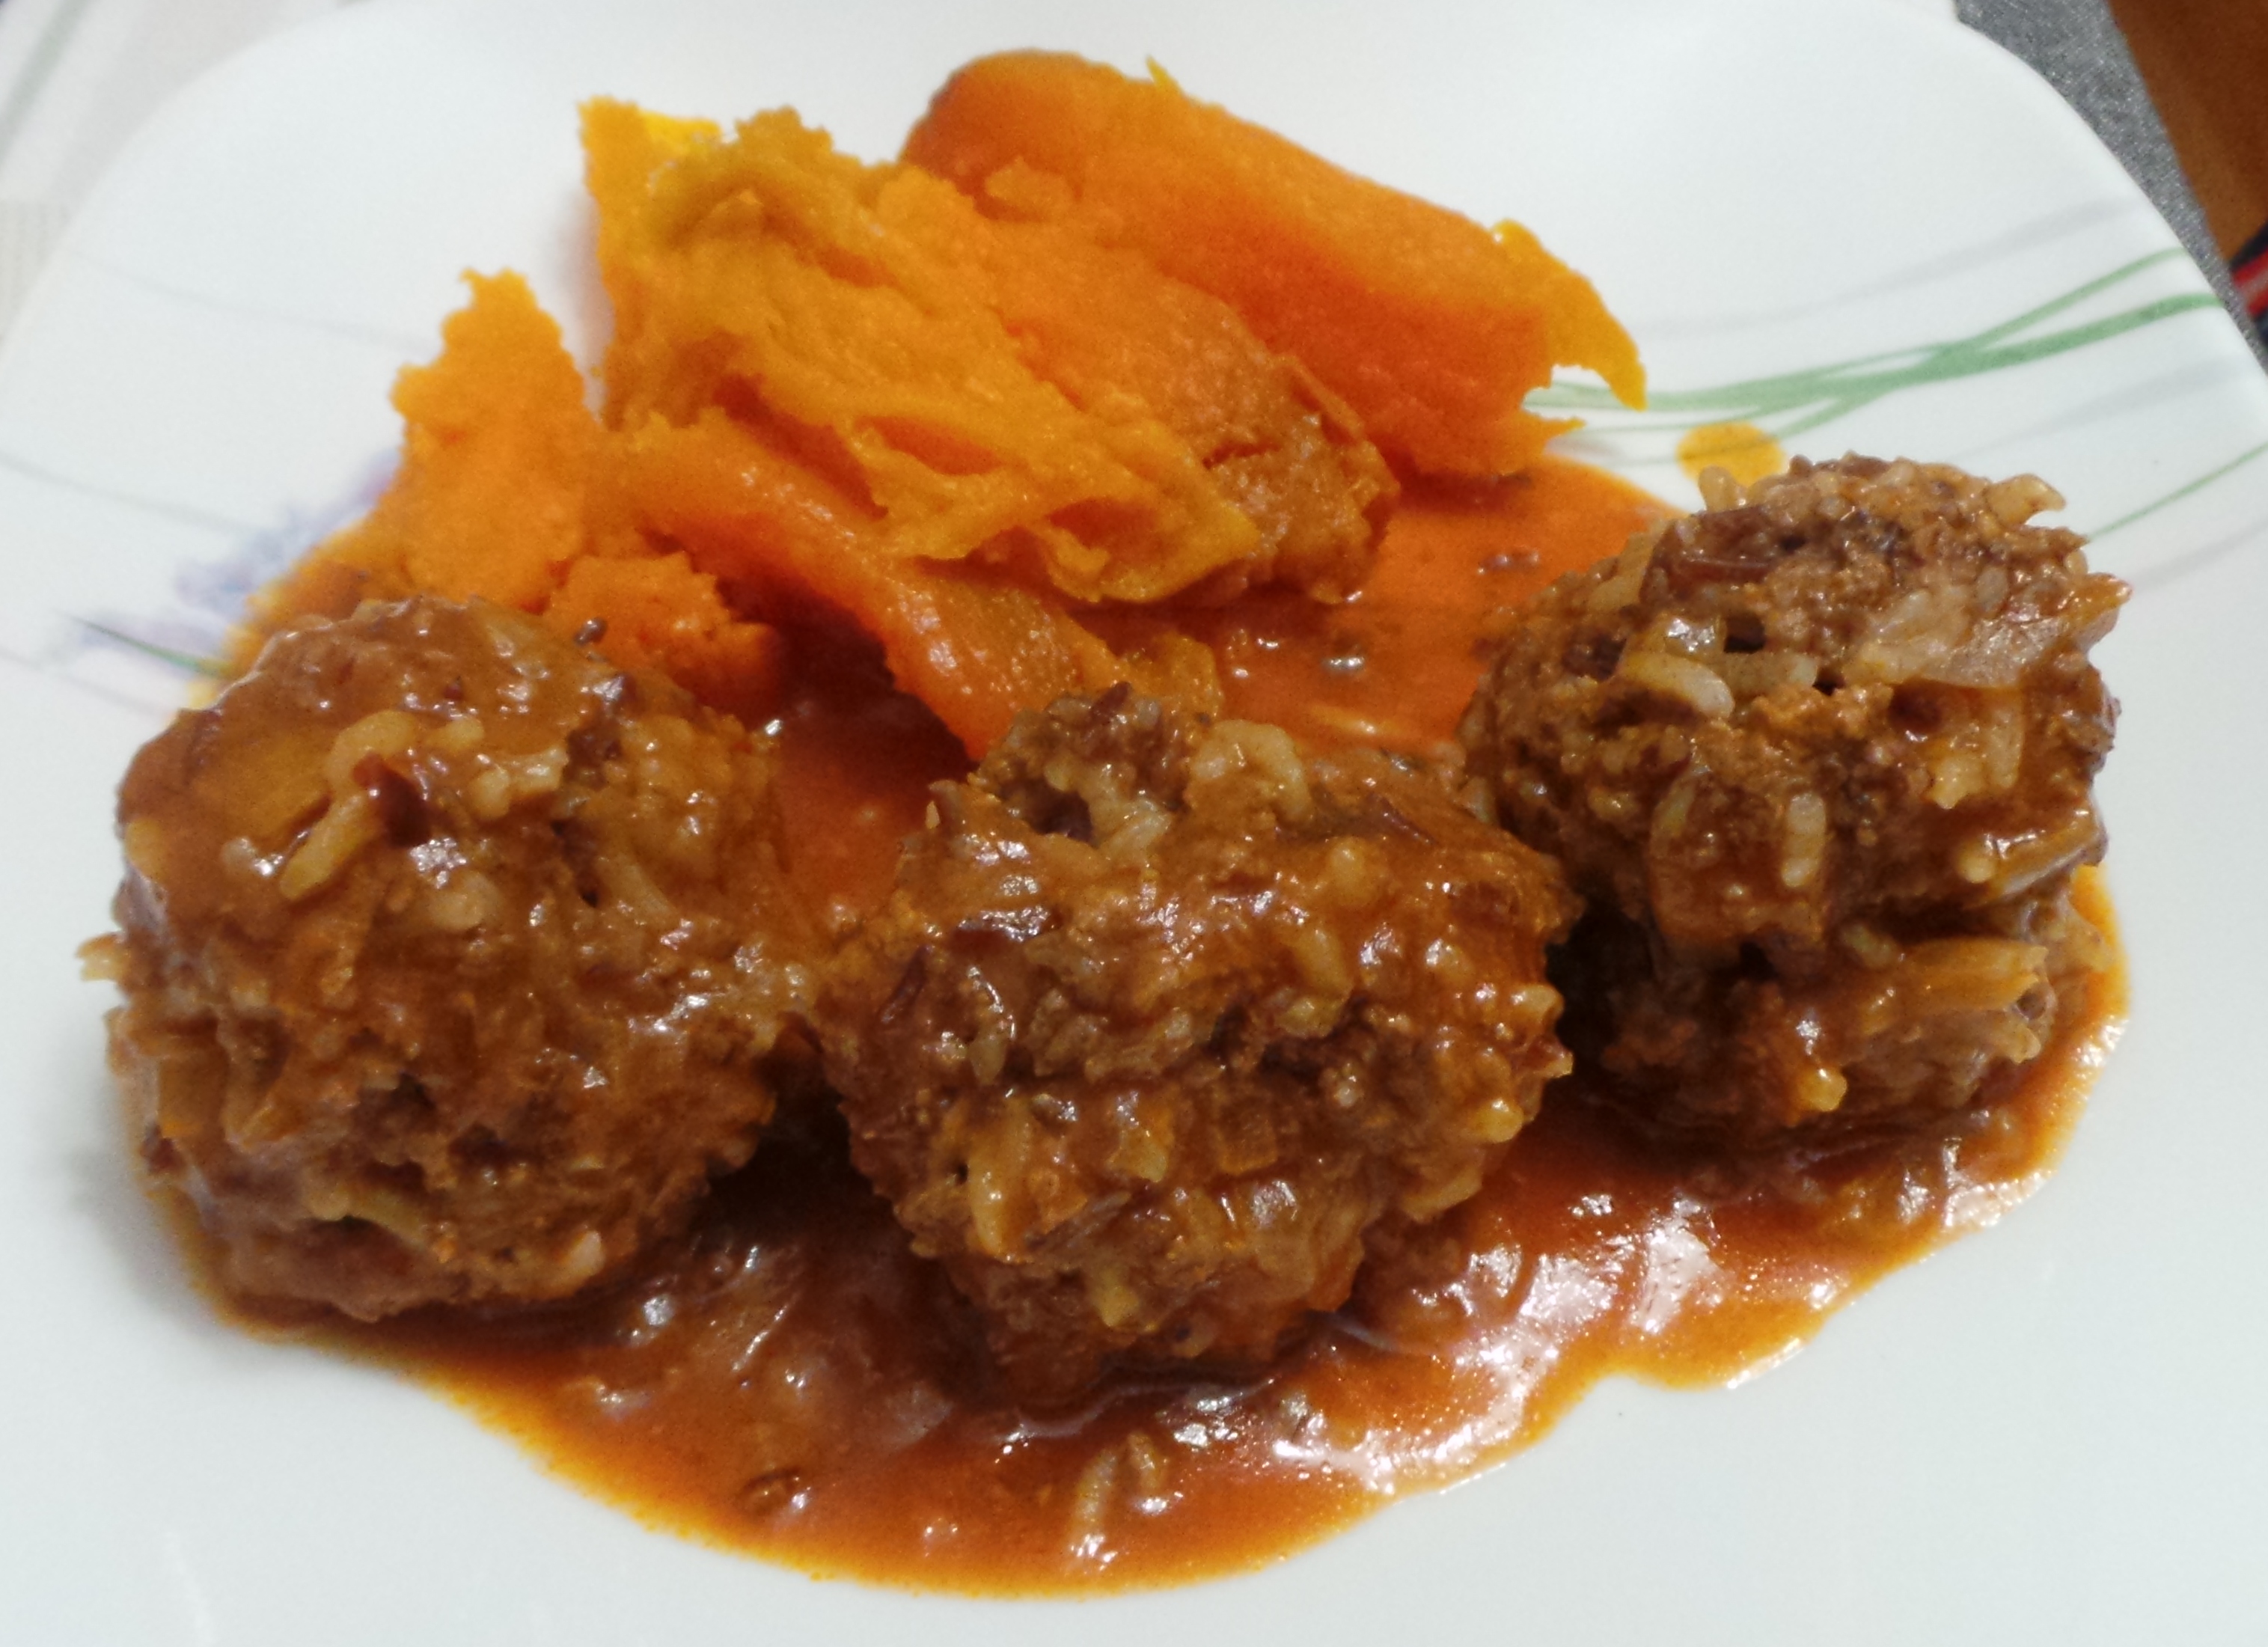
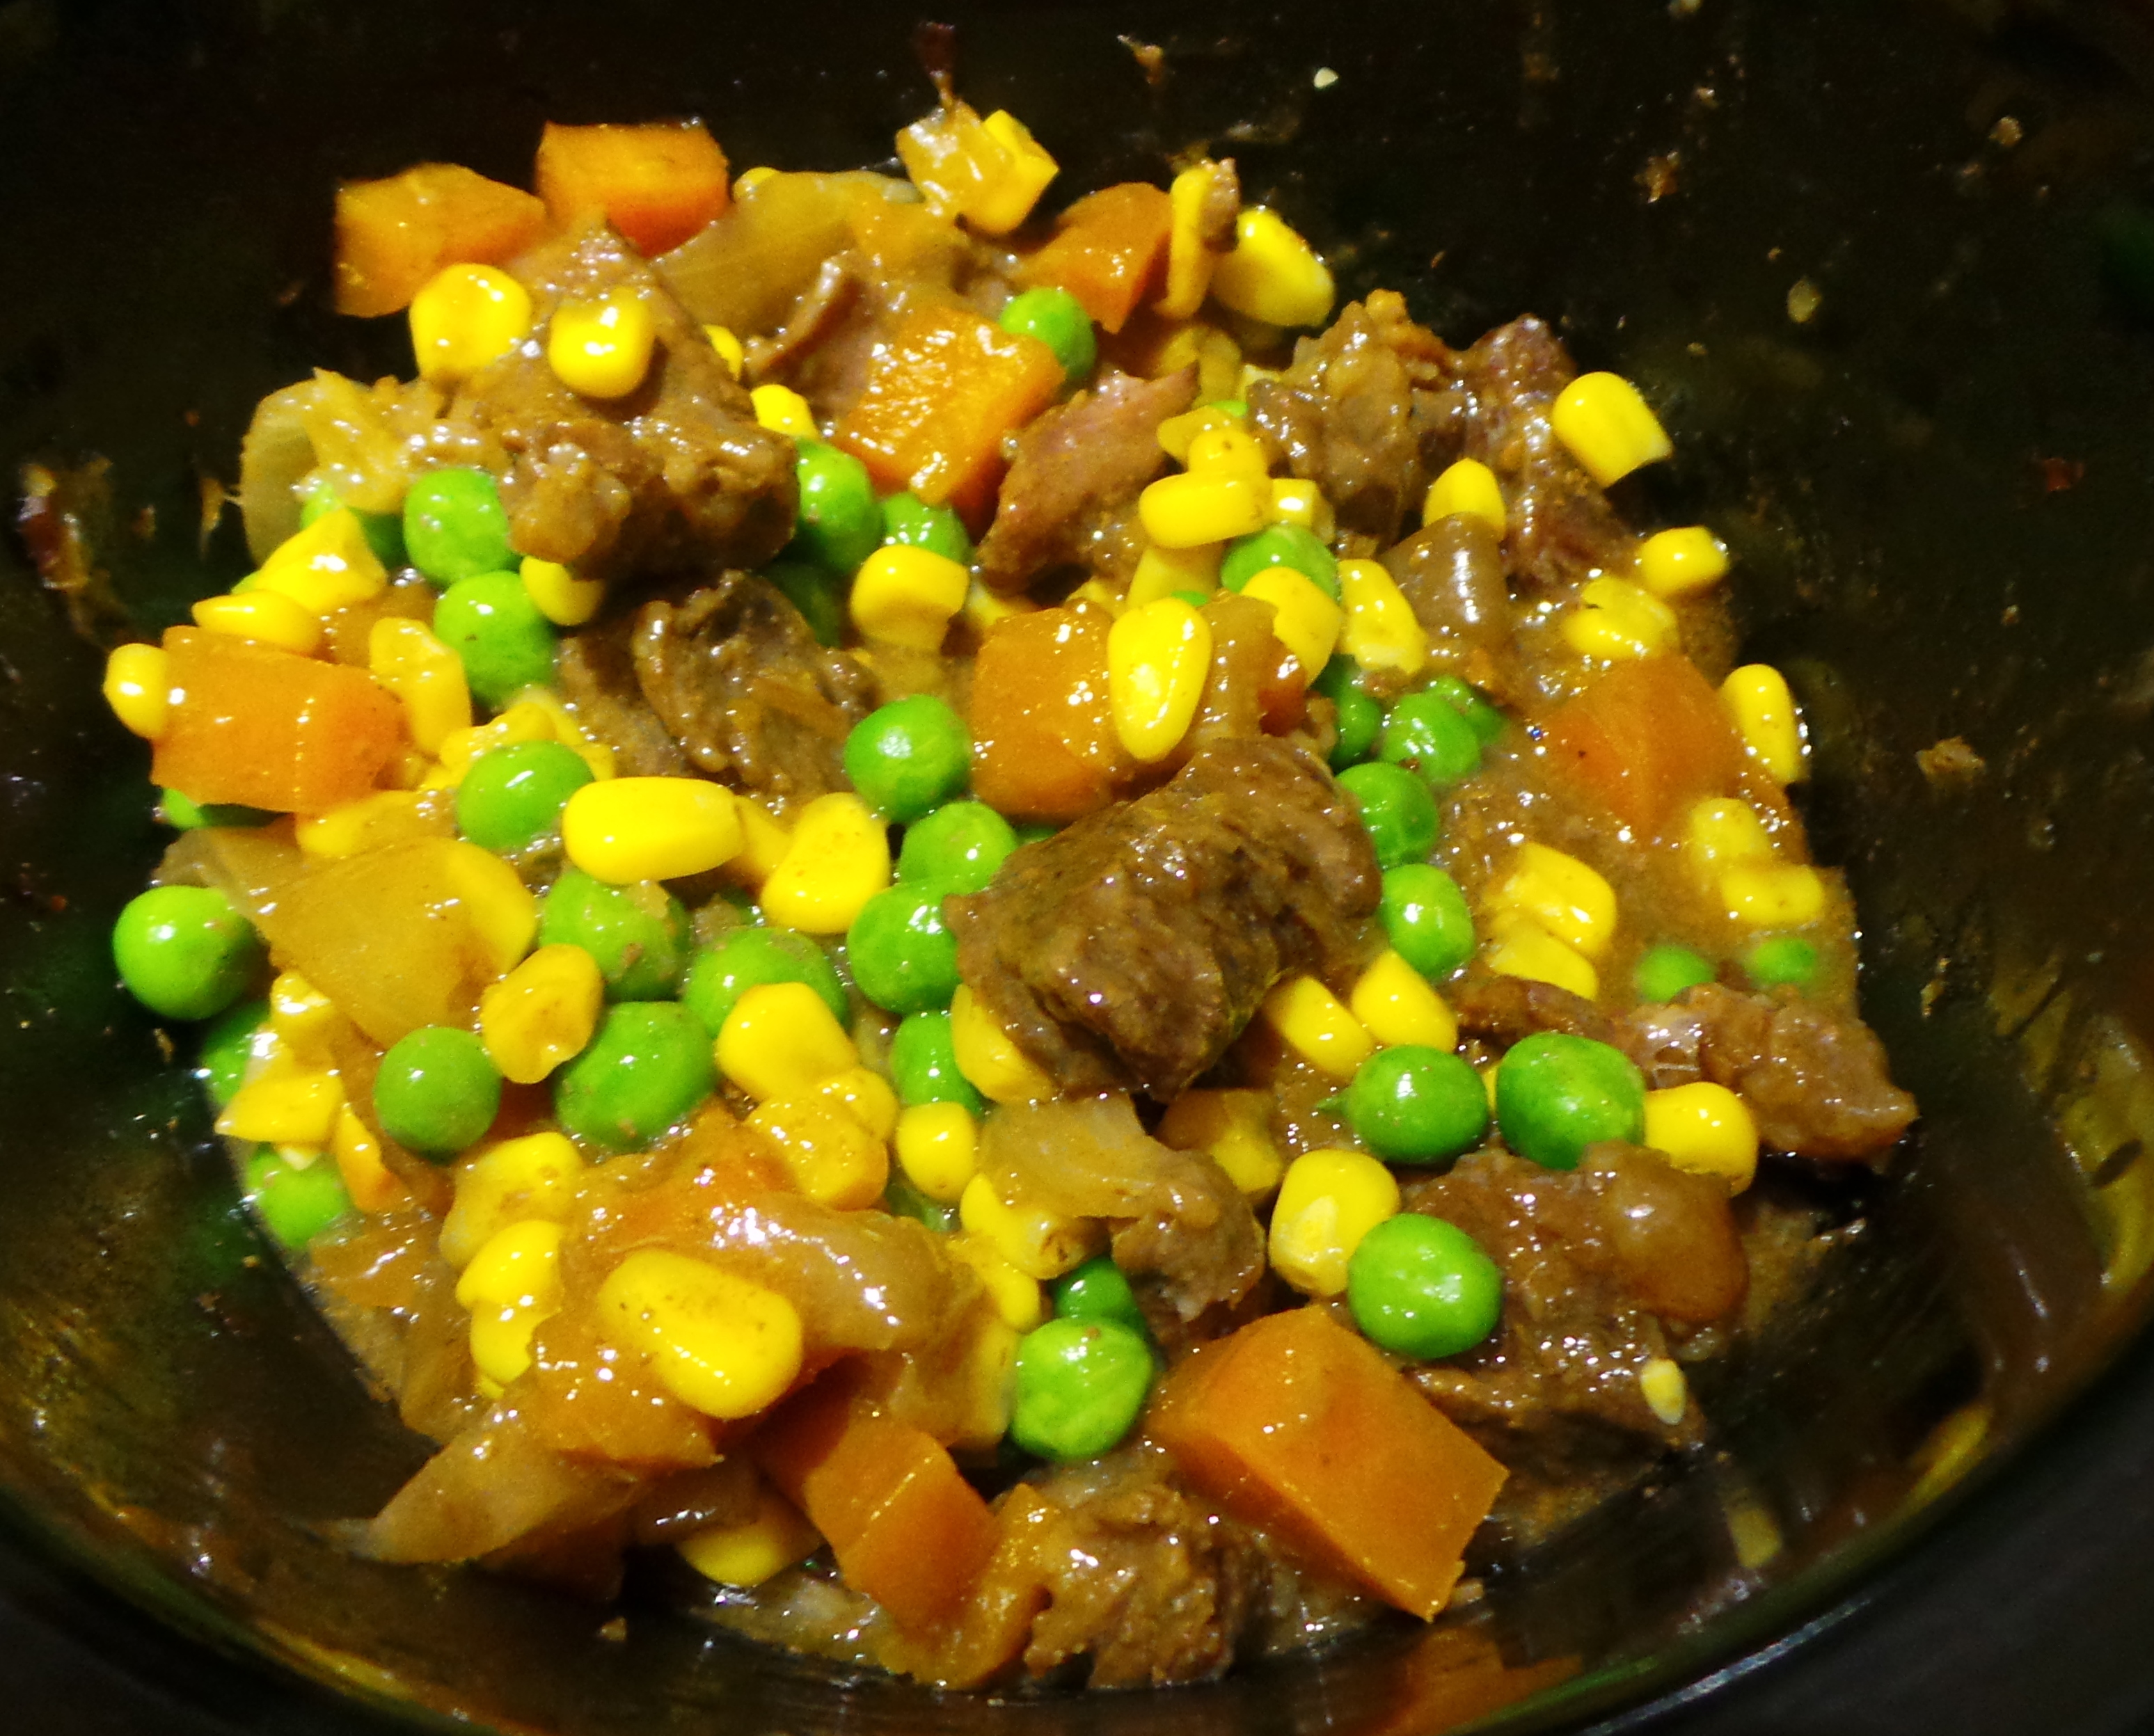
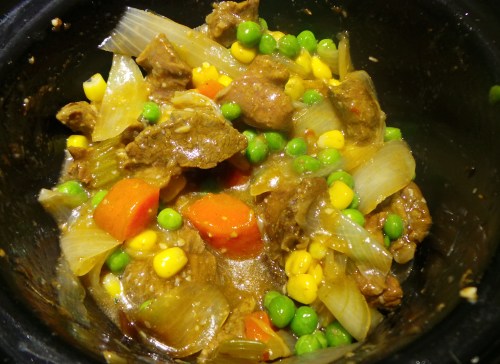
I felt that I’d like a few more vegetables in this, so I stirred through a handful each of frozen peas and frozen corn and popped the lid back on the pot for 30 minutes while I steamed some jasmine rice.

And this is the final result:

The final result

The final dish served with rice.

If you wish for a more tender version (although this is fab!) follow the instructions here and leave it overnight in the refrigerator before cooking.

Enjoy!

Making Chicken Stock in a slow cooker

So, don’t you hate those people who get all snobby about stock powders that come in cubes and cans and stuff?

You know, the ones who make their own stock and simply can’t understand anyone who doesn’t?

chicken stock (2)

Yeah.

I’ve become one of them. Sorry.

I used to be the person who would reach for the Massel or the Vegeta if stock was necessary, but since I moved at the start of the year I’ve been making my own actual liquid stock and it is soooooo much better than anything I’ve ever bought – even in one of those tetra pack doovers.

The hardest part is storing it. However, since I had to buy a new refrigerator when I moved, I got a wider one with these lovely drawers in the freezer. I lovingly ladle the stock into mason jars, place them in the freezer and forget about them until I need stock for risotto, gravy or soup…

I make my chicken stock in the crock pot or slow cooker overnight.

It’s terribly uncomplicated. Every now and then The Boy and I buy a BBQ Chook* from the local supermarket for one reason or another. After we’ve picked as much of the flesh as we can off it, I use it for stock. Now, if the freezer is already well stocked with…um… stock, we simply freeze the carcass until we need to restock the … stock. Follow? Good.

Leftover BBQ Chook

Leftover BBQ Chook

Making the stock goes like this:

Pop your chicken carcass into a slow cooker or crock pot. You can do this with an uncooked chicken, but a cooked one will give you far more flavour. Make sure to remove any stuffing from the cavity and dispose of it. You don’t want that in your liquid.

To the slow cooker add a roughly chopped onion, a couple of carrots and some celery. There is no need to add salt or any other seasonings. You want your stock to be as versatile as possible, add other flavours to the final dishes not here.

Roughly chopped vegetables

Roughly chopped vegetables

It honestly doesn’t matter how your vegetables look either. They’re all going to be thrown away at the end of the process — after every skerrick of flavour has been cooked out of them. Basically, you just want to be able to fit them in the pot with the chicken.

Cover the contents with water – you can boil the water first if you wish.

Add water to your stock pot

Add water to your stock pot

Turn the slow cooker on to low and then ignore it for 8 or so hours. Better yet, get this all done after dinner and leave it to cook overnight while you sleep. You’ll wake up to a delicious smelling house and a slow cooker full of something that looks like this…

Cooked chicken stock

Cooked Chicken Stock

And doesn’t that look terribly unattractive? Don’t worry, it’s not the finished product.

Turn your slow cooker off, let the contents cool for a bit, and set a large sieve inside a large bowl. Line the sieve with some cheesecloth or a new kitchen wipe like this:

Line your sieve with a fresh cloth

Line your sieve with a fresh cloth

Then upend the contents of your slow cooker into it. It will look horrendous.

Strain the broth from the solids

Strain the broth from the solids

Walk away from the sink. Shower, dress, have a nice cup of something warm and caffeinated.

Leave it alone.

Then, after an hour or so, remove the sieve and discard the contents. Bin them, bury them, place them in your compost or Bokashi bin; you will no longer need them in your kitchen. What you will want is this, this liquid gold. <cue heavenly choir>

Pure chicken stock

Pure chicken stock

Don’t worry about the fine layer of fat you can see in the sheen on the surface. That is pure flavour and, when chilled, will give the stock a gelatinous texture.

Now, all you need to do is bottle it. Place it in some sterilised mason jars and freeze it as I do.

Mason jar of chicken stock

Mason jar of chicken stock

You could also place it into ziploc bags for freezing.

Alternatively, you can put it in a large saucepan and boil it until it is so reduced that you can freeze it in ice-cube trays as an über concentrate that you add water to when defrosted.

My 3 litre slow cooker made 2 ½ litres of stock. Isn’t it purdy?

A whole batch of chicken stock

A whole batch of chicken stock

Give it a shot, you’ll love the results. I promise. It will also make you feel all chef-y and virtuous (for not throwing food away) at the same time.

Let me know how you go.

*Side note:  Try going into an American supermarket and asking for a BBQ Chook. I dare you. If you happen to be an American reading this, it can be translated as ‘Rotisserie Chicken.”  You’re welcome.