At the start of this year, a friend requested that I make a cheesecake for her birthday in July. A chocolate and peanut butter cheesecake, to be precise.
I didn’t want to be making something from purchased Reese’s products, so I started searching for a recipe.
Let me say that there are A LOT of recipes for peanut butter and chocolate cheesecakes out there, and most of them have a Reese’s requirement.
Then – at practically the last moment – I thought of Nigella.
She saved me.
I found this recipe here. It was everything I wanted and I was even able to adapt it for the coeliacs amongst the diners.
It didn’t use a water bath either, which made it much less fuss to make. As Nigella explains in her notes, a water bath would give it a silky texture, however baking it without one gives a texture that brings to mind the peanut butter itself.

Seconds were requested.
I replaced the digestive biscuits in the crust with the same weight of almond meal, but did pretty much everything else according to her recipe.
I broke out my trusty food processor for this one, but it could be done with just electric beaters or by hand. Make sure that the cream cheese is at room temperature or you could hurt something.
First line the base of a 23 cm/9 inch springform tin. I give detailed instructions on how to do that here.
Then place the almond meal, some salted peanuts, soft unsalted butter and dark chocolate chips into the food processor bowl. I measure mine into a separate bowl first.
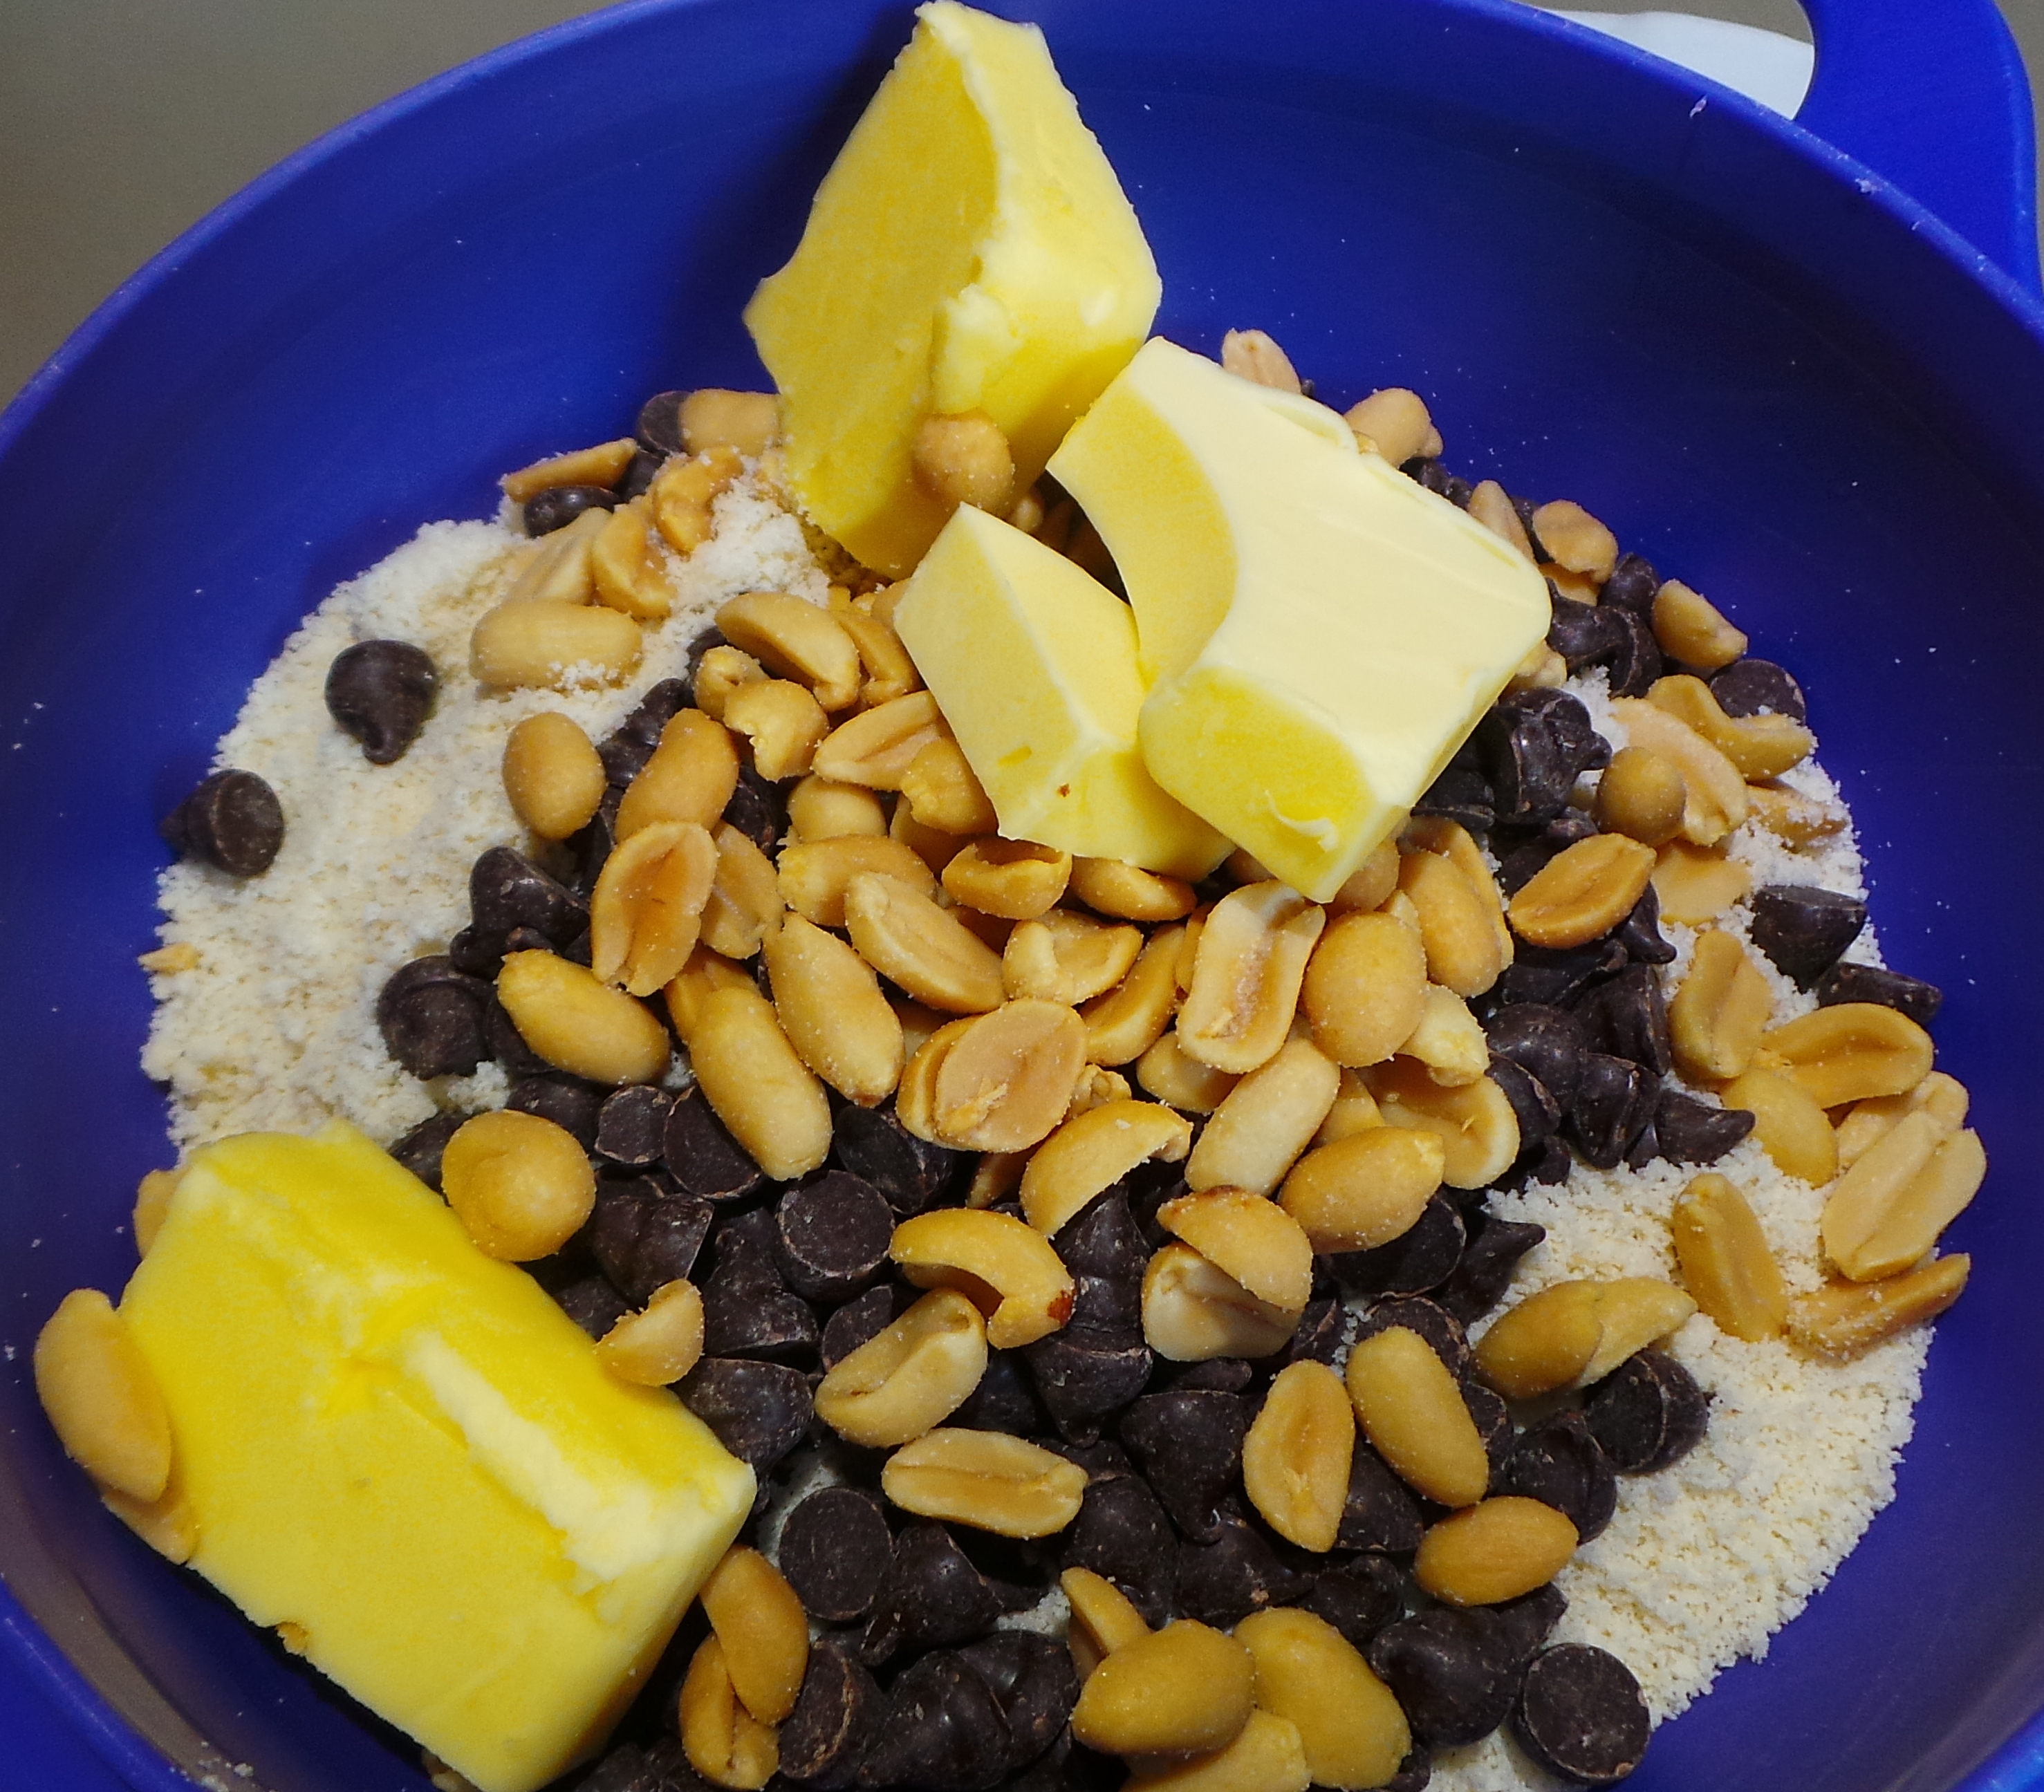
These will form the crust.
Then process them until well-combined.
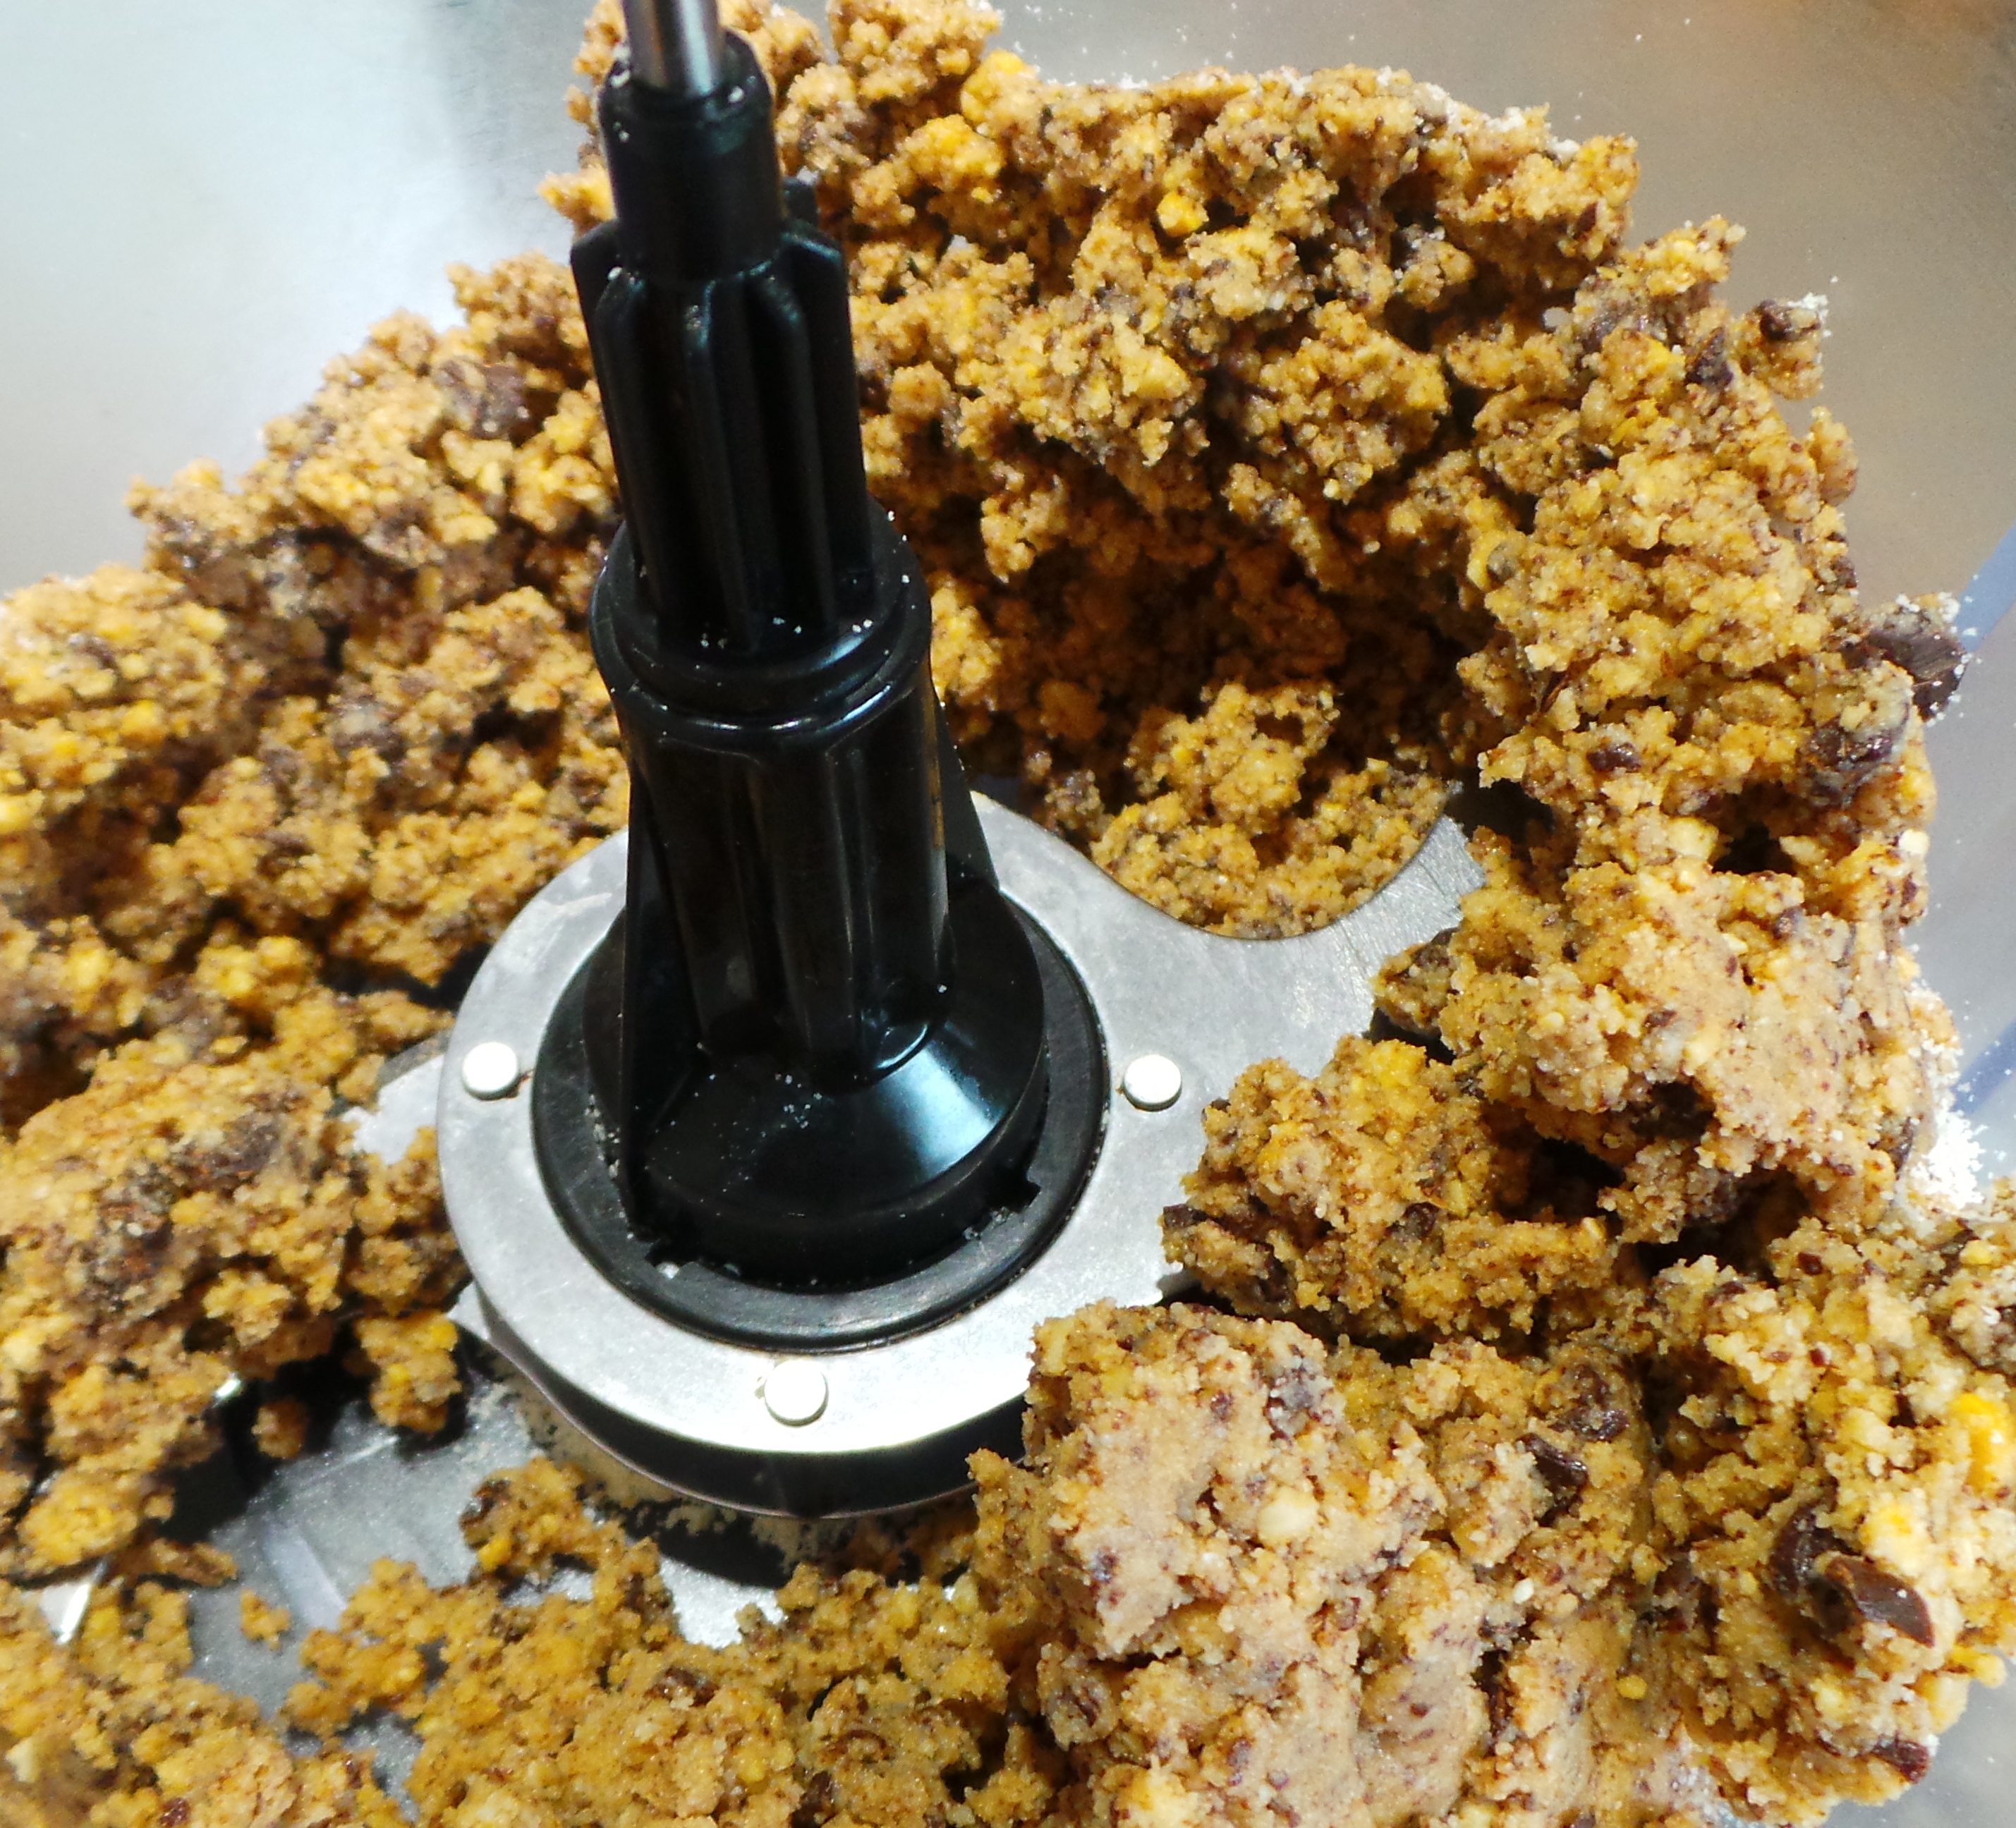
Almost there.
If you don’t have a food processor, use chopped nuts and melt the butter and chocolate together before mixing thoroughly.
You want it to come together into a clump. Once you’ve got a satisfying-looking blob, turn it into the base of the springform tin and press it into the bottom and up the sides.
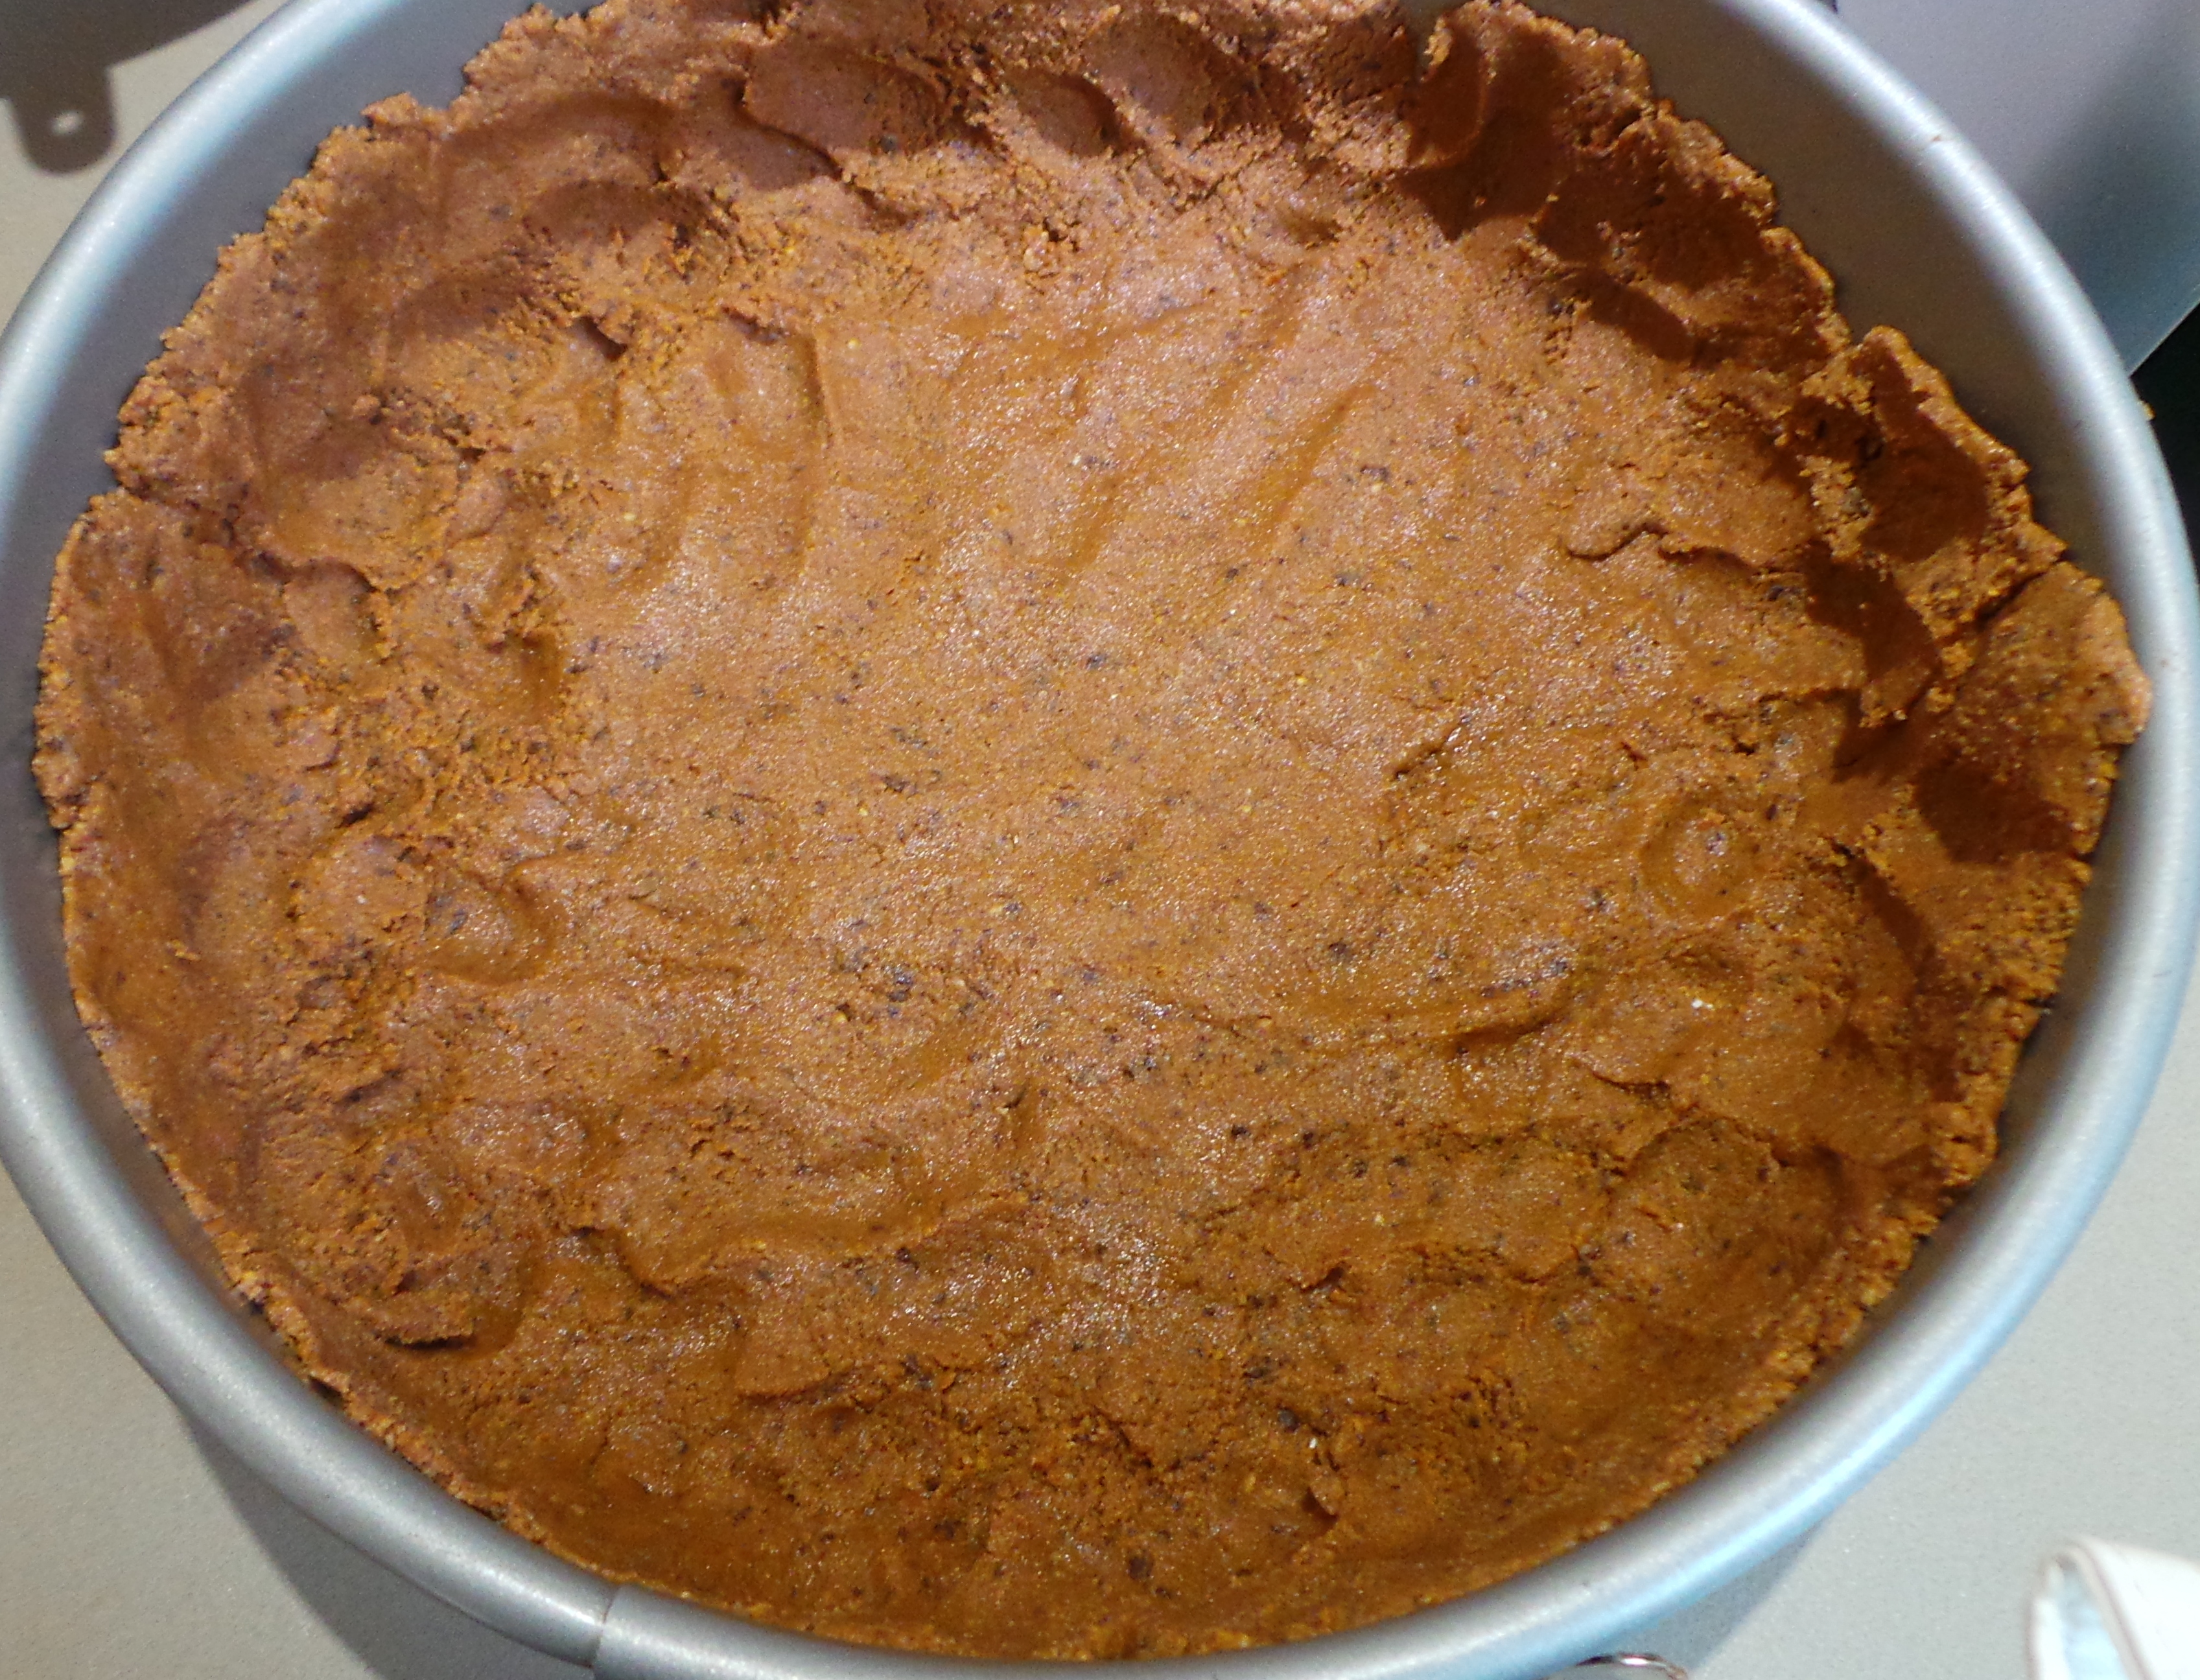
Press the mix across the base and up the sides of the cake tin.
This will form a nice crust once baked. However, you need it to be cool to hold together long enough once in the oven. So put it in the fridge while you make the filling.
Rinse out your food processor bowl and turn on the oven. Use the metal blade and fill the processor bowl with the softened cream cheese, eggs and egg yolks, caster sugar, some sour cream and – of course ! – smooth peanut butter.
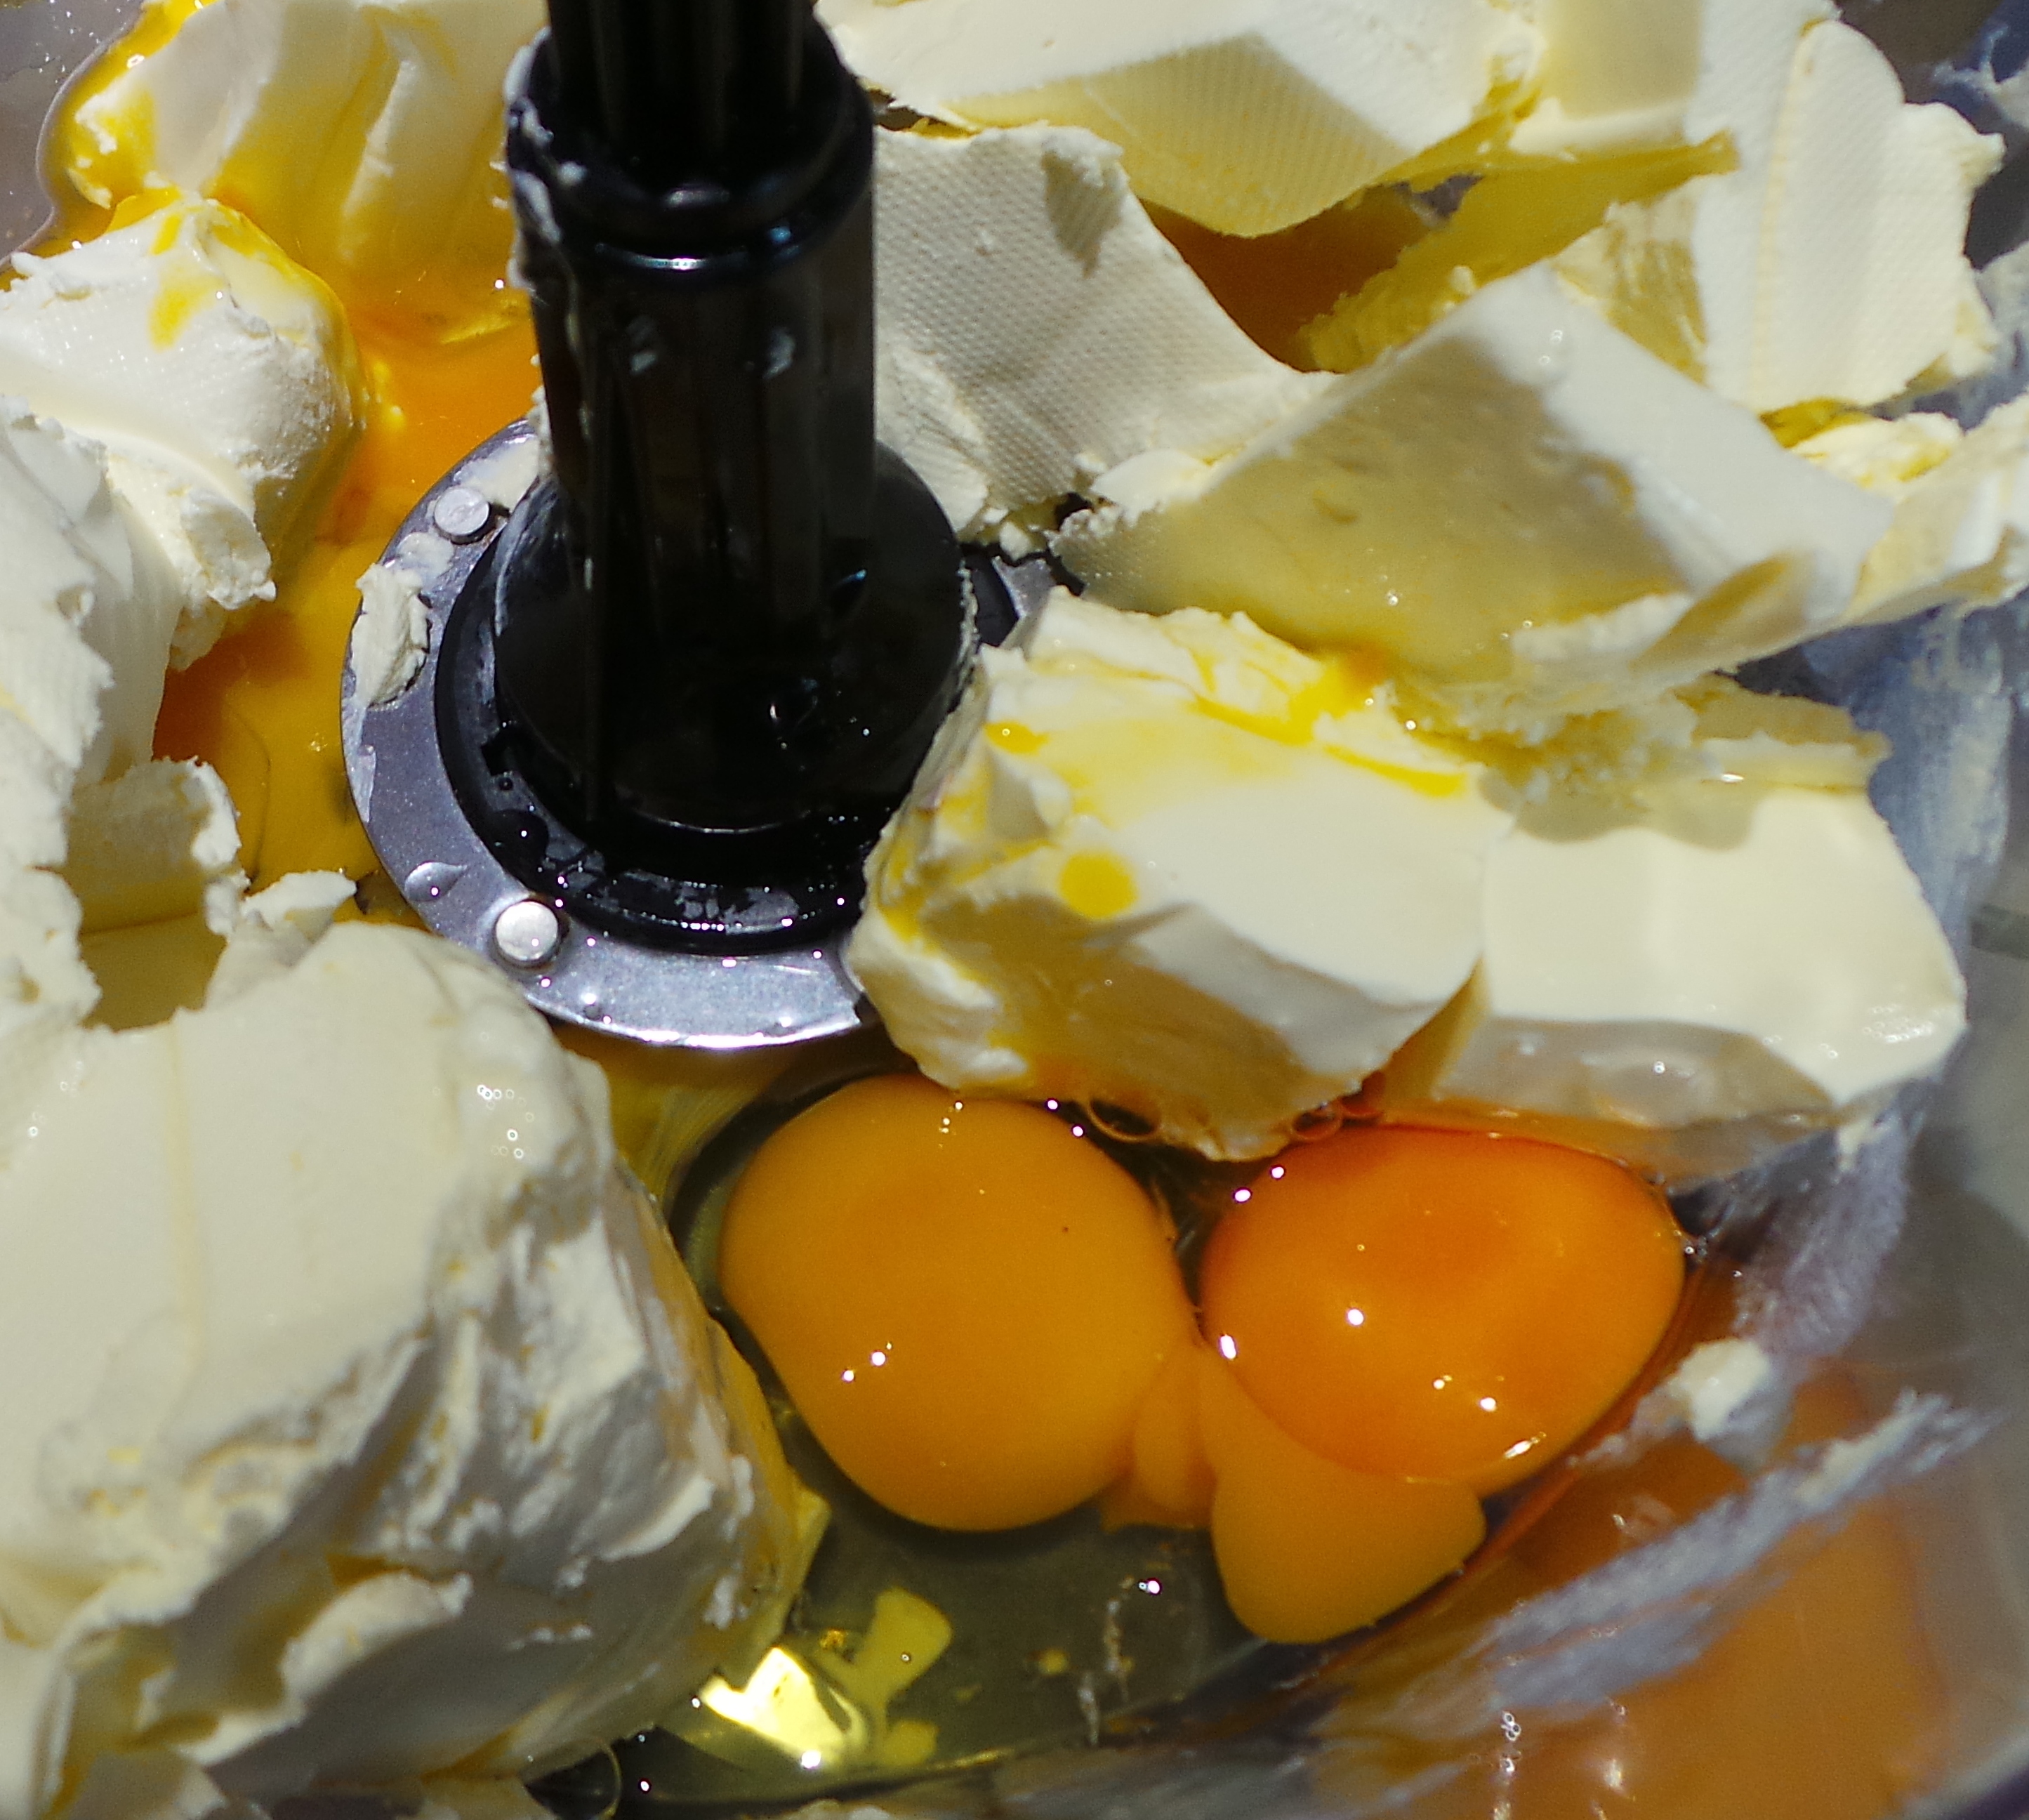
Cut the cream cheese into smaller blocks first…
I broke this into steps, mixing together the cheese and the eggs before adding the other ingredients. I have actually burned out a food processor motor on too-hard cream cheese in the past and nowadays I’m nervous…
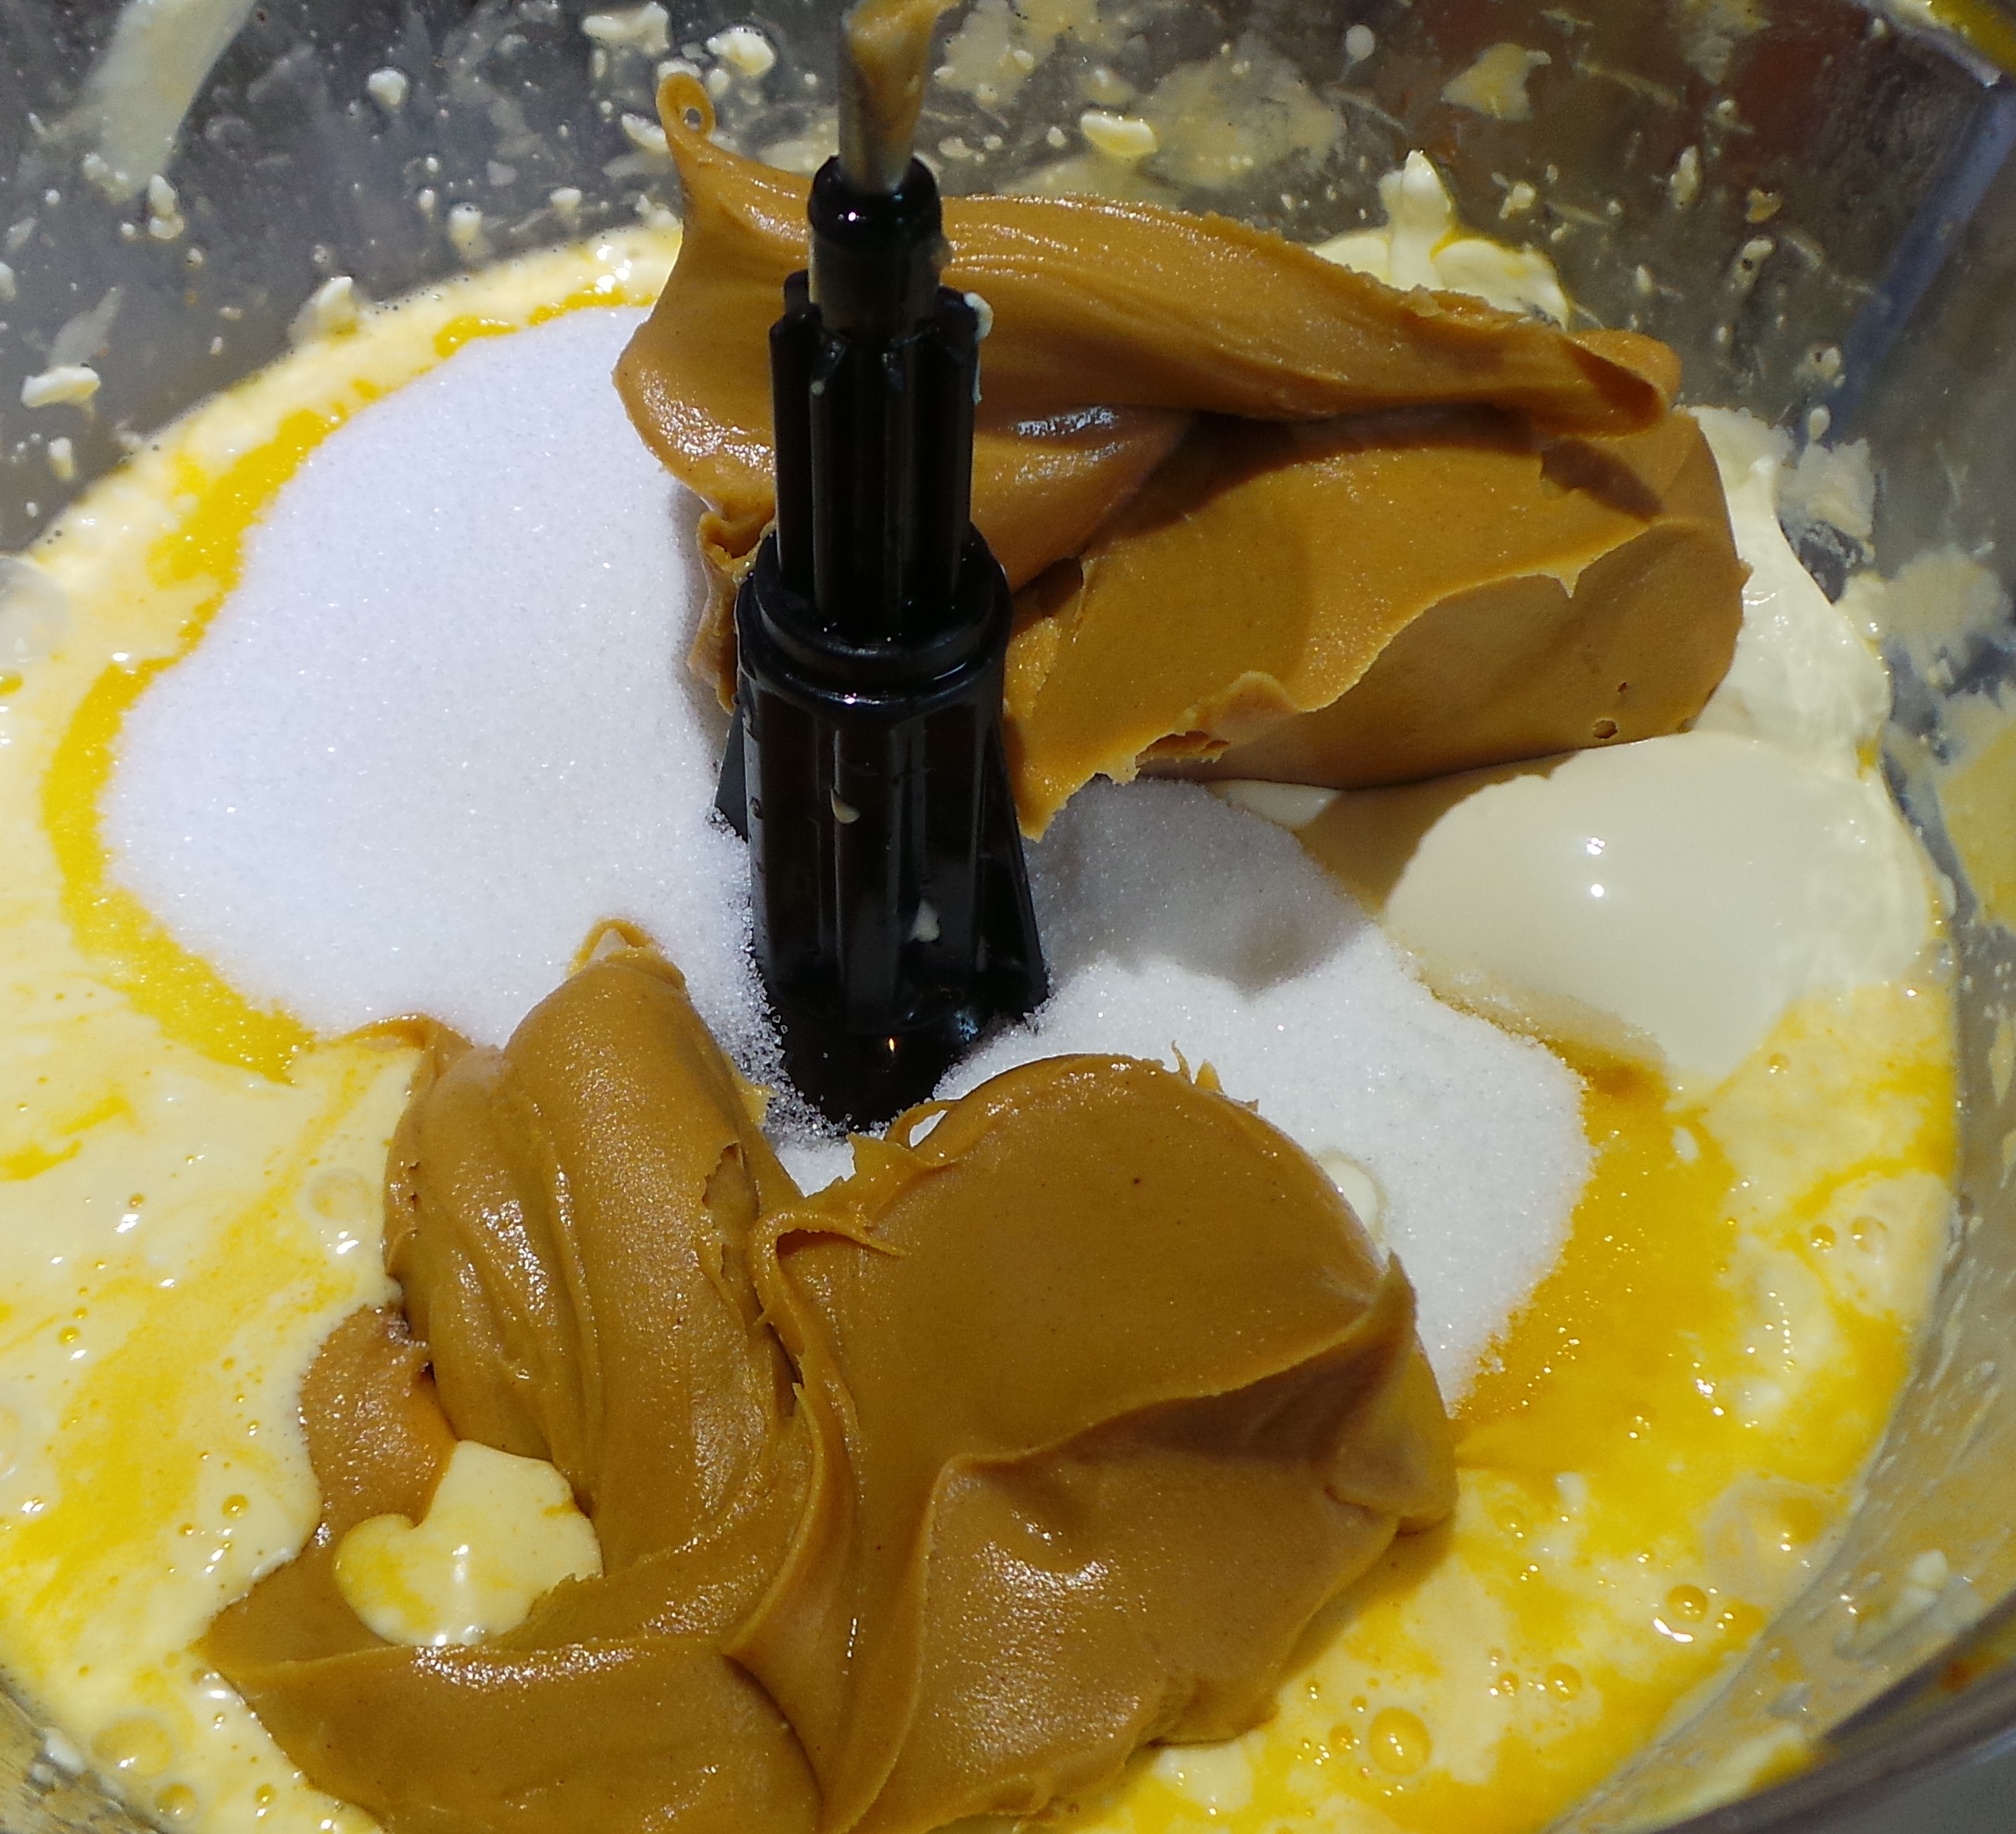
Yes, you can lick the spoon when you add the PB.
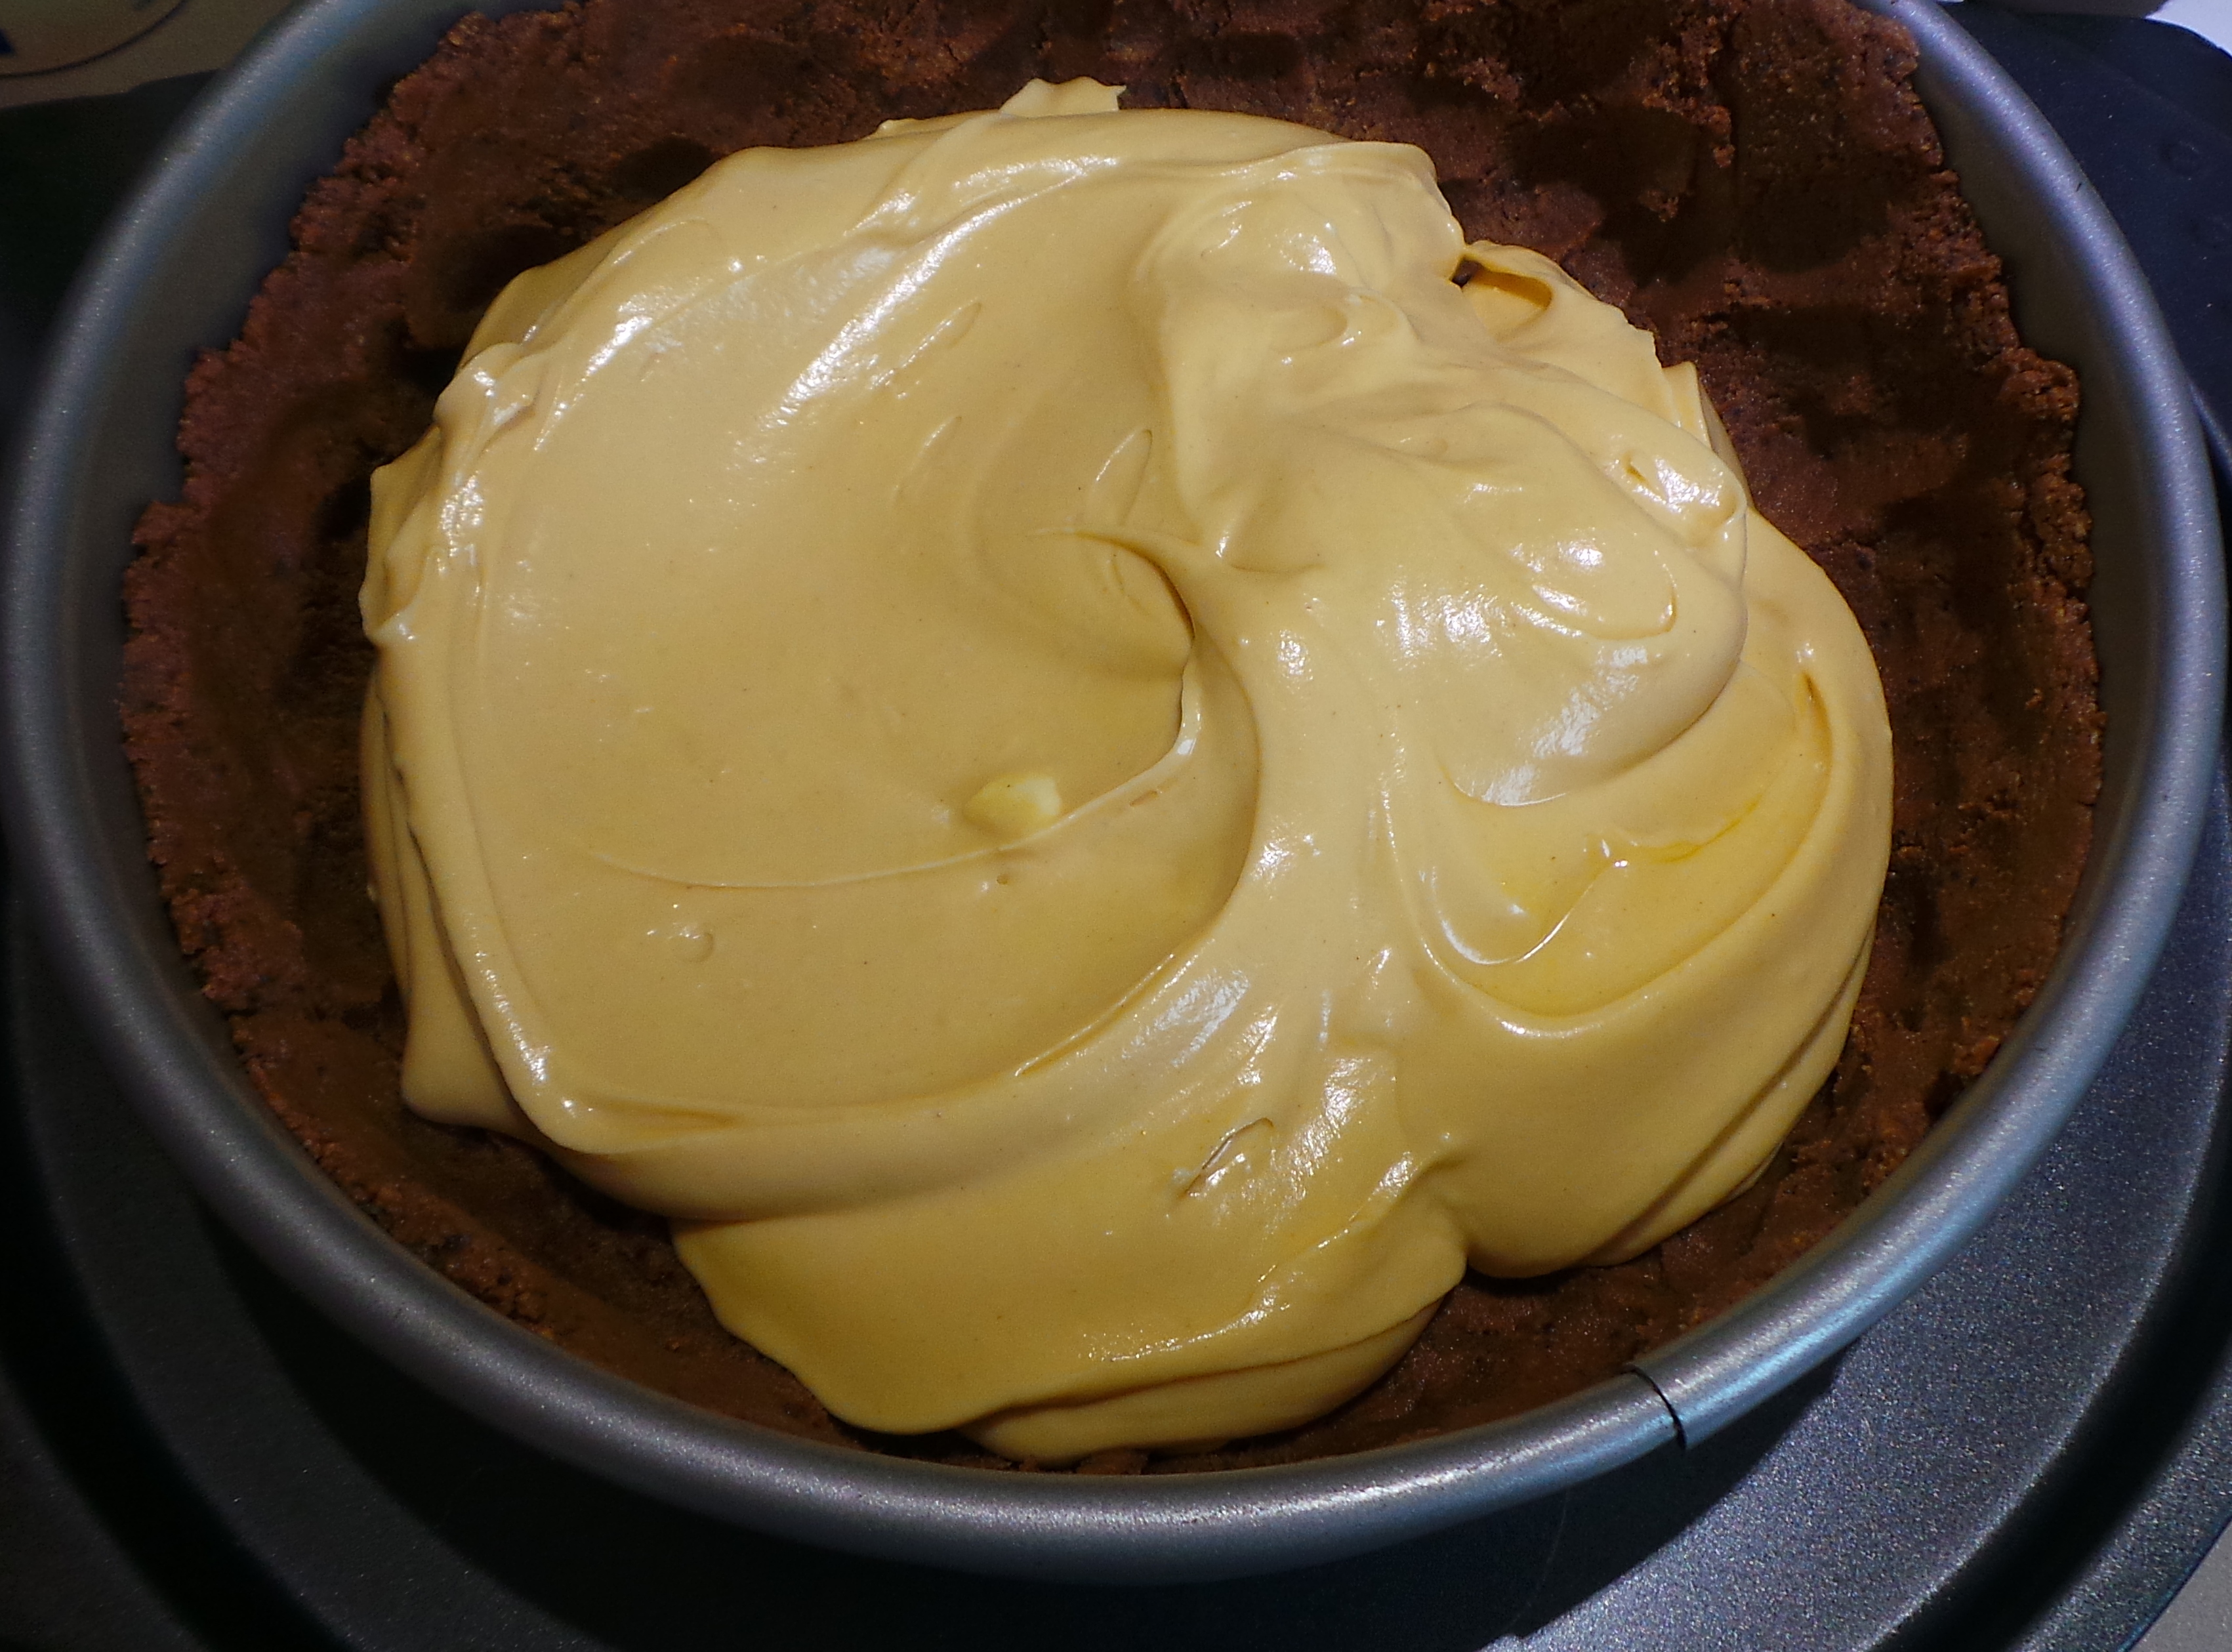
Whiz it until it becomes smooth and inviting… then pour and scrape it into the crust you prepared earlier.
That wasn’t too difficult, was it?
Do yourself a favour at this stage and place the springform tin on an oven tray. This will make it much easier when moving the cake to and from the oven.
Smooth out the filling.
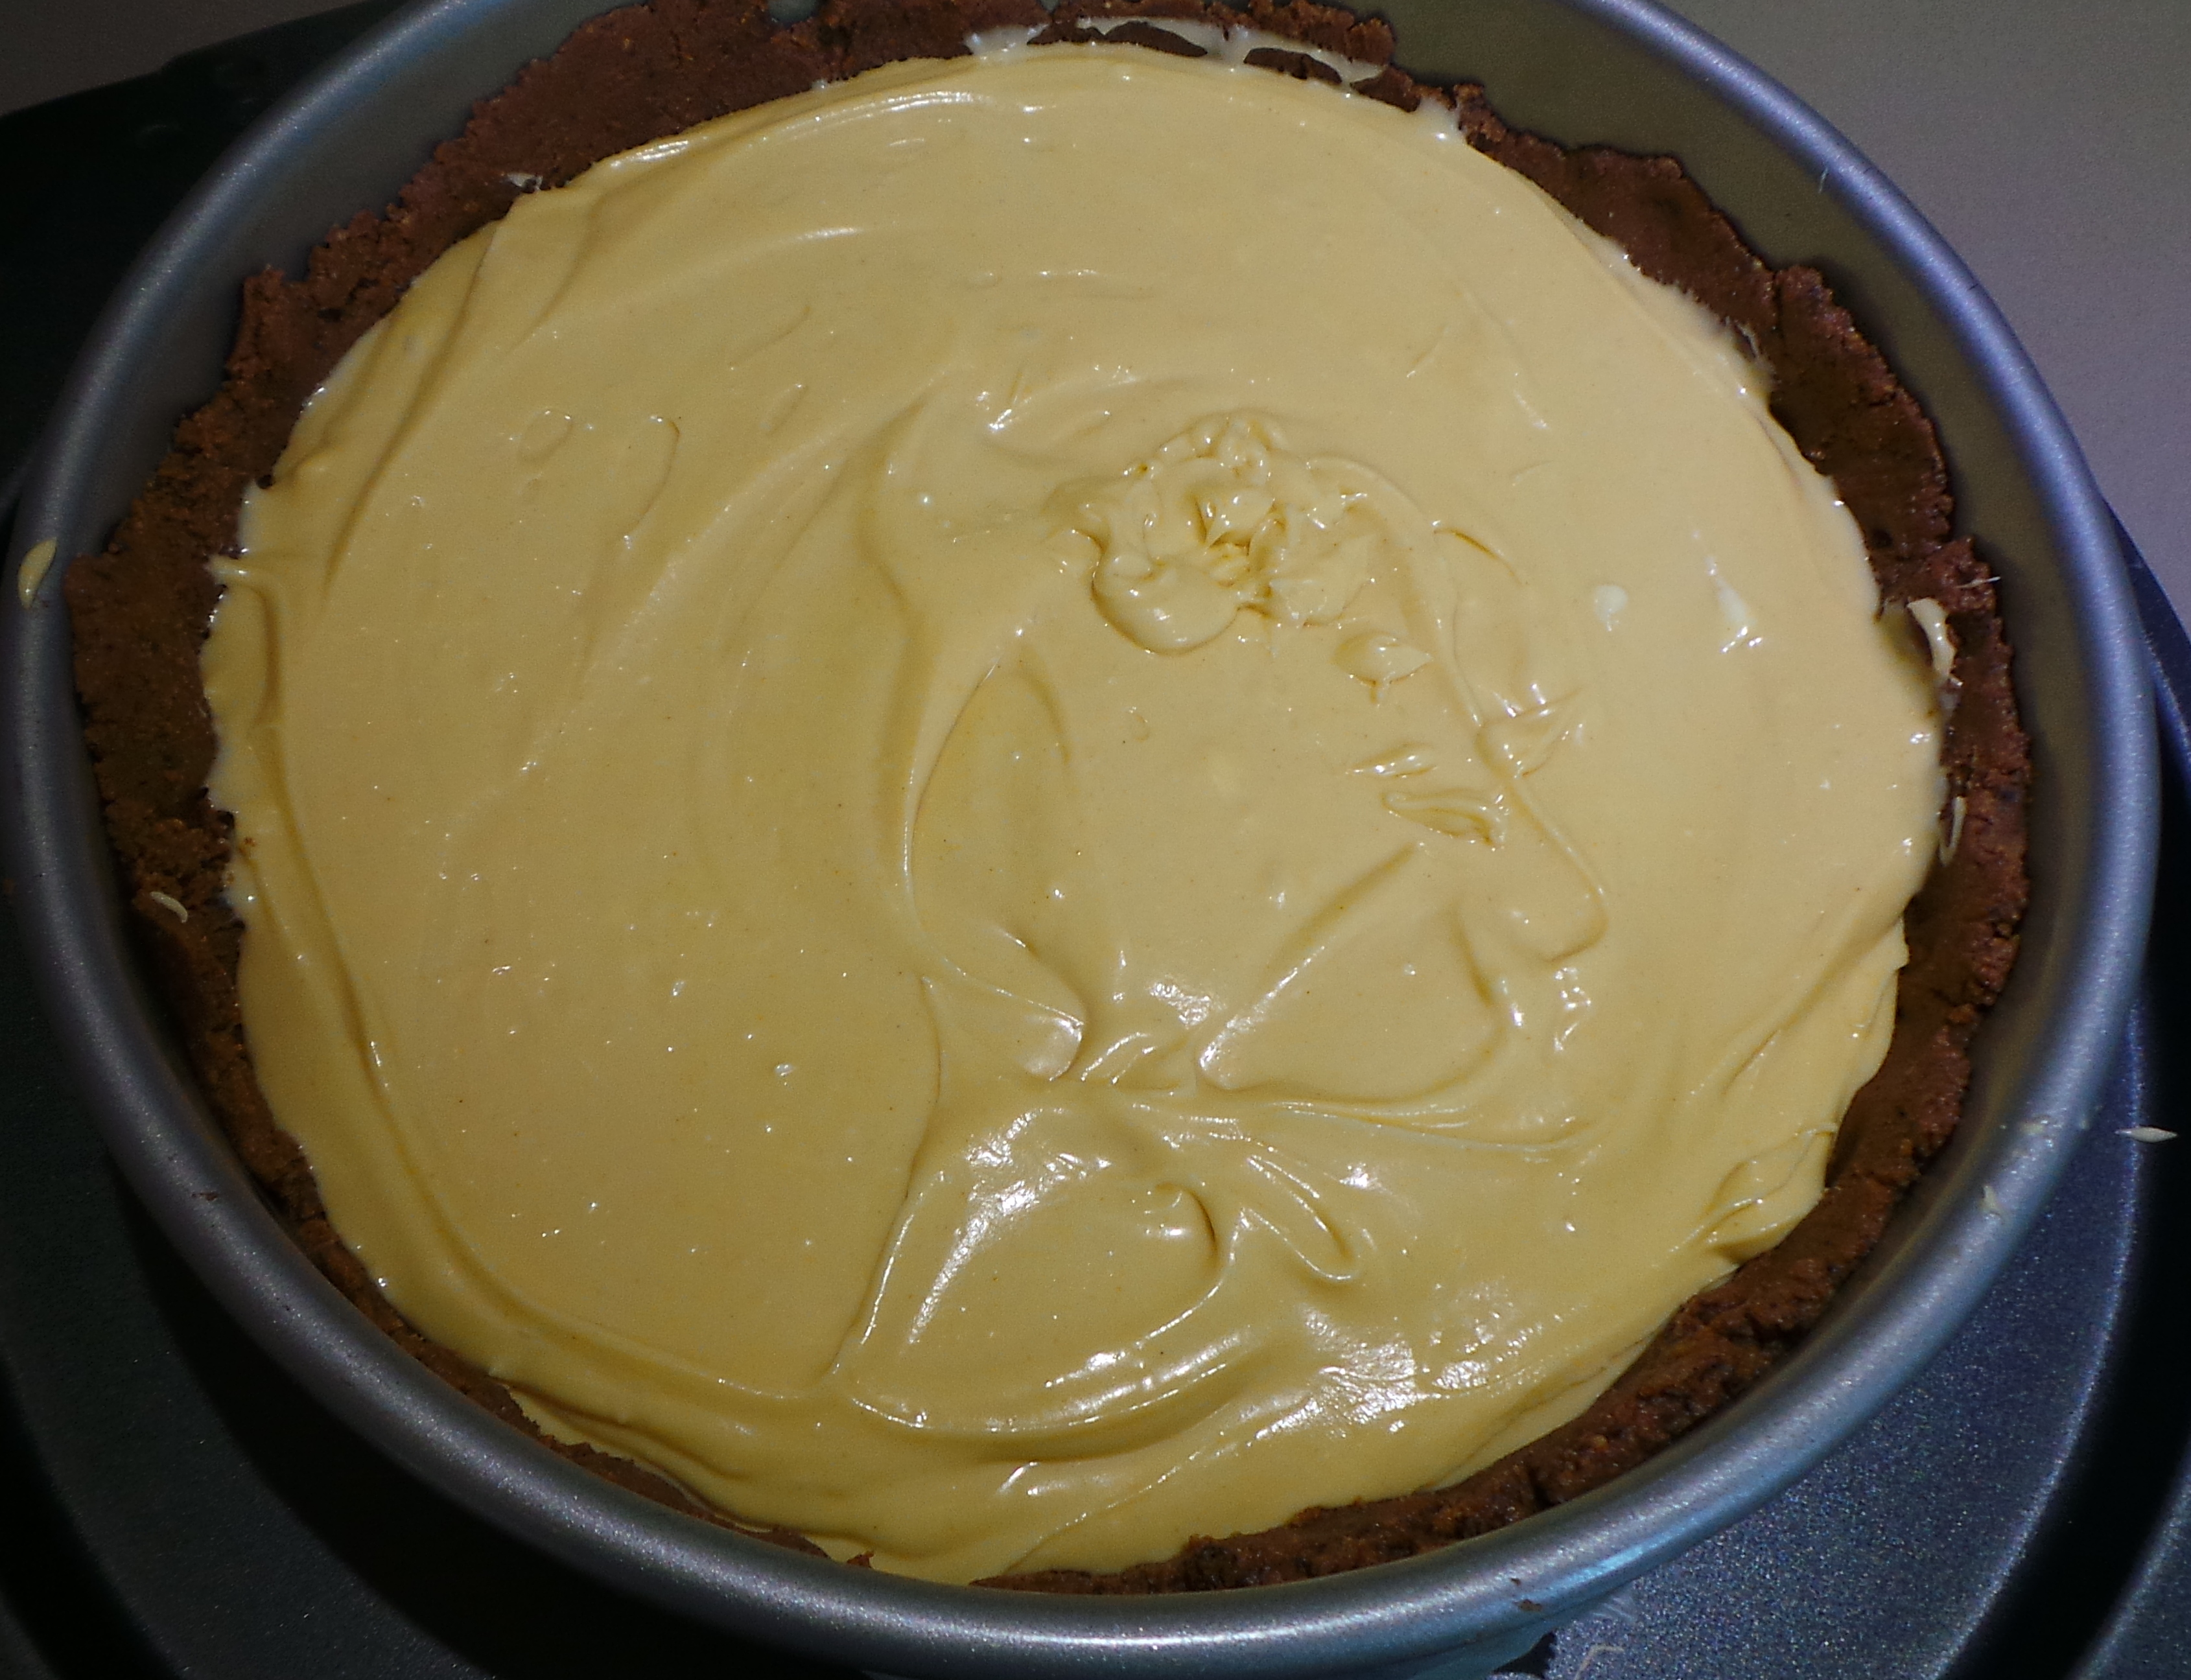
Just do your best, it’s not going to be perfectly smooth.
Now you can bake it for 50 mins or so.
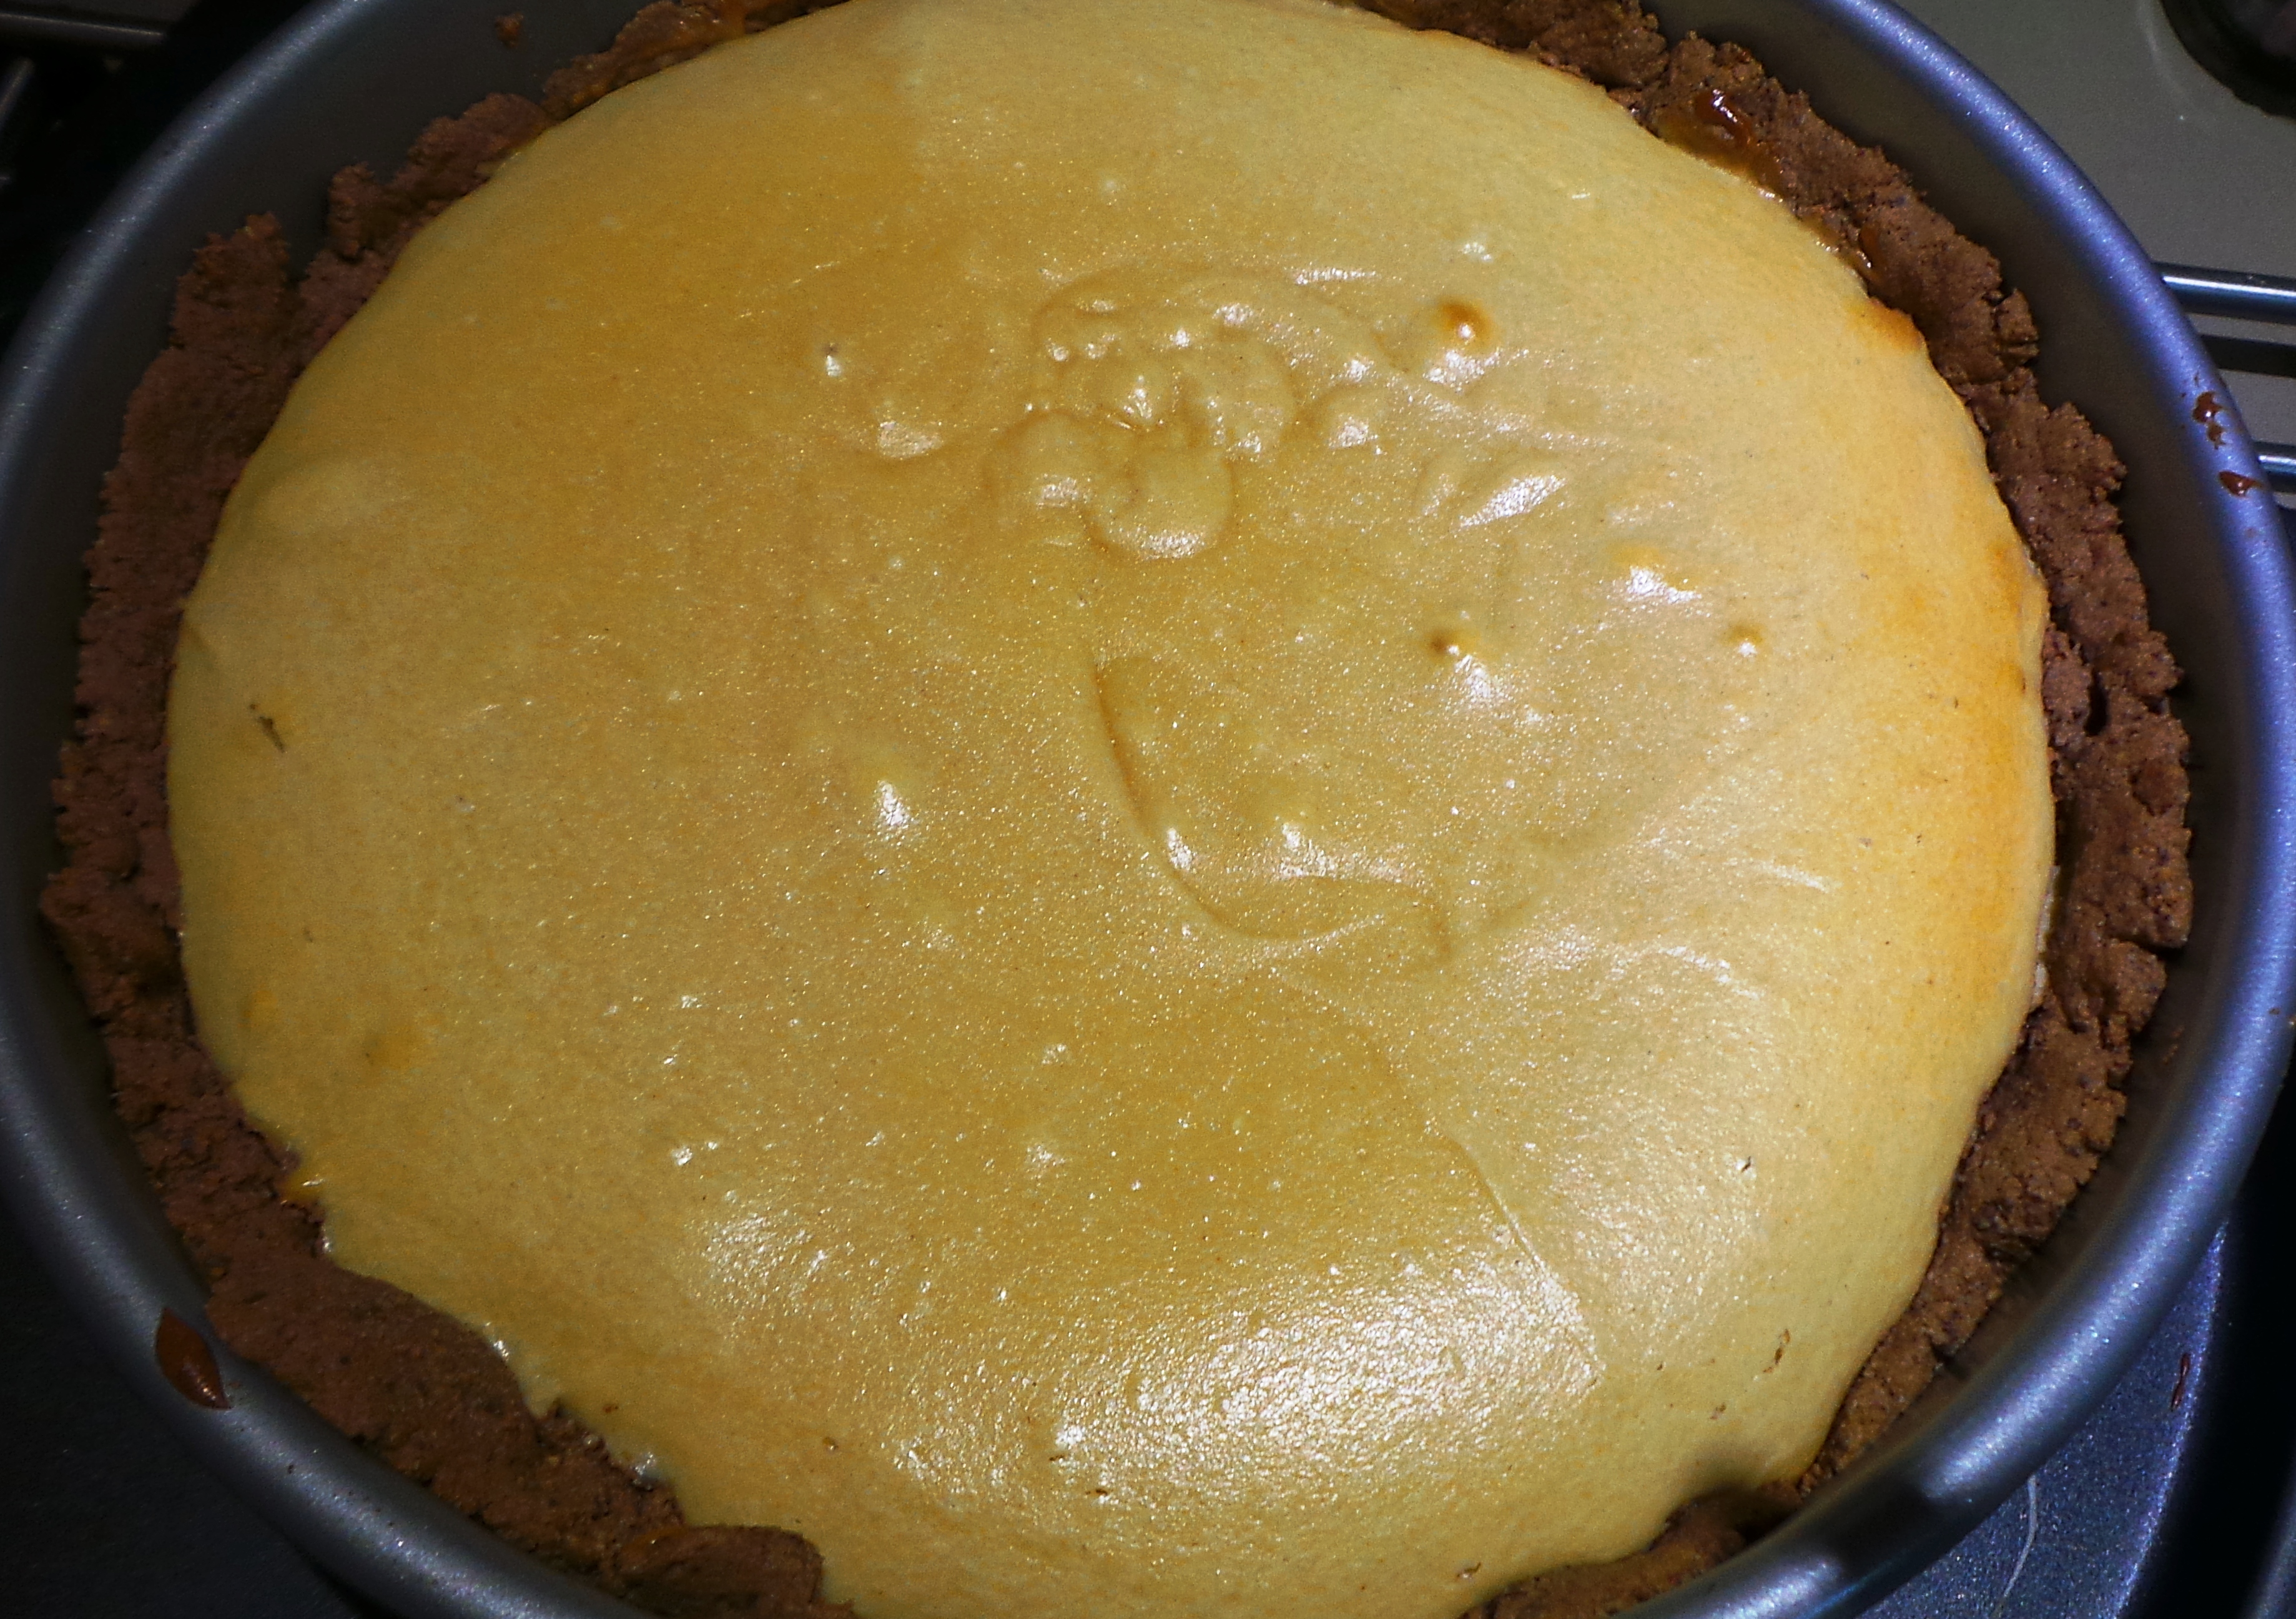
After 50 mins.
Wash up while it cooks, but take it out of the oven once the top only is set and feels dry, because there’s more chocolate to go on.
Natch.
In a small saucepan, melt together more sour cream, MOAR chocolate chips and some brown sugar.
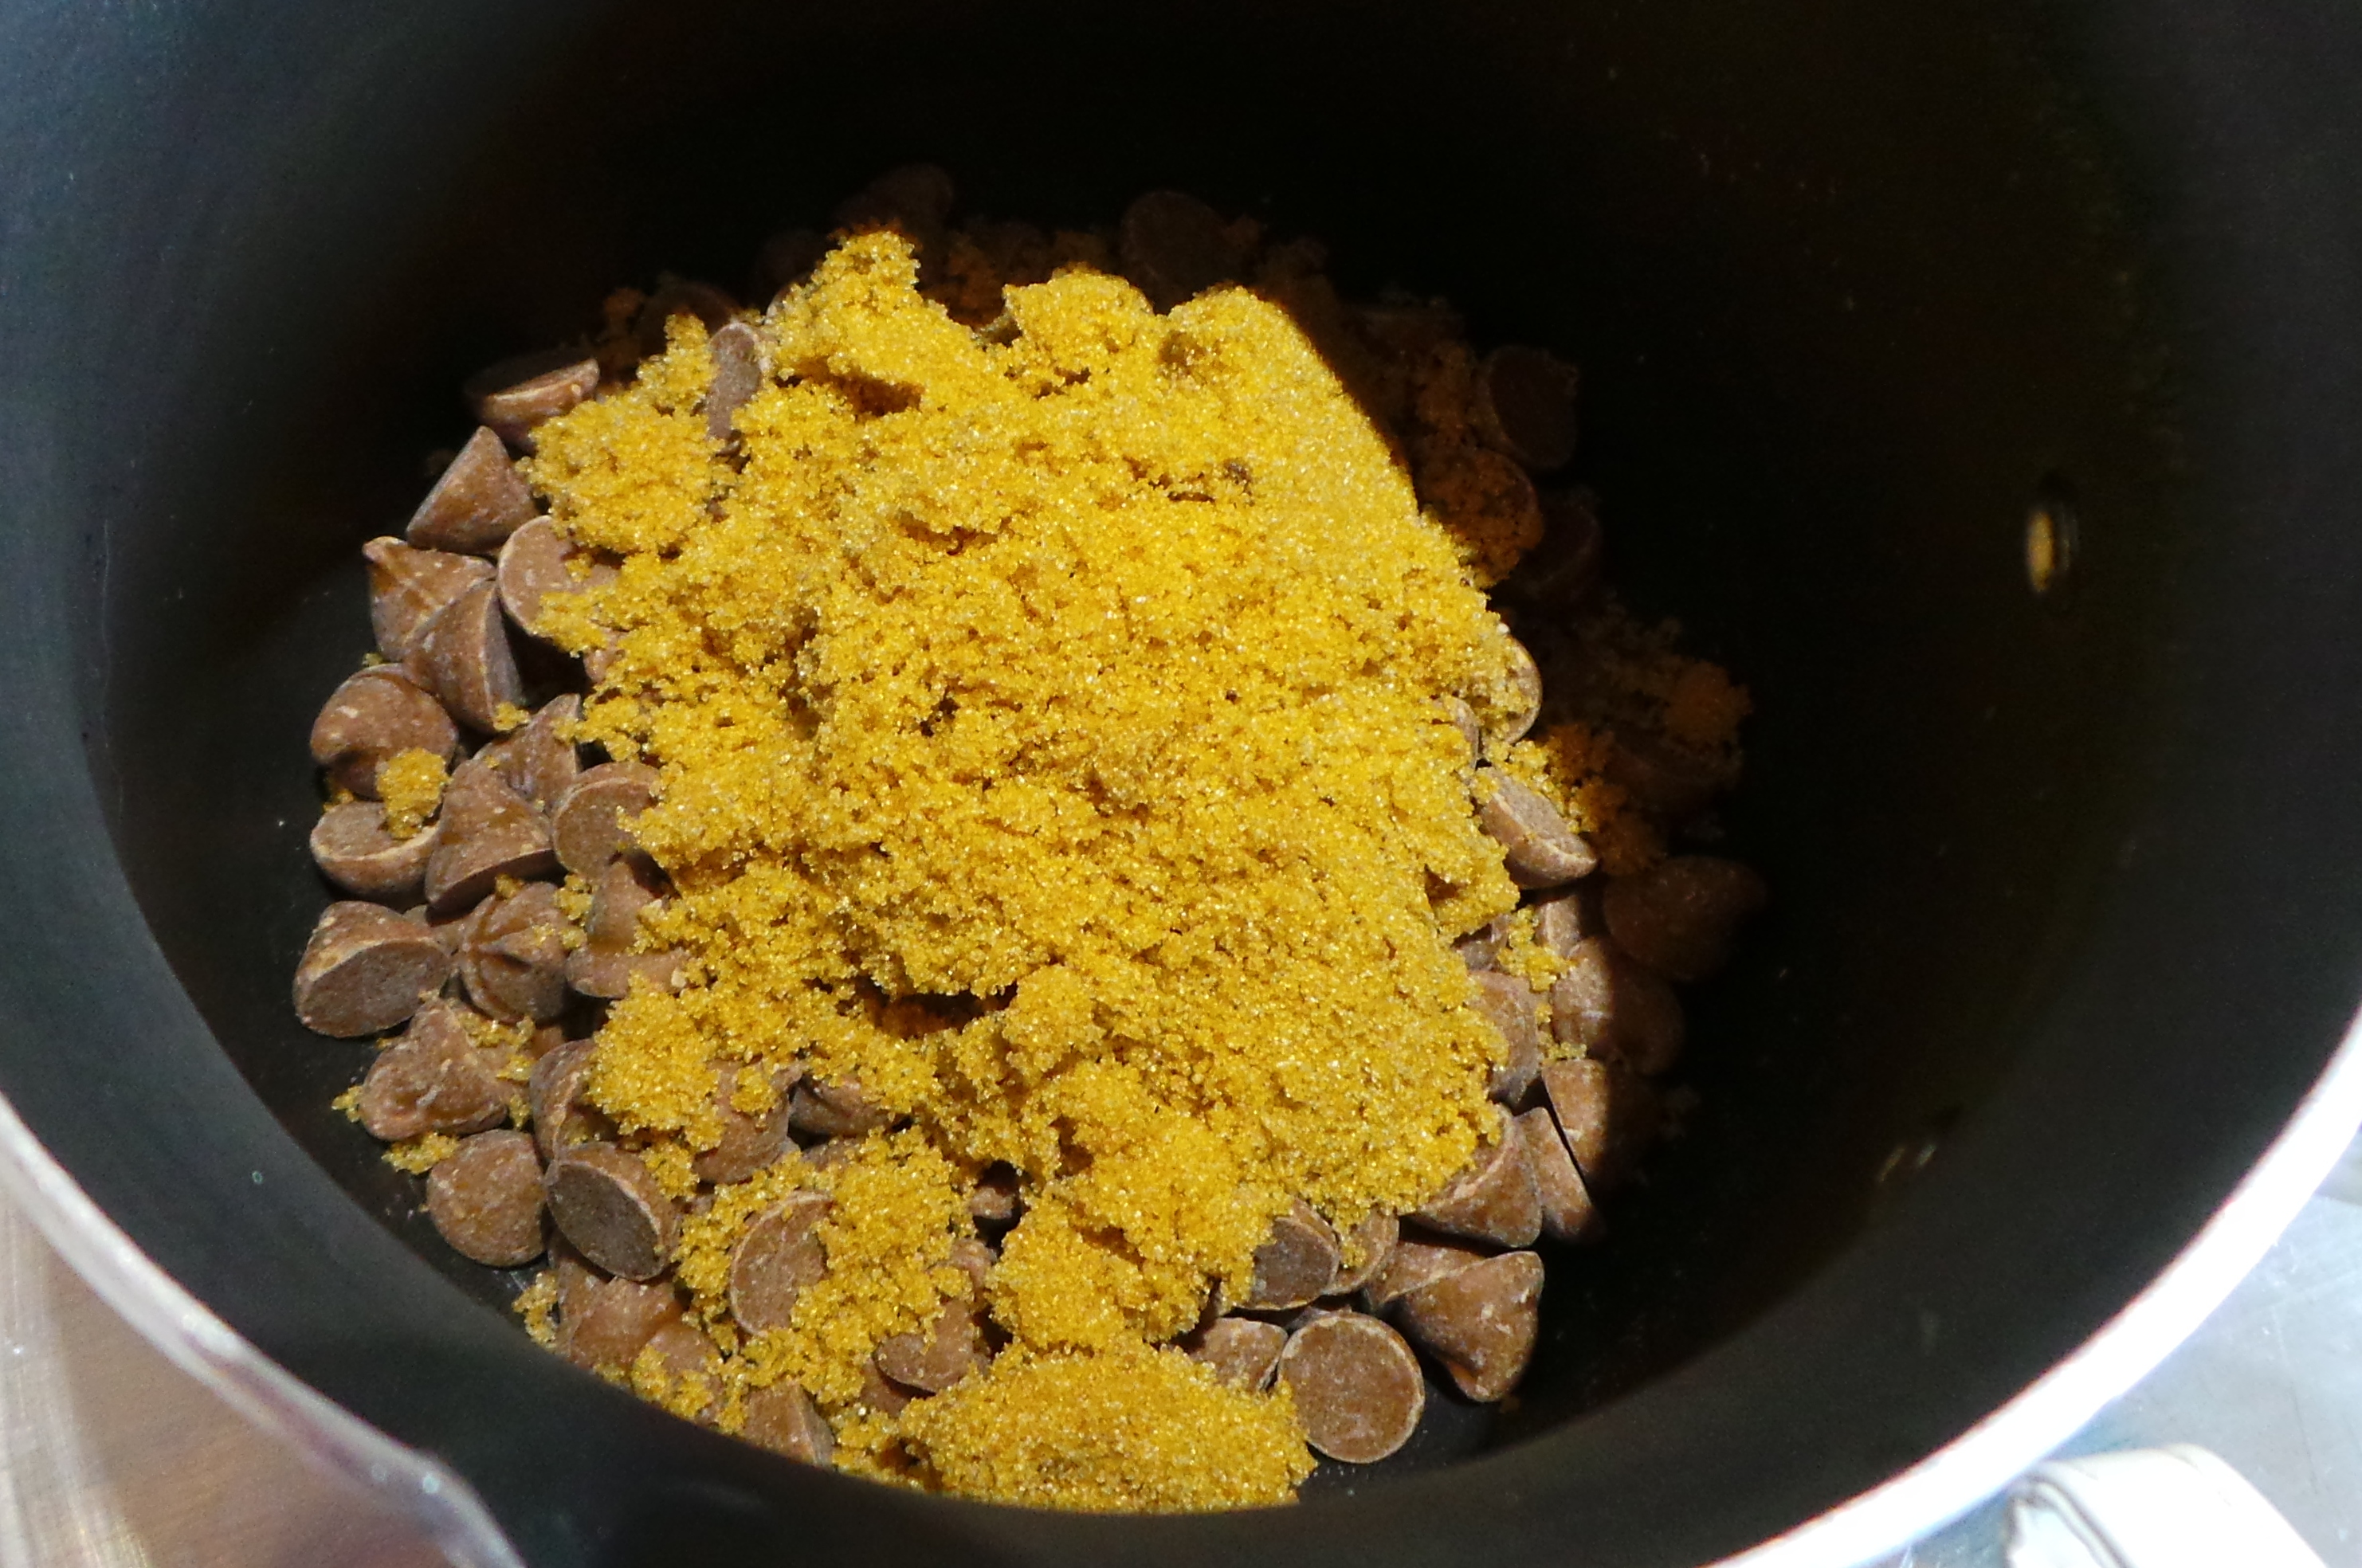
The topping begins here.
You’ll make a wonderful ganache, which you will then lovingly spoon and very gently spread over the top of the cake. Of course, the spoon and the remnants in the saucepan then become the Cook’s Treat.
Because this is a Nigella recipe. Dur.

Add some chocolate to your peanut butter and cheese.
As you can see, I didn’t quite get the chocolate all melted. Oh well. Bake for another 10 mins, remove from the oven and let it cool in its tin. Cover with cling film and put it in the fridge overnight.
Again you are wanting the butter in the crust to firm up and the cheese to also set. If you chill it overnight it will be much easier to get it out of the tin. Trust me.
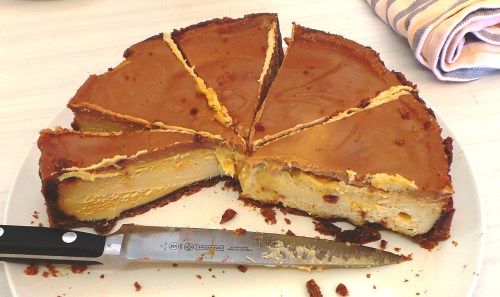
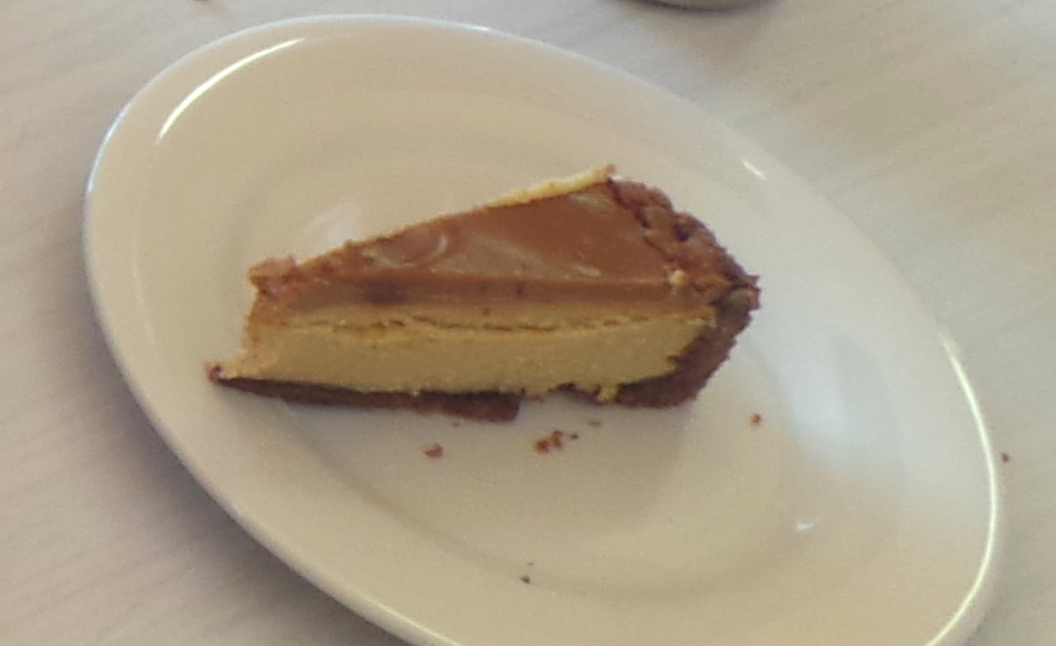
When you do release it from its tin and slice it, be prepared for everyone asking you how you managed “to get the layer of chocolate to stay on top of the cake mix?”
Aren’t you clever?
Then they’ll taste it and look as happy as this guy. I promise.

Happy kitten.
The birthday girl was pretty chuffed too…
Chocolate Peanut Butter Cheesecake
Ingredients
for the base
200 g almond meal
50 g salted peanuts
100 g dark chocolate chips
50 g softened unsalted butter
for the filling
500 g cream cheese (room temperature!)
3 large eggs
3 large egg yolks
200 g caster sugar
125 ml sour cream
250 g smooth peanut butter
for the topping
250 ml sour cream
100 g milk chocolate chips
30 g soft light brown sugar
Method
Remove your cream cheese from the refrigerator and place somewhere warm.
Line the base of a 23 cm/ 9 inch springform cake tin. Place aside.
In a food processor, blend together the ingredients for the base. Once it has come together to form a clump, turn it into the prepared springform tin and press it firmly into the base and up the sides to form a crust. There’s no need to be delicate.
Place the tin into the refrigerator while you make the filling.
Rinse out the food processor bowl and preheat the oven to 170°C/ 325 °F.
Using the ingredients for the filling, cut the blocks of (warmed and soft!) cream cheese into chunks and place into the food processor bowl.
Add the whole eggs and egg yolks, sugar, sour cream and smooth peanut butter and pulse a few times before processing to a smooth, silky mixture.
Retrieve your cake tin and crust from the refrigerator and pour and scrape the filling into it. A silicon spatula will make this job go much more smoothly if you have one. Smooth out the top and bang the tin once or twice to knock out any air bubbles in the mixture.
Place the tin on a baking tray for ease of handling and put into the oven.
Bake for 1 hour – but set your kitchen timer for 50 mins and check the cake then. The top – and only the top – should feel set and dry.
Take the cheesecake out of the oven, temporarily, and place on a cooler rack while you prepare the topping.
In a small saucepan, and over a low heat, combine the ingredients for the topping. Stir to ensure the chocolate becomes properly blended in as it melts. Remove from the heat.
Spoon and spread the topping very gently over the surface of the cake. Try not to break that firm upper crust as this will ensure you have distinctly separate layers on your finished dessert.
(If you do break it and end up with marbling, say you liked the aesthetic.)
Put it back in the oven for a further 10 minutes.
Remove to a cooling rack and allow to cool in the tin. Cover and refrigerate overnight.
Keep refrigerated until about 10-15 minutes before serving, if possible. If it gets too warm it may become too gluggy to cut cleanly. If this happens, try dipping your knife into warm water and wiping clean between slices.
Don’t expect leftovers.
Like this? Follow us on Facebook or subscribe to receive updates by email.
