I’m back! Sorry it’s been so long, I’ve been unwell.
Today’s post was going to be about something else, but the ladies I made this dish for a week or so ago have been nagging me to post the recipe.
We aim to please.
This particular pie can be as sweet as you like to make it however, if you follow my example, it won’t be very sweet at all. Also, while it looks quite heavy and rich, it’s really quite light on the palate and the digestion.
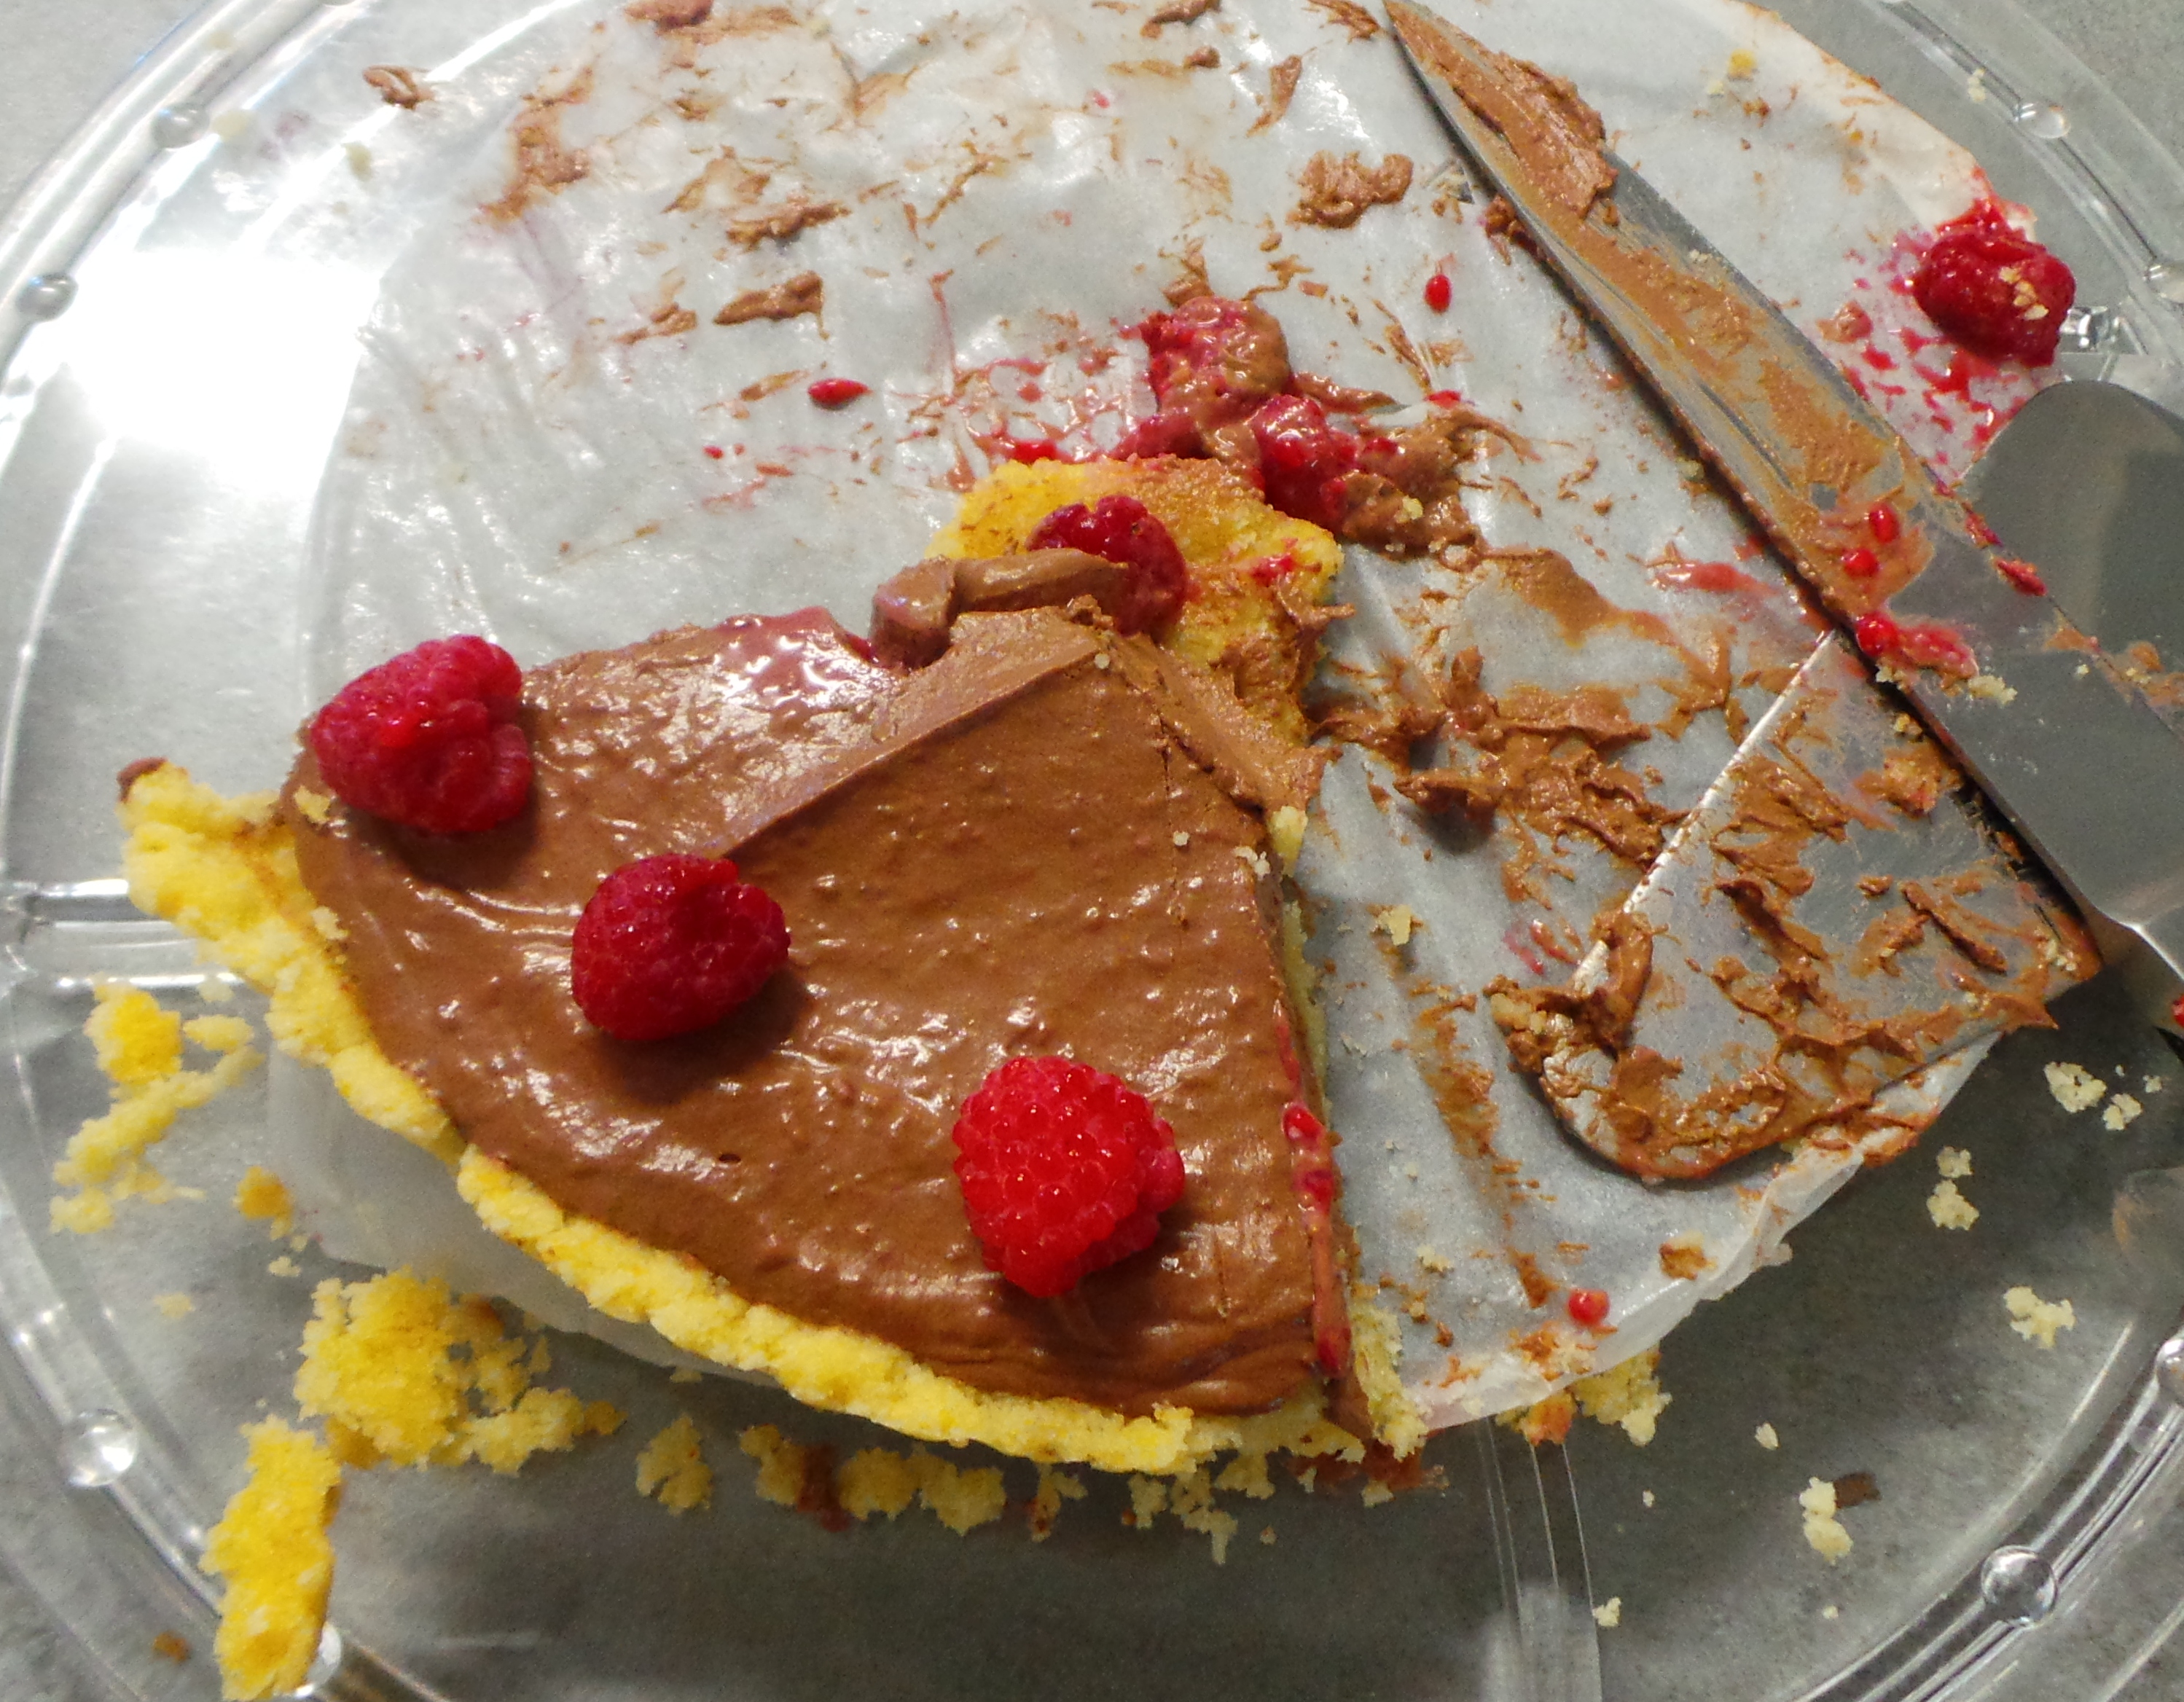
What it looked like 5 minutes after I served it …
I’m afraid that I didn’t originally even intend to put this up here, so the photos may be a little patchy (and I really have been unwell…)
I found the original recipe for this here, but I’ve fiddled with it a little since. Not much, but enough to make it suitable for my coeliac friends.
It’s a dish that is amazingly deceptive. It looks like an ultra-rich cheese or mousse cake that has taken you hours of labour to pull together.
It’s not. It has a secret ingredient.
Tofu.
Now, before any of you screw up your faces and start spitting epithets my way … if you’ve had tofu before and thought it tasted bad – that’s NOT the fault of the tofu. It’s the fault of whoever cooked it for you.
Tofu is an inexpensive protein that has essentially no flavour of its own. Surround it with deliciousness, or marinade it in the same and that deliciousness is what you will taste.
It comes in various textures: hard, firm and silken being the most common. This recipe uses silken tofu – and a food processor.
Now you could probably pull this one off with a stick or immersion blender, you might even manage it with an electronic beater, but a food processor will definitely do it. You need something to whiz up the raspberries.
Not fancy, but tasty.
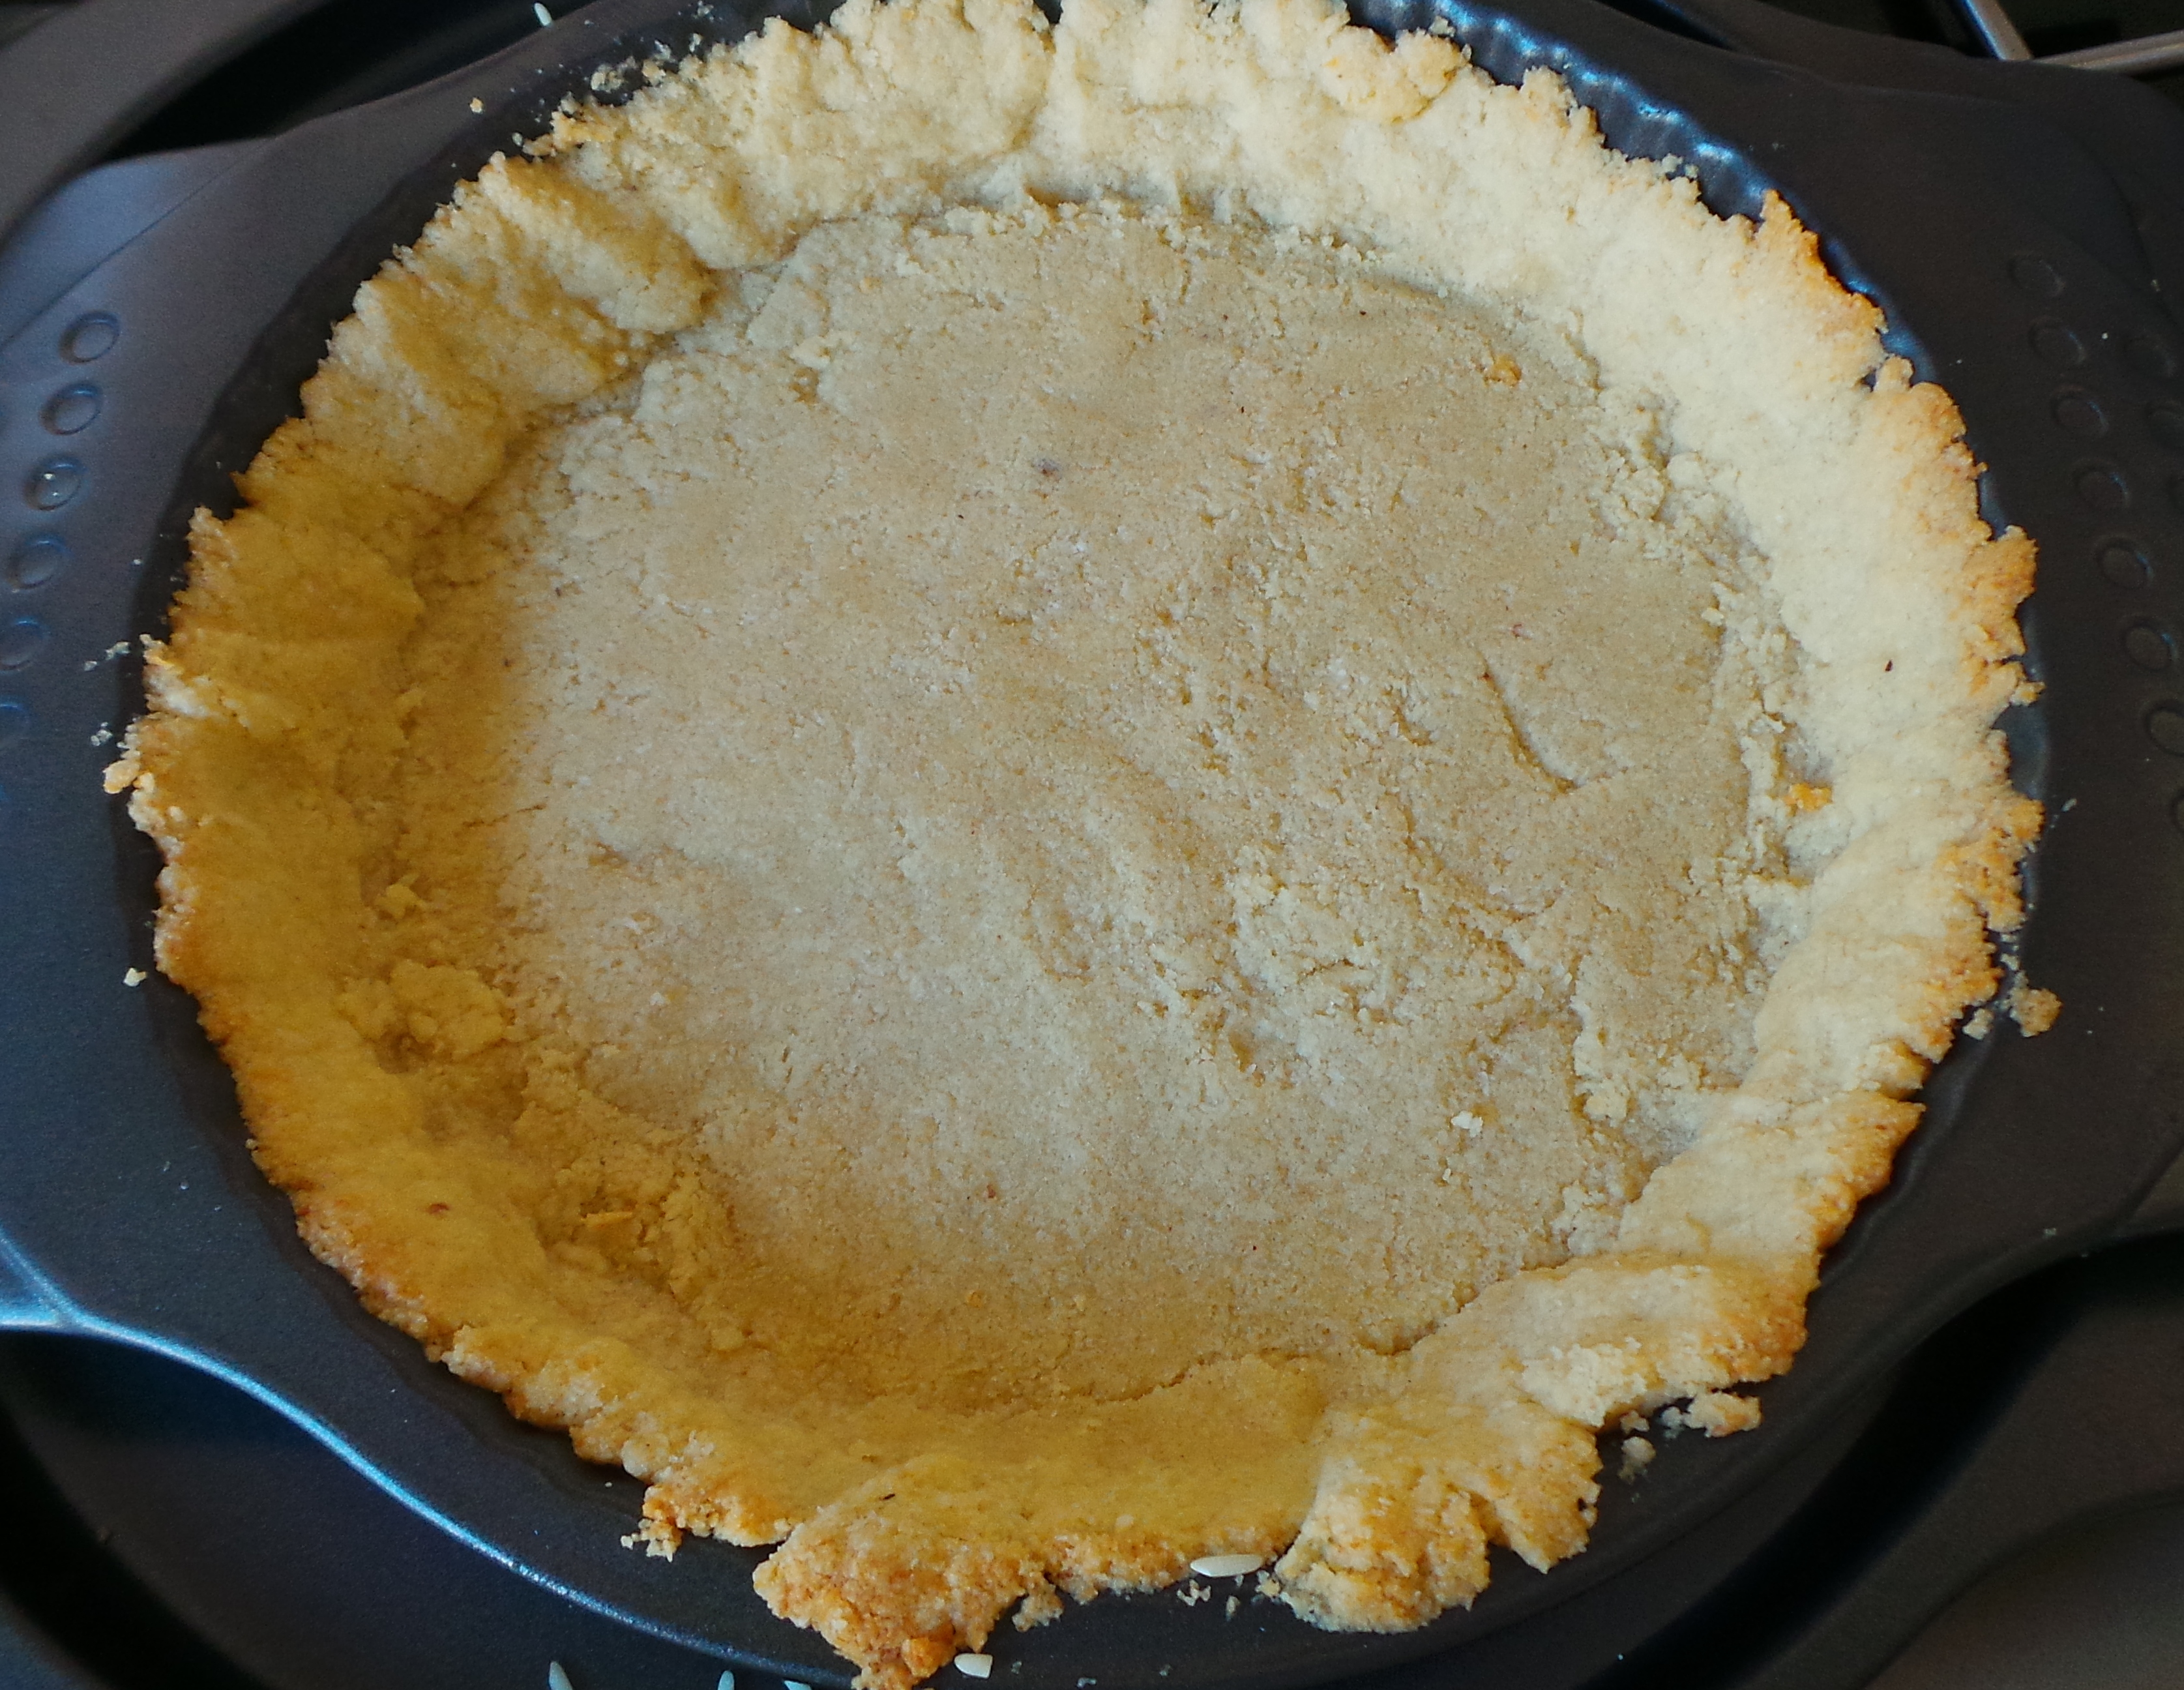
The original recipe calls for a purchased Graham cracker pie crust, but…gluten. So, I put together my own, simply using a small packet of almond meal, some melted butter and a couple of tablespoons of dried coconut. I mixed them all together in a bowl and then pressed them into a fluted flan tin with a removable base.
Now, should you do the same, feel free just to pop it into the fridge and allow the butter to set firm. It will still be perfectly edible. I decided to blind bake mine and allow the nuts to toast a little.
So, I covered the base in parchment paper and filled the void with rice. Then I baked it at 180°C for around 10 mins or so.
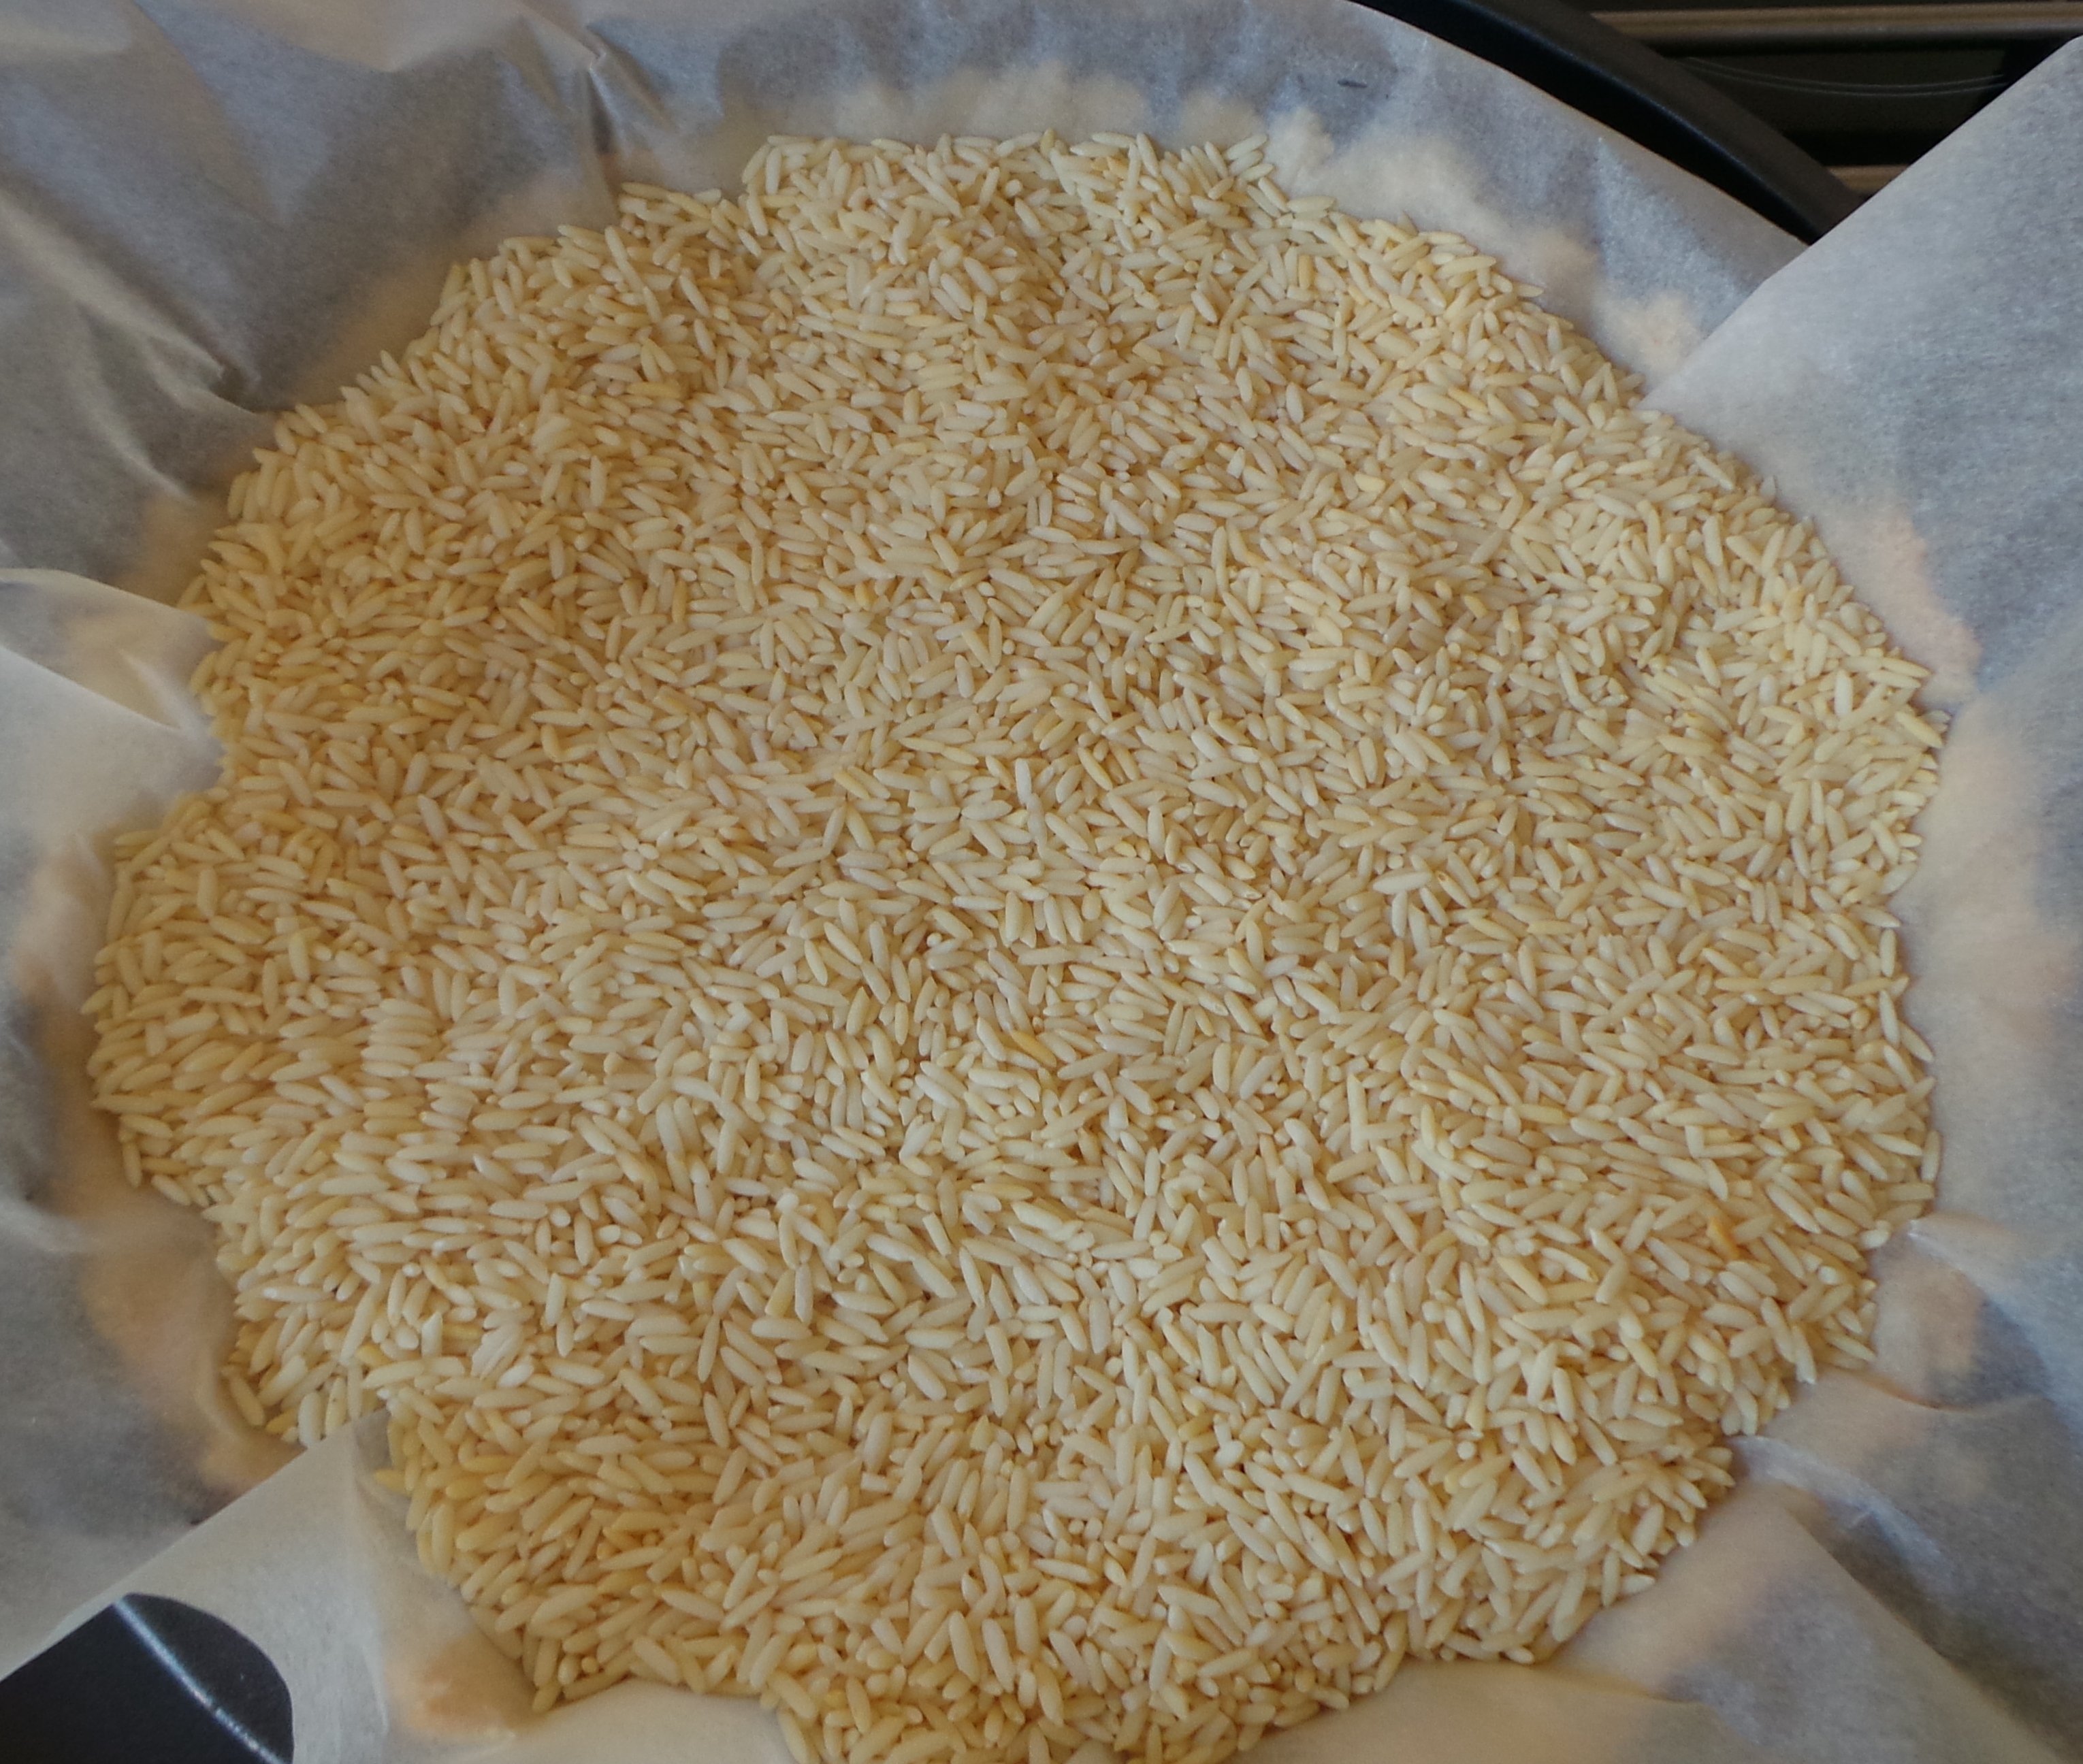
Blind baking
The blind baking just helps it to keep its shape better.
Now for the pie filling.
Get thee some silken tofu. You’ll find shelf-stable versions, but you’ll also find fresh versions in the refrigerator section of the supermarket.
I found this one.
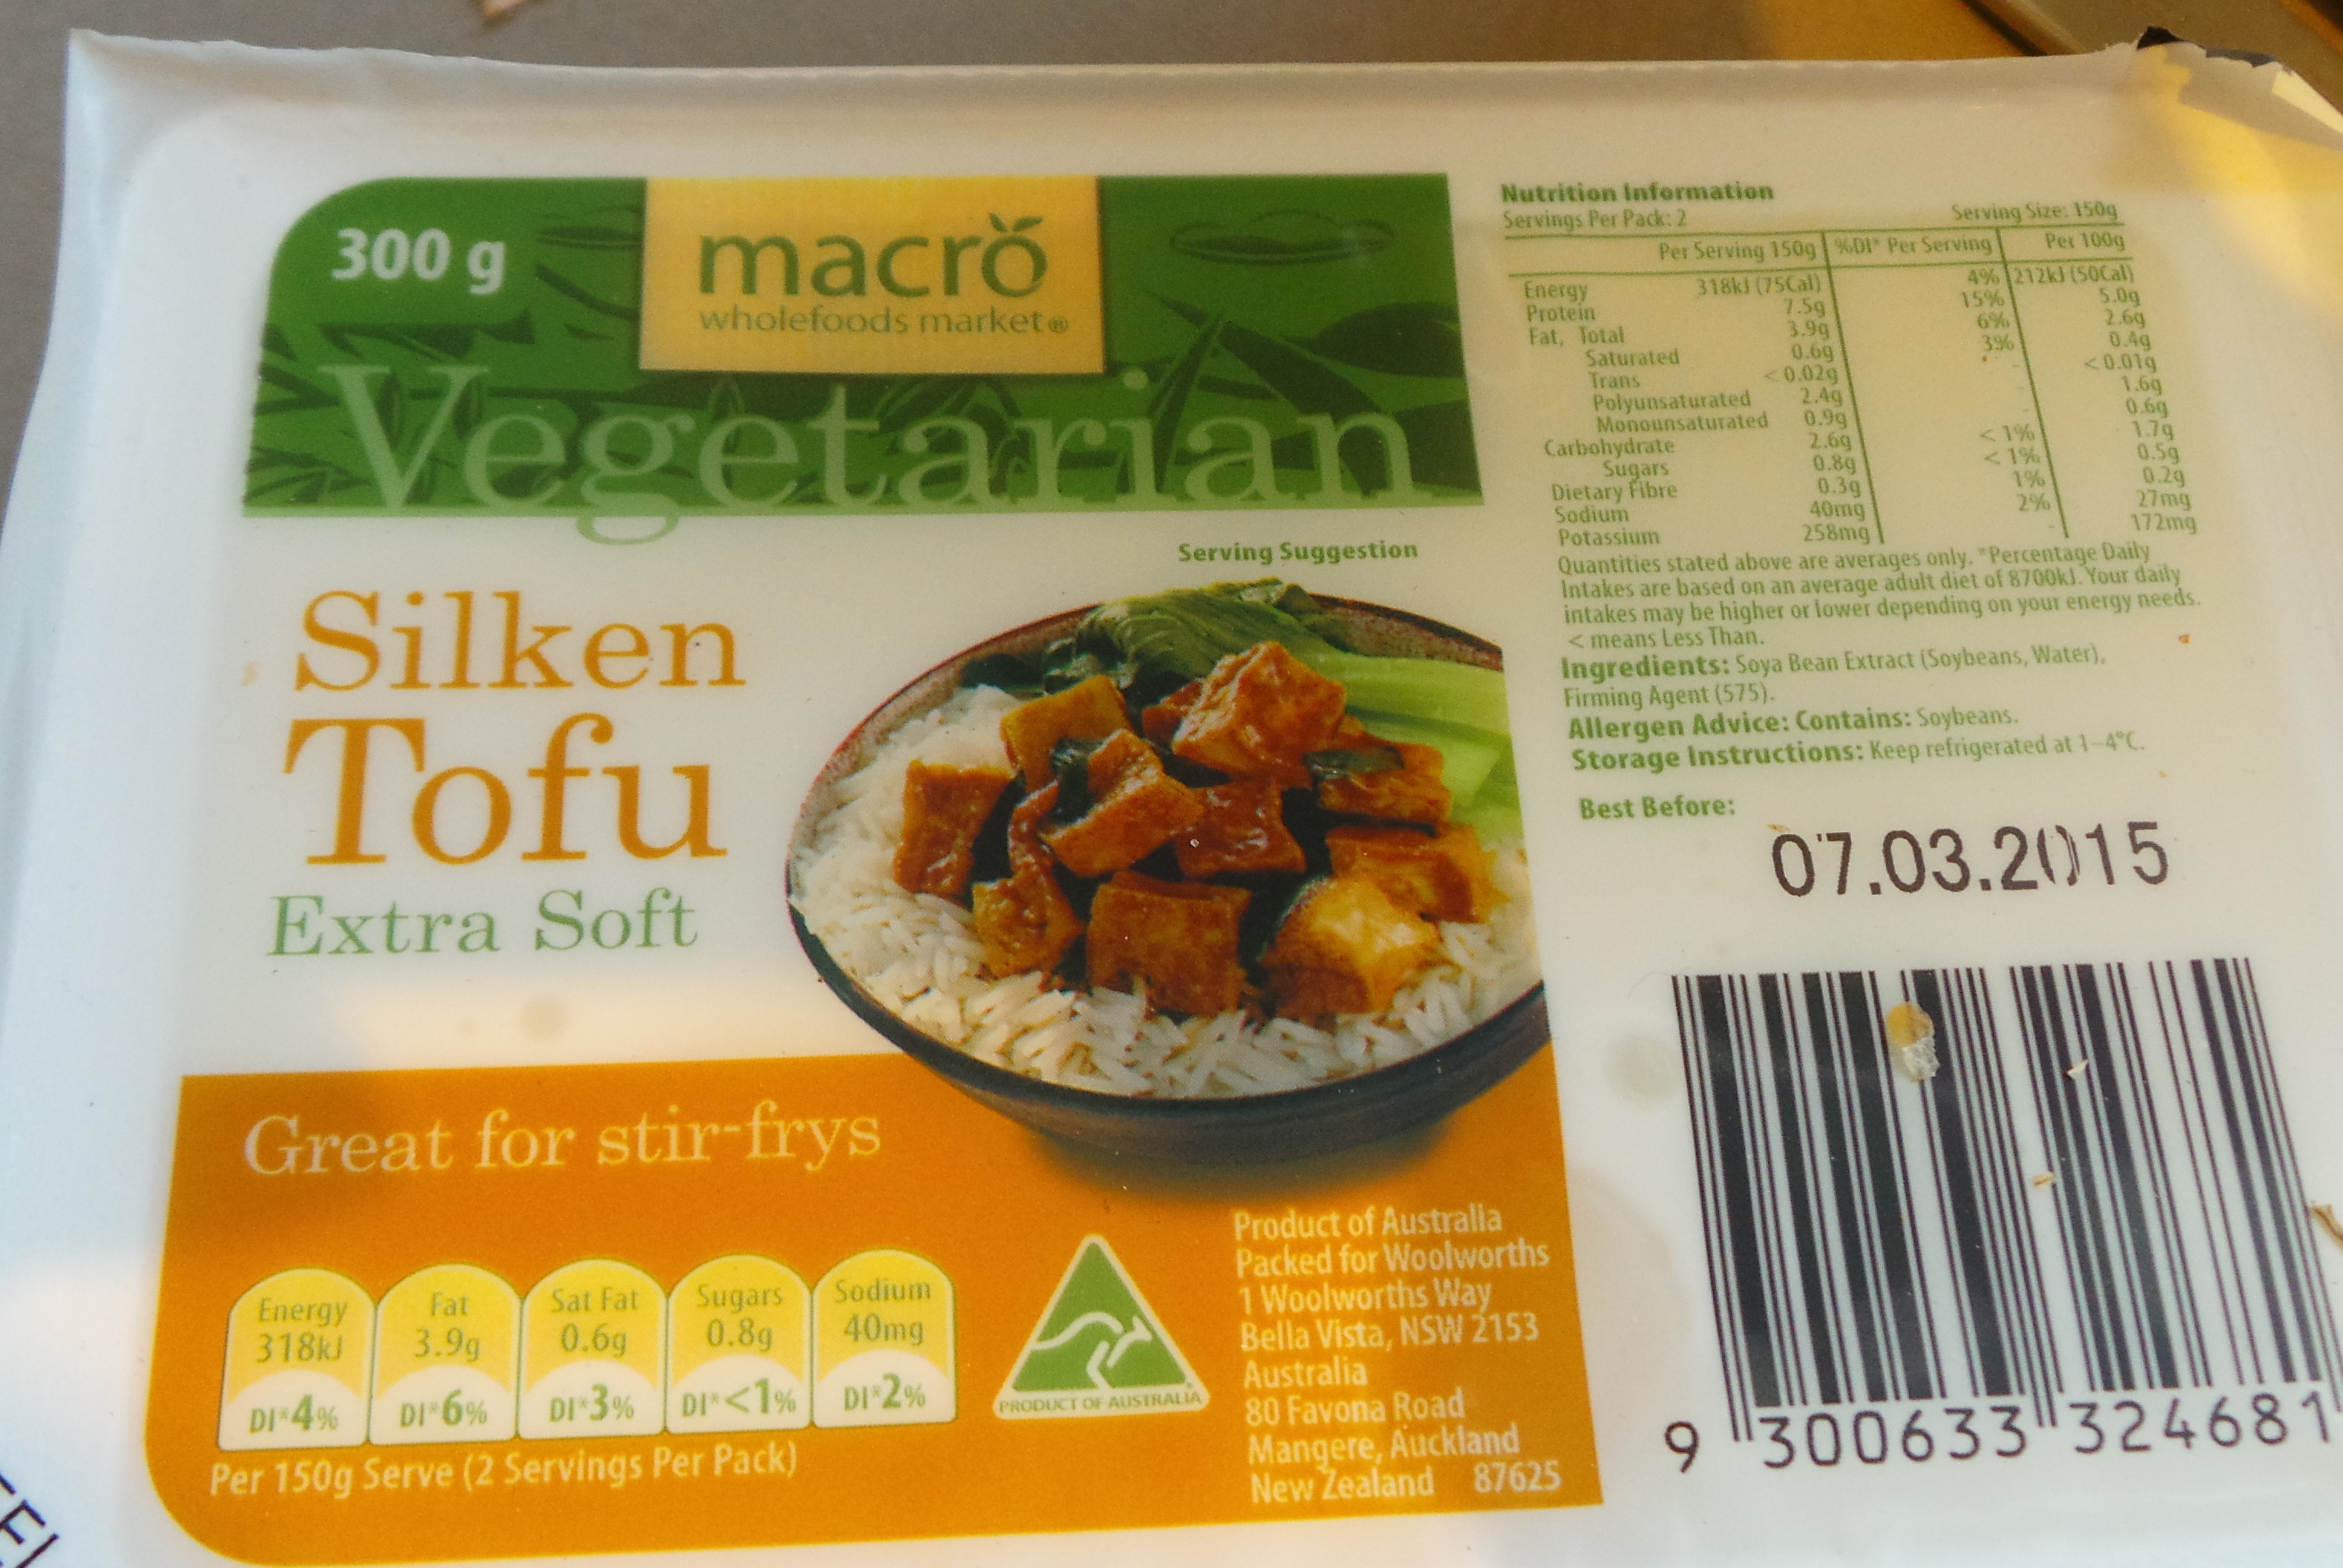
Let’s just try not to notice that this company can’t spell “stir fries”…
It’s not quite as much as the recipe called for, but I merely topped up the weight with raspberries. Sue me.
So, drain away any liquid with the tofu. Be aware that it is very soft. Don’t try to pick it up out of the package, just slip it into the bowl of your food processor. Pulse for 30 seconds or so, it will look a bit like this.
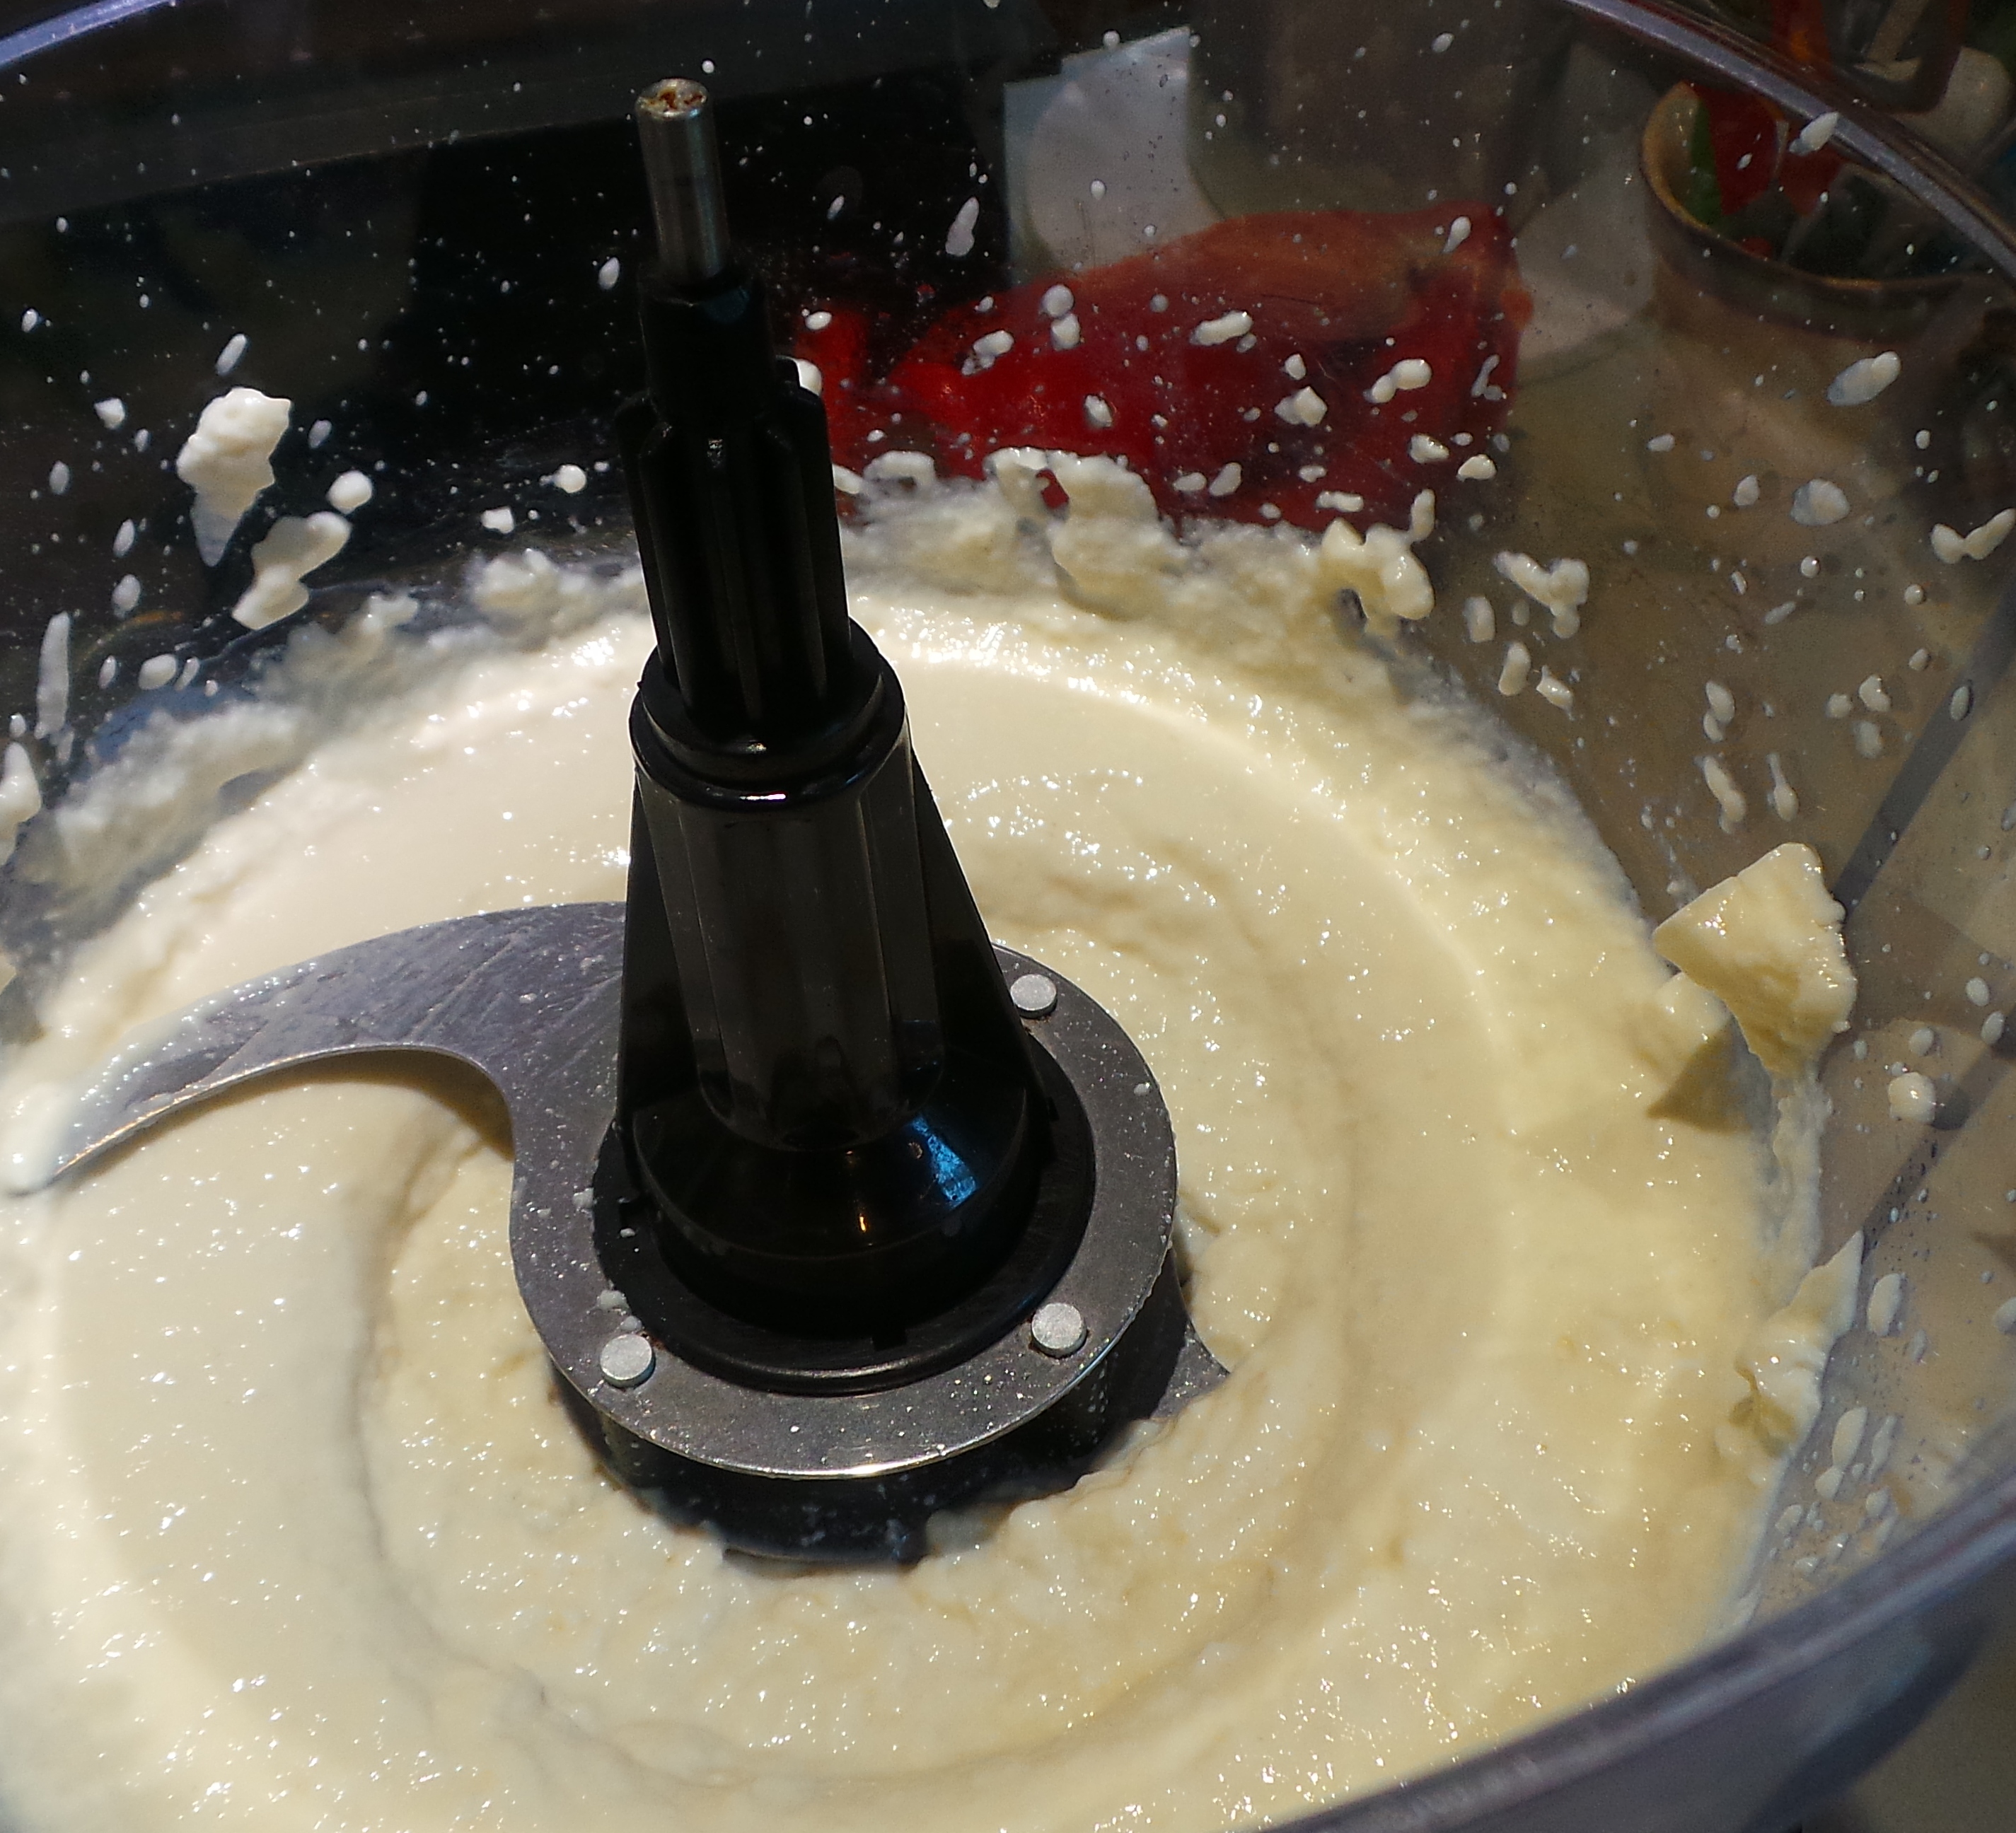
Whip up your tofu.
Add your vanilla essence and maple syrup. The original recipe called for confectioners’ or icing sugar as well but, as they also tend to include some gluten products in the package (to stop clumping), I decided to just use more maple syrup. I added about ½ a cup.
It’s possible that using the powdered sugar would give a firmer set. I don’t know.
Now melt your chocolate. I use a glass jug to do this in the microwave and a mix of dark and milk chocolate. Given my own preference for the less sweet I’d actually like to use all dark chocolate. However, not everyone shares my d’ruthers, so I compromise.
You could probably even make this dish with white chocolate alone. Be aware though that the raspberries will colour the chocolate, unlike in this example where they disappear.
Heat in thirty second increments and stir between zapping.
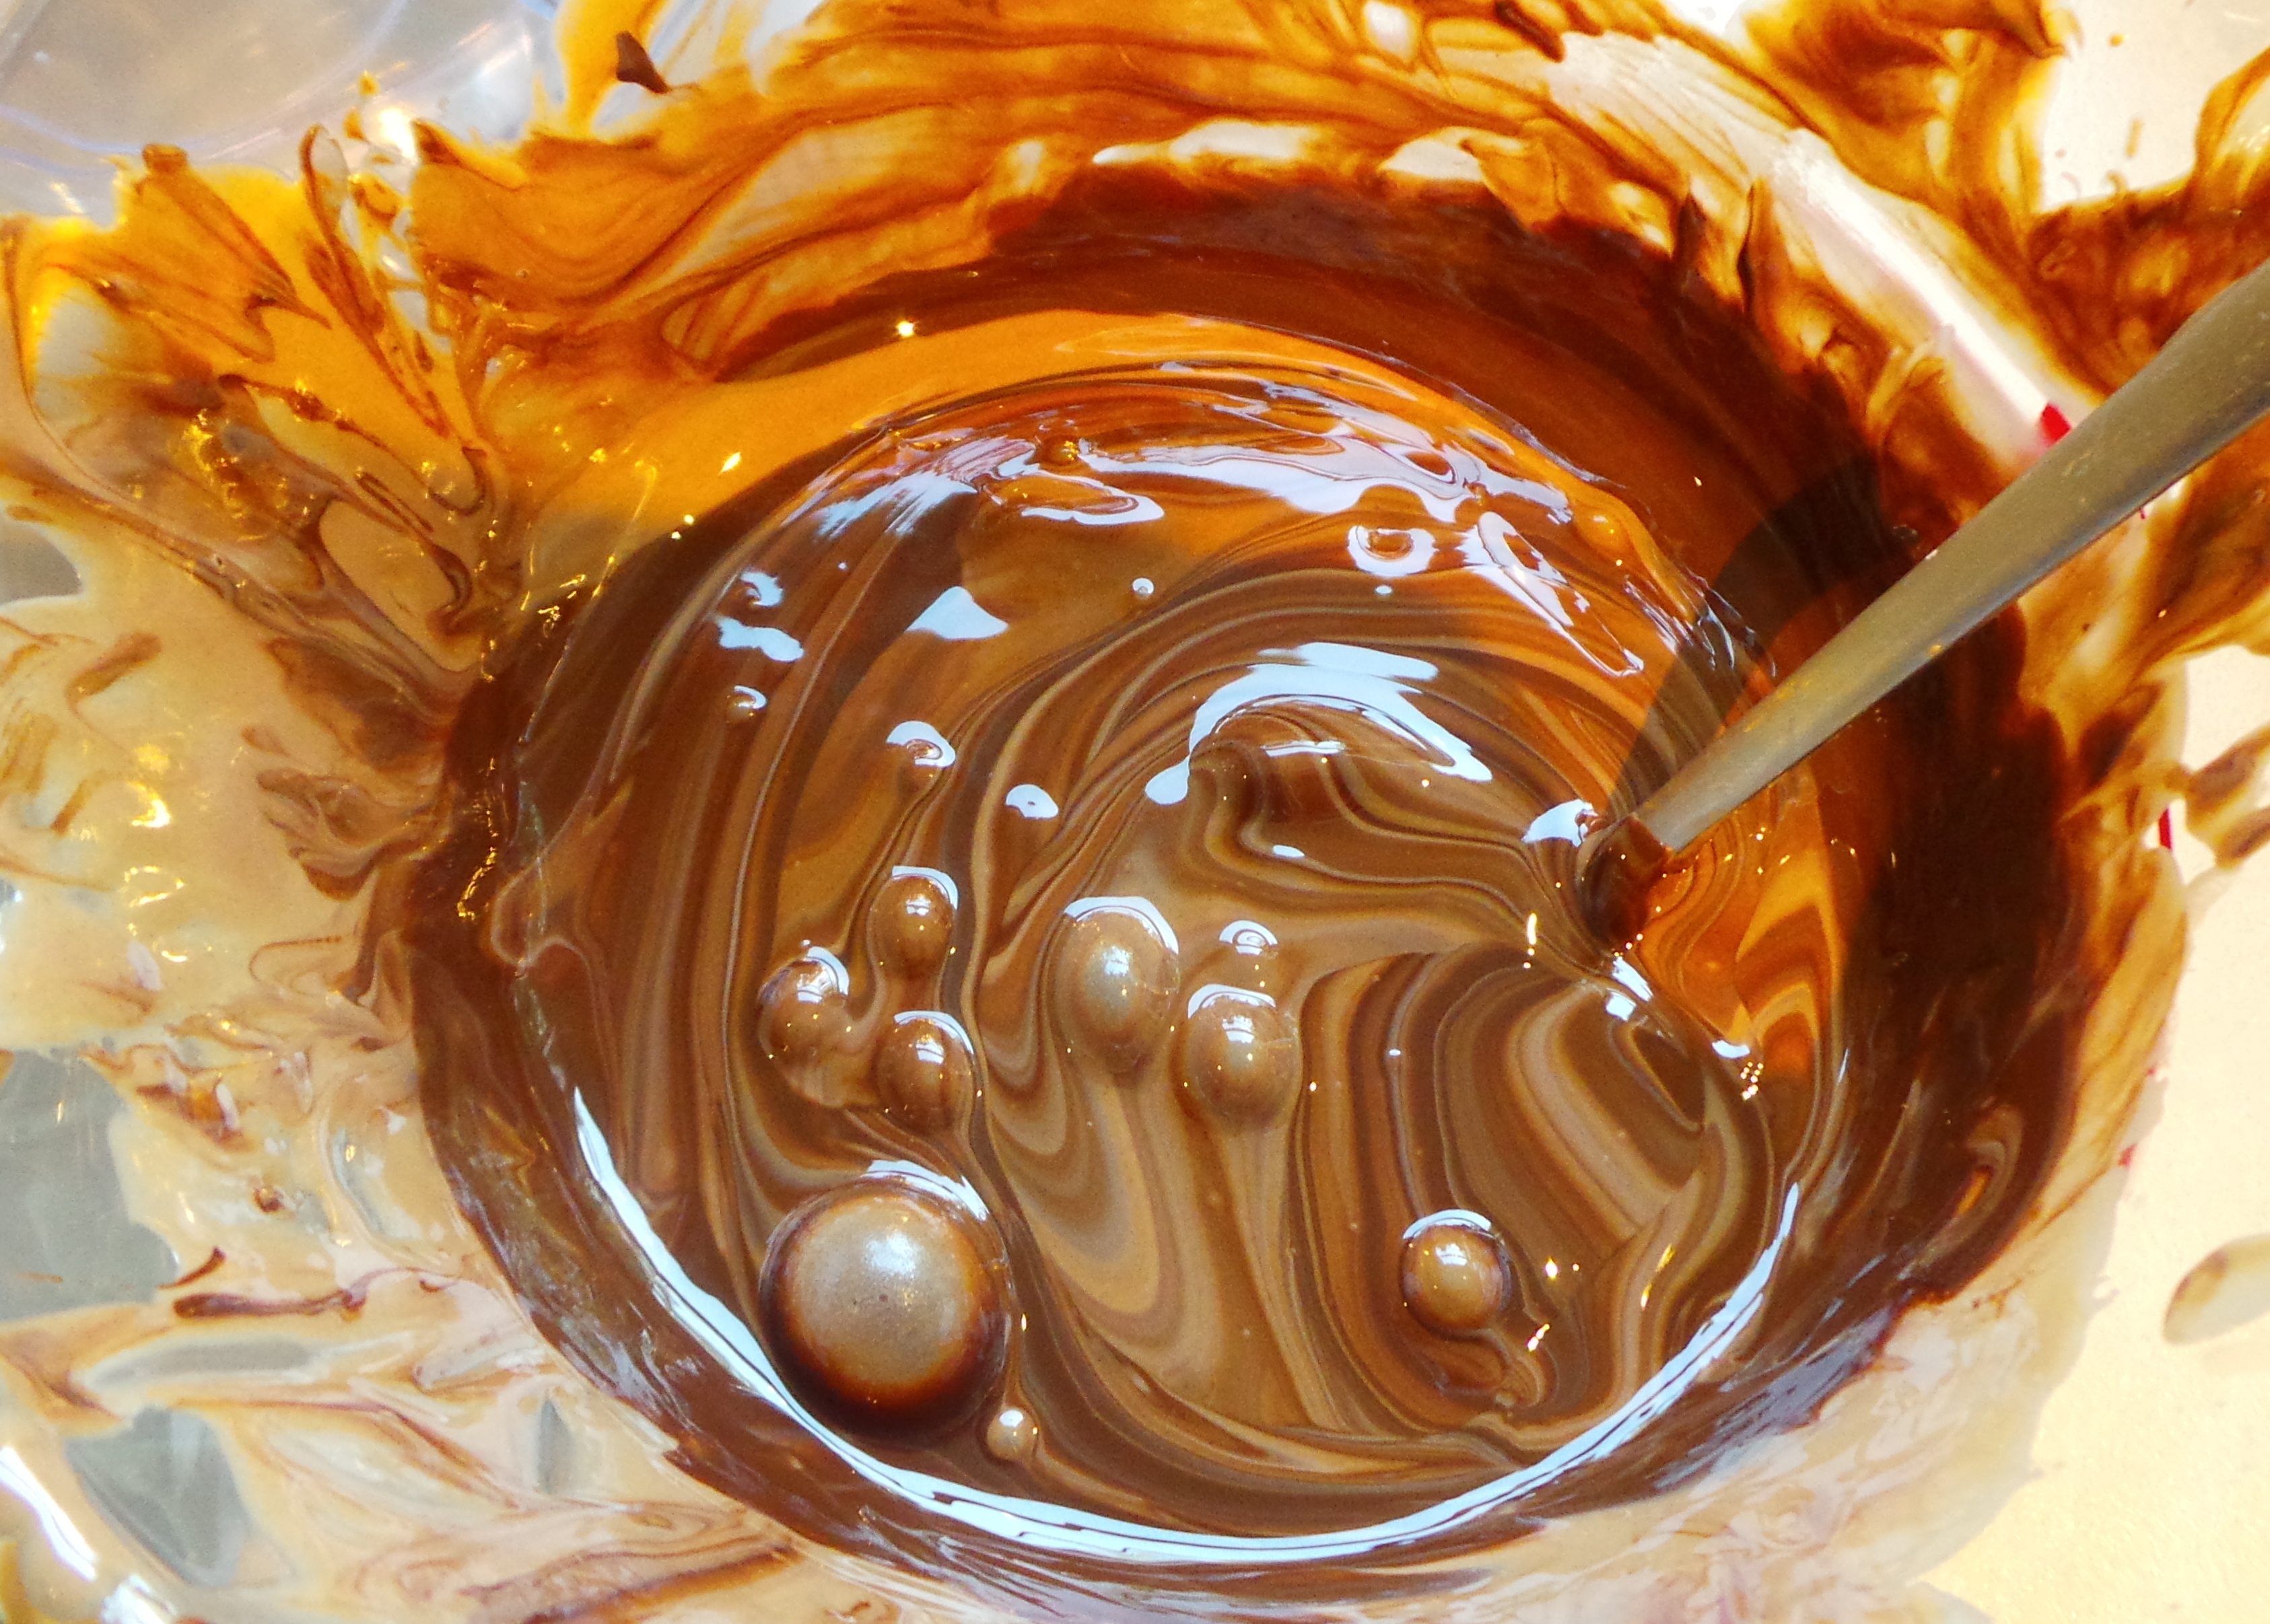
Isn’t it purdy?
You can do this in a small saucepan on the stove, of course. I was trying to keep down the heat in the kitchen on an already scorching hot day. 🙂
Using a spatula, scrape it all out into the bowl of your food processor and blend well. Watch the tofu disappear…

Now doesn’t that look deliciously silky?
Pop in your defrosted raspberries (or use fresh!) and blend again.

These will give a light, refreshing raspberry tang to your pie.
That was hard, wasn’t it? Such drudgery.
I’m sorry.
Only a little way to go.
Retrieve your pie crust from the refrigerator and fill it with this chocolately lusciousness.

And you’re done.
And then refrigerate until firm – at least 2 hours. If you can leave it overnight then that will be just spiffy.
Garnish it with raspberries before serving. I forgot to take a picture of that bit. Sorry.
However, here it is before I transported it. I cut half into slices when it was straight out of the refrigerator and placed a handful of raspberries in a separate container to decorate it with at the other end. You may do whatever you like, but I just put a raspberry at the fat end of each slice and piled the remainder in the centre to cover the jagged points….
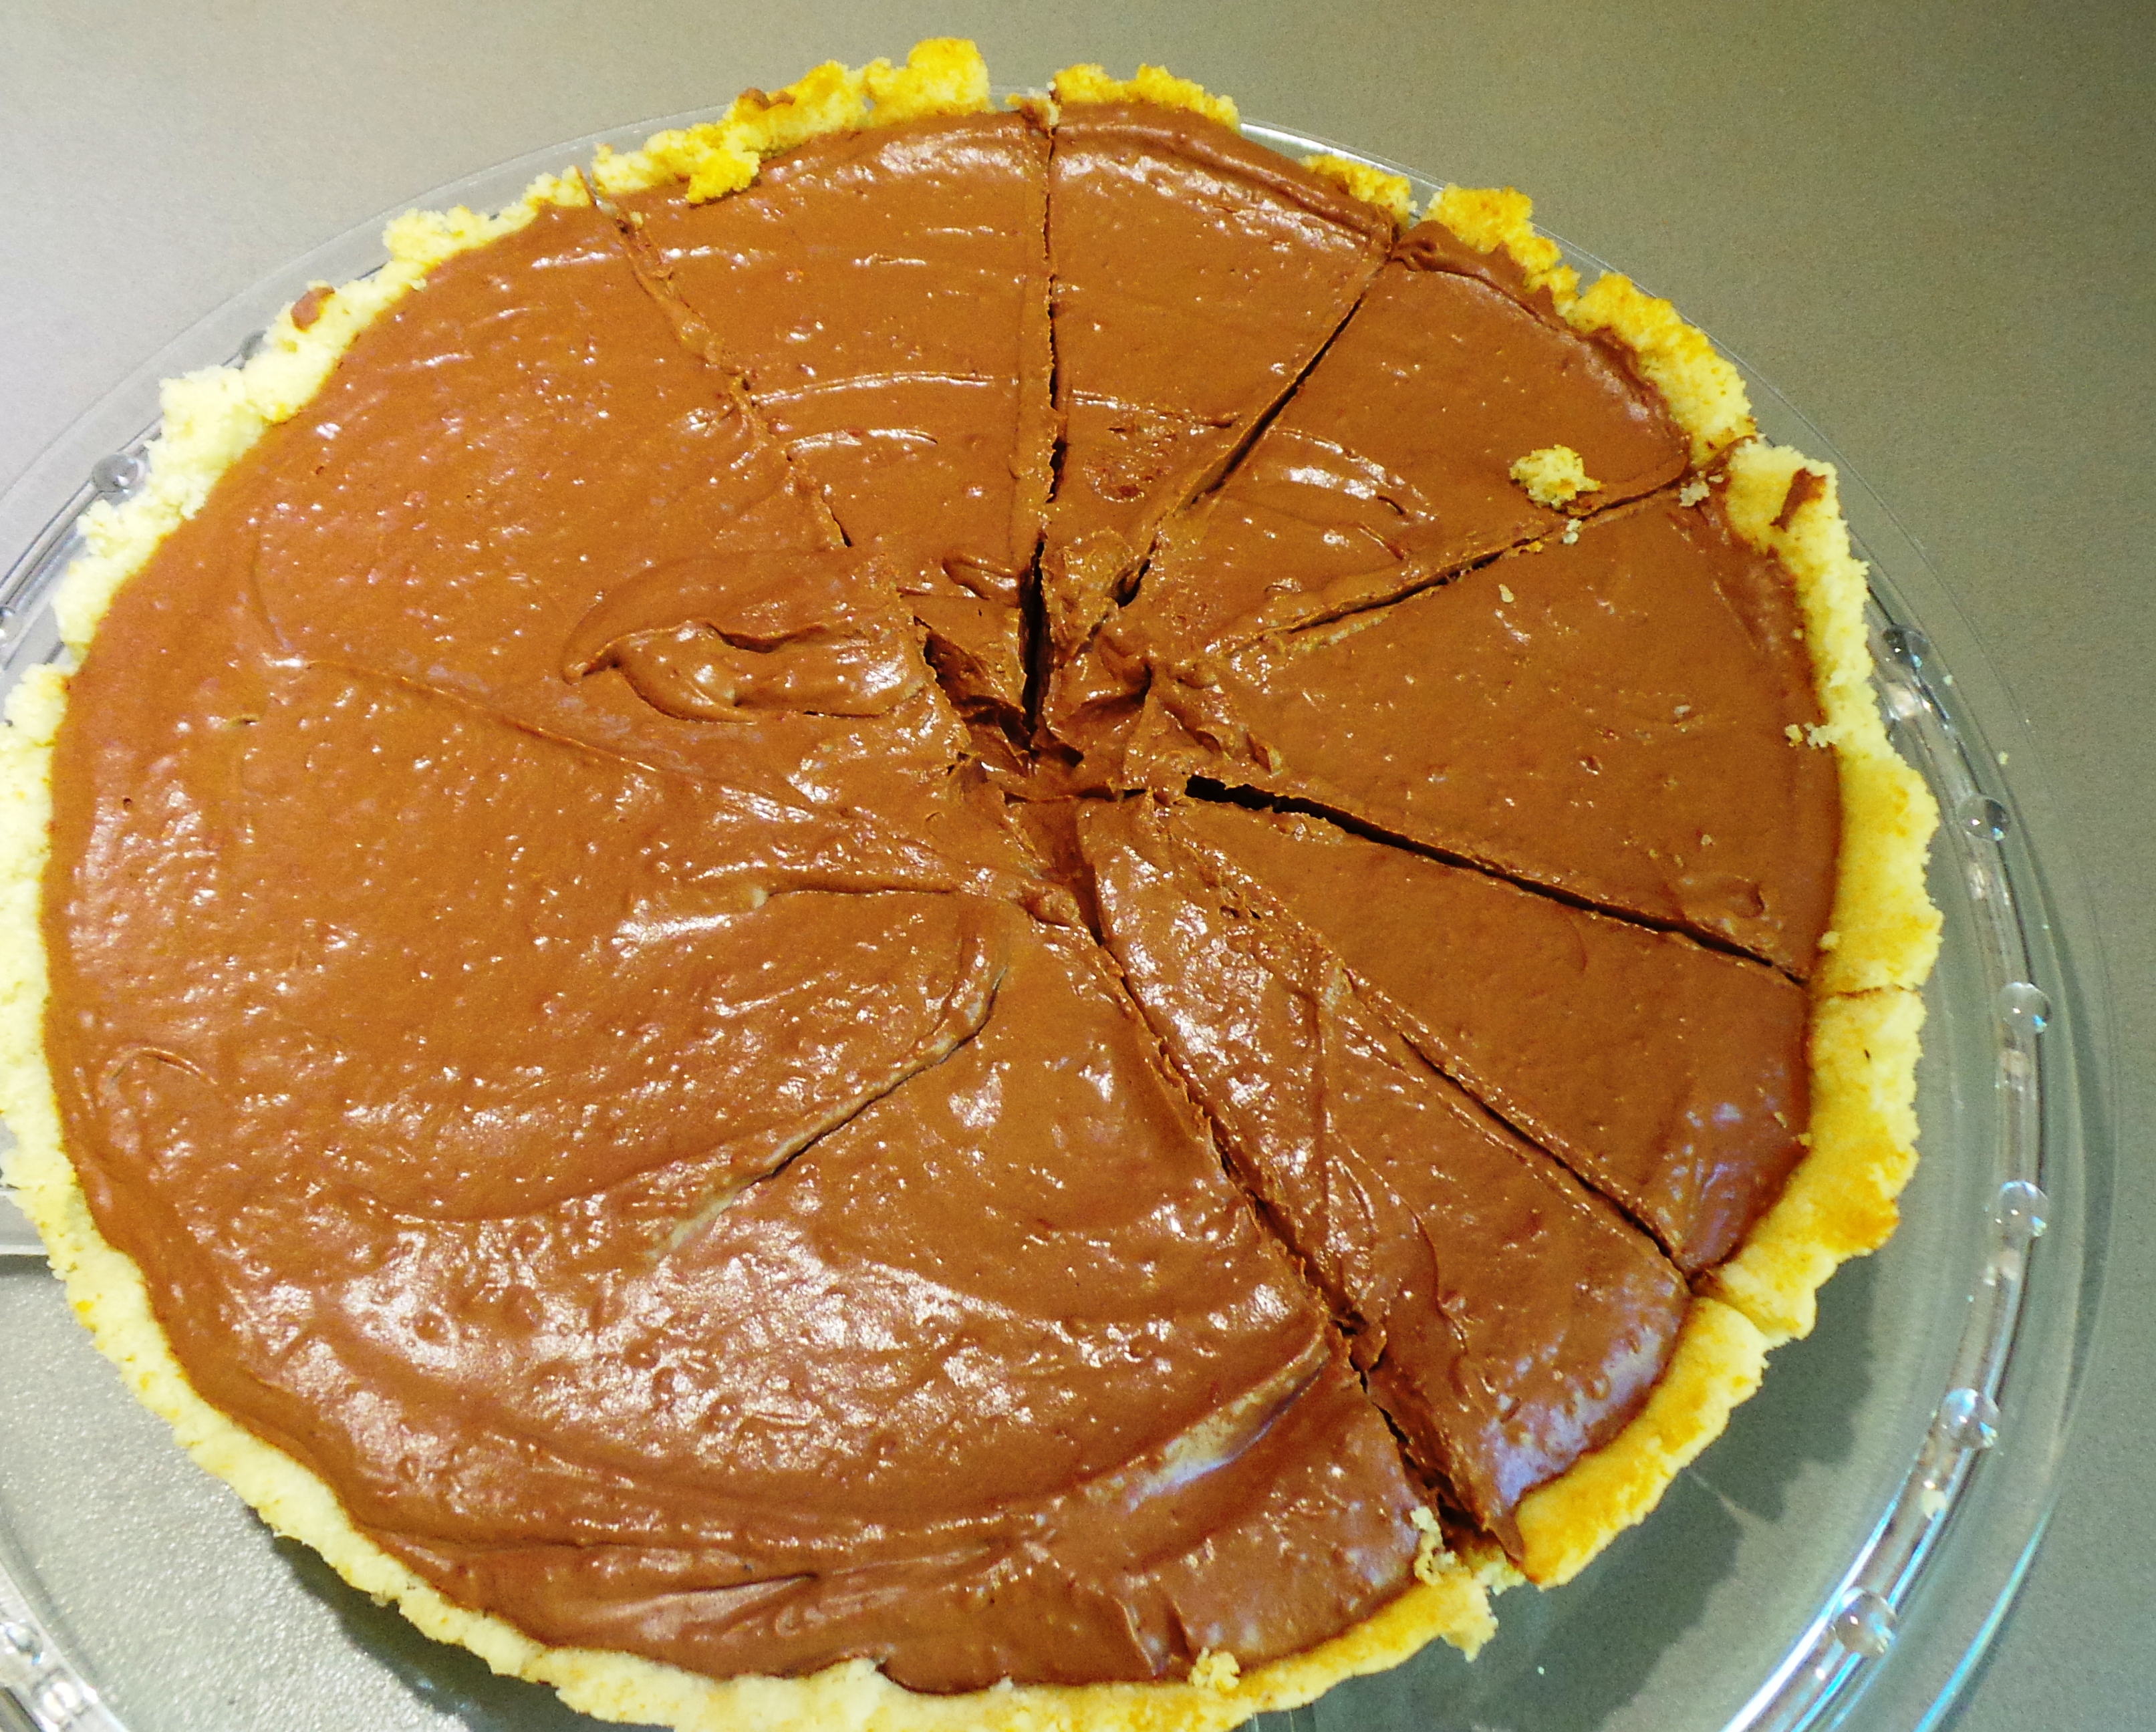
The finished pie, before garnishing.
It must have worked because this was how it looked 5 minutes after serving and I had to actually ask a lady to wait while I took this pic.
What it looked like 5 minutes after I served it …
Honestly, the hardest thing you’ll have to do with this dish is to convince people that it’s made with tofu.
Really truly.
Chocolate Raspberry Pie
Ingredients
345g silken tofu
1½ cups (300g) chocolate chips (dark, milk or mixed)
½ cup maple syrup
1 tsp vanilla extract
1 cup frozen raspberries, thawed
1 x 23cm pie crust.
Method
Place your choice of chocolate in a microwavable bowl or jug. Heat on Medium for 1 minute. Stir, then continue microwaving on Medium, stirring with a non-wooden implement every 20 seconds, until melted.
Be aware that chocolate in a microwave may melt (and possibly burn) without changing shape – stir between zaps!
Drain the tofu and pulse in a food processor or blender until smooth.
Add the melted chocolate, maple syrup and vanilla. Process again until smooth.
Add raspberries and process until very smooth; scraping down the sides as necessary.
Spread the mixture into your prepared pie crust.
Refrigerate until firm, at least 2 hours or overnight if possible.
Garnish with fresh raspberries, if you wish.

This was very tasty and not too sweet. Being gluten free, I’m sure I’ll be making this.
Thanks
LikeLike
It’s one of those recipes that threaten to become a staple after the first time you make it.
LikeLike
Mmmmm – looks delicious and easy. Will try this soon.
LikeLike